GA, USA
|
Posted: 11/24/2007 8:11:30 PM EDT
[Last Edit: GTLandser]
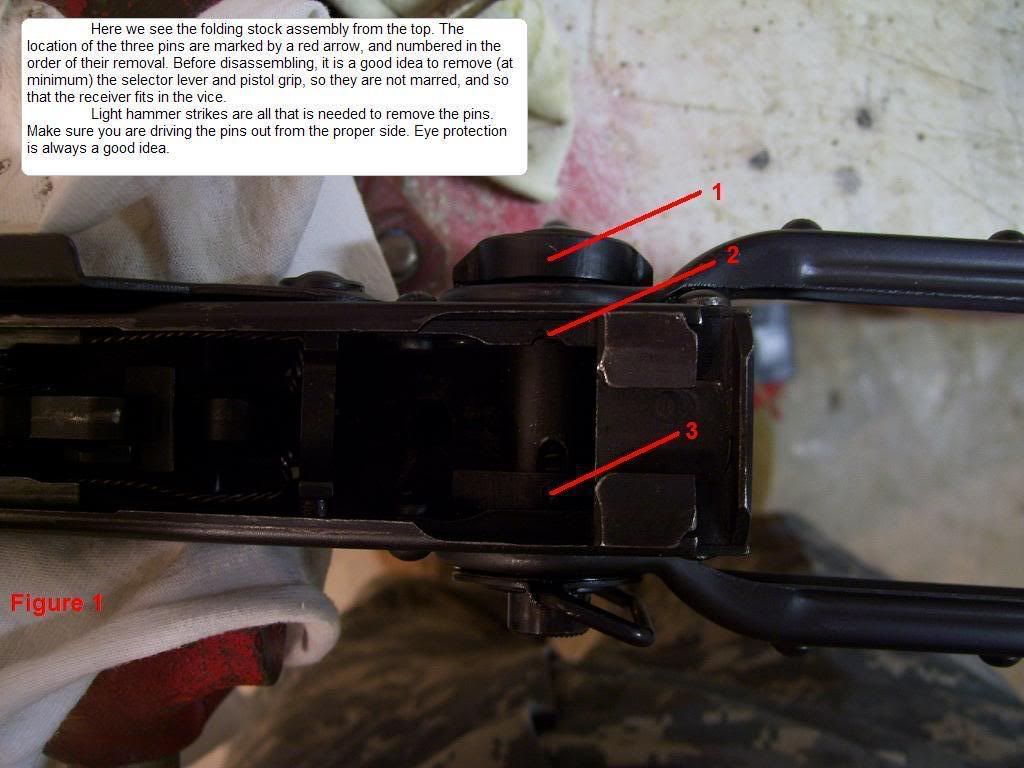
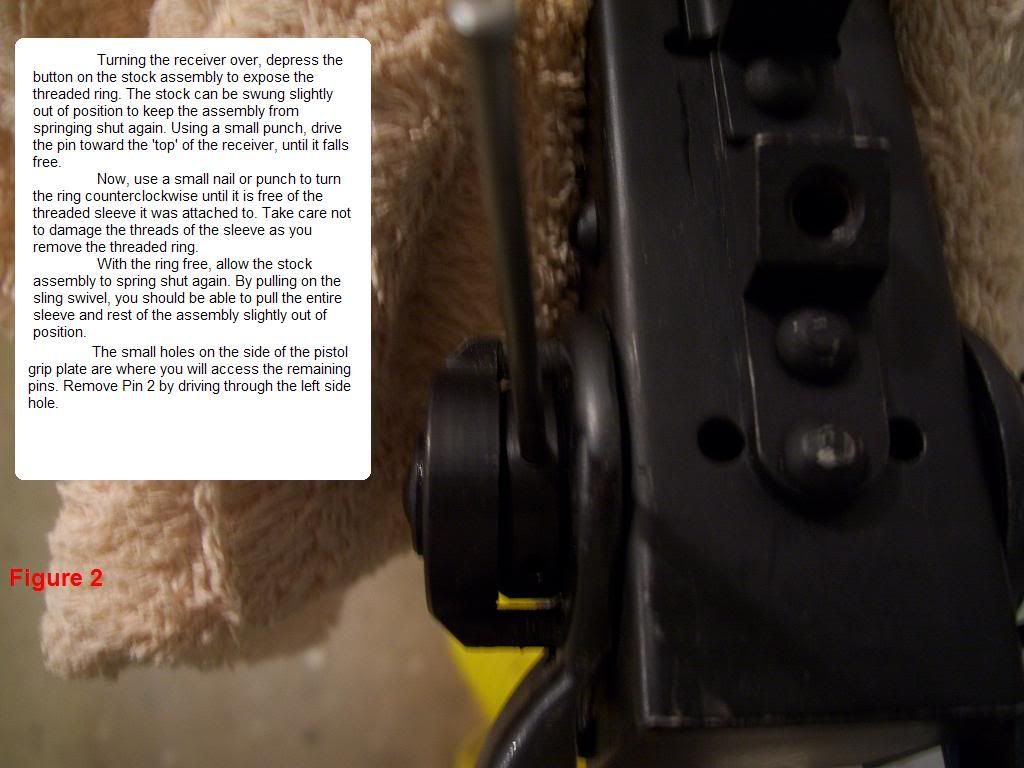
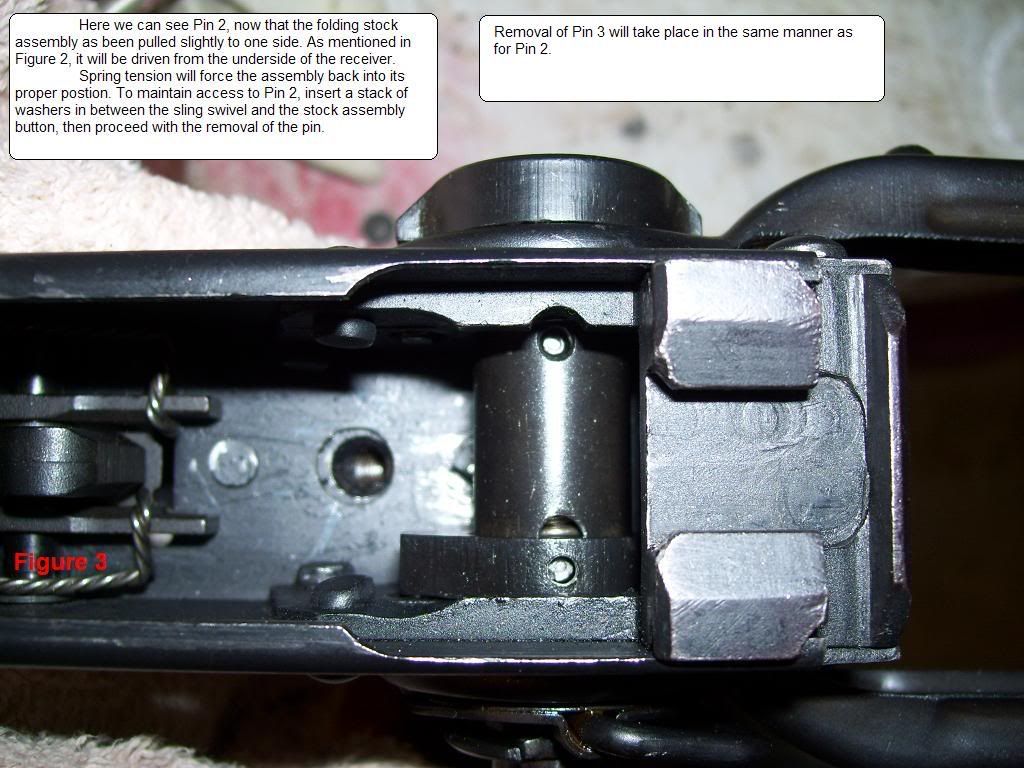
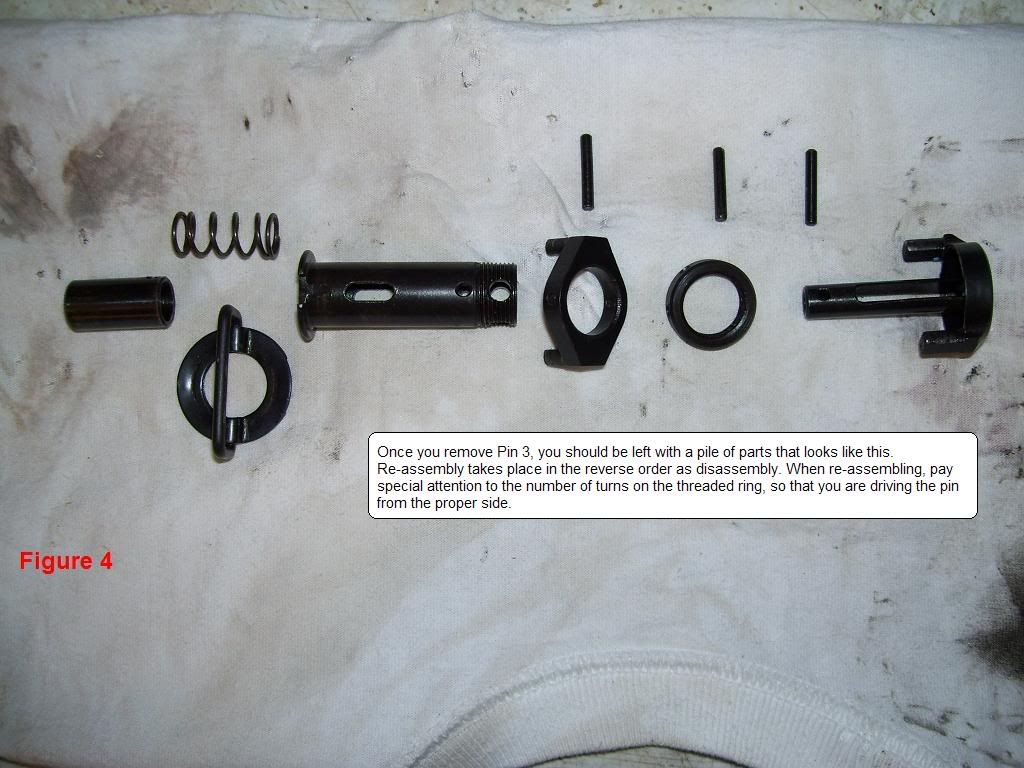
ETA: the threaded ring has several holes; make sure the re-alignment of the ring is the same as when you disassembled so you are putting the pin back in from the correct side. ETA2: the pins themselves are identical; but the threaded ring has at least one different sized hole, making it important to drive the pin from big-hole-side to small-hole-side. You will be able to identify the sides by the wear around the holes. ETA3: Notice the location for the pins on the sleeve––in some locations, a pin passes through and connects several different pieces, so alignment is important. Obviously, Pin 1 goes in the large hole on the right-hand end, Pin 2 goes in the next hole to the left, and Pin 3 fits in the slot at far left. Getting Pin 3 through the holes in the button, slot in the sleeve, and through the left-side studded locking ring is especially obnoxious, so here again a stack of washers to depress the button is helpful. ETA4: to access the original pictures, I created a throw-away photo-bucket account. I release all rights to these pictures, for any commercial or non-commercial use. User name: user654789 Password: okmOKM |
|
|
USA
|
[#1]
This is a fantastic article........But, Can anyone post how to assemble one and which way and which order do the pieces go???
|
|
|
|
[#2]
Can anyone repost these pictures?
|
|
|
|
[#3]
Bump for forum cleanup.
|
|
|
|
 Win a FREE Membership!
Sign up for the ARFCOM weekly newsletter and be entered to win a free ARFCOM membership. One new winner* is announced every week!
You will receive an email every Friday morning featuring the latest chatter from the hottest topics, breaking news surrounding legislation, as well as exclusive deals only available to ARFCOM email subscribers.

AR15.COM is the world's largest firearm community and is a gathering place for firearm enthusiasts of all types.
From hunters and military members, to competition shooters and general firearm enthusiasts, we welcome anyone who values and respects the way of the firearm.

Subscribe to our monthly Newsletter to receive firearm news, product discounts from your favorite Industry Partners, and more.
Copyright © 1996-2024 AR15.COM LLC. All Rights Reserved.
Any use of this content without express written consent is prohibited.
AR15.Com reserves the right to overwrite or replace any affiliate, commercial, or monetizable links, posted by users, with our own.


