Warning


Close

Confirm Action

Are you sure you wish to do this?

Confirm Cancel
BCM
User Panel

Page AK-47 » RPK / RPD / PKM
AK Sponsor: palmetto
Site Notices
Posted: 6/26/2023 9:15:14 PM EDT
It was the Cold War and I was brought up being told commie equipment was junk.  But I was a kid and the Soviets were more a mystery than a monster and kids are always curious about a mystery.  Then Red Dawn came out and I was hooked.  I was so absolutely fascinated, I wanted to be the first kid on my block with an AKM.  Thanks to my paper route and an understanding Mother, I was.  It was a Chicom Type 56 with a stamped receiver and an underfolding stock.  I quickly discovered that, in the rifle department at least, commie equipment was actually pretty nice!  Sure, it was a little crudely built but, where it counted, it was EXTREMELY well made.  Over 35 years and 10,000 rounds later, I still have that little buddy and it's the last rifle I'd ever sell:


I say, that was $313.95 well spent!


    Well, as we get older, we tend to think more deeply, see things more objectively, and evaluate more effectively.  Once the wall fell and Warsaw Pact stuff became widely available, we all learned that their weapons were vastly better made than we were told growing up.  Yes, the "enemy" military doctrine, and technological level differed from the West and their equipment reflected that, but at a basic manufacturing level, their firearms were just as well made as anything we fielded.  In fact, an argument can be made that some of their individual weapons actually surpassed ours depending on the combat environment.  But that's an argument for another time and I'm off topic.


    As I got older and my collection grew, I formed a hierarchy of Warsaw Pact firearms in my mind.  At the top of the list for collectability, Soviet made stuff is always going to be at the top of the heap.  Of course, there are many variables to consider, but speaking in broad strokes, it's Soviet.


     Now, for value, it gets all jumbled up real fast.  For example, with the exception of an as issued 1949 Soviet SKS, an East German SKS is going to bring stupid money compared to any other Warsaw Pact example.  However, beyond "can I afford it?" I rarely consider monetary value when looking at things.  For me, this hobby isn't about money, it's about fun so I tend to stay away from "value" conversations.


    One of my favorite things to look at when considering the various countries is Quality of finish.  This is not to be confused with Quality of build.  As far as I'm concerned, ALL of the Warsaw folk made durable, reliable and acceptably accurate firearms but the fact is, the finish varied greatly.  In my experience, the two countries that really stood out above the rest with regards to fit and finish in the Warsaw Pact were the East Germany and Poland, especially in the earlier years.  In fact, I had my Polish RPD out for inspection today and it's what prompted me to write this.  So let's take a look at what I'm blathering on about.


    This isn't meant to be one of my in-depth essays on a particular firearm although I'd like to get around to that for this rifle one day.  Instead, it's just a casual look at how "pretty" this old clunker is.  Of all my commie rifles, this example exhibits, by far, the finest bluing, best machining, and obvious attention to detail during assembly.  I mean, you can tell that everyone involved in its manufacture actually cared about the end product. This particular RPD started life back in 1960 and must have gone straight from the factory in Radom into deep storage where it sat until it was sold off as scrap to God knows who until finally being imported into the US in the early 2000's.  A Class II manufacturer guy I know bought a small number of these as parts sets with the intention of building a couple as full-auto's and selling the rest off as semi-auto's.  He was kind enough to let me look through all of them and pick the one I wanted before he offered them to anyone else.  As stated, it appeared to be unissued.  It was also 100% matching down to the smallest numbered part (and the Poles numbered LOTS and LOTS of parts).  What I'm trying to get at here is that I had/have absolutely no doubt that what I was buying had factory original finish on it so it would make a good reference example for what one was supposed to look like factory fresh in 1960.  So, let's check out some of the details.  I think you'll agree when I tell you it has an almost commercial finish.


I want to say I bought this back in 2010 but I'm not certain.  I do know I've had it for well over a decade now:


While I've had this out to the range a number of times, I mainly bought it simply because I wanted it.  I can't tell you how many rounds it's had through it since being reactivated without looking through my book but it's probably close to 1000 at this point.  It had some teething problems at first but I generally worked them out.  Stoppages were never the problem.  The problem was, as it always is with RPD semi-auto conversions, light primer strikes.  Without going into all the minutia, that problem was mostly solved and I only occasionally get a light primer strike when using old Chinese ammo with it's very hard primers.  These are toys, not weapons of war.  


Anywho, the above pictures only show you that we're looking at an RPD; they don't show you what I'm talking about.  For that, we need to get up close and look at some details.

Let's start with the rear sight:


Notice how neatly the numbers are stamped, the 50m increments, and how nicely all of the graduations are filled in with red paint.  At the back is a micrometer adjustment knob for windage wan protective ears to keep the windage adjustment where you set it. In front of the sight is a round bit that is used to hold the top cover in place on its hinge.  Look very carefully between this bit and the front of the rear sight and you'll just barely see two rivetsthat have been ground perfectly smooth and blued over. Nice!  Also, notice all of the various finely machined angles on the sight base, and elevation slider.  I didn't take a picture of it but the rear of the sight has an index mark while the base has a number of hash marks so that you can track your windage adjustment.  All of these marks are also nicely filled with red paint.


The rear of the front sight showing the beautiful machining employed to give such an elegant radius.  It's course windage adjustable by loosening the nut.


Also notice how the protective ears become thinner as they rise.  None of this was necessary for a squad automatic weapon to do its job but someone was taking pride in their work.  


A view through the side of the front sight illustrating the fine machining:


the top of the left bipod leg showing the rivet ground smooth:


This is one of the few exterior places where you can actually see the grind marks.


Rear of the stamped top cover showing an almost black chrome finish:


I added the white paint to show off how nicely the markings were done.  I have a feeling they were engraved instead of stamped.


Left and right views of the gas block:


This rifle still has the original barrel.  I think these pictures pretty much speak for themselves.  


Front mounting point for the gas tube:


This also serves as the sling swivel and cleaning rod storage socket.  Again, commercial Quality machining and bluing.


Rear gas tube mount and front of handguards:


The wood was not lacquered, only oiled and both halves are pencil numbered to the rifle on the inside.  When I first bought it, the wood was very light, indicating that it had been stored in a crate with no real exposure to air.  Unfortunately, they have darkened considerably over time.


The barrel has quite a few inspection stamps.  Here are a couple examples showing how well struck they are:


So shiny!


Stock ferrule:


Knurling on charging handle:


I have one more post to do showing the neato cleaning kit and some internals.  I'll be back in a bit.
Link Posted: 6/27/2023 2:40:15 AM EDT
[Last Edit: ProbableColtAddict] [#1]
I forgot to post two pictures in the last post.  


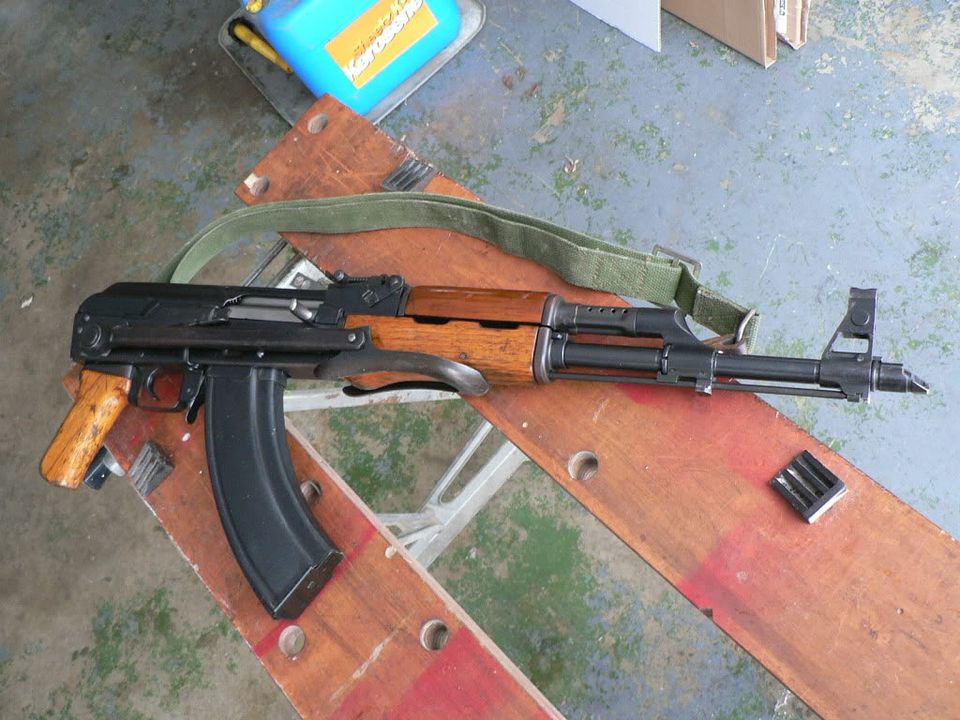
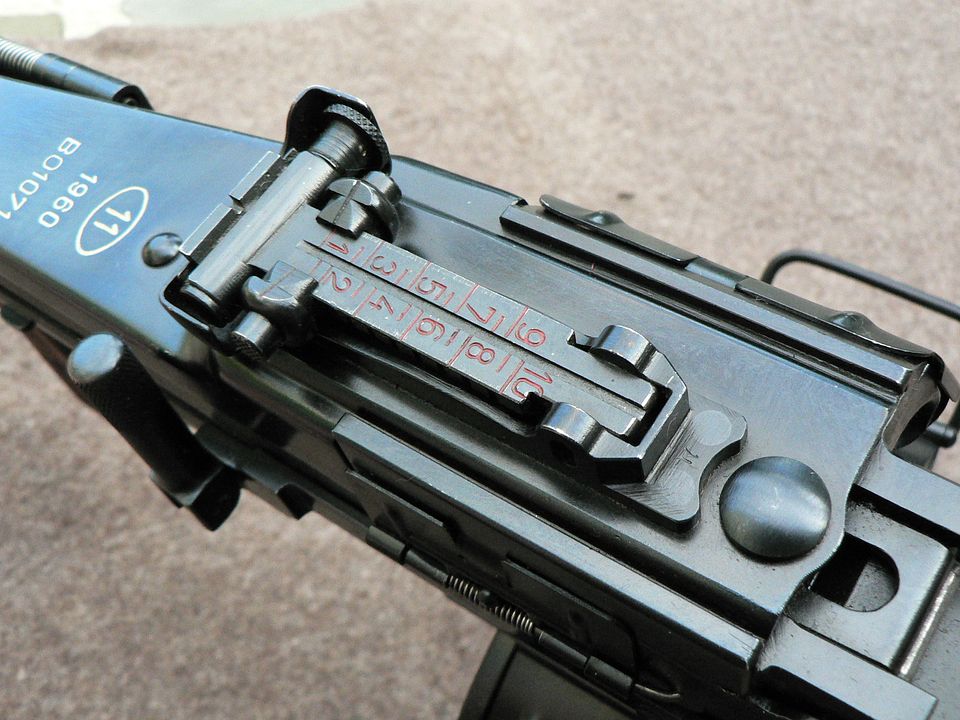
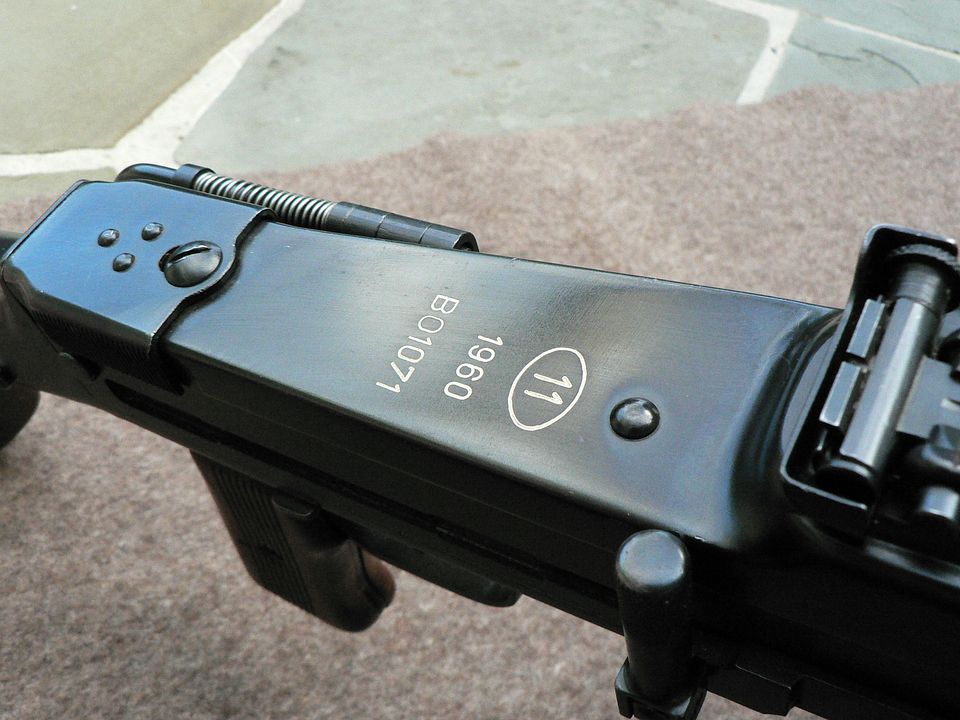
The first one is the right side of the trigger and stock housing:


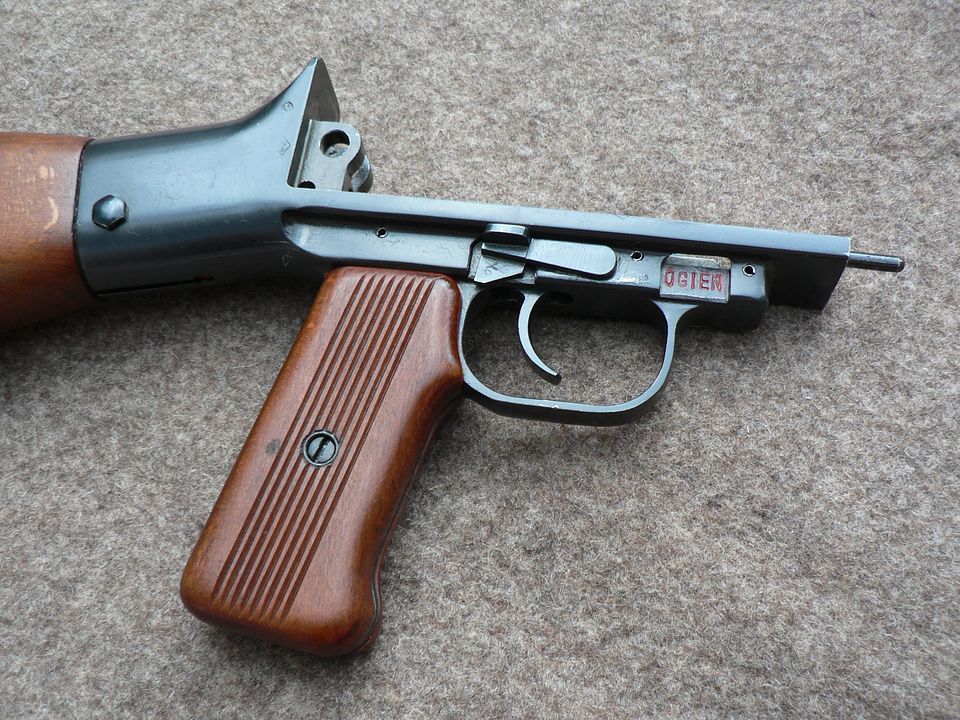
Again, we're just looking at the overall fit and finish of the parts here.  The pistol grip panels are beautifully shaped and appear to be beech.  The entire steel lower is machined and equally well sculpted.  "OGIEN" is Polish for "FIRE".


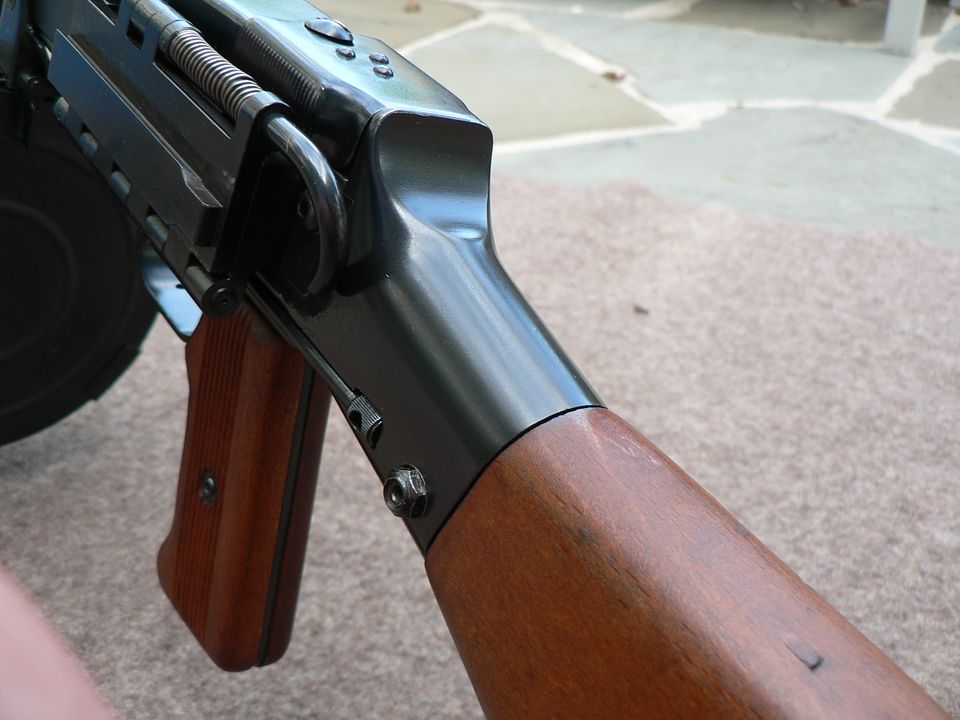
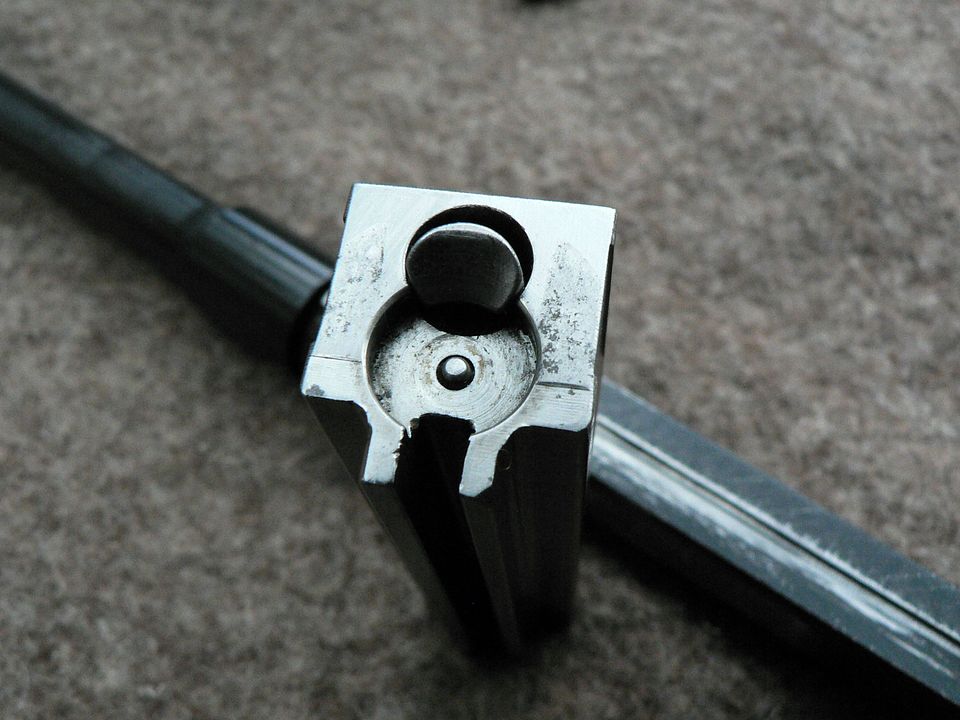
The second one shows the butt plate to wood fitment.  Zero gaps:


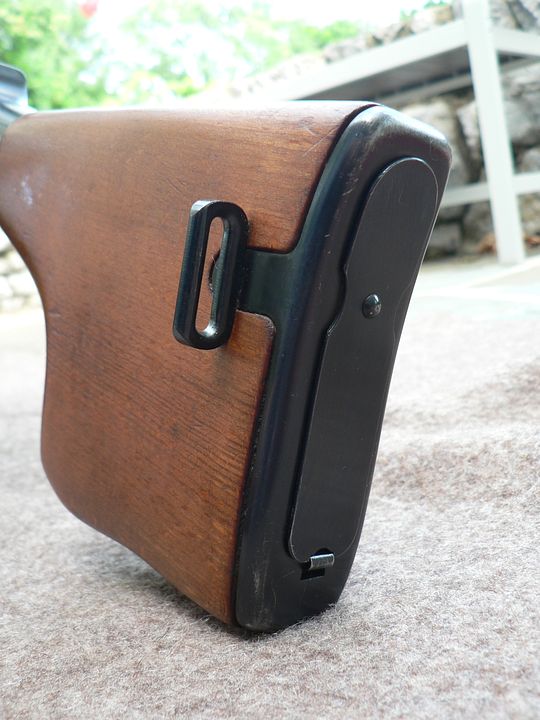
​The bump in the middle is the rivet holding the rotating trap door in place.  Pull down on the spring tab at the bottom and the door pivots 90 degrees.  This allows you access to remove the recoil spring (not necessary for normal cleaning) and to remove the cleaning kit.


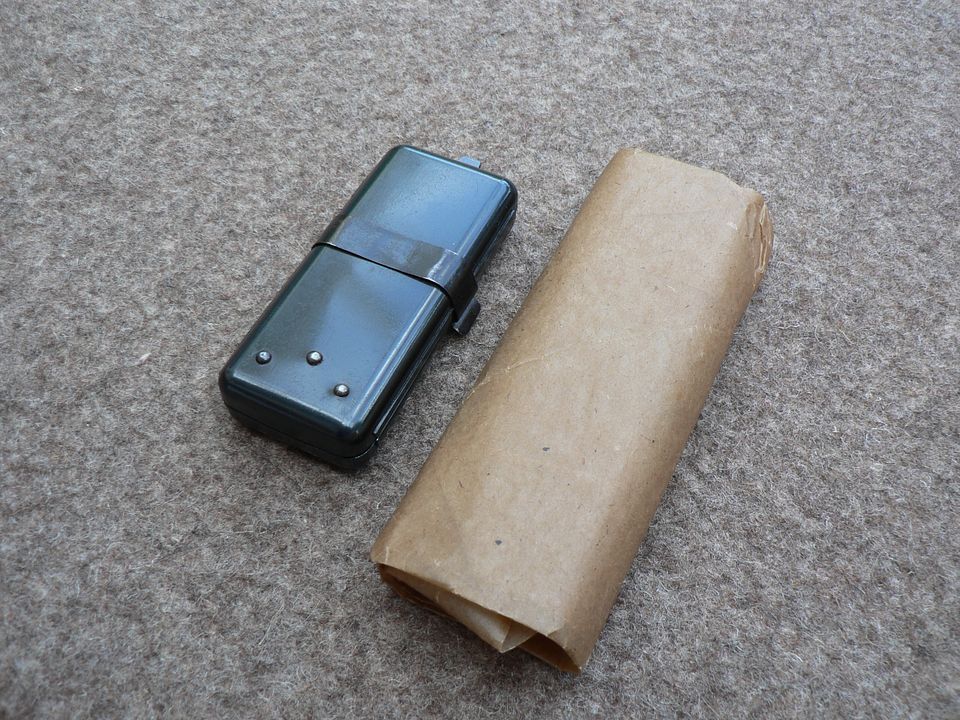
The cleaning kit that came with the rifle is on the left and a NOS one is wrapped up on the right:


Here, we see both opens showing all the goodies inside:


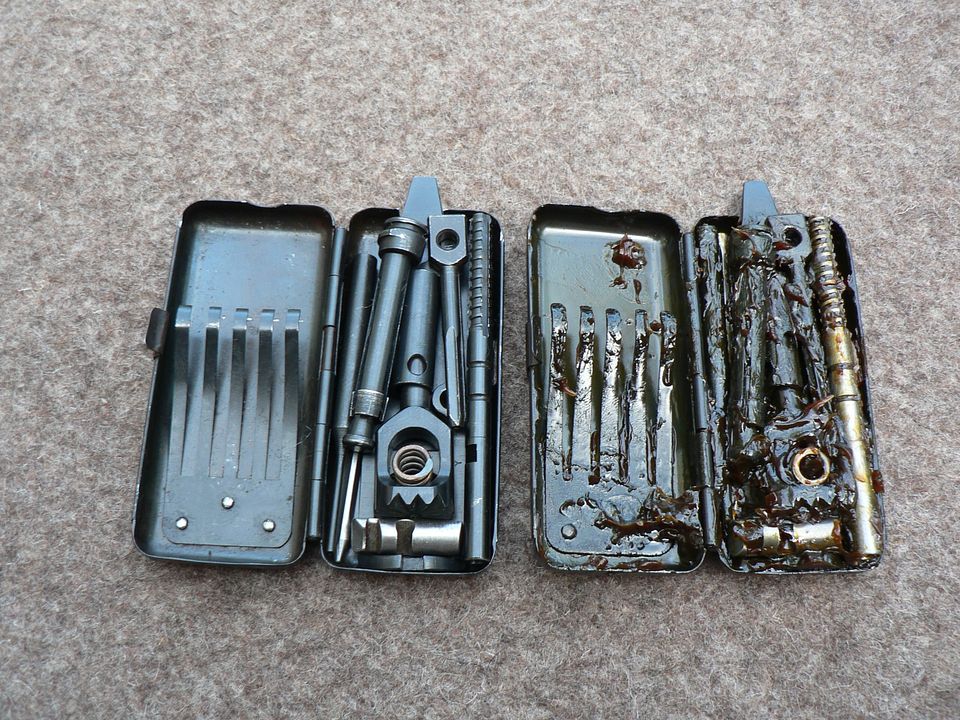
For the picture, I've placed everything on the kit I use in the same positions as the NOS kit.  These were dirt cheap at first.  Then, as parts started drying up, many vendors pirated the spare firing pin, extractor, and extractor spring out of the kits and selling them separately.  To me that's dishonest.  Anyway, the lesson to learn here is that you should buy this stuff when it originally hits the market and is plentiful.  If you wait, you're only going to regret it later.  Even though I only ever actually use one drum, I bought a pile of them at the time cheap.  Now, they are around $70 when you rarely encounter them.  Remember the lesson....


Here, I've laid out all the bits to show you just how extensive the kit is:


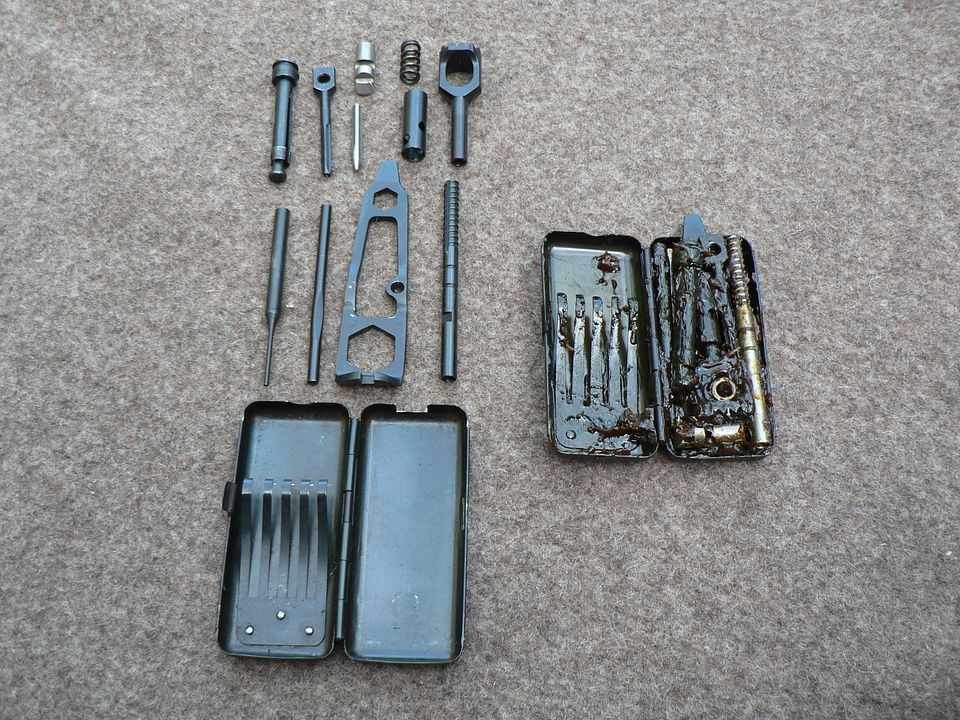
At top, left to right:

broken shell extractor, small scraper for the gas ports, spare extractor, above a partial spare firing pin (I'll explain below), spare extractor spring over a multi-purpose adapter (used to make a "T" handle among other things), large scraper for the gas cup.

  **  About the firing pin....... part of the semi-auto conversion kit was a small rod to be used as an intermediate firing pin between the slide hammer and the actual firing pin in the bolt.  This intermediate firing pin was so poorly hardened (if it was hardened at all), it would begin to mushroom after just a few rounds.  With continued use, it would lock in the bolt carrier and create a runaway firing situation.  After playing with this for a while, I finally decided to omit it and fabricate my own by cutting part of the spare firing pin off, modify it, and use it as the intermediate firing pin.  It worked perfectly and I just kept the remainder of the original spare firing pin instead of tossing it.  I still have a spare in the NOS cleaning kit so it all worked out. **

Continuing on with the cleaning kit parts, row two, left to right:

pin punch, rod to be used with the aforementioned multi-purpose adapter to create a "T" handle, a multi-use tool used as a wrench, screwdriver, prying device, and other stuff, and finally, a bore cleaning jag.  The actual cleaning rod is stowed along the left side of the receiver.  

At the bottom is the steel case.  It's held closed by a spring latch and can be used as a handle for the screwdriver if desired.  The little spring fingers in the lid apply pressure to all the contents when stowed to keep them from rattling.  The entire thing is a sweet little box of efficiency!


We'll finish this up by looking at some of the internal components.


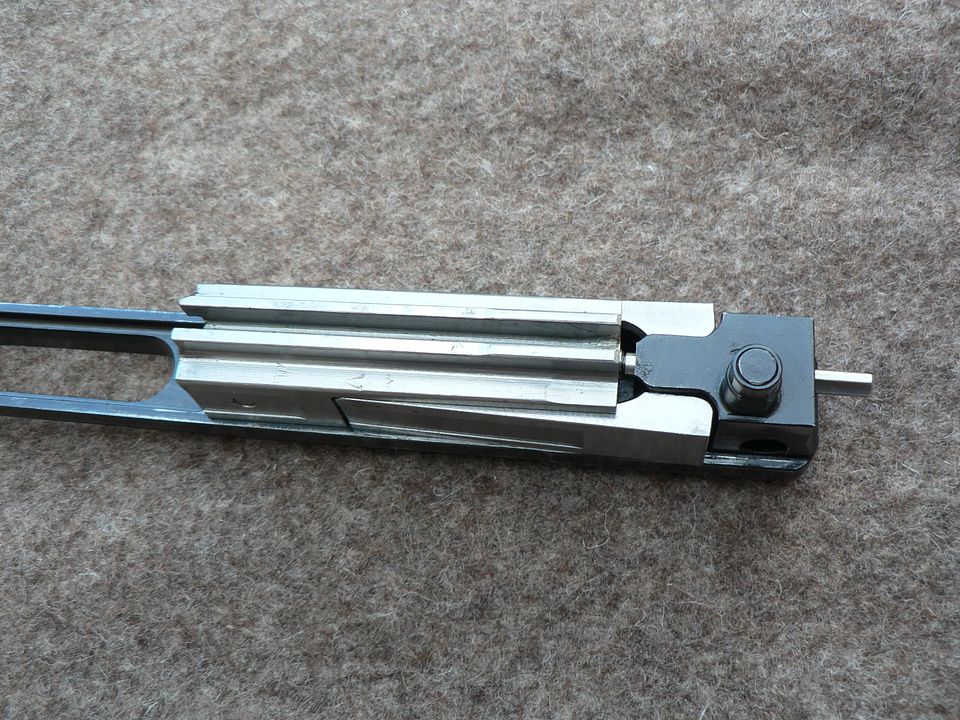
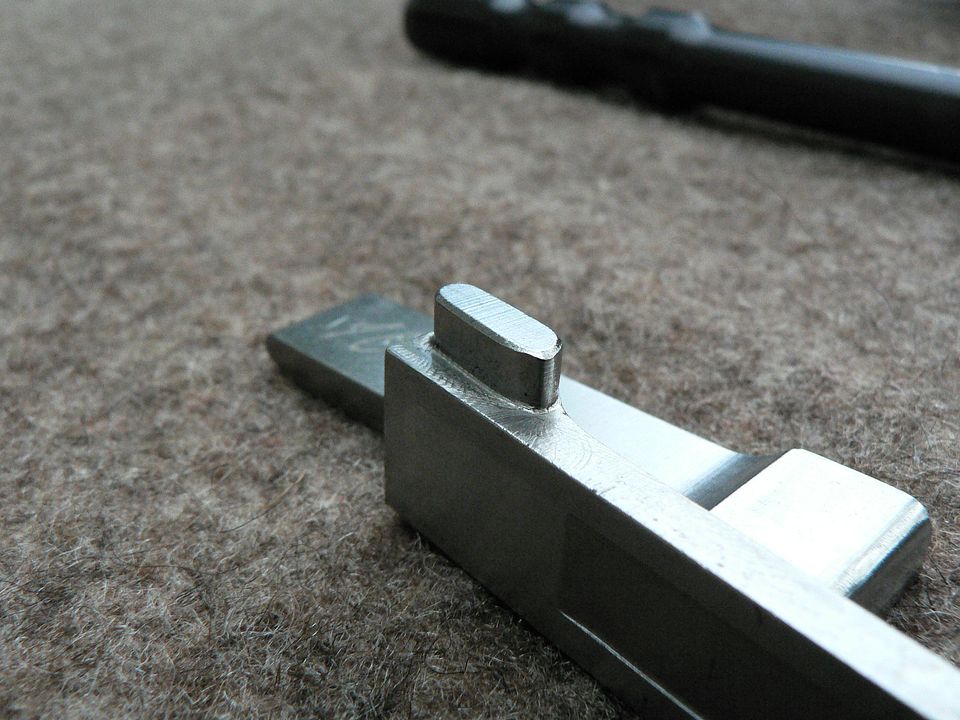
First, we see the bolt sitting on the carrier with the locking flaps in the "locked" position.  In this position, they would protrude into cutouts in the receiver, thus locking the action:


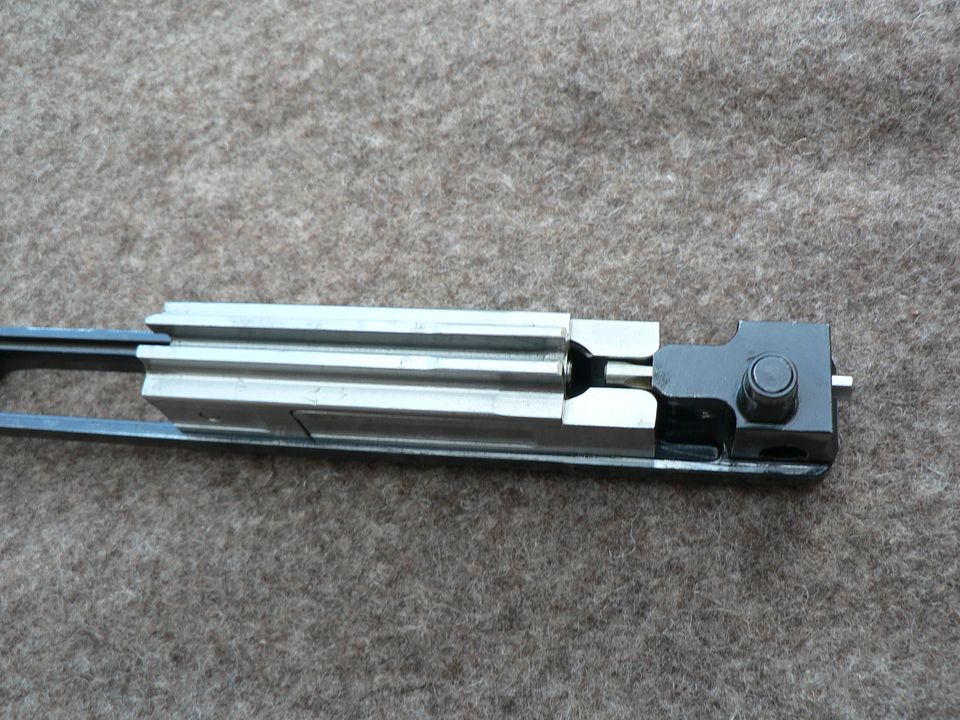
After ignition, as the bullet travels down the barrel, part of the gas is bled off to act on the gas piston, pushing the bolt carrier to the rear.  As the carrier moves backwards, cam slot machined into it, interact with a lug protruding from the bottom of each locking flap, pulling them inwards against the bolt and out of the cutouts in the receiver.  This allows the bolt/carrier assembly to continue to the rear, pulling the spent casing from the chamber as it does so.  Here. we see the action unlocked with the flaps pulled inward against the bolt:


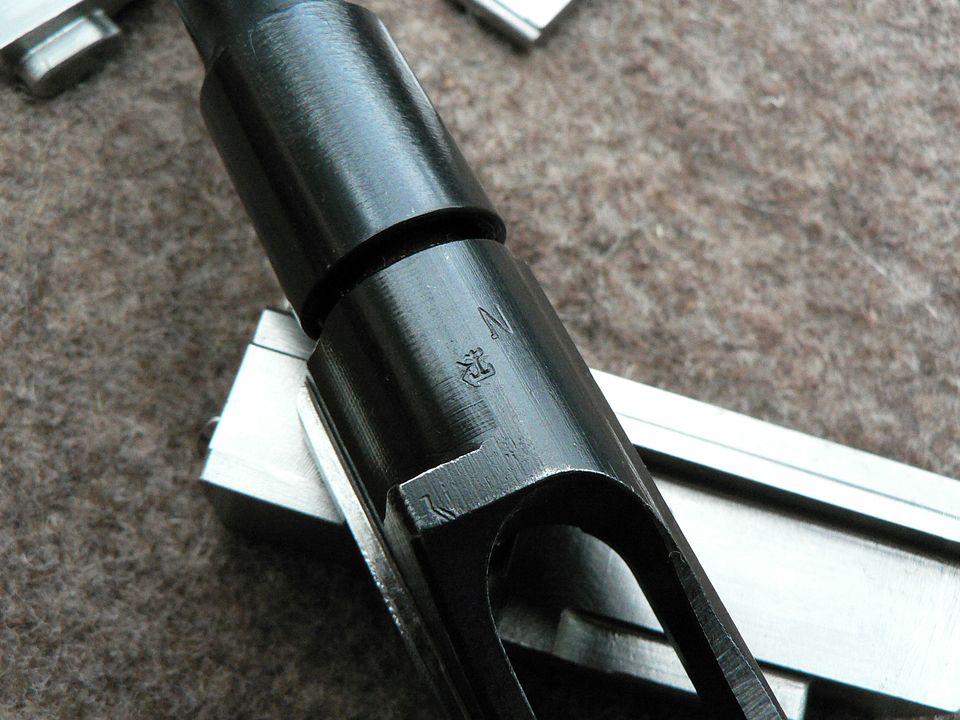
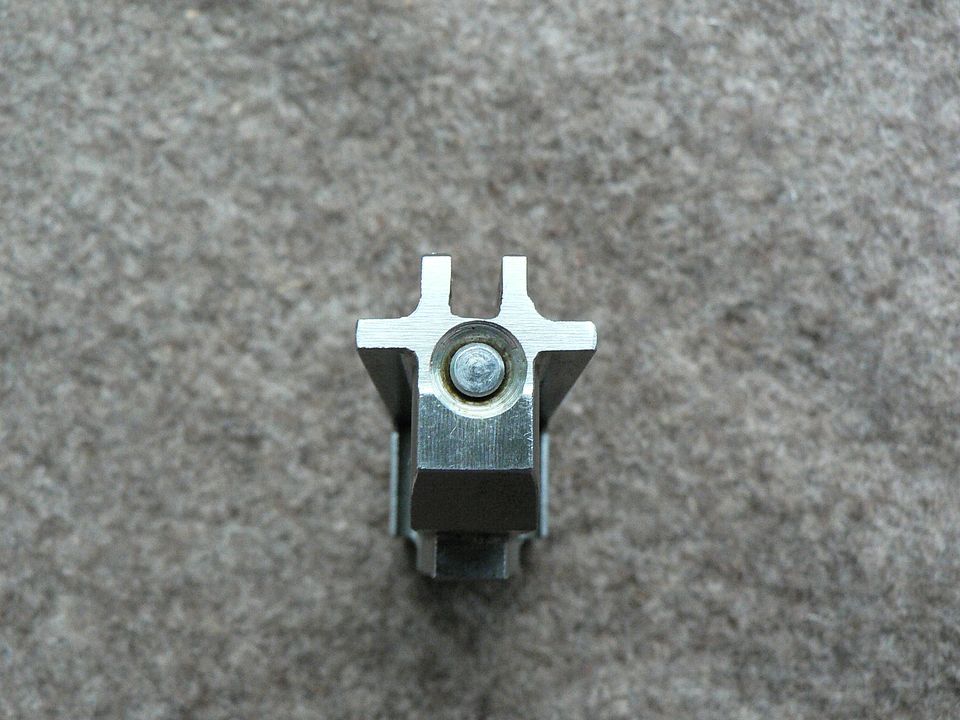
Here's the finish on the gas piston:


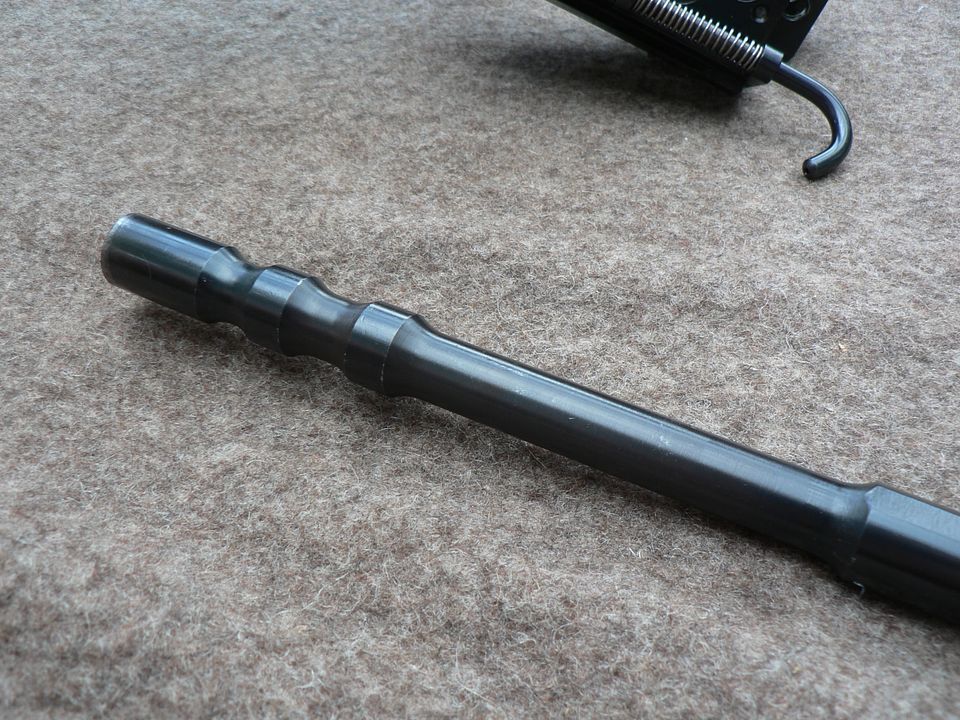
Nice, nice, NICE!  The piston is, as far as the end user is concerned, permanently attached to the bolt carrier.  


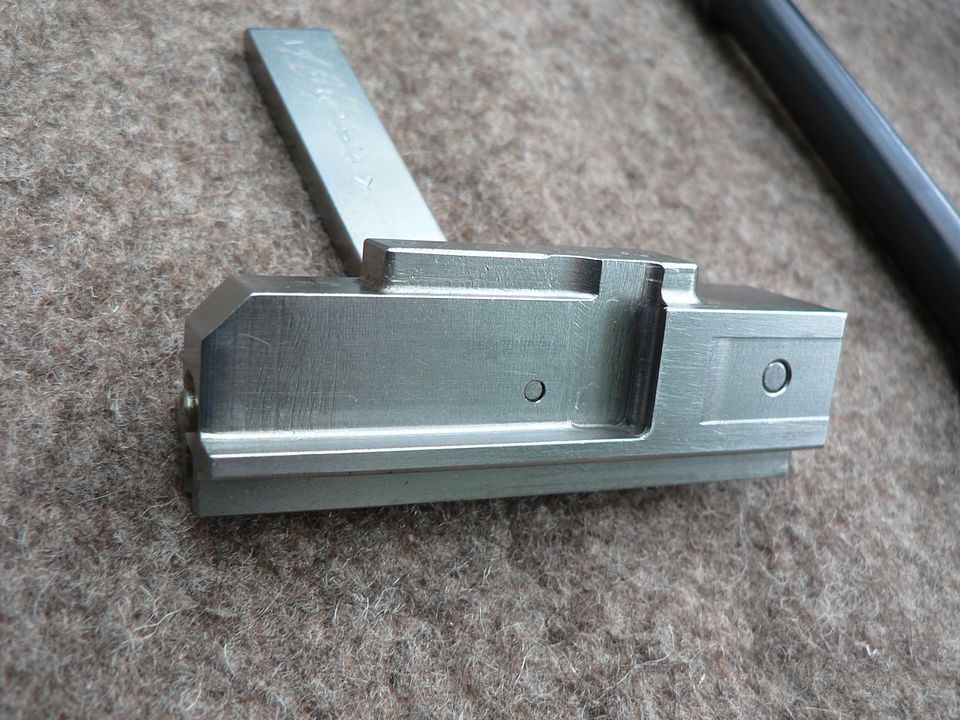
Machining on the top of the bolt carrier:


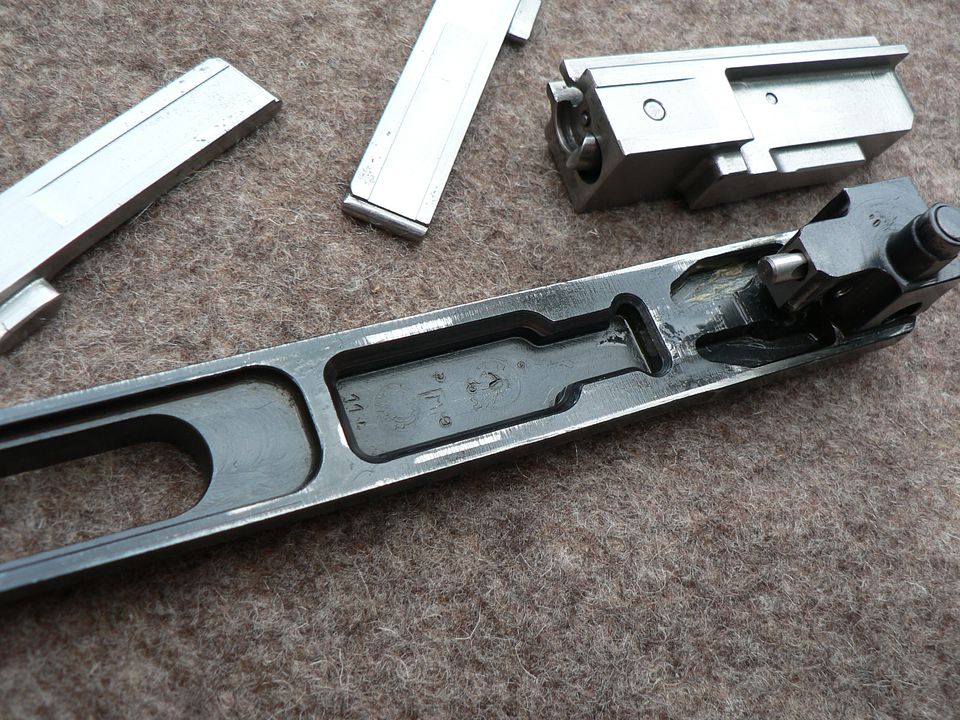
The bottle shaped area with all the inspection marks is where the bottom of the bolt rests.  Behind that are the two camming slots that move the locking flaps inwards.  


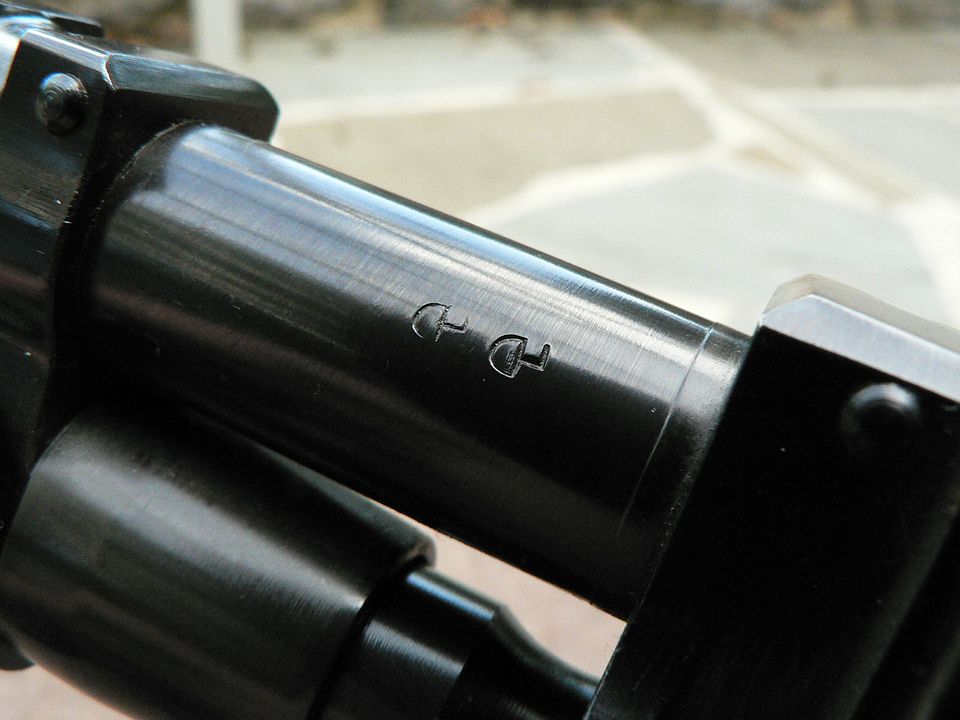
The serial number on the bottom of the bolt carrier appers to be engraved:


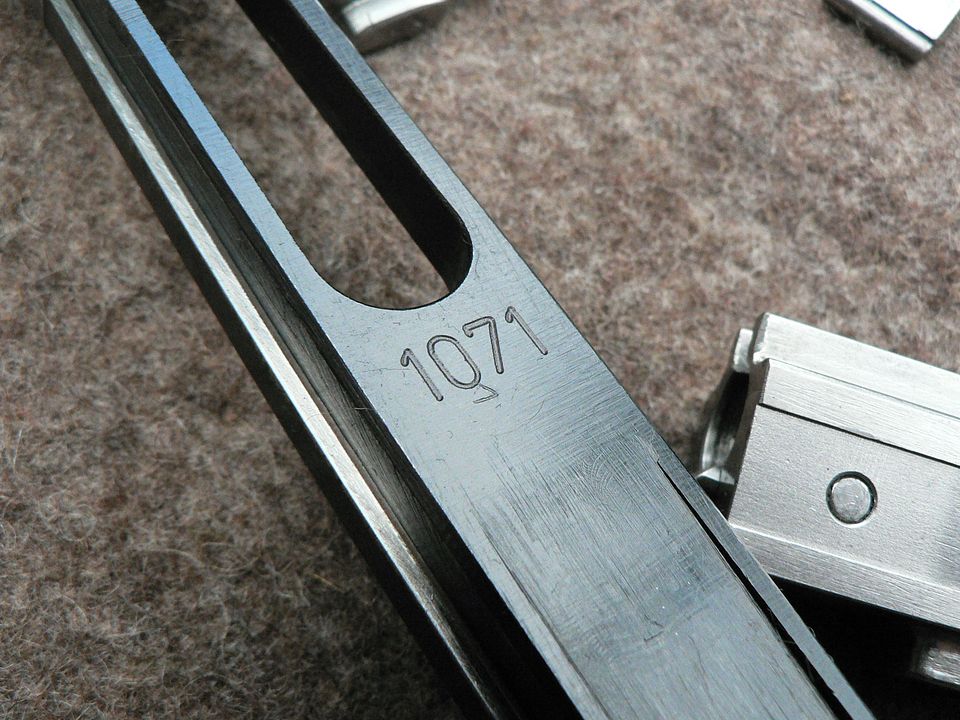
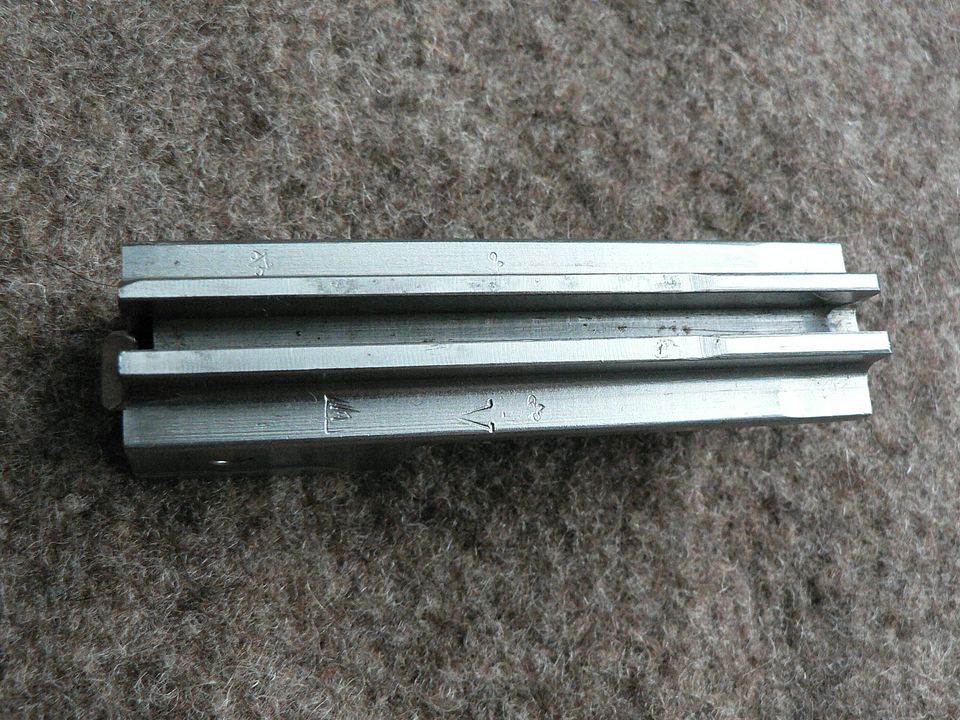
More very nicely stamped inspection marks on the bottom of where the gas piston and bolt carrier meet:


Again, we see the deep blue finish.


Inside surface of the locking flaps showing the electro penciled serial number and a number of inspection stamps:


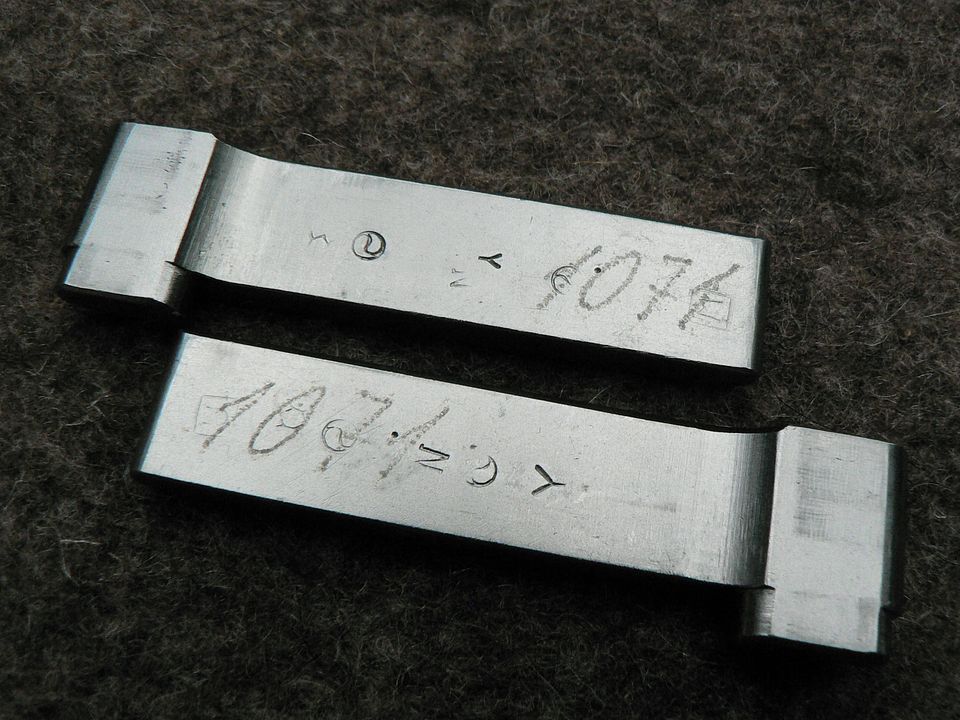
​These parts are bare steel with no finish.


Outside surface of the left locking flap turned upside down:


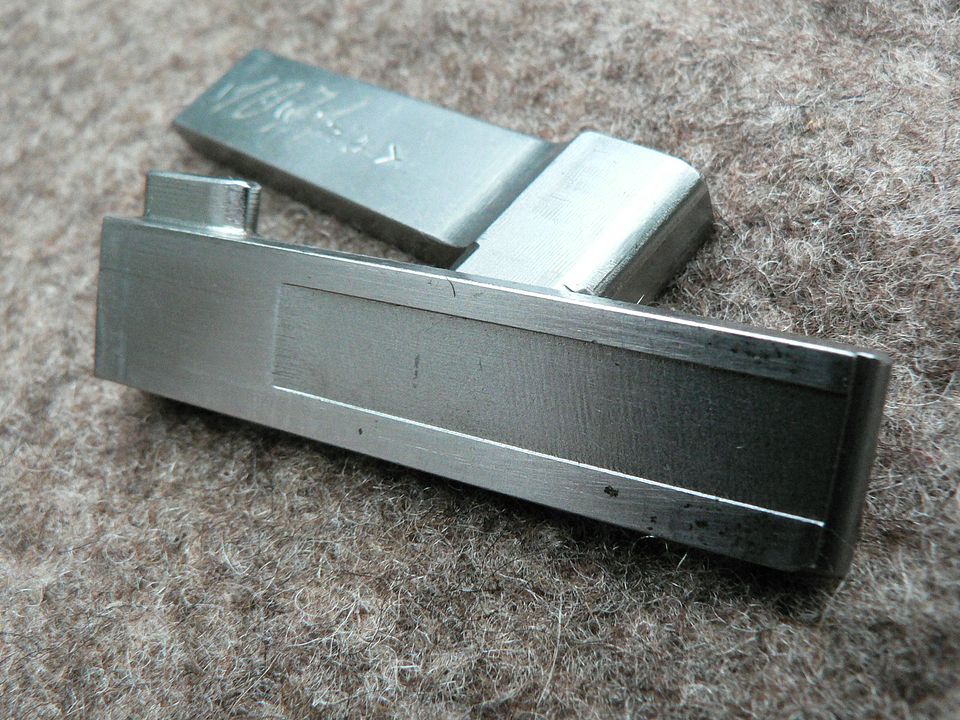
Front is to the right of the picture.  It's rounded at the front so that it can pivot where it meets the bolt.  


Detail of the lug that rides in the cam slot on the bolt carrier:


Not a crude cut or angle to be seen.


We'll finish up with the bolt.  It's also in the white:

Bottom, showing the electro penciled serial number and a plethora of inspection stamps:


It wouldn't be Warsaw Pact is it wasn't covered in stamps!!


Left side of the bolt showing the recess for the locking flap.  Bottom is at the top of frame and rear is to the left:


LOTS of work went into this part.


Top of the bolt showing the ejector slot and even more stamps:


Rear of the bolt showing the back of the firing pin:


And, finally, the front of the bolt:


And that's it, a quick look at some of the beautiful details on a typical Polish made RPD.  While there are a fair number of stamped bits, most of this rifle is made the old school way out of finely machined and richly blued steel blocks.  Compared to the RPK that replaced it, the RPD was an absolute work of mechanical art.  Thankfully, the man who built it for me was VERY careful to preserve the original finish.  It took him a while and he said that he'd NEVER build another RPD after his one time run.  I was grateful to get this all those years ago and I hope to enjoy it for years to come.  Maybe one day I'll do an in-depth look at all the details but this'll do for now.  I just had it out for inspection and had some spare time today so I figured I'd share my fascination with it's overall Quality.  Hopefully you enjoyed it as well.  Thank you for your time!
Link Posted: 6/27/2023 3:04:20 AM EDT
[#2]
WOW!!!
Link Posted: 6/27/2023 6:26:12 AM EDT
[#3]
Link Posted: 6/27/2023 9:37:14 AM EDT
[Last Edit: _DR] [#4]
Not saying those weapons pictured are problematic, however clean machining, fit and finish and appearance do not necessarily translate to flawless function. I have had Chicom manufactured firearms that looked beautiful, but had frequent malfunctions when actually firing them. A Chinese Tokarev clone I used to have comes to mind. FTF every 3rd round, like clockwork.


Page AK-47 » RPK / RPD / PKM
AK Sponsor: palmetto
Close Join Our Mail List to Stay Up To Date! Win a FREE Membership!

Sign up for the ARFCOM weekly newsletter and be entered to win a free ARFCOM membership. One new winner* is announced every week!

You will receive an email every Friday morning featuring the latest chatter from the hottest topics, breaking news surrounding legislation, as well as exclusive deals only available to ARFCOM email subscribers.


By signing up you agree to our User Agreement. *Must have a registered ARFCOM account to win.
Top Top