|
Posted: 9/5/2008 12:17:05 AM EDT
This is a demonstration of the methods I used to fabricate a new trip for my Registered Drop In Auto Sear (RDIAS) using mostly hand tools. This process takes me about 4 hours from beginning to end the first time, slightly faster after that. It’s not fast and it’s not perfect but it allows the average Joe to keep his RDIAS running with not much more than basic hand tools.
 ATTENTION: While the trip is not a machine gun in itself producing one without owning a legal Auto Sear may be perceived as constructive content by the alphabet agencies. To make these trips I used O1 tool steel. My sear came with a stainless steel trip and I’ve made one out of mild steel, both only lasted a few thousand rounds before they were pretty beat up and would no longer run consistently. The blanks I’m using were cut for me to ¼”x1”x1” by a local member on this board who was kind enough to give me his scrap steel. O1 can be ordered online in cold-rolled ¼”x1”x however long you want bars. Here is a photo of my beat up stainless trip, as you can see the bottom of my M16 BCGs dug into the top of the trip. 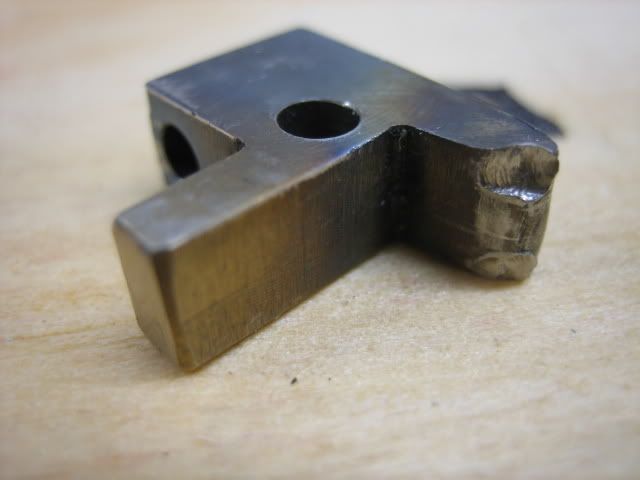 The Tools needed are: 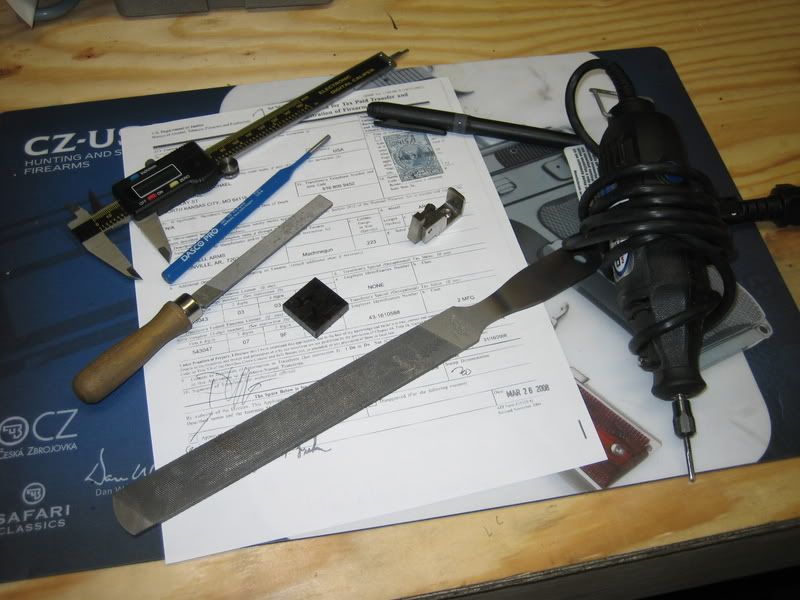 Safety Glasses Vice (I prefer a small 3” vice for this kind of work) Black Sharpie Marker Dremel tool w/ heavy duty cutting wheels (I also used a carbide burr) Large and Small bastards Calipers MAPP Gas Torch Used Motor Oil Magnet Drill or Drill press Bits to match your RDIAS’s pivot pin hole (prob. 1/8) and its spring retention hole (5/32) 1. Color the whole blank with a sharpie 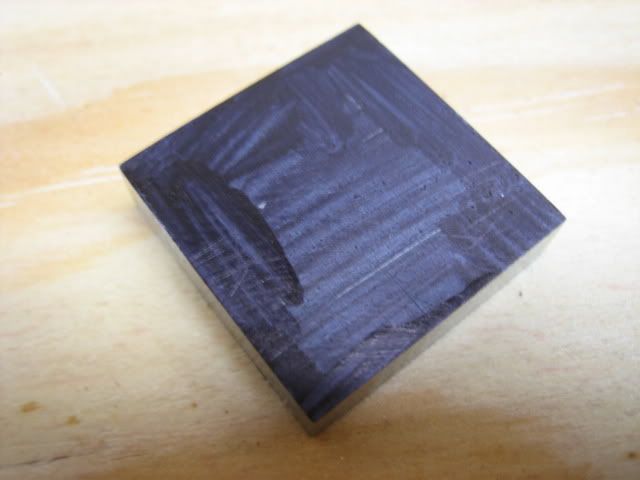 2. Use a caliper to measure your old trip or use blueprints to get the measurements. Scribe the outline onto the blank. Make the actual top trip arm long, this will be adjusted in a later step. 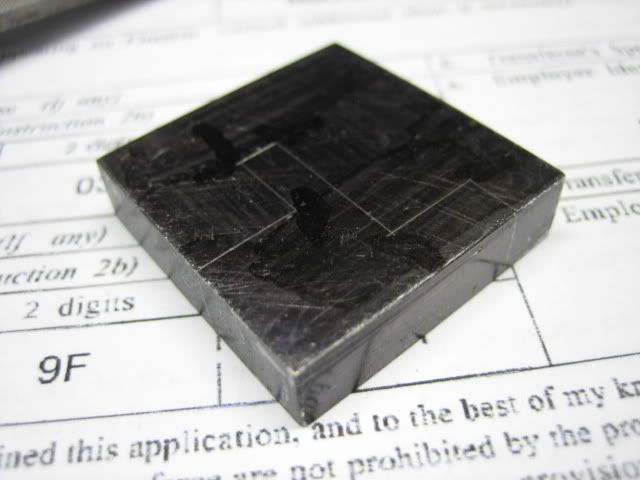 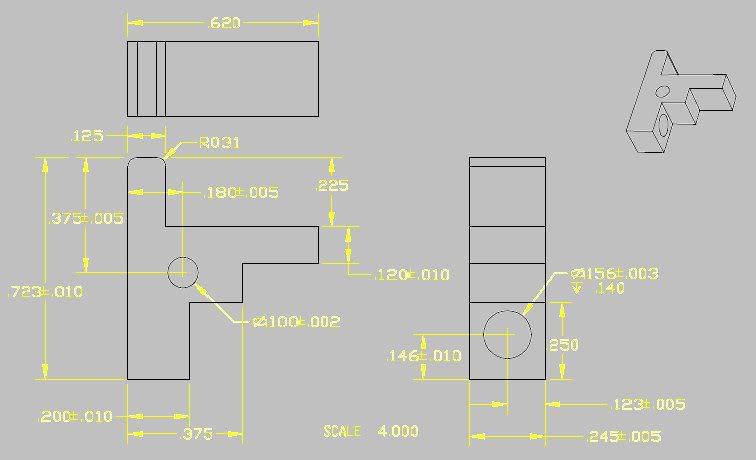 3. Lock the blank down in a vice and use a Dremel tool w/ heavy duty cutting heads to cut the metal away, don’t try to cut on the lines, stay back we’ll clean it up later with a bastard. Also keep it cool using water or compressed air. Remember this steel will get hard when you heat it up, this will make it hard or impossible to file on. 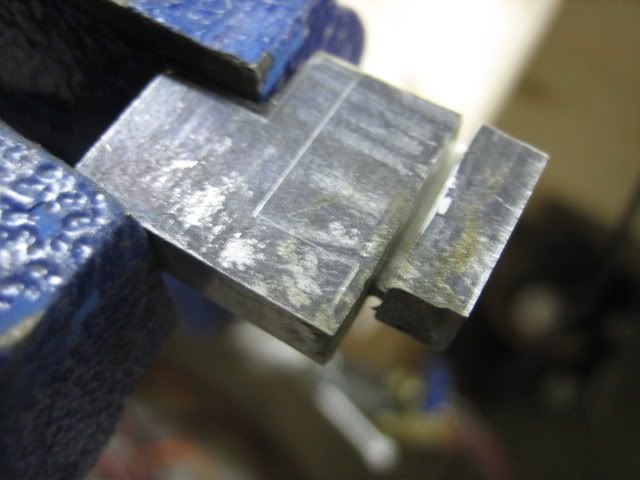  The initial cut should look about like this. Notice that I’m about a millimeter away from the desired size.  4. Now make sure you lines are still visible, if they aren’t remark them. Lock the piece down in the vice and remove some material. I used the carbide burr to remove metal down to about .5mm of my finishing line. Once you get close start in with the file, go slow, remember you can’t put material back once you remove it. 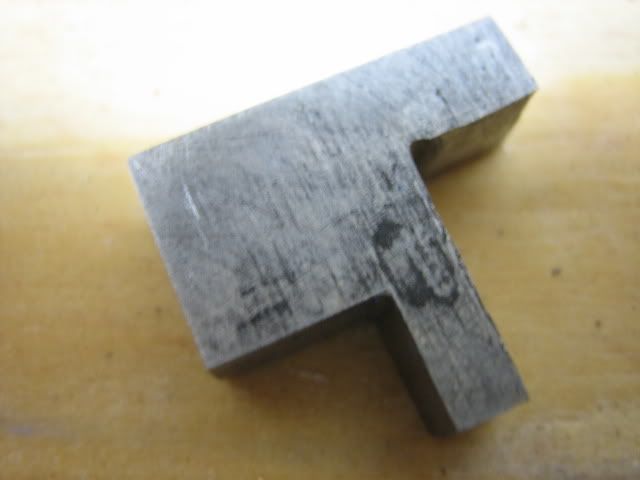 File and sand each section until you are happy with it then move onto the next, eventually it should look something like this. 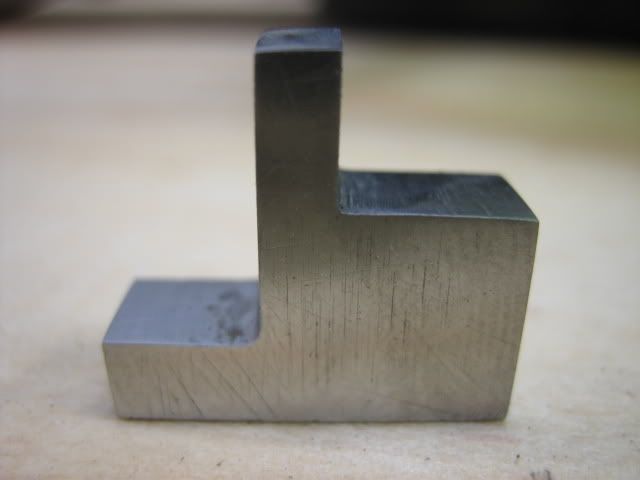 5. The next step is to drill your holes. The RDIAS trips have 2 holes, one for the pin and one to retain the return spring. My pin hole is 1/8” and my spring hole is 5/32” (look at the holes in your RDIAS to verify what sizes you need to drill). I’ve done this with a hand drill before, but it was obviously not as accurate as using a drill press, however it can be done. 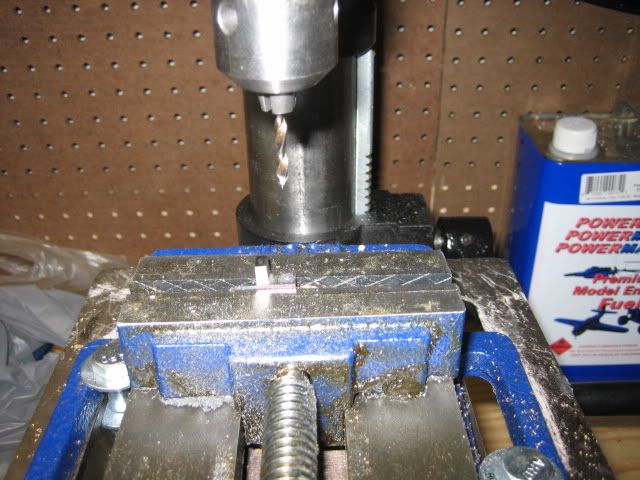 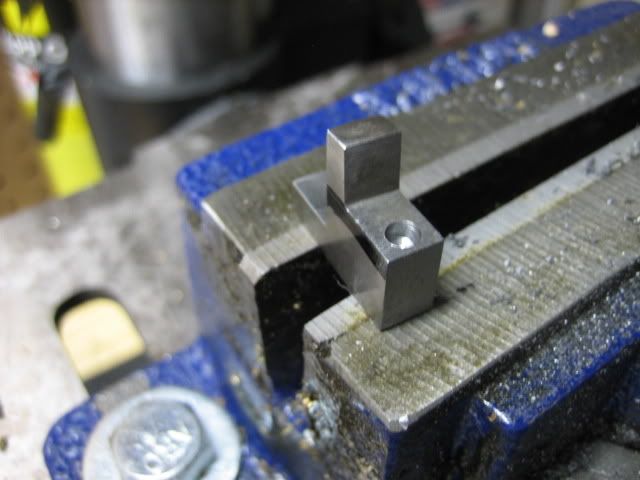 With both holes drilled it should begin to look like a complete trip (the one in production is on the right) 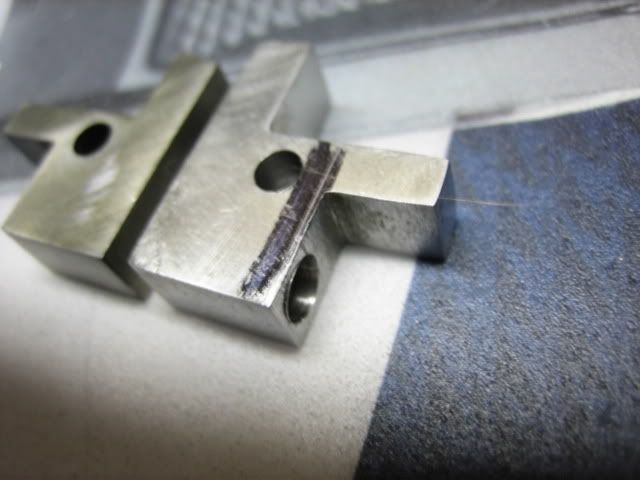 6. Now the trip arm must be adjusted. This step is important because you want the tallest trip arm possible to provide the trip with as much material and strength against the hardened BCG, but it has to clear the belly of the bolt as the bolt cycles rearward. Assemble your RDIAS, set it on the rear lug of each upper you will be using, pull the bolt rearward and make sure it doesn’t drag. If it does you have to remove more material. The clearance can be checked by using a black sharpie on the top of the trip arm, cycle the bolt and check the trip arm to see if/where the black ink has been rubbed off. The bare areas are high spots that must be removed. 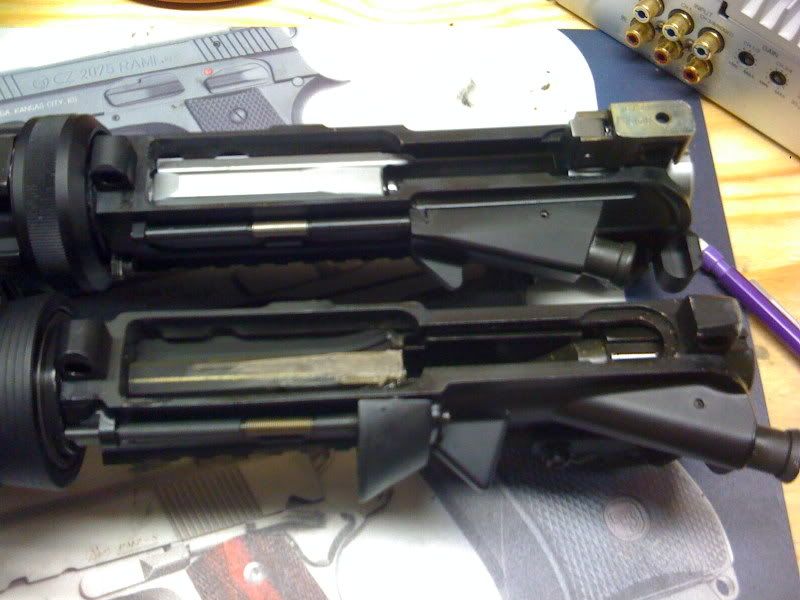 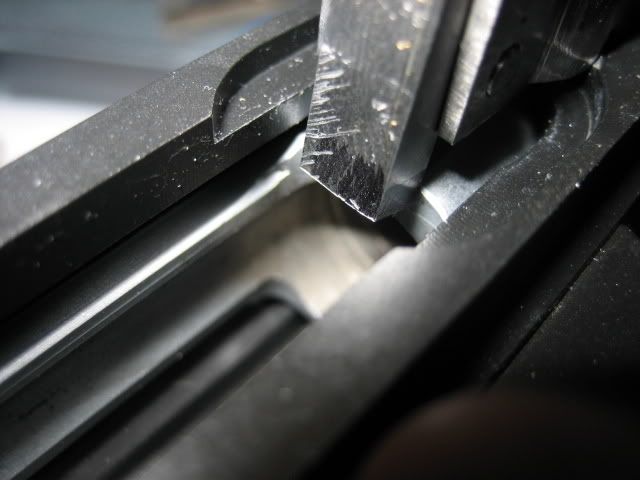 Get it close without touching… 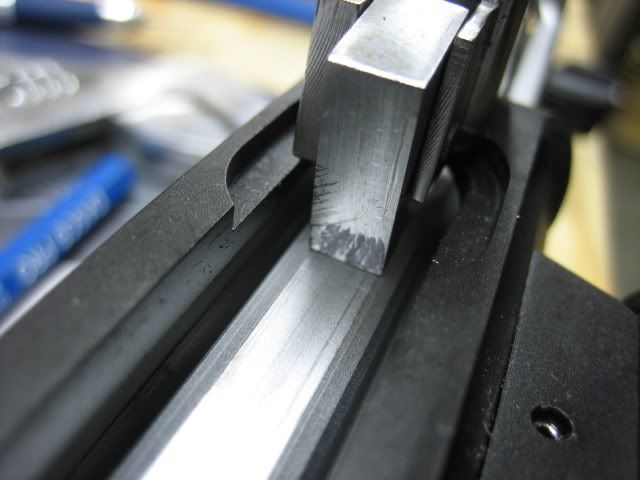 Keep in mind that to provide the most material the top of the trip arm should be parallel to the top of the RDIAS when it is not being pressed forward by the bolt. 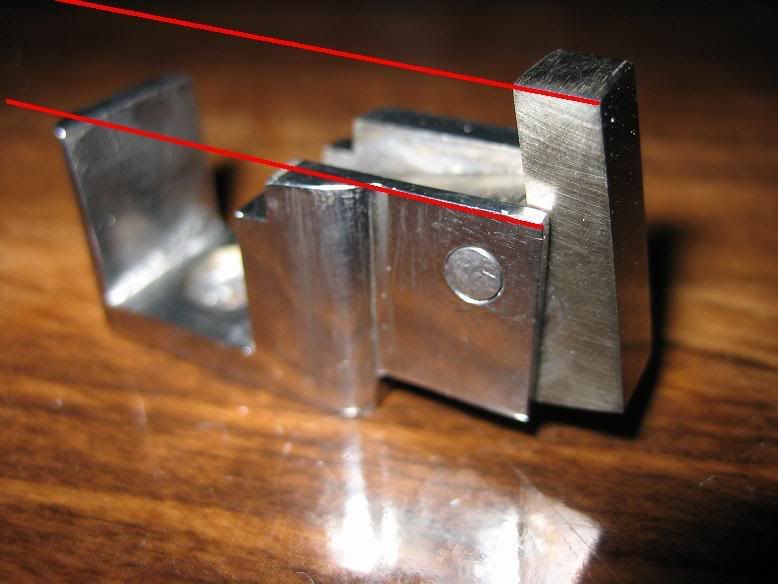 7. Checking your timing This write up isn’t intended to explain how to adjust the timing on an RDIAS. Good directions can be found HERE. I will however explain what it will look like if it is correct. 7a. 1st MAKE SURE THE GUN IS UNLOADED, as you will have to pull the trigger. 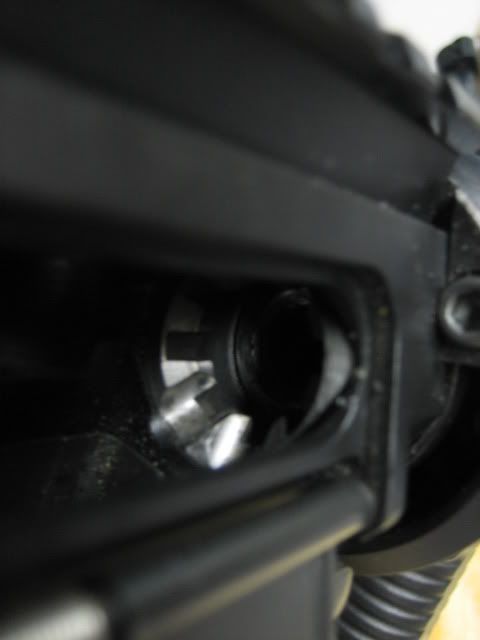 7b. Put the gun on full auto  7c. Pull the trigger while you hand cycle the bolt rearward and then let it return into battery. You should hear the hammer release just before the bolt closes.  8. If timing checks out, the next step is to harden the trip. This is where you’ll need a magnet. When the steel becomes hot enough and reaches the critical hardening temperature it will lose its magnetism. 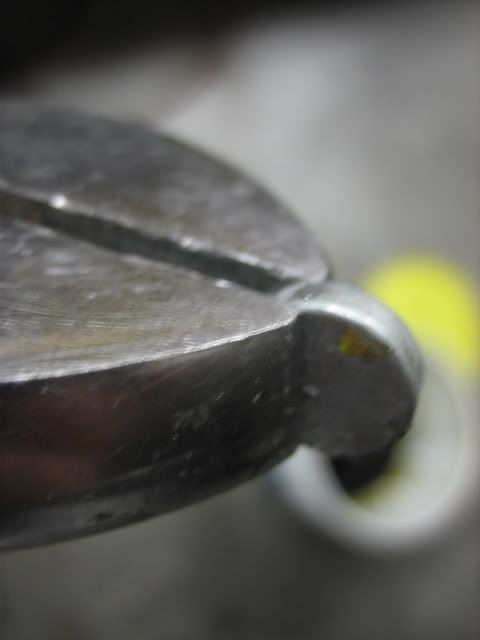 8a. Hang your Trip so it can be heated (old coat hanger works fine) 8b. Get out the MAPP gas torch and used motor oil. 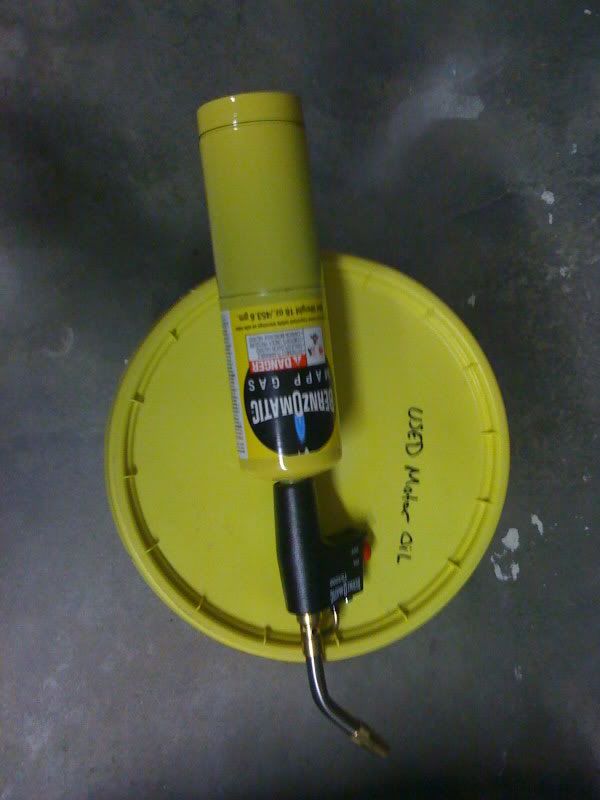 8c. Begin heating up the trip until it’s red, then check it with the magnet. 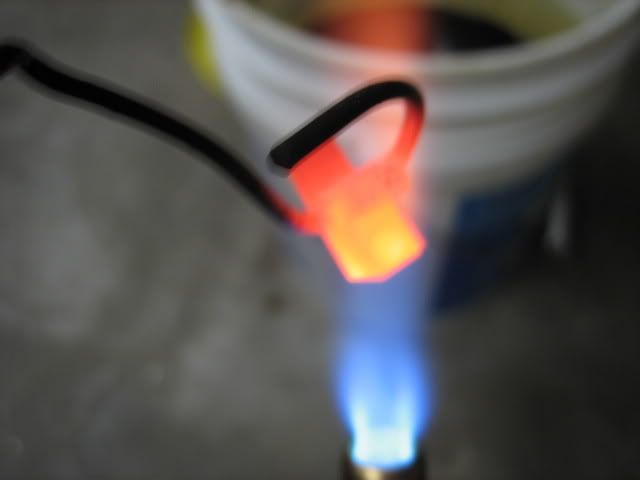 8d. If it holds a magnet keep it hot for about 20 seconds, then dunk it in used motor oil. Once submerged keep it moving so that gasses don’t keep the oil from reaching the steels surface. 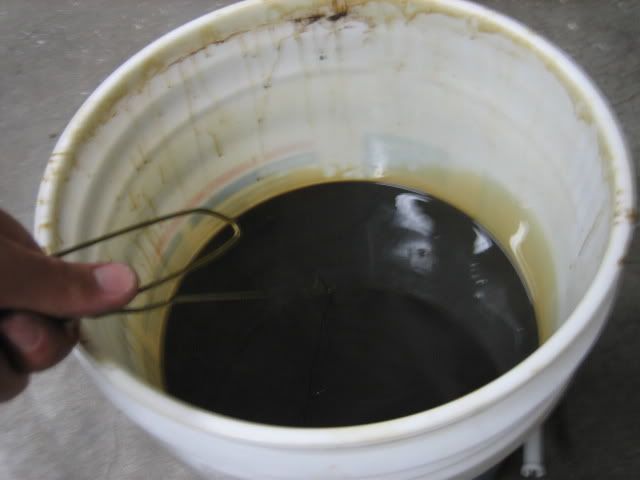 Once it’s cool remove it, it’ll be all black and it’ll need a good scrubbing. 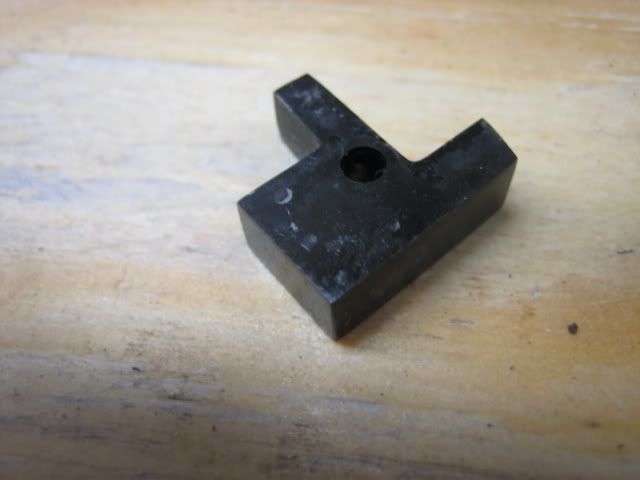 If properly hardened you should notice that the file you used before the trip was hardened will no longer bite into the steel and sandpaper just polishes it. 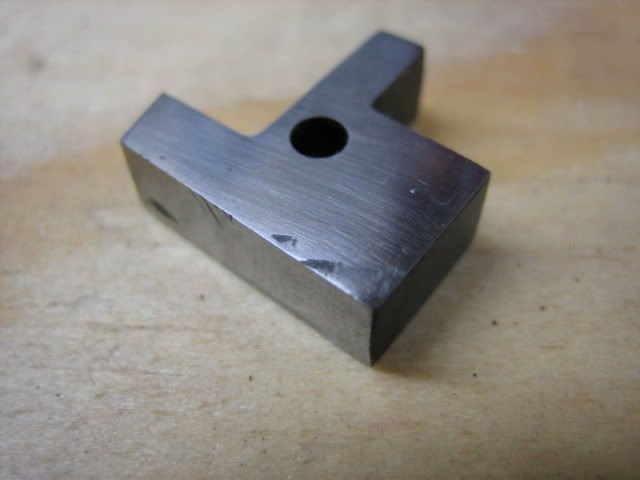 9. The last step is to temper the trip, this will make the steel tougher by removing some of the hardness. I used my oven set at 375* (this will keep it pretty hard) for 30 minutes. 10. Once it’s done install the trip in the RIDAS and check function again, if it checks out you’re good to go. 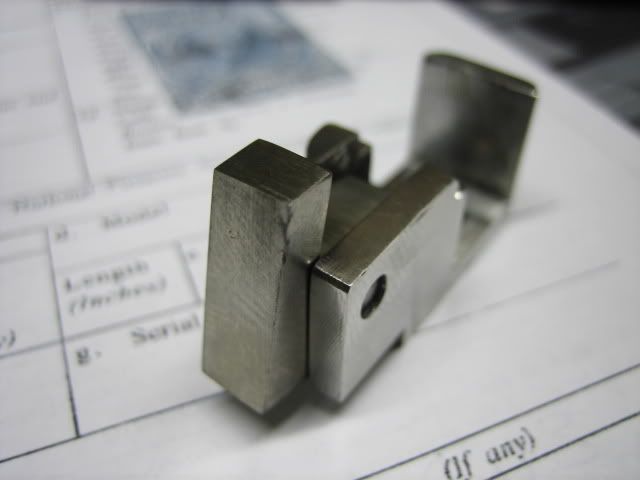 Hope you guys learned something... Jerad |
|
|
|
|
[#1]
Sweet man. Glad it came out.
Lemme rip off a mag or two and we'll call it even. 
|
|
|
|
USA
|
[#2]
Appreciate the post, this is my next investment. Copied, pasted and saved
|
|
|
OH, USA
|
[#3]
Job well done.
|
|
|
VA, USA
|
[Last Edit: JCB4ME]
[#4]
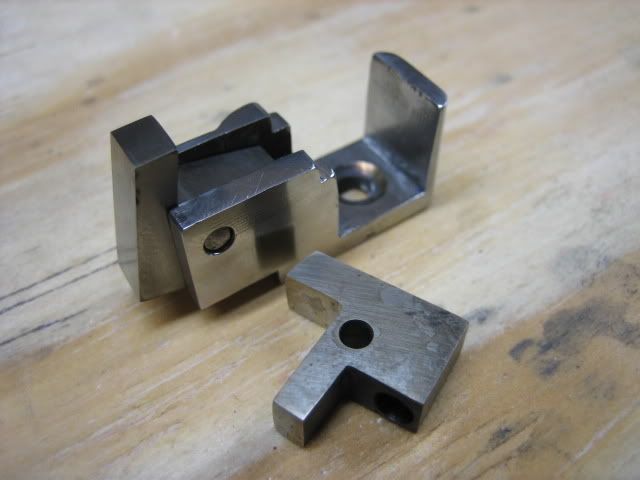
Great Post, nice photos and it makes a lot of sense the way you have explained it. It is interesting to see you making a "square" trip vice the rounded ones lots of folks run (I think the rounding is to let the RDIAS be dropped in a lower and have the upper slammed down on them). My JCB has the square trip, and needs to be placed on the upper and then rotated down carefully into the lower as one unit. Here are some pics of mine, the last one shows the trip/BCG gap.   
|
|
|
|
[Last Edit: Jerad]
[#5]
I used an angled trip arm to maximize the amount of material on the trip arm and extend the trips life. I install my trip the same way as you, attach it to the rear lug with the arm being tripped by the BC then I rotate the upper onto the lower. You can see the amount of material that had to be removed to round off the trip.  You can also see how little metal on your trip actually contacts the bolt. Using the angled trip would allow 2-3mm more metal contact while still allowing the trip arm to clear the bolt. 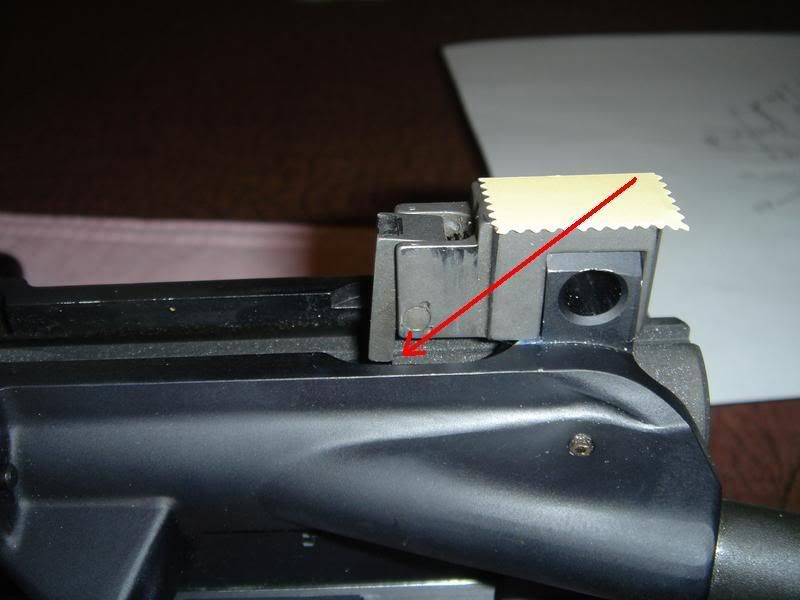
|
||
|
|
VA, USA
|
[#6]
I can see where there is room to leave some more material on the trip but it is less than 2-3mm I believe--I will have to measure it out. I have wondered about how hard a factory M-16 sear is; I imagine there is an intentional relationship between how hard the average bolt carrier is and how hard the auto sear is...do they want to the BC to wear or the sear? I have also wondered about how fast the BC is moving when it hits the trip. By looking at mine, the lugs are starting to rotate when the trip is hit so I expect it is a bit less than the full velocity of the BC under spring pressure of the return stroke--but not much. The wear point for the trip appears to be the angled part of the BC that makes initial contact (before the trip starts to rotate and carry more load up to its tip). Do you think a bigger trip will spread out the initial impact over a larger area and reduce wear? Or is it more important to have the hardness level correct?
|
|
|
|
[#7]
I would say that the most important factor is hardness. I put ~500 rounds of 9mm/22 threw my M16 today and I can't even see a mark in the new hardened trip. If it had more metal but was soft, it's going to eventually just get beat up. Absolutely nothing wrong with your trip, my first stainless steel trip was rounded, but the SS was too soft. So I set out to design/make a trip that could take 10s of thousands of rounds worth of beating....
|
|
|
|
|
[#8]
Tag for later..............................................$1900 left to go........

|
|
|
|
|
[#9]
|
|
|
|
OH, USA
|
[Last Edit: M60Joe]
[#10]
Yes the radius allows the upper to close like a sear gun.  
|
|
|
|
PA, USA
|
[#11]
I don't know that it works any better than oil quenching, but there's stuff called Casenit that I've used a few times with good results. You can get it from Brownells and McMaster-Carr, I think.
Torch the part, dip it in the Casenit powder, and then torch the part again and quench in water. Has worked on 10/22 extractors, and seems to be working on the cam-thing in the Lee Auto-Prime. Thanks for posting the thread. I should probably measure my trip, in case something happens to it. |
|
|
VA, USA
|
[#12]
They aren't cheap, but you could get a (good) set of hardness files to give you a better idea of your heat treating.
Practice your heat treat with a similar size piece of stock until you get the feel for it. I would keep the blank as cool as possible during your roughing cuts. The less stress you introduce will help you get a more uniform finished part. |
|
|
|
[#13]
I read the AR10 link/trip thread a while back and now I run into this.
I kept thinking, damn, at least I have a band saw.
|
|
|
|
IL, USA
|
[#14]
Originally Posted By Suburban:
I don't know that it works any better than oil quenching, but there's stuff called Casenit that I've used a few times with good results. You can get it from Brownells and McMaster-Carr, I think. Torch the part, dip it in the Casenit powder, and then torch the part again and quench in water. Has worked on 10/22 extractors, and seems to be working on the cam-thing in the Lee Auto-Prime. Thanks for posting the thread. I should probably measure my trip, in case something happens to it. Casenit is for "case" or surface hardening of steels that do not oil or air harden, things like regular carbon steel. The hardening only penetrates the surface for a shallow depth. Tool steels are engineered to be heat treated and this treatment affects nearly all the material depending on thickness and quenching. Casnint should not be used on oil, air, water or other hardening tool steels, only mild steels. This is an excellent write up and thanks to the OP for making this post clear and understandable. efxguy |
|
|
|
[#15]
Good post. I always had an idea on how to, but not step by step.
|
|
|
|
USA
|
[#16]
Sorry to bring up an old thread, but what unit of measurements are used in the blueprint with the yellow numbers in the first post? Is it out of an inch?
|
|
|
|
[#17]
Yes, they are out of an inch.
|
|
|
|
AZ, USA
|
[#18]
Jerad,
I had asked this a few months ago and got very little feedback. Where can you get a replacement sear spring? |
|
|
|
[#19]
I found my springs in click pins, just started taking random pens apart until I found one that was light, it really doesn't take much spring pressure to run a RDIAS.
|
|
|
|
|
[Last Edit: Alaskacajun]
[#20]
cool thread
- Clint |
|
|
|
|
[#21]
Interesting thread. Nice step by step info. I especially like the magnet/oil quenching info since that's more applicable in a lot of other projects if hardening is required.
|
|
|
|
|
[Last Edit: ultramagbrion]
[#22]
Thank you for this write up Jerad. . . . guerrilla machining at it's best right there .
|
|
|
|
|
[#23]
Very interesting, especially your optical comparator. :)
ARe the sear bodies hardened also? Posted Via AR15.Com Mobile |
|
|
|
|
[Last Edit: FlDiveCop71]
[#24]
Originally Posted By Cole2534:
Are the sear bodies hardened also?  ...................... ......................
|
|
|
|
|
[#25]
Originally Posted By FlDiveCop71:
Originally Posted By Cole2534:
Are the sear bodies hardened also? ......................Was that a bad question? |
|
|
|
|
[#26]
Originally Posted By Cole2534:
Originally Posted By FlDiveCop71:
Originally Posted By Cole2534:
Are the sear bodies hardened also? ......................Was that a bad question? I didn't fabricate mine, it's a Norrel stainless pre 86 RDIAS. I would assume it's hardened, but I don't know for sure. |
|
|
|
|
[#27]
Originally Posted By Jerad:
Originally Posted By Cole2534:
Originally Posted By FlDiveCop71:
Originally Posted By Cole2534:
Are the sear bodies hardened also? ......................Was that a bad question? I didn't fabricate mine, it's a Norrel stainless pre 86 RDIAS. I would assume it's hardened, but I don't know for sure. Please dont think that I'm implying you did. I've never handled or used one, and the trip was treated so I was just wondering if the other part was too. I'd expect it to be untreated, personally, as it really shouldn't have any wear spots. Posted Via AR15.Com Mobile |
|
|
|
|
[Last Edit: FlDiveCop71]
[#28]
Originally Posted By Cole2534:
Was that a bad question? Let's just say it's a question that's better posed through IM's or Email rather than an open forum. Questions regarding or related to the the construction of sear bodies are (as I understand it) .....beyond the scope (or coc / legalities) of this forum. |
|
|
|
|
[#29]
Oh. Gotcha.
My apologies! Posted Via AR15.Com Mobile |
|
|
|
|
[#30]
Originally Posted By FlDiveCop71:
Originally Posted By Cole2534:
Was that a bad question? Let's just say it's a question that's better posed through IM's or Email rather than an open forum. Questions regarding or related to the the construction of sear bodies are (as I understand it) .....beyond the scope (or coc / legalities) of this forum. I think it was a perfectly legit question. There didn't seem to be any indication of wrongdoing here. He didn't say "Hey guys, I'm trying to make an RDIAS and I need plans...oh yeah should I heat treat this thing?"
It's perfectly reasonable to discus the construction of machine guns, silencers, etc. here in a legal manner. It can be very helpful to potential buyers to know what their options are when buying and why someone might want certain metallurgical properties of one product over another. That's what this place if all about IMHO. |
|
|
|
FL, USA
|
[#31]
I very seriously doubt sear bodies are hardened. Many are made out of aluminum.
|
|
|
LA, USA
|
[#32]
Ok, Dumb question. But If this doesn't have a serial or the original has a serial then how can you rebuild the DIAS, with out transferring the serial from one to another. no one please take this as accusatory or anything other than a learning question as I'm ramping up to get my first MG.
I'm debating between the DIAS, the LL and/or a converted lower. What did I miss? Thanks guys |
|
|
|
[#33]
Originally Posted By meauxcg:
Ok, Dumb question. But If this doesn't have a serial or the original has a serial then how can you rebuild the DIAS, with out transferring the serial from one to another. no one please take this as accusatory or anything other than a learning question as I'm ramping up to get my first MG. I'm debating between the DIAS, the LL and/or a converted lower. What did I miss? Thanks guys The part they are replacing is not serialized. Note that this doesn't mean you can make this part just because it's not serialized.. |
|
|
|
|
[#34]
tag
|
|
|
|
MO, USA
|
[#35]
If the sear trip is a wear item, how many rounds does one typically last?
Just asking rhetorically, as I have a RR Colt M16A1. But it seems to me that if you are going to the trouble of making these, if the wear rate is very high, it might be a good idea to make more than one at a time. Perhaps even have a couple blanks cut with a water jet or plasma cutter. Also seems like the tip, since that is where the wear occurs, would benefit from a mirror polish. RCA |
|
|
|
[#36]
Good thread
|
|
|
|
|
[#37]
Originally Posted By kingoftheriver: If the sear trip is a wear item, how many rounds does one typically last? Just asking rhetorically, as I have a RR Colt M16A1. But it seems to me that if you are going to the trouble of making these, if the wear rate is very high, it might be a good idea to make more than one at a time. Perhaps even have a couple blanks cut with a water jet or plasma cutter. Also seems like the tip, since that is where the wear occurs, would benefit from a mirror polish. RCA Sorry I don't check this very often. The wear rate is very low, but keep in mind these used to sell for $30 so premium materials wasn't a concern. I haven't made a new one since this original post and I have minimal discernible wear on it. It will out live me. |
|
|
|
 Win a FREE Membership!
Sign up for the ARFCOM weekly newsletter and be entered to win a free ARFCOM membership. One new winner* is announced every week!
You will receive an email every Friday morning featuring the latest chatter from the hottest topics, breaking news surrounding legislation, as well as exclusive deals only available to ARFCOM email subscribers.

AR15.COM is the world's largest firearm community and is a gathering place for firearm enthusiasts of all types.
From hunters and military members, to competition shooters and general firearm enthusiasts, we welcome anyone who values and respects the way of the firearm.

Subscribe to our monthly Newsletter to receive firearm news, product discounts from your favorite Industry Partners, and more.
Copyright © 1996-2024 AR15.COM LLC. All Rights Reserved.
Any use of this content without express written consent is prohibited.
AR15.Com reserves the right to overwrite or replace any affiliate, commercial, or monetizable links, posted by users, with our own.


