AR, USA
|
[Last Edit: Hoodooman]
[#1]
Originally Posted By camoman33935:
Thanks for the compliments fellas. The reason I didn't do the barrel and the scope is because I used the camo Krylon and didn't figure it'd hold up too good on the metal. When I get the money for Duracoat I will definitely do the whole rifle and the scope. By the way, what are yall guys using for a clear coat? I've been to every store in town that carries spray paint and have not been able to find any Krylon Flat clear coat. Thanks, Gavin I've used a Valspar flat (not matte/satin) clearcoat, I found it at Lowes last time. Edit - Valspar 65060 Clear Flat, UPC# 071915233050 |
|
|
|
[#2]
Here's my contribution. Just finished it Friday night. Krylon Camo khaki, OD, brown and matte finish. I think I'm addicted to this technique!


|
|
|
|
|
[Last Edit: MinutestilMidnight]
[#3]

Remington 700 in 308 in background, Savage 110 BA in 338 LM in front, simple Krylon. |
|
|
|
|
[#4]
Originally Posted By unforgiven5150:
Here's my contribution. Just finished it Friday night. Krylon Camo khaki, OD, brown and matte finish. I think I'm addicted to this technique! http://i324.photobucket.com/albums/k348/un4gvn5150/SPR/IMG_4038.jpg http://i324.photobucket.com/albums/k348/un4gvn5150/SPR/IMG_4040.jpg http://i324.photobucket.com/albums/k348/un4gvn5150/SPR/IMG_4046.jpg http://i324.photobucket.com/albums/k348/un4gvn5150/SPR/IMG_4044.jpg http://i324.photobucket.com/albums/k348/un4gvn5150/SPR/IMG_4043.jpg http://i324.photobucket.com/albums/k348/un4gvn5150/SPR/IMG_4042.jpg http://i324.photobucket.com/albums/k348/un4gvn5150/SPR/IMG_4041.jpg I don't know if you realized it yet, but you should take your flip ups off the scope and hit the inside of the covers too, especially the front one. Good job on it though! |
|
|
|
|
[Last Edit: FullMetalChef]
[#5]
Originally Posted By MinutestilMidnight:
Thanks for the compliments. I'm not sure why I didn't think of that! Just went and did it right now.
Originally Posted By unforgiven5150:
Here's my contribution. Just finished it Friday night. Krylon Camo khaki, OD, brown and matte finish. I think I'm addicted to this technique! http://i324.photobucket.com/albums/k348/un4gvn5150/SPR/IMG_4038.jpg http://i324.photobucket.com/albums/k348/un4gvn5150/SPR/IMG_4040.jpg http://i324.photobucket.com/albums/k348/un4gvn5150/SPR/IMG_4046.jpg http://i324.photobucket.com/albums/k348/un4gvn5150/SPR/IMG_4044.jpg http://i324.photobucket.com/albums/k348/un4gvn5150/SPR/IMG_4043.jpg http://i324.photobucket.com/albums/k348/un4gvn5150/SPR/IMG_4042.jpg http://i324.photobucket.com/albums/k348/un4gvn5150/SPR/IMG_4041.jpg I don't know if you realized it yet, but you should take your flip ups off the scope and hit the inside of the covers too, especially the front one. Good job on it though! |
|
|
|
CT, USA
|
[Last Edit: TF-41]
[#6]
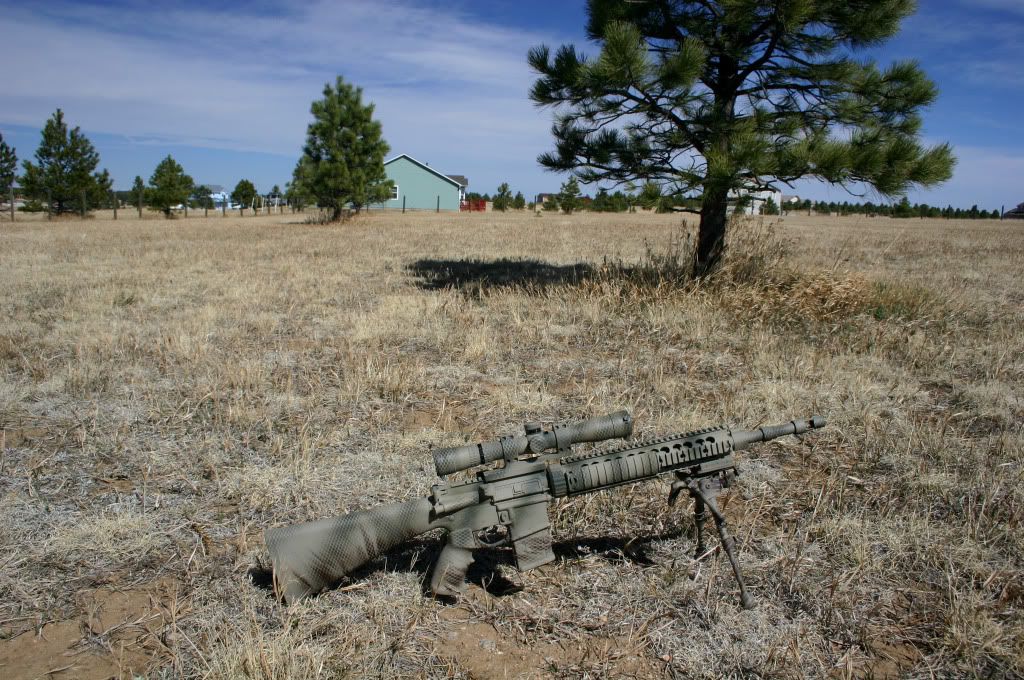
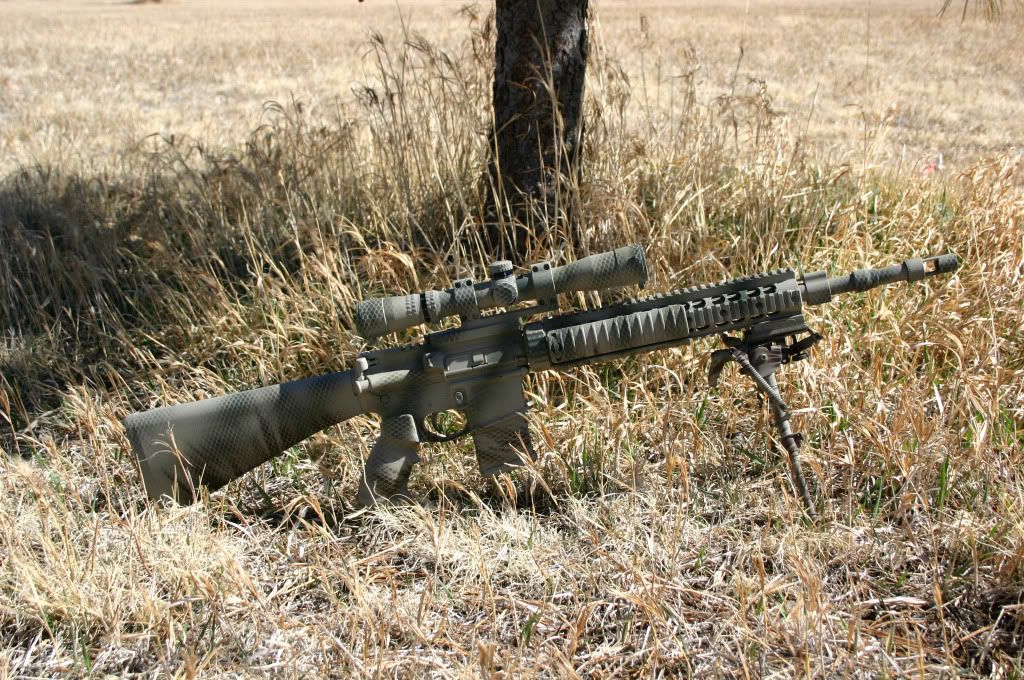
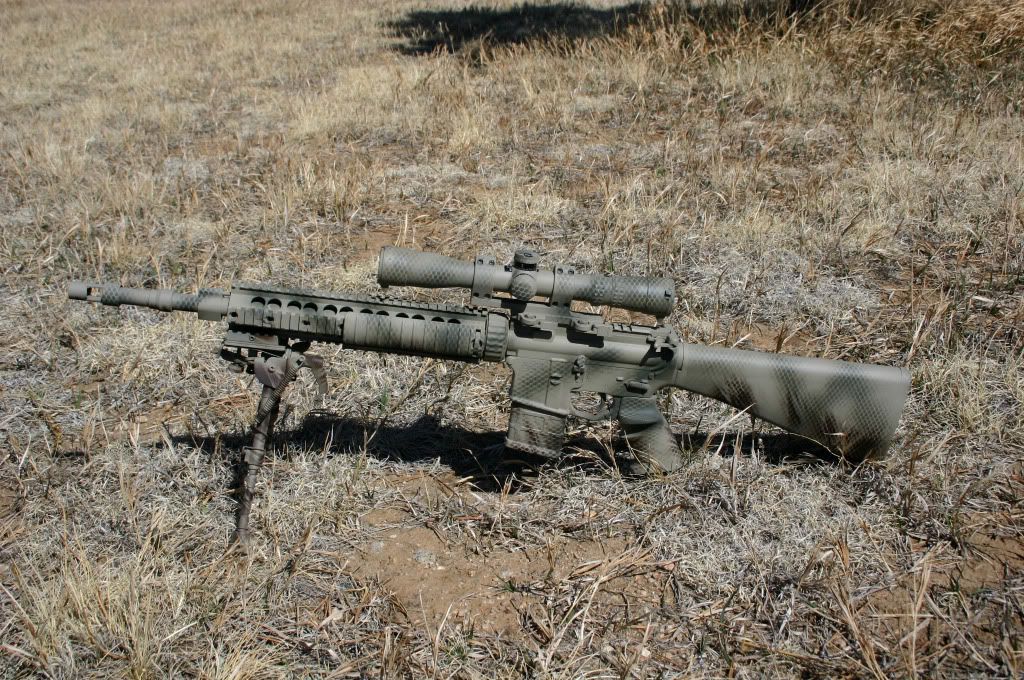
I just reassembled my Rem 700 308 after painting the stock and bipod the other day. I did not paint the scope and rest of the metal yet since I have not fired the gun with the new scope, rings, and base I installed. I want to make sure everything is definately good to go before I paint those items. Regardless, Krylon Fusion Camo Khaki base coat, followed by stripes of Olive, Brown, OD, and very sparingly Sandstone(the whitish looking areas). Finished with Krylon Matte Clear coat. I LOVE this technique! I was going for the multicam coloring without the template of course. Maybe a touch more green or a very very light green basecoat instead of Khaki??? But...it is always easier to blend in lighter than darker... Also, any good tips for when it comes to painting the scope?

|
|
|
AL, USA
|
[#7]
Originally Posted By TF-41:
I just reassembled my Rem 700 308 after painting the stock and bipod the other day. I did not paint the scope and rest of the metal yet since I have not fired the gun with the new scope, rings, and base I installed. I want to make sure everything is definately good to go before I paint those items. Regardless, Krylon Fusion Camo Khaki base coat, followed by stripes of Olive, Brown, OD, and very sparingly Sandstone(the whitish looking areas). Finished with Krylon Matte Clear coat. I LOVE this technique! I was going for the multicam coloring without the template of course. Maybe a touch more green or a very very light green basecoat instead of Khaki??? But...it is always easier to blend in lighter than darker... Also, any good tips for when it comes to painting the scope? http://img714.imageshack.us/img714/7940/sniper1n.jpg That looks great. I really like the way you used the colors to have light areas and dark areas. Scopes are tricky. Because of their finsih, paint does not like to stick to them. I have a method that has worked fairly well. I'd love to take credit but someone else here put me on it. I do not remember his screen name...sorry. I like to clean the scope with alcohol wipes and of course, tape off anything that you don't want paint to get on. Start with your base coat and spray a VERY light misting coat...so light, that you may not even notice that you got any paint on the scope. Most of the time, I will preheat the scope with a hairdryer so the paint basically dries on contact. After the misting coat, I'll hit it with the hairdryer again. I then let it dry for a few hours. Next, I take a paper towel and wipe the scope down. You will see some of the paint coming off onto the towel. This is the paint that was not sticking very good. At times, I've had it look like more paint came off on the towel than stayed on the scope. Next, spray a second misting coat, let it dry and then repeat. I generally change towels every other coat. I repeat this proces until I have the base coat the desired color. With tan going over black, I've sprayed as many as 12 misting coats to get full coverage...yes, pattience is required. After the base coat is finished, I apply the pattern all in one step. I do not wipe the scope down anymore at this point but I do continue to preheat with the hairdryer and hit it with the hairdryer after applying the pattern. The paint from the pattern should be sticking to the base coat so if the base coat went on good you should have no worries. I then hit it with a matte clear coat for added protection. Good Luck. |
|
|
CT, USA
|
[Last Edit: TF-41]
[#8]
Thanks for the compliments and the tips for the scope. I think I finally developed my "own style" for the pine straws now. I start off by doing diagonal stripes with OD and Brown laying next to each other for the length of the gun...THEN I go back over in the opposite diagonal and direction with the half dozen Olive stripes and essentially overlap what I laid down. Finally, I'll lay just a few stripes with the Sandstone to make the finish POP with some very light coloring. What I found with using this many colors and the overlapping of the base stripe colors laid down is the straw marks aren't just Khaki. It looks really good to see the Sandstone leaving straw marks which are Olive in color for example or OD marks with Olive on top, etc. etc.. Thanks for developing this technique...you created a monster. I also do my stripes within 6 inches of the rifle and lay them down fast but heavy. It makes very defined lines through the straw and not this spackly mess without definition. I'll update the rifle pic when the metal is done.
|
|
|
|
[#9]
Here's my latest; a bit of a hybrid. The brown on the lower end was laid over pine needles, my usual technique, and the mesh netting. I think it came out looking damned nice. Before I laid the color on, I painted the grip and rail panels with Rustoleum Textured paint. This gives it a nice grippy surface, similar to, but not as rough, as skaters tape. Finished the rifle off with Duracoat matte clear to seal it in.
|
|
|
|
|
[#10]
Did the holster today finally. How much more courage do I need to refinish a firearm?
 |
|
|
|
|
[#11]
Originally Posted By MrVegas:
Did the holster today finally. How much more courage do I need to refinish a firearm? http://i117.photobucket.com/albums/o75/thatonekidmatt/PaintJob.jpg Just do it! All of the paint jobs after your first firearm just get easier and more fun. Over the last few years I've painted my guns, guns for my friends, paintball guns for every guy I play with, airsoft guns for my Boy Scouts, my ladder, my glasses case, holsters . . . . the list just goes on and on. |
|
|
|
NC, USA
|
[#12]
Has anybody done the Pinestraw using Duracoat?
|
|
|
SC, USA
|
[#13]
Just painted my new squirrel buster.
Gamo .177 Rocket break barrel.  If it weren't for the fleas on my dogs and the oak trees in my flower beds, i'd almost feel sorry for them
 |
|
|
PA, USA
|
[#14]
Originally Posted By offroader1006:
Just painted my new squirrel buster. Gamo .177 Rocket break barrel. If it weren't for the fleas on my dogs and the oak trees in my flower beds, i'd almost feel sorry for them I really like the way that came out, excellent job. |
|
|
PA, USA
|
[#15]
A little body filler, SEM texture coating, paint, and its almost a decent looking gun

|
|
|
|
[#16]
Originally Posted By Birddog1911:
Here's my latest; a bit of a hybrid. The brown on the lower end was laid over pine needles, my usual technique, and the mesh netting. What kind of mesh netting? I have used carious "mesh" materials and have come out with a fail on each one. |
|
|
|
|
[#17]
Pictures didn't come out that well but she blends in great.

|
|
|
|
|
[#18]
Thanks for the info bjwar10. My first attempt. Went with more green, I live in cental FL and we still have leaves on the trees during hunting season.
Before 
After 
Closeup 
Only pic I have outside ATM 
|
|
|
|
AL, USA
|
[#19]
Originally Posted By Mad_Italian:
Thanks for the info bjwar10. My first attempt. Went with more green, I live in cental FL and we still have leaves on the trees during hunting season.
Before http://i1087.photobucket.com/albums/j471/shark130/0707111700.jpg After http://i1087.photobucket.com/albums/j471/shark130/0825111607.jpg Closeup http://i1087.photobucket.com/albums/j471/shark130/0825111605.jpg Only pic I have outside ATM http://i1087.photobucket.com/albums/j471/shark130/0822111224.jpg 
|
|
|
|
[#20]
Originally Posted By REDX: Has anybody done the Pinestraw using Duracoat? I have; slightly more difficult keeping the "straw" material in place, unless you tape it down, or are good with your hands. But it is still pretty easy to do. Someone asked me about the mesh that I used; it is simply a "delicates" laundry bag bought at Walmart. To keep it well in place, I sprayed it with Elmers spray adhesive, let it set for 5 minutes, and then lay it on the rifle. |
|
|
|
AL, USA
|
[Last Edit: Jellybean18]
[#21]
Unfortunately, my mind slipped when I did the mags. the stripes are horizontal instead of vertical. But that will be fixed soon enough.


|
|
|
GA, USA
|
[#22]
Originally Posted By Birddog1911:
Originally Posted By REDX:
Has anybody done the Pinestraw using Duracoat? I have; slightly more difficult keeping the "straw" material in place, unless you tape it down, or are good with your hands. But it is still pretty easy to do. Someone asked me about the mesh that I used; it is simply a "delicates" laundry bag bought at Walmart. To keep it well in place, I sprayed it with Elmers spray adhesive, let it set for 5 minutes, and then lay it on the rifle. thanks Birddog |
|
|
AL, USA
|
[#23]
Originally Posted By bjwar10:
Just finished my new Grip-Pod...I did not have any Norrell's Tan on hand so I used some Krylon Satin Nutmeg as a base coat on the Grip-Pod. Dug out my pine needles and finished it off with the same old Krylon OD, Brown and Khaki. You can see that the Grip-Pod has a bit more of a coyote look than the FDE of the Norrell's...same goes for the GGG front sight. http://i106.photobucket.com/albums/m248/bjwar10/IMG_5516.jpg http://i106.photobucket.com/albums/m248/bjwar10/IMG_5503.jpg http://i106.photobucket.com/albums/m248/bjwar10/IMG_5499.jpg i would love to see a video from u doing this bjwar10. ive tried but i just can never get this look. |
|
|
|
[Last Edit: NoFnNamesLeft]
[#24]
Oh, what the Hell.......
Rattle, rattle, rattle....... Here ya go! 
Pro tip: shove a cotton ball between the lenses and covers just in case any paint spray detours. |
|
|
|
|
[#25]
Originally Posted By rizzo1318:
Originally Posted By Birddog1911:
Here's my latest; a bit of a hybrid. The brown on the lower end was laid over pine needles, my usual technique, and the mesh netting. What kind of mesh netting? I have used carious "mesh" materials and have come out with a fail on each one. Man this is old but I've used a camo mesh scarf/sniper veil and it worked pretty good. I like my mesquite pattern a lot for down here but the mesh works well too. |
|
|
|
SC, USA
|
[Last Edit: JRCooke]
[#26]
Better quality pictures.

|
|
|
|
[#27]
For those who are painting the whole bolt guns:
Are you painting them as one unit or are you disassembling them first? Thanks |
|
|
|
FRA
|
[#28]
Personnally, I paint alltogether.
I don't dissassembly 'cause I think that if do so, the overal scheme coherence will not be kept. In an other hand, the bolt inside the receiver preserve the chamber to receive any paint. |
|
|
AL, USA
|
[#29]
Originally Posted By hunterboy56:
For those who are painting the whole bolt guns: Are you painting them as one unit or are you disassembling them first? Thanks Normally, I like to spray the base coat with everything taken apart and then reassemble for the camo pattern but... Here's one that I did and only camoed the stock. I really like this look. The scope came from a different rifle with a coyote base rather than the FDE base of the rifle. 
Here's a shotgun that I camoed and then reassembled just to show that it can look good as well. With the pinestraw pattern either way you do it can turn out fine. 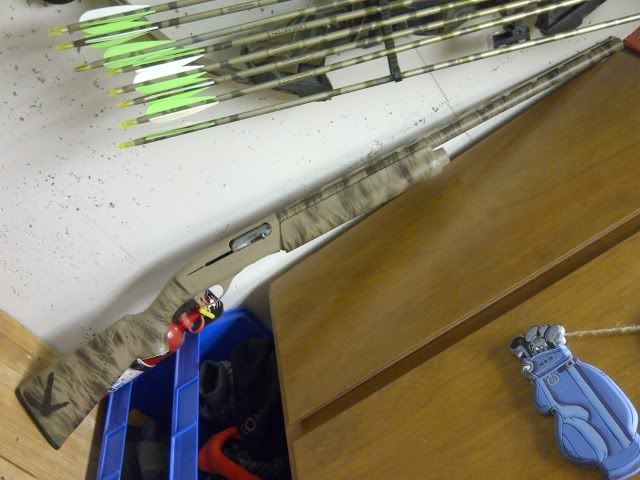
|
|
|
|
[#30]
Ok. I'm getting a new stock and wanted to paint my gun, but wanted to make sure I did it right.
|
|
|
|
|
[#31]
Originally Posted By hunterboy56:
For those who are painting the whole bolt guns: Are you painting them as one unit or are you disassembling them first? Thanks For a rattle can job I usually leave everything assembled, and tape or use rags to keep paint off of anything you didn't want painted... |
|
|
|
TN, USA
|
[#32]
I've done it both ways. I guess it's just a matter of how thorough (read anal) you want to be. The last two I've done, I pulled the barrel/receiver and put a basecoat on everthing. Then I reassemble for the camo pattern. On my current build, everything has gotten a coyote brown basecoat but only the stock is getting a camo pattern.
|
|
|
TX, USA
|
[#33]
The only thing I haven't really seen mentioned in here, are you removing the anodizing prior to paint? Or are you getting decent adhesion leaving it intact?
|
|
|
VA, USA
|
[#34]
Leave the anodizing. Just degrease with alcohol or other degreasing agent prior to paint.
|
|
|
|
[#35]
Here's my new addition. Started off with a SAI Scout scope mount and modified handguard up front but I picked up a new GI handguard today and needed to paint it for everything to match. It was Mossy Oak from the factory.
Before: 
After: 
And before I painted the rifle, I thought I should try doing it on something else first, so I painted my homemade E-Caller. 
Sorry for the crappy Cellphone Pics. Plus it may be a little too dark for the prairie grass on the lowlands, but should be good to go for the sage-brush flats, and hills. |
|
|
|
WA, USA
|
[#36]
http://i1079.photobucket.com/albums/w507/Fltri02/camo6.jpg" />http://i1079.photobucket.com/albums/w507/Fltri02/camo5.jpg" />http://i1079.photobucket.com/albums/w507/Fltri02/camo3.jpg" />http://i1079.photobucket.com/albums/w507/Fltri02/camo2.jpg" />
First attempt at this. Thanks for all the previous submissions and ideas. At least here in the PNW, we have lots of fir and pine needles, branches and droppings to work with. Will try and get it out in the flora & fauna to get more pics. |
|
|
WA, USA
|
[#37]
http://i1079.photobucket.com/albums/w507/Fltri02/camo6.jpg
http://i1079.photobucket.com/albums/w507/Fltri02/camo5.jpg http://i1079.photobucket.com/albums/w507/Fltri02/camo3.jpg http://i1079.photobucket.com/albums/w507/Fltri02/camo2.jpg Sorry, first post didn't upload photos as expected. Let's try this. |
|
|
OH, USA
|
[#38]
Did a "Snow" camo on an AK––trying to get pictures to load. Did flat antique ivory first, then did pine needles in khaki and flat green. That is what matched the best when I looked out my windo, and just a couple fo shots of brown to top it off. Wife says it looks so good I ought to sell it
|
|
|
|
[#39]
Originally Posted By dmb4765:
Did a "Snow" camo on an AK––trying to get pictures to load. Did flat antique ivory first, then did pine needles in khaki and flat green. That is what matched the best when I looked out my windo, and just a couple fo shots of brown to top it off. Wife says it looks so good I ought to sell it Pics or it didn't happen! |
|
|
|
WA, USA
|
[#40]
Update:
Ok gang, finally got the high rings for an old 4x32 scope to mount up on the project. Couldn't wait on weather and schedule to paint it first, so took it out and dialed it in first. Finally, after a week of schedule/weather issues, took it off and shot it with the same colors and pattern as the rifle. Even though it was painted several weeks after and off the rifle, I was amazed how well it matched. This method works well and is very easy to do. Hardest part is the prep and masking, but even that isn't difficult. So those that are giving thought to doing this, all I can say is if I can do it, anyone can. Have fun and remember the two most important rules: Rule #1 Don't sweat the little stuff and Rule #2 It's all little stuff. LOL http://i1079.photobucket.com/albums/w507/Fltri02/camoscope2.jpg http://i1079.photobucket.com/albums/w507/Fltri02/camoscope3.jpg http://i1079.photobucket.com/albums/w507/Fltri02/camoscope4.jpg http://i1079.photobucket.com/albums/w507/Fltri02/camoscope5.jpg |
|
|
FL, USA
|
[#41]
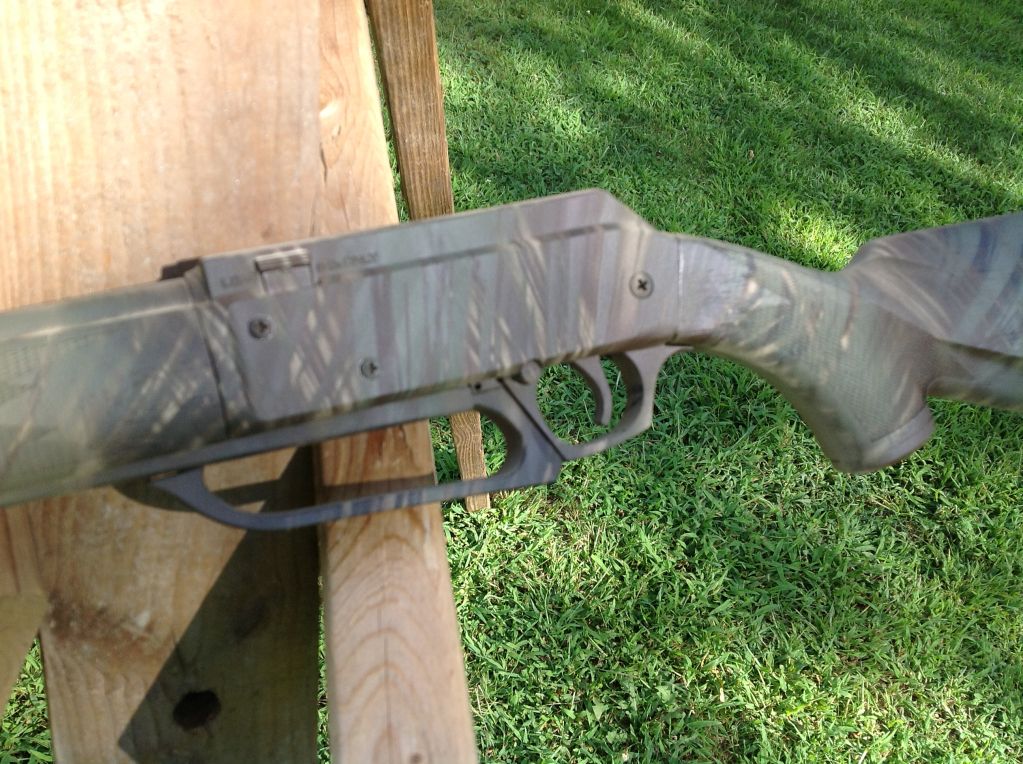
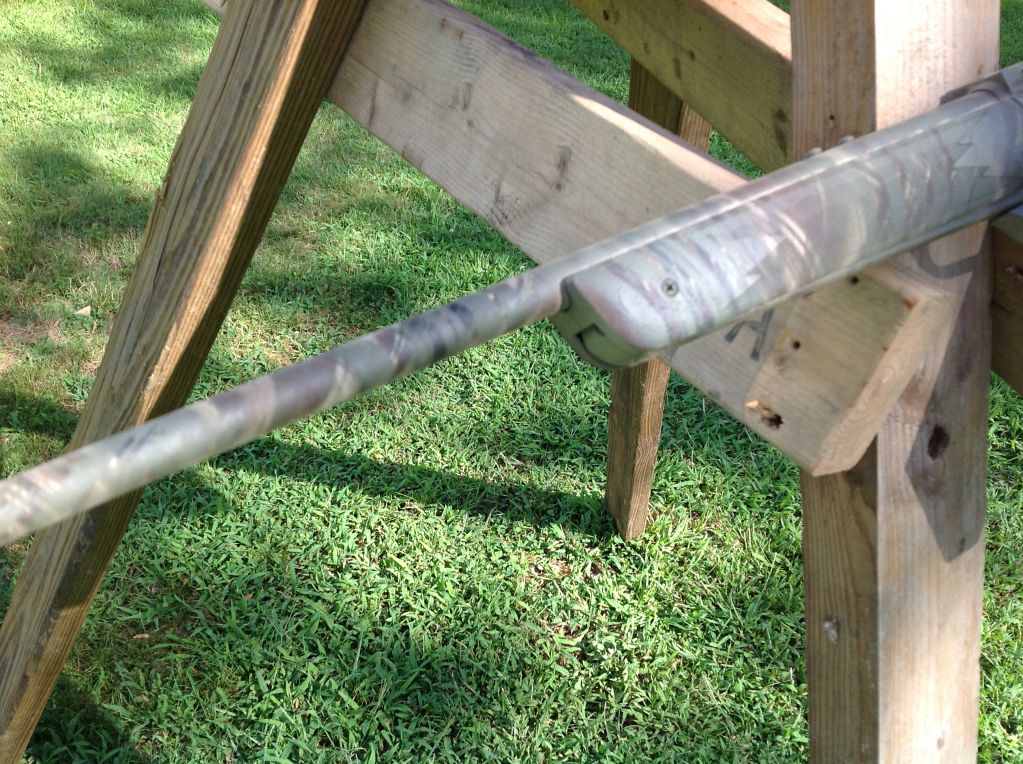
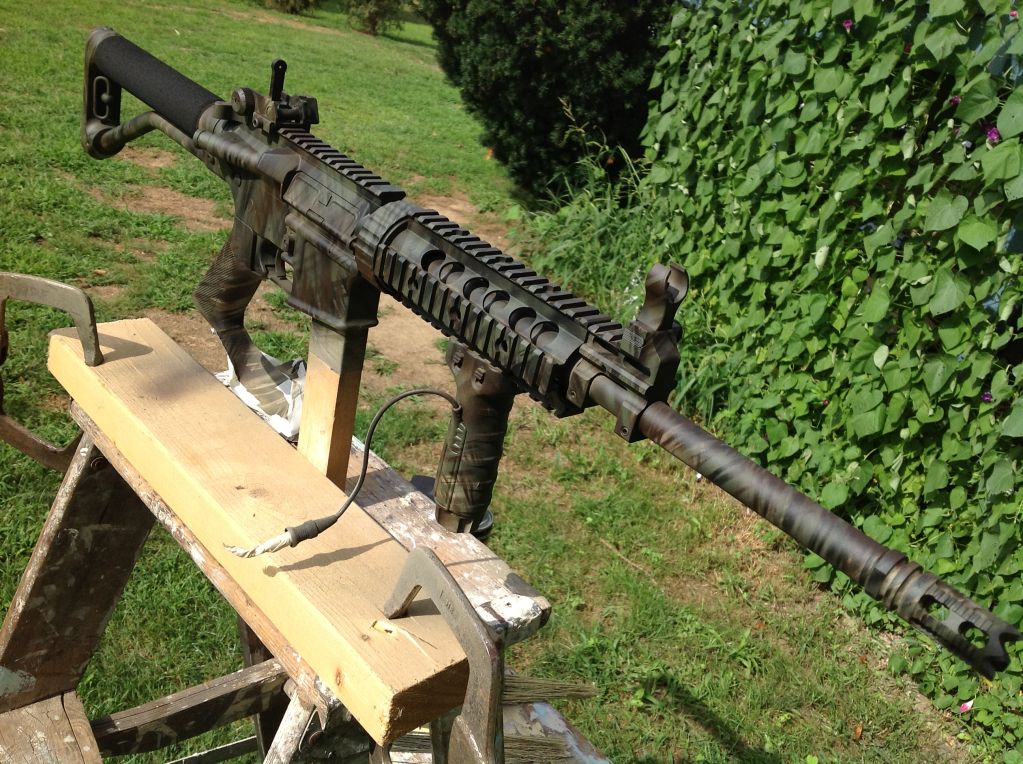
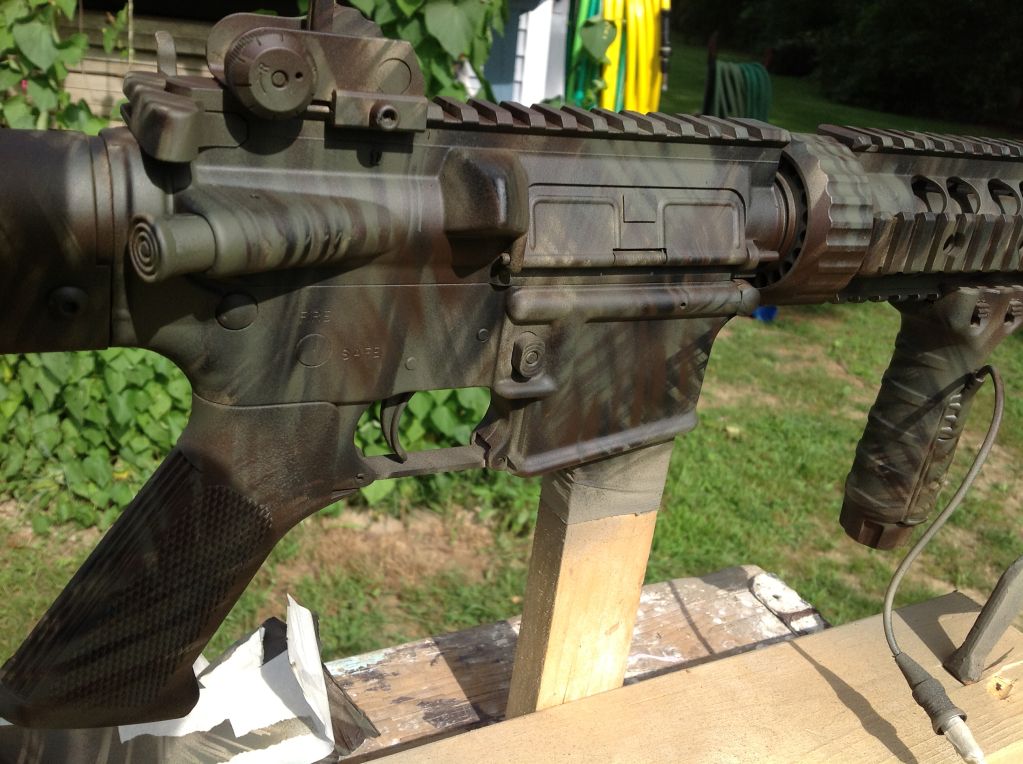
Painted the furniture on my AR today. Did not want to paint the whole rifle because I plan on having the upper cut down for a SBR in the near future.

|
|
|
|
[#42]
Originally Posted By camoman33935:
Painted the furniture on my AR today. Did not want to paint the whole rifle because I plan on having the upper cut down for a SBR in the near future. http://i959.photobucket.com/albums/ae75/camoman33935/IMAG0476.jpg Cut down? Why not just put another barrel on it? |
|
|
|
FL, USA
|
[Last Edit: camoman33935]
[#43]
Originally Posted By Loe_307:
Originally Posted By camoman33935:
Painted the furniture on my AR today. Did not want to paint the whole rifle because I plan on having the upper cut down for a SBR in the near future. http://i959.photobucket.com/albums/ae75/camoman33935/IMAG0476.jpg Cut down? Why not just put another barrel on it? I thought about that but having it cut down at this point it would get me into the SBR world for less money. I don't know, I may just save up my money and buy a complete 11.5" BCM upper and use the 16" one for a rifle for my fiance. |
|
|
|
[#44]
Originally Posted By camoman33935:
Originally Posted By Loe_307:
Originally Posted By camoman33935:
Painted the furniture on my AR today. Did not want to paint the whole rifle because I plan on having the upper cut down for a SBR in the near future. http://i959.photobucket.com/albums/ae75/camoman33935/IMAG0476.jpg Cut down? Why not just put another barrel on it? I thought about that but having it cut down at this point it would get me into the SBR world for less money. I don't know, I may just save up my money and buy a complete 11.5" BCM upper and use the 16" one for a rifle for my fiance. Not sure how much cutting one down costs, but a BCM 11.5 inch barrel is $229. Rainier might have some cheaper ones. Leaves you with an extra 16" to do another AR build. |
|
|
|
FL, USA
|
[#45]
Originally Posted By Loe_307:
Originally Posted By camoman33935:
Originally Posted By Loe_307:
Originally Posted By camoman33935:
Painted the furniture on my AR today. Did not want to paint the whole rifle because I plan on having the upper cut down for a SBR in the near future. http://i959.photobucket.com/albums/ae75/camoman33935/IMAG0476.jpg Cut down? Why not just put another barrel on it? I thought about that but having it cut down at this point it would get me into the SBR world for less money. I don't know, I may just save up my money and buy a complete 11.5" BCM upper and use the 16" one for a rifle for my fiance. Not sure how much cutting one down costs, but a BCM 11.5 inch barrel is $229. Rainier might have some cheaper ones. Leaves you with an extra 16" to do another AR build. It would only cost me $65 plus shipping to have my current barrel cut down by ADCO. Thanks for the suggestion though I will look into it and weigh my options. Sorry for getting the thread off track fellas. |
|
|
TX, USA
|
[#46]
Thanks for all the pics and advice. This thread convinced me I could krylon my rifle....and I love how it turned out! I started with Krylon OD as the base, then used tan and light green with local leaves and pine needles to add contrast, then came back with OD to finish it off. Now I want to paint everything. Thanks, guys!
http://i128.photobucket.com/albums/p196/cbc_anderson/Picture2160.jpg http://i128.photobucket.com/albums/p196/cbc_anderson/Picture2151.jpg http://i128.photobucket.com/albums/p196/cbc_anderson/Picture2152.jpg http://i128.photobucket.com/albums/p196/cbc_anderson/Picture2153.jpg http://i128.photobucket.com/albums/p196/cbc_anderson/Picture2154.jpg http://i128.photobucket.com/albums/p196/cbc_anderson/Picture2159.jpg |
|
|
AL, USA
|
[Last Edit: secretwheelman]
[#47]
My first attempt. I wish the lines were a bit more defined, but it works for me.
http://i1008.photobucket.com/albums/af204/secretwheelman/mk12-1.jpg http://i1008.photobucket.com/albums/af204/secretwheelman/100_0422-Copy.jpg http://i1008.photobucket.com/albums/af204/secretwheelman/100_0421.jpg |
|
|
AL, USA
|
[Last Edit: secretwheelman]
[#48]
Went ahead and painted the swan sleeve and #40.
 |
|
|
|
[Last Edit: Hawgleg44]
[#49]
I decided to camo an AR that I put together from spare parts I had laying around. You know you have a lot of parts when I built a complete AR and still have boxes of parts left over! Since the colors of the AR don't match up well at all I figured it's a perfect candidate for a Krylon job.
But, since I only painted one other firearm, a chopped down single barrelled shotgun, using evergreen branches, I wanted to practice on something first. This broken air rifle was perfect for practice. I'm happy with the way it turned out, so I'll be doing my coyote rifle tomorrow. I started with a base of khaki, then green, brown, and a little black for shadows. I went back with a little more green after it was all done. I'll post pics of the AR when it's done. 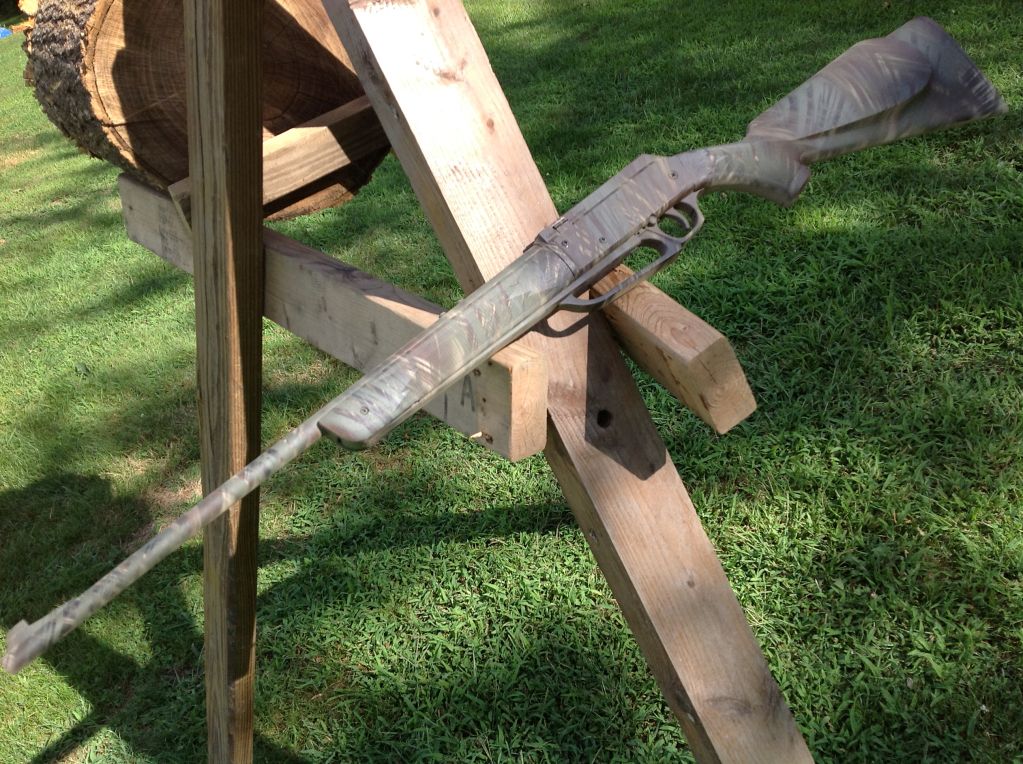

|
|
|
|
|
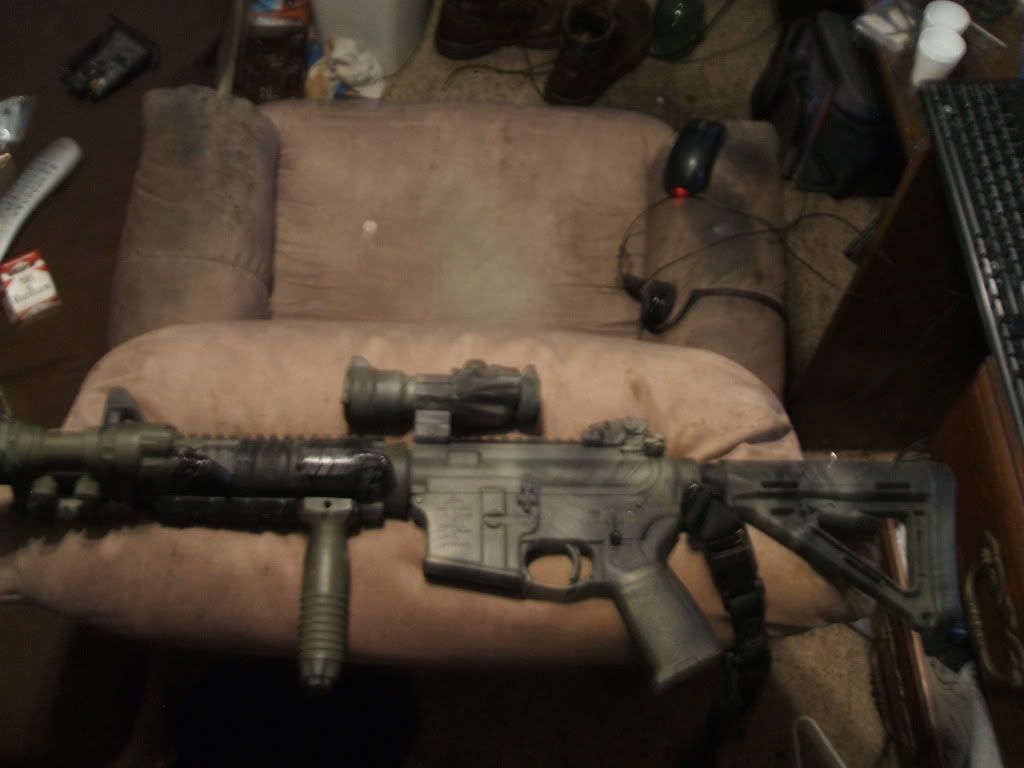
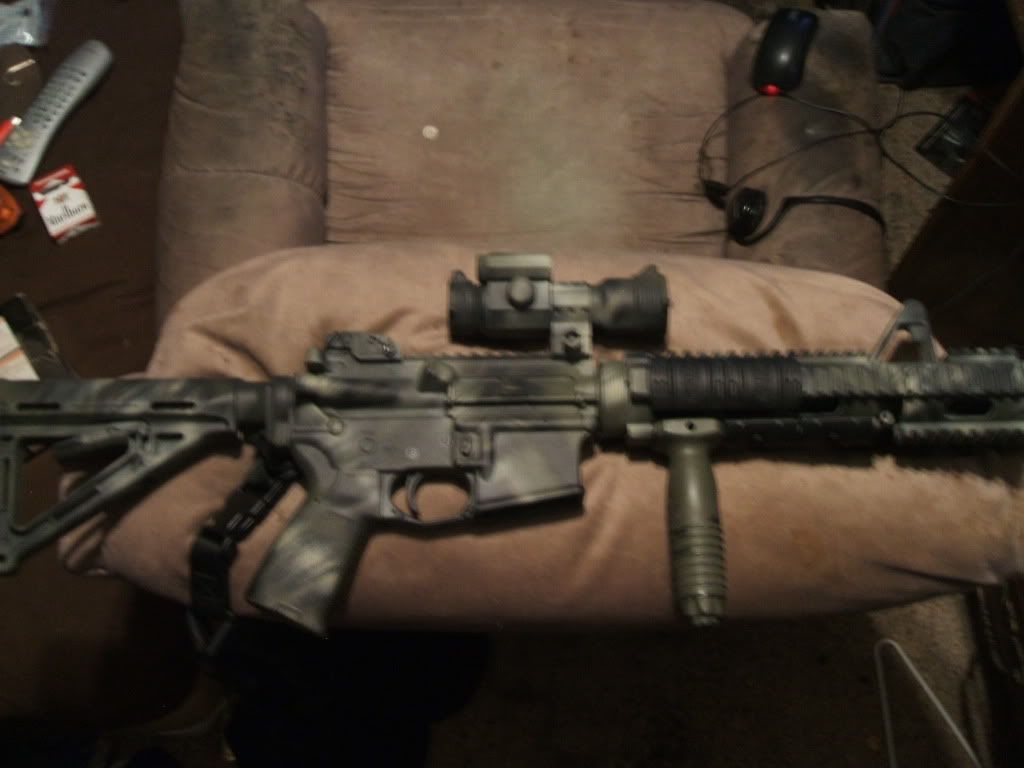
[#50]
OK, the air rifle came out good yesterday, so I did my AR today. I might be trading my Mini-ACOG for a 4x ACOG, so until I know what ACOG is going to be mine, I can't paint it to match. I'll paint the Streamlight have for it to match when I do the ACOG.
|
|
|
|
 Win a FREE Membership!
Sign up for the ARFCOM weekly newsletter and be entered to win a free ARFCOM membership. One new winner* is announced every week!
You will receive an email every Friday morning featuring the latest chatter from the hottest topics, breaking news surrounding legislation, as well as exclusive deals only available to ARFCOM email subscribers.

AR15.COM is the world's largest firearm community and is a gathering place for firearm enthusiasts of all types.
From hunters and military members, to competition shooters and general firearm enthusiasts, we welcome anyone who values and respects the way of the firearm.

Subscribe to our monthly Newsletter to receive firearm news, product discounts from your favorite Industry Partners, and more.
Copyright © 1996-2024 AR15.COM LLC. All Rights Reserved.
Any use of this content without express written consent is prohibited.
AR15.Com reserves the right to overwrite or replace any affiliate, commercial, or monetizable links, posted by users, with our own.


