|
Posted: 10/30/2019 9:22:53 AM EDT
How about a running thread on what came off your printer recently & maybe some background?
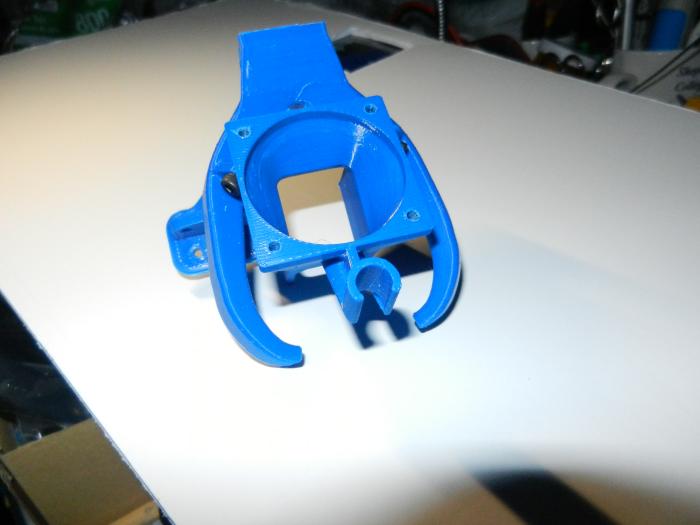
This was the last print last night, it is a set of parts (front spindle components) that will go in a 3D printed MKUltra 4WD 1/10 scale Truggy, done in e-Sun PLA+ on an Ender 3. 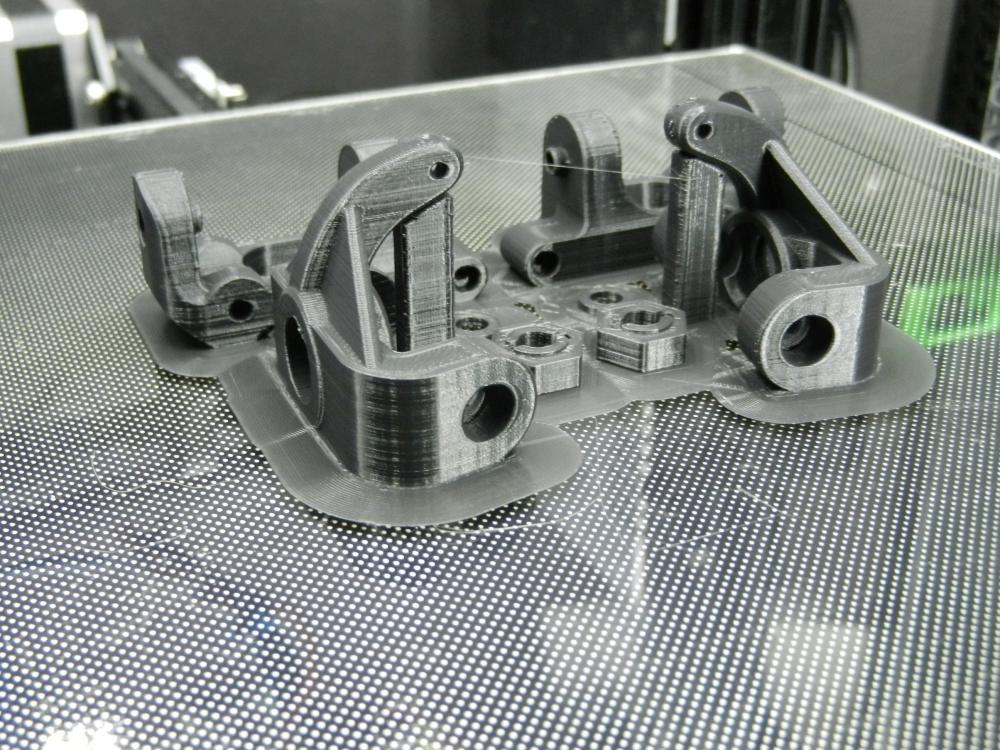
|
|
|
|
|
[#1]
Magic wand for a Halloween costume. Wand is SUNLU copper silk PLA and the handle is Hatchbox black PLA.
Fun, since it is the tallest item I have printed so far and it got that Z axis up there. https://www.thingiverse.com/thing:3187683 |
|
|
|
|
[Last Edit: smullen]
[#2]
Seeing things people print make me want a 3D Printer bad, but I just can't justify the expense...
I'm sure I'll be in over a 1000 bucks before I'm printing anything useful... Maybe much more... |
|
|
|
|
[#3]
Originally Posted By smullen:
Seeing things people print make me want a 3D Printer bad, but I just can't justify the expense... I'm sure I'll be in over a 1000 bucks before I'm printing anything useful... Maybe much more... Realistically, you need about $300 to get going. That gets you a basic Chicom printer, a few upgrades to make that printer usable, filament and some basic tools, and you should have money left over. Of course, if you get bitten by the nerd bug, you will strive to upgrade and modify your printer until you achieve 3D printing perfection |
|
|
|
|
[#4]
@nikdfish
Curious as to the reason for that unholy number of brims for PLA ??? |
|
|
|
|
[#5]
Originally Posted By smullen:
Seeing things people print make me want a 3D Printer bad, but I just can't justify the expense... I'm sure I'll be in over a 1000 bucks before I'm printing anything useful... Maybe much more... I bought my Ender 3 for about $229 (& you can find them cheaper) and 3 rolls of PLA filament (about $50) as my startup package, so less than $300 do do enough to figure things out & see what I wanted to change. Over time I probably have put maybe another $120 - $150 into the printer itself in bits & pieces - swapping out controller & display and buying components to upgrade the extruder, springs, bowden tube w/fittings and adding a BL-Touch sensor & maybe $50 or $60 on the enclosure w/air handling. Add another $50 or $60 for buckets w/lids for filament storage. That all added maybe $250 to the equipment portion over a 10 month period or a total that is still ballpark $500 for non-consumable expenditures. |
|
|
|
|
[Last Edit: nikdfish]
[#6]
Originally Posted By Rat_Patrol:
@nikdfish Curious as to the reason for that unholy number of brims for PLA ??? An unexpected side benefit is being able to pull the whole job off as one sheet. I have over a dozen jobs associated with this build, many which are multi-part, and it does make easier to keep things organized until the assembly starts. |
|
|
|
|
[#7]
Originally Posted By nikdfish:
I sliced a bunch of multi-part jobs at the same time, some w/ tall & skinny components, & just left the same brim count for all. I was willing to waste a bit of plastic to be sure I didn't have to reprint because one small item tipped over half way through. I don't always do that, but did in this instance. An unexpected side benefit is being able to pull the whole job off as one sheet. I have over a dozen jobs associated with this build, many which are multi-part, and it does make easier to keep things organized until the assembly starts. Originally Posted By nikdfish:
Originally Posted By Rat_Patrol:
@nikdfish Curious as to the reason for that unholy number of brims for PLA ??? An unexpected side benefit is being able to pull the whole job off as one sheet. I have over a dozen jobs associated with this build, many which are multi-part, and it does make easier to keep things organized until the assembly starts. |
|
|
|
|
[#8]
|
|
|
|
|
[#9]
|
|
|
|
|
[#10]

|
|
|
|
|
[#11]
 Fusion 360 Tutorial for Absolute Beginners— Part 1 I started this Fusion 360 tutorial, but work called to come in early and I didn’t get a chance to print the first model I made (just a box). |
|
|
|
|
[#12]
|
|
|
|
|
[Last Edit: nikdfish]
[#13]
A first go-round test print, in progress, of a couple of "C-clips" designs for use with an IWB holster. I'm printing in e-Sun blue PLA+ ( it was what was currently loaded...) to test size & function.
Once everything is dialed in, I'll probably print a batch in black PLA+ & maybe try a test print with 95A TPU. |
|
|
|
|
[#14]
I left the machine printing some small parts (cable chain), and when I woke up it was a stringy mess...

|
|
|
|
PA, USA
|
[#15]
Originally Posted By Rat_Patrol:
Not really. Realistically, you need about $300 to get going. That gets you a basic Chicom printer, a few upgrades to make that printer usable, filament and some basic tools, and you should have money left over. Of course, if you get bitten by the nerd bug, you will strive to upgrade and modify your printer until you achieve 3D printing perfection I bought my Ender 3 Pro for $206 shipped (no shipping or taxes) and a roll of Esun PLA+ glow in the dark filament for $22.99 shipped (no shipping or taxes)....two days ago! What is that, like...$228.99 OTD and I'm guessing 1kg will have me printing all kinds of interesting do-dads for months! |
|
|
|
[#16]
I printed this today.

It was supposed to be a case for my Nano VNA (a piece of radio test gear) like this. 
The best time to check on the printer when it makes an odd noise is when it starts, not 5 minutes later. 
|
|
|
|
|
[#17]
My Ender 2 is chugging away on parts for a Prusa Bear. My Ender 3 has decided to be a little bitch and not let filament stick to the bed today.
|
|
|
|
|
[#18]
Nothing yet. I might get the time later today to install the drag chain on my bed heater wire harness, though.
|
|
|
|
|
[#19]
Originally Posted By nikdfish: Maybe if you need no-fiddling, plug-n-play. But, if you don't mind a bit of DIY adjustments & incremental mods, you can start a lot less. I bought my Ender 3 for about $229 (& you can find them cheaper) and 3 rolls of PLA filament (about $50) as my startup package, so less than $300 do do enough to figure things out & see what I wanted to change. Over time I probably have put maybe another $120 - $150 into the printer itself in bits & pieces - swapping out controller & display and buying components to upgrade the extruder, springs, bowden tube w/fittings and adding a BL-Touch sensor & maybe $50 or $60 on the enclosure w/air handling. Add another $50 or $60 for buckets w/lids for filament storage. That all added maybe $250 to the equipment portion over a 10 month period or a total that is still ballpark $500 for non-consumable expenditures. |
|
|
|
|
[#20]
Originally Posted By shade_1313:
How do you like the BL-Touch? I'm looking at adding an auto bed leveling system to my CR-10 s5. |
|
|
|
|
[Last Edit: nikdfish]
[#21]
Printed a wing for the MKUltra Truggy build in blue eSun PLA+
After that & some modified gears (see the shadow in the hair-spray layer), I printed the last revision of my DIY IWB holster "C-Clip". 
Here side by side with the C-Tac product 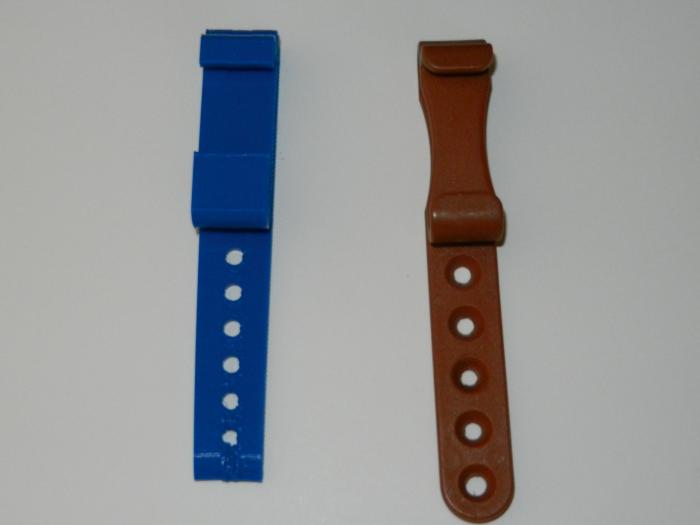

PLA+ may actually work for this, printed with 100% infill (in black rather than blue). I stressed some of the earlier prints until they broke & they were pretty tough, not brittle. I do plan to print a semi-flex 95A TPU version once I get around to changing out the filament. |
|
|
|
|
[#22]
Originally Posted By Iguana775:
https://www.AR15.Com/media/mediaFiles/310783/IMG_20191030_133721_741_jpg-1142593.JPG |
|
|
|
|
[#23]
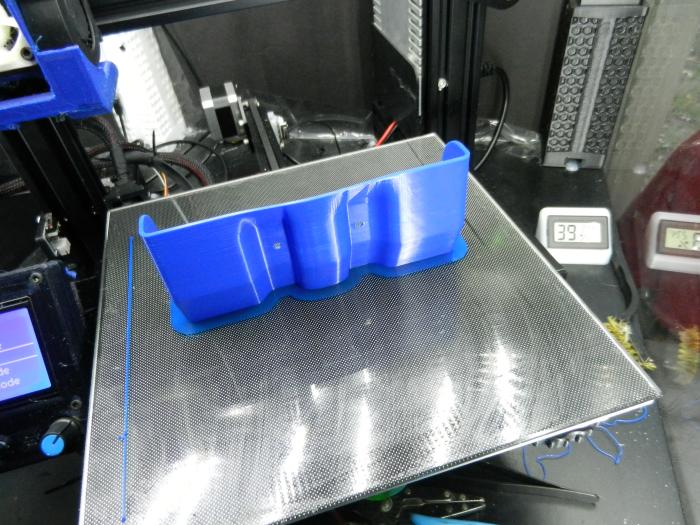
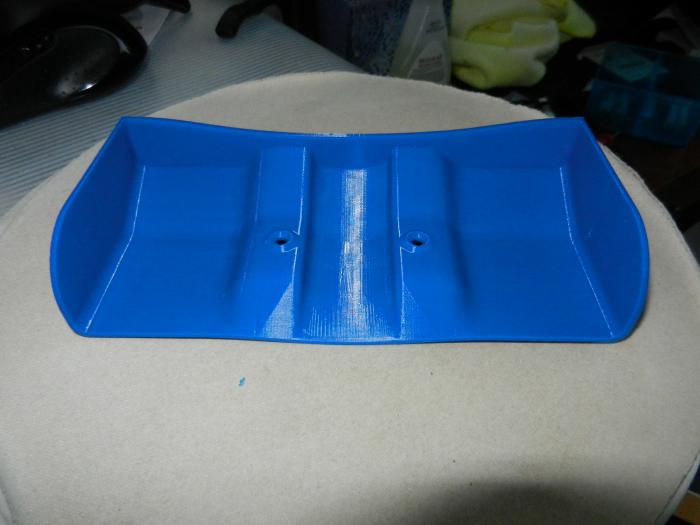
2nd attempt at printing this LC9 magazine rack. Serious lifting at one corner which I didn't notice when I left it to print. Probably explains why the first attempt printed out of whack then went spaghetti monster.
Will try another one later, but at least I know the design works. .2 layer height, 10% infill, 22 hours print time. |
|
|
|
|
[Last Edit: Iguana775]
[#24]
|
|
|
|
|
[#25]
Originally Posted By jhereg:
Are the files online to print that? |
|
|
|
|
[Last Edit: jhereg]
[#26]
Originally Posted By Iguana775:
Yea, got it off of Thingiverse Originally Posted By Iguana775:
Originally Posted By jhereg:
Are the files online to print that?  Ended up doing the cat demo last night. Printed a coaster this evening. Am printing a whistle right now. Will print out some filament clips after this, and then a camera mount over night probably. This will go on the list of things to print. Ended up doing the cat demo last night. Printed a coaster this evening. Am printing a whistle right now. Will print out some filament clips after this, and then a camera mount over night probably. This will go on the list of things to print.
|
|
|
|
PA, USA
|
[#27]
Originally Posted By nikdfish:
PLA+ may actually work for this, printed with 100% infill (in black rather than blue). I stressed some of the earlier prints until they broke & they were pretty tough, not brittle. I do plan to print a semi-flex 95A TPU version once I get around to changing out the filament. Maybe a slicer thing, maybe just a setup error that affects extruded volume. A trick the guys that print the miniature game piece things have found is to make your bottom layers like 999, or at least more than the part needs. This will print every layer solid like the bottom, and they seem to think it helps. |
|
|
|
[#28]
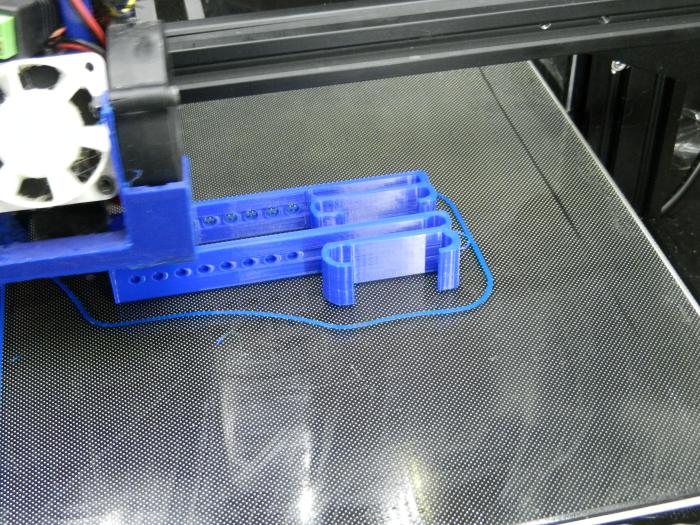
Holder for my MEC shotshell reloader bushings.
Still having corner lifting. I tried increasing bed heat, didn't help. Made sure the hairspray covered the print area, didn't help. Now I'm just trying to find some rubbing alcohol in the house to try and clean off build plate. |
|
|
|
|
[#29]
Originally Posted By rcav8r:
Holder for my MEC shotshell reloader bushings. Still having corner lifting. I tried increasing bed heat, didn't help. Made sure the hairspray covered the print area, didn't help. Now I'm just trying to find some rubbing alcohol in the house to try and clean off build plate. https://www.AR15.Com/media/mediaFiles/85434/IMG_20191109_104041950_jpg-1154876.JPG |
|
|
|
|
[Last Edit: nikdfish]
[#30]
double tap ...
|
|
|
|
|
[#31]
What type of filament?
I've found good old glue stick works very well on pla, petg (actually as a release agent) and decent on abs. |
|
|
|
|
[#32]
PLA.
I haven't had corner lifting in ages, I figure the colder temps are creeping into the basement. I'll have to try the brim. |
|
|
|
|
[#33]
Just did a fan cover & display housing for a separate box for the Ender 3.
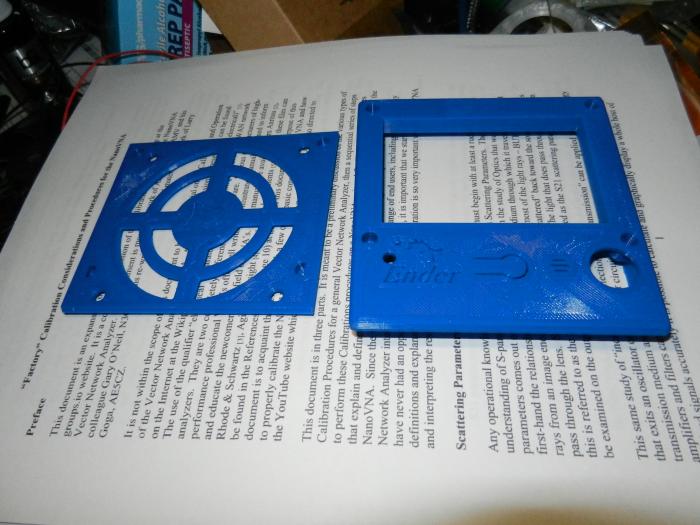
The box is specific to the MKS Gen L board and a RepRap discount full graphic Smart Display (https://www.thingiverse.com/thing:2926560) . 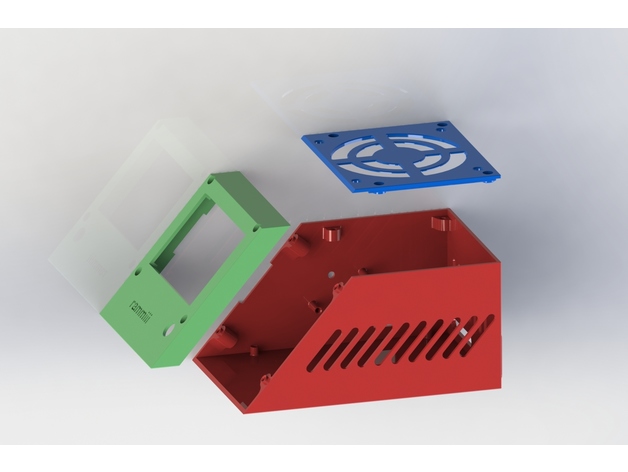
The original .stl for the display housing required removal of the buzzer (not enough depth) & only left a pin hole for access to the reset button. I didn't like that I mashed it up with a display housing I had used earlier which accommodated the buzzer & had a flex button for pressing the reset, blending the edges. I had found a Ender logo on another model, so that got included while I was at it. I'll also be adding an outboard set of MOSFET's for bed & head when I do the changeover. I have a separate mount for the two, each with it's own 40mm fan (coming out of my current control box, the new box gets an 80mm fan). |
|
|
|
MN, USA
|
[Last Edit: Boostinjdm]
[#34]
Tpu buffer bumpers.
|
|
|
|
[#35]
nothing too exciting. an X axis mounted cam mount, a z axis knob,and a PSU fan cover for the ender 3
|
|
|
|
|
[#36]
Finished up the enclosure for the MKS Gen L board & Reprap display. Done in blue eSun PLA+. The case was from https://www.thingiverse.com/thing:2926560
with the display cover mashed with the one from https://www.thingiverse.com/thing:2993606 
80mm fan goes on top (12v) using a DC buck to step down from 24v. I may tweak the converter for less than 12v to moderate the speed so I don't get too much flow that could affect the hot bed. The right side openings encourage air flow over the stepper drivers. 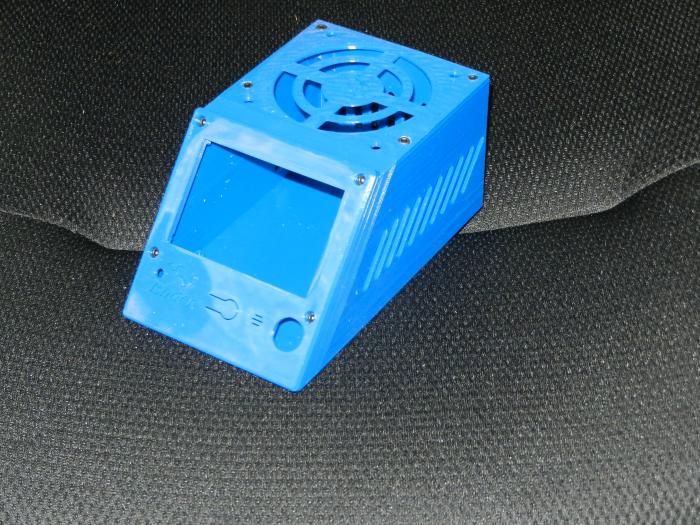
On the left side are cutouts for the USB port and the full size SD card slot. 
Cable slots & vents on the rear. 
|
|
|
|
|
[Last Edit: nikdfish]
[#37]
I tried out the 12v 80mm fan mounted on the box. The fan used to be on the enclosure air filter system (since replaced with a radial blower). I'm using a DC DC buck converter since the fan will get powered by the 24v Ender 3 supply, the converter currently getting powered by a 14v source for testing. I had previously set the converter at 12v, but it was too loud & moved too much air so I dialed the voltage down until it was pretty quiet & moved a more appropriate amount of air. That was at about 5 - 6v.
|
|
|
|
|
[#38]
Never had a dock for my phone before so I decided to make one. Found one meant for my phone+ the official case but I like to live dangerously so no case so it feels a little loose just sitting there.

|
|
|
|
|
[Last Edit: nikdfish]
[#39]
Did a mount for a couple of 30A MOSfet's to use with hot end & heated bed. The small "platforms" are for a couple of 40mm fans I have lying around (but not sure I'm going to use them ...)

|
|
|
|
PA, USA
|
[#40]
If you need to get more mosfets, look into these. There for a while I was seeing at least a post a week about the little black ones shitting the bed. Hopefully they got better.
Good Mosfet Nice size, similar price to the cheap ones, but does the cool stuff the expensive ones do. Biggy is you can trigger them with a low voltage so can use extra pins on the board. I usually move the bed to one of these free pins, which frees up the normal bed output for LEDs, fans, etc. |
|
|
|
[Last Edit: nikdfish]
[#41]
Originally Posted By oetkbyetdia:
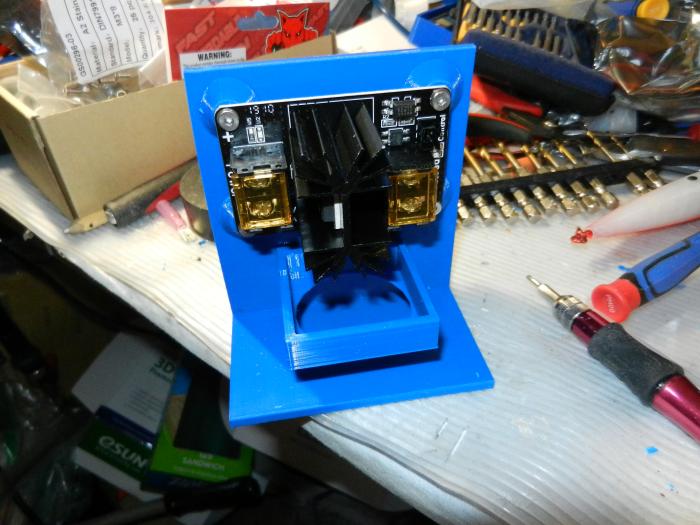
If you need to get more mosfets, look into these. There for a while I was seeing at least a post a week about the little black ones shitting the bed. Hopefully they got better. Good Mosfet Nice size, similar price to the cheap ones, but does the cool stuff the expensive ones do. Biggy is you can trigger them with a low voltage so can use extra pins on the board. I usually move the bed to one of these free pins, which frees up the normal bed output for LEDs, fans, etc. Finished up this print project today. I figured I needed a box for the nanoVNA I got the other day so I bashed this together on Tinkercad for a quickie. Still using the blue eSun PLA+ that was loaded on the machine 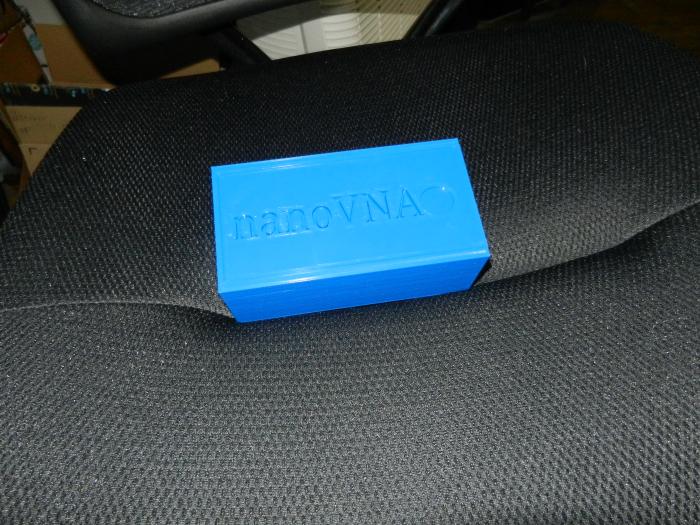
It's a sliding top box 
divided into two layers seperated by an inner lid. The top section is for cable assemblies 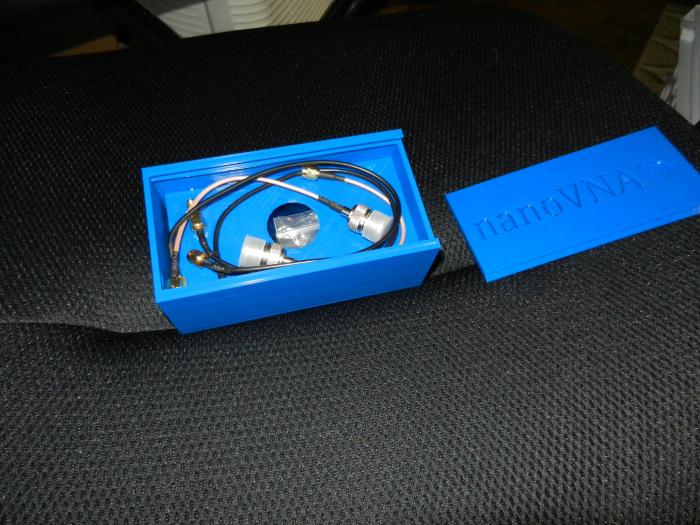
and the bottom section is subdivided into three sections. 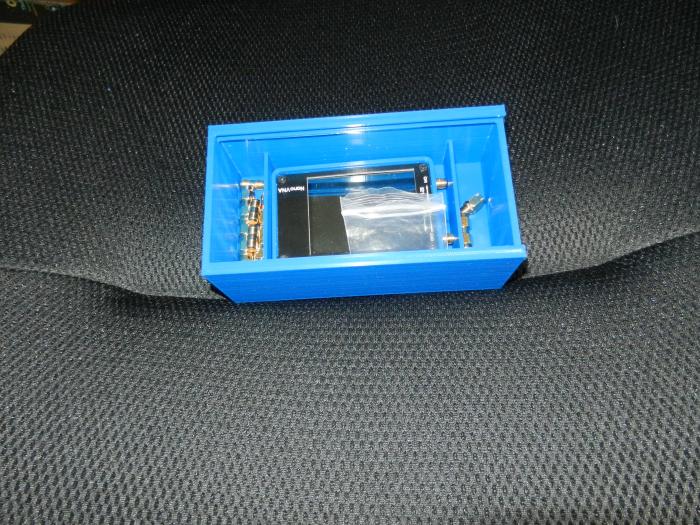
The middle for the nanoVNA and calibration fittings, the left is a bunch of SMA gender changers, the right has SMA/RP SMA adapters. I put a copy on thingiverse https://www.thingiverse.com/thing:3972968 |
|
|
|
|
[#42]
Originally Posted By Iguana775:
https://www.AR15.Com/media/mediaFiles/310783/IMG_20191030_133721_741_jpg-1142593.JPG |
|
|
|
|
[Last Edit: aeroworksxp]
[#43]
cool stuff guys
|
|
|
|
|
[#44]
 Jigs to epoxy TO-220 MOSFETS to heat sinks. Jigs to epoxy TO-220 MOSFETS to heat sinks.
|
|
|
|
|
[Last Edit: nikdfish]
[#45]
A minimalist fan mount for an Ender 3. It uses the OEM hot end fan, one 5015 for parts cooling, has support for an endoscope for a nozzle cam and a BL-touch mount with minimal offset. I'm going to do some refitting on the Ender 3 soon & thought I'd take a look at this. It was a quick print for the two parts.
Printed from PLA+. I think the stand off distance on the parts blower outlets will let it survive nicely. The dual 5015 Hero Me has had distortion issues even when printed from PETG related to how close they were positioned relative to the heater block. Time will tell ... |
|
|
|
|
[#46]
Originally Posted By rcav8r:
Holder for my MEC shotshell reloader bushings. Still having corner lifting. I tried increasing bed heat, didn't help. Made sure the hairspray covered the print area, didn't help. Now I'm just trying to find some rubbing alcohol in the house to try and clean off build plate. https://www.AR15.Com/media/mediaFiles/85434/IMG_20191109_104041950_jpg-1154876.JPG |
|
|
|
|
[#47]
Originally Posted By Iguana775: I read that too hot of a bed can cause that. maybe that's the case? Adding a brim did the trick. |
|
|
|
|
[#48]
I thought that this was neat so I had to print it.

|
|
|
|
|
[#49]
Just a little bowden tube cutting jig to test settings.
Verified perfect x-y-z calibration, then found my e was +3mm on a 100mm run. Got that dialed in. Perfect first layer on the bottom (despite part of the skirt not sticking in front here). Seeing some gaps on the top part and a very tiny bit of stringing on the center hole. Maybe this ERYONE PLA doesn't like 200 like my Hatchbox does? The next print (my kazoo body nemesis from last weekend with 5 failed prints where it was hitting the nozzle after a couple inches) did not adhere to the bed. Trying a pre-heat of the bed for about 10 minutes to see if it will work this time. Literally 5 mins after this print, no adhesion.
Another weird thing is on the mesh level, I will often go to a point and go, "Ahh, nozzle too high!" Then adjust it down, then back to perfect, and it was actually much closer to the original value then after the initial move. 
And I swear sometimes when I got in to Motion -> Bed Leveling there will sometimes be an option that says Bed Leveling: Off, which I set back to On, but right now I am not seeing it. (Marlin bugfix 2.0) |
|
|
|
|
[#50]
|
|
|
|
 Win a FREE Membership!
Sign up for the ARFCOM weekly newsletter and be entered to win a free ARFCOM membership. One new winner* is announced every week!
You will receive an email every Friday morning featuring the latest chatter from the hottest topics, breaking news surrounding legislation, as well as exclusive deals only available to ARFCOM email subscribers.

AR15.COM is the world's largest firearm community and is a gathering place for firearm enthusiasts of all types.
From hunters and military members, to competition shooters and general firearm enthusiasts, we welcome anyone who values and respects the way of the firearm.

Subscribe to our monthly Newsletter to receive firearm news, product discounts from your favorite Industry Partners, and more.
Copyright © 1996-2024 AR15.COM LLC. All Rights Reserved.
Any use of this content without express written consent is prohibited.
AR15.Com reserves the right to overwrite or replace any affiliate, commercial, or monetizable links, posted by users, with our own.


