|
[#1]
Originally Posted By Lawman734:
Hmm, can't say that I've ever seen those before. I'd have to echo Ryan's thoughts on the fitment though. if you bought them, let us know how they well they work at reducing road noise. me thinks it won't really matter much though. On another note - I did do some painting today. Overall, I'm very pleased but the hood can definitely use another coat - it'll be another couple of weeks before I can get to it though. http://i28.photobucket.com/albums/c238/Lawdog734/Resized_20161002_180935_zpsriokrdup.jpeg Originally Posted By Lawman734:
Originally Posted By jake-cutter:
Lawman or Ryan, have either of you seen the fender liners installed on any vehicles. I am thinking of picking some up to see if they will reduce tire noise in the rear. If anything else, they have the holes for where I will be installing the slantback kit and I could use them as a template, just thinking. Hmm, can't say that I've ever seen those before. I'd have to echo Ryan's thoughts on the fitment though. if you bought them, let us know how they well they work at reducing road noise. me thinks it won't really matter much though. On another note - I did do some painting today. Overall, I'm very pleased but the hood can definitely use another coat - it'll be another couple of weeks before I can get to it though. http://i28.photobucket.com/albums/c238/Lawdog734/Resized_20161002_180935_zpsriokrdup.jpeg As usual, looking awesome! I'm sure you saw with that Behr it needs to cure 3-4 weeks before exposure to water. I can attest to that first hand. Apparently while I was out of town it rained pretty much every day and I ended up with a very small leak in my shelter, enough to cause about about a 3-4" wide puddle on my soft top where I had it laid out. I dried it but now I have a slightly lighter spot on it now. At least it's just on the top. 
|
|
|
|
IN, USA
|
[#2]
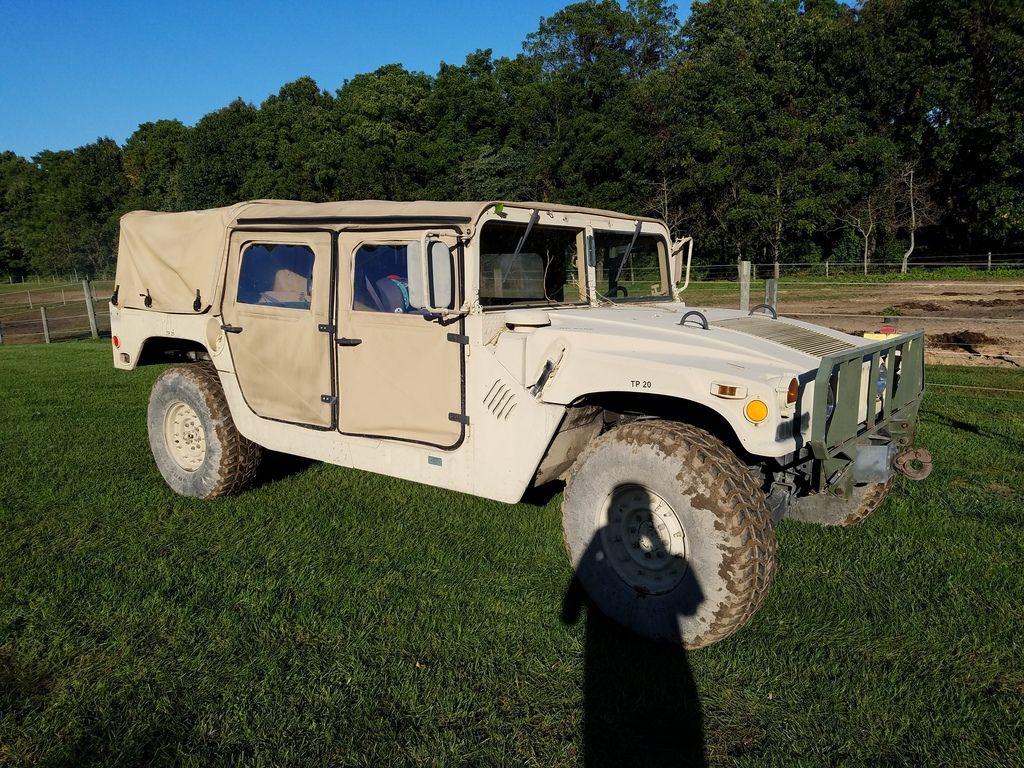
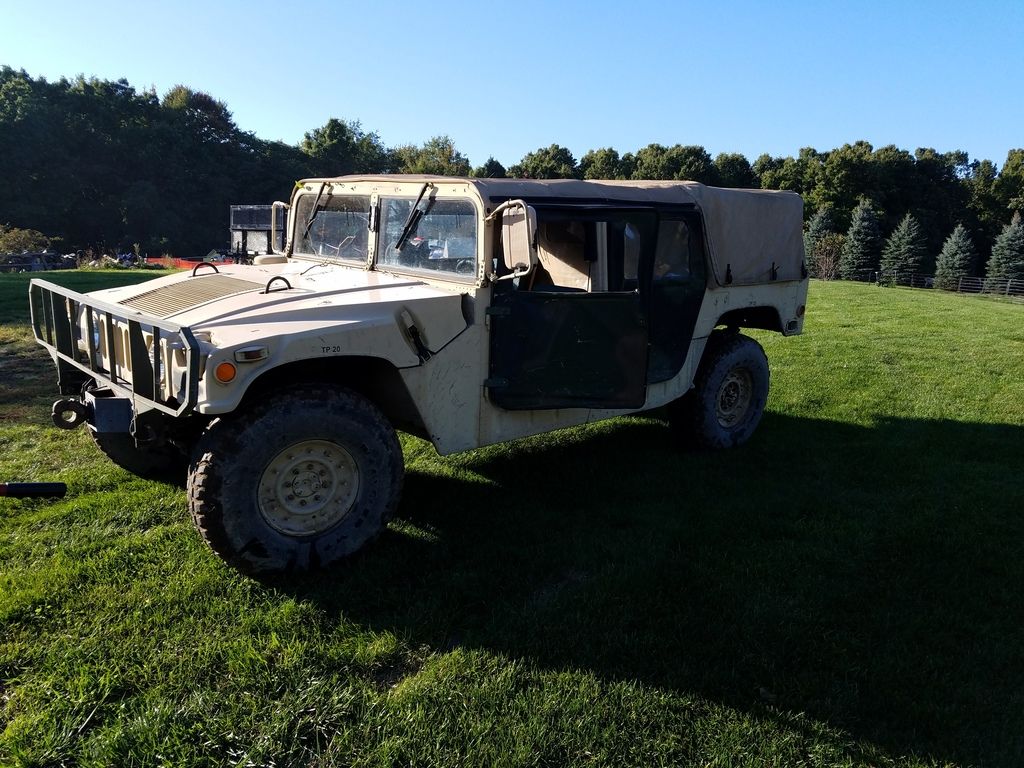
Got the 2 left doors put on, the rear fits pretty well, but the front needs a good bit of tweaking to halfway seal at the top.
I even rigged up a setup to keep them shut without handles. 
Used some regular car wash soap and some spray on siding cleaner to get the tan doors cleaned up. 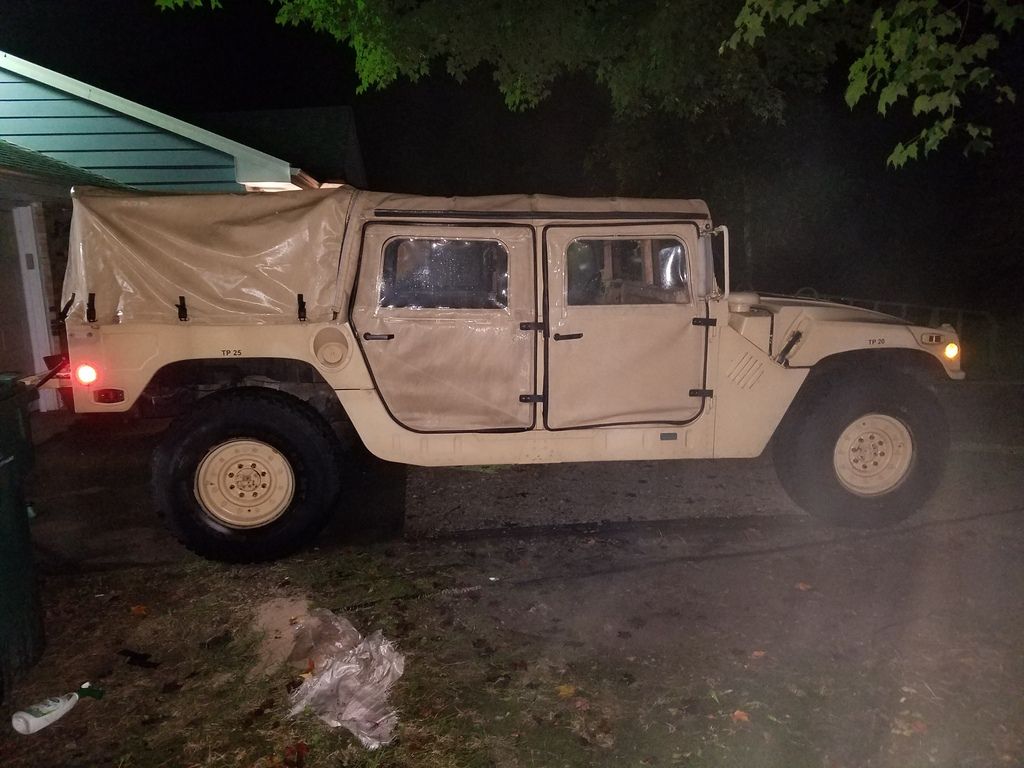
Swept out the back and organized all the extra nuts, bolts, screws, and washers. 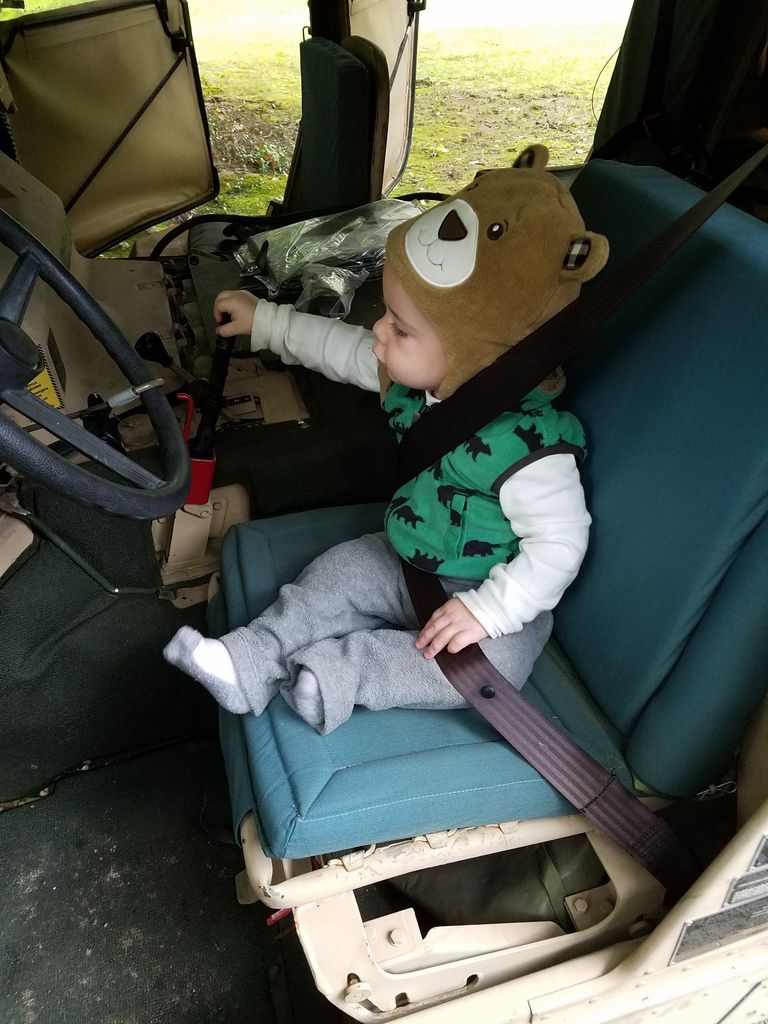
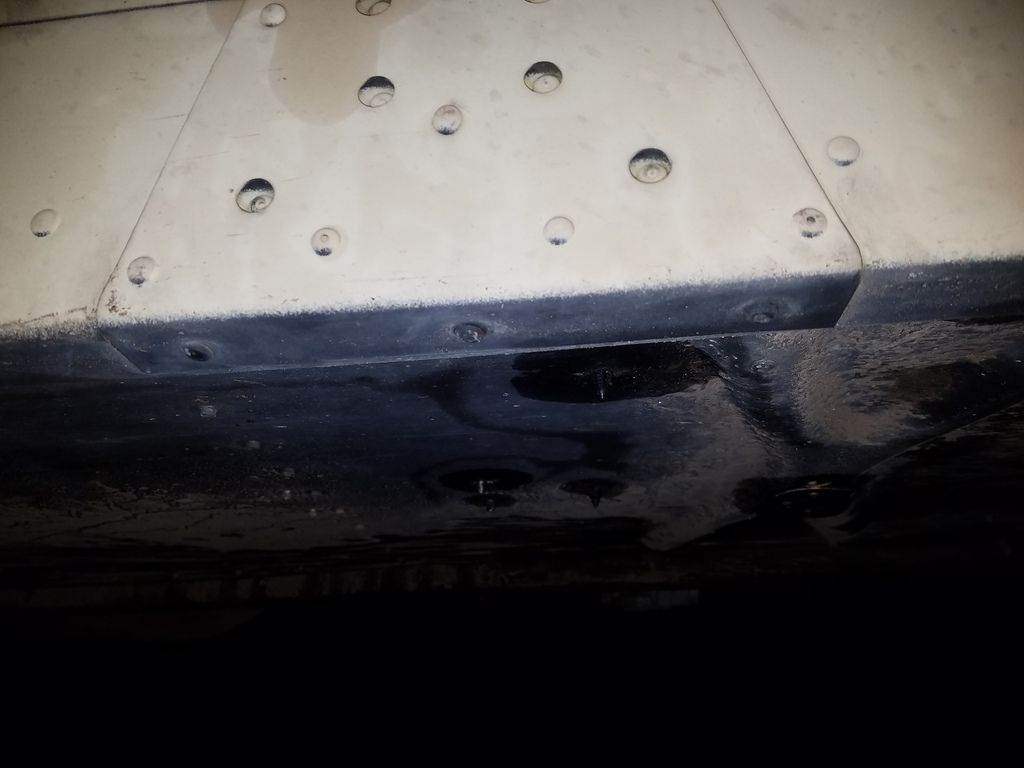
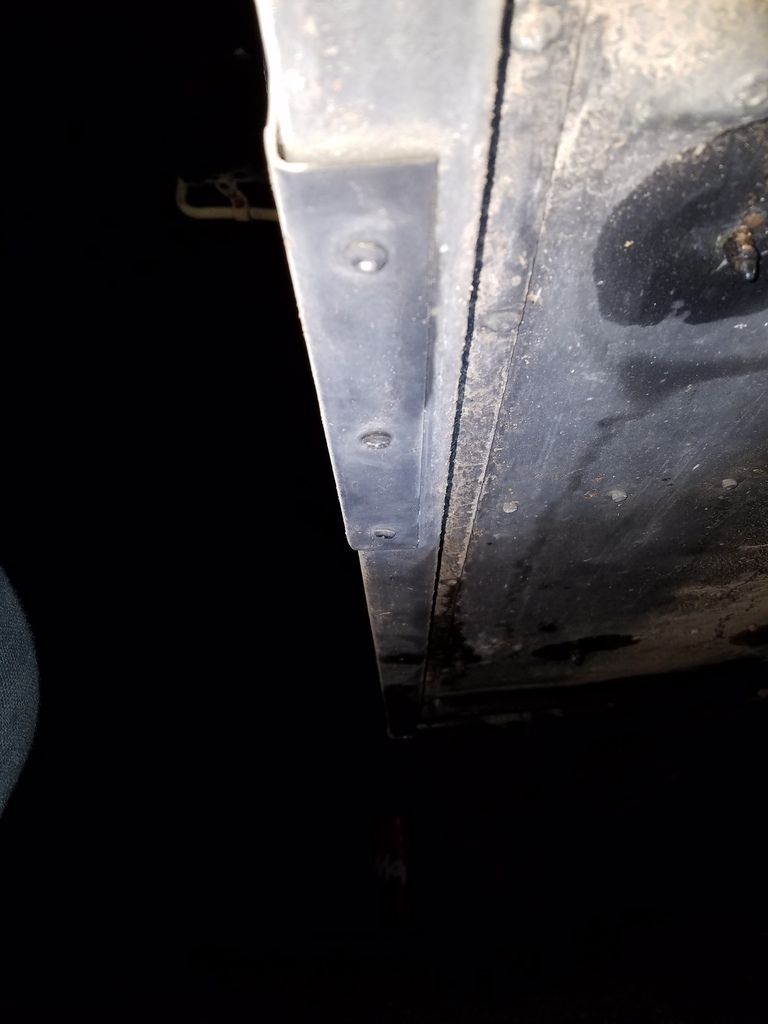
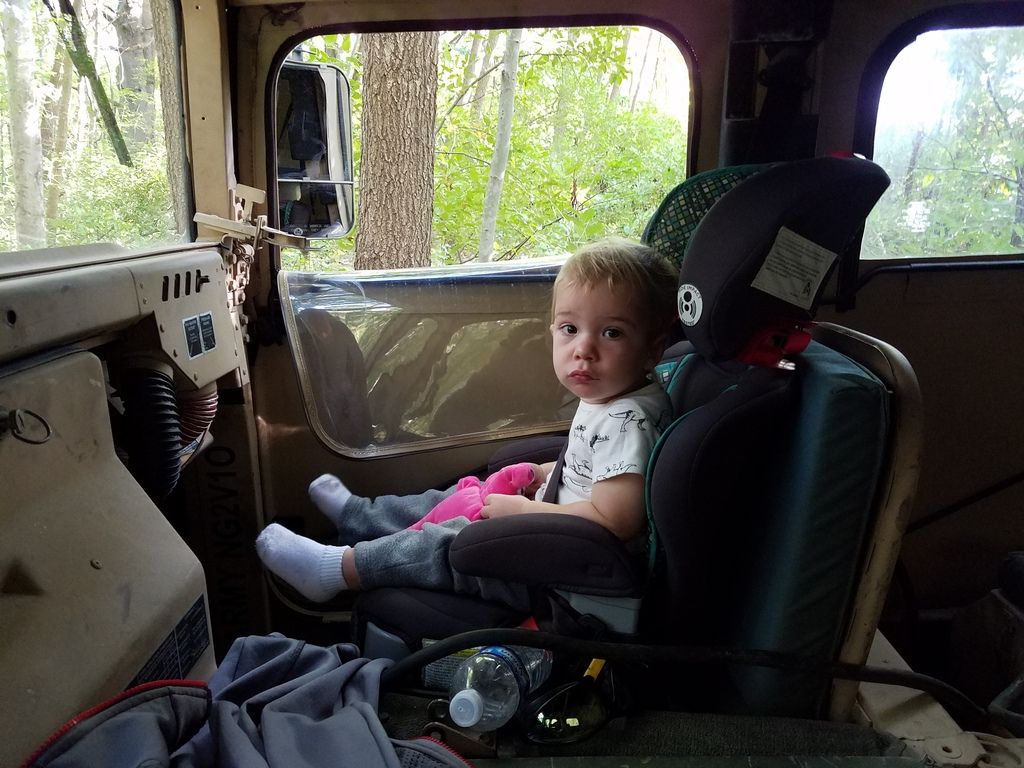
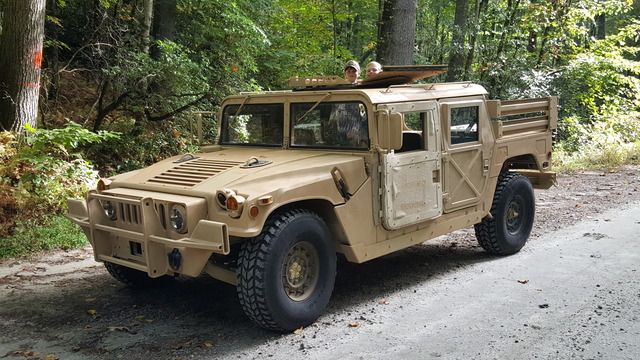
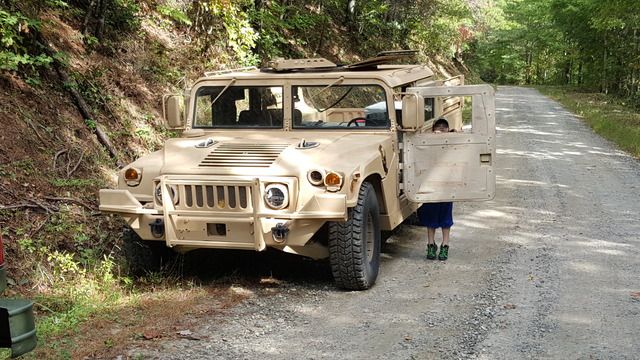
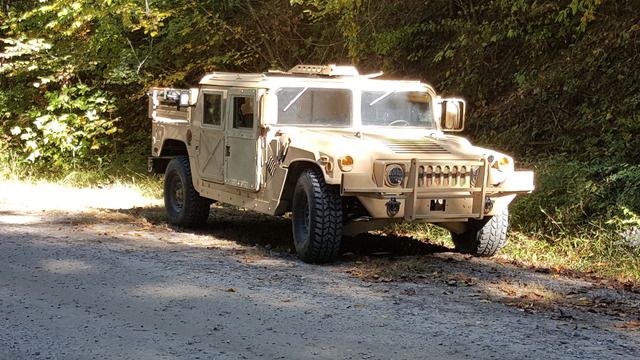
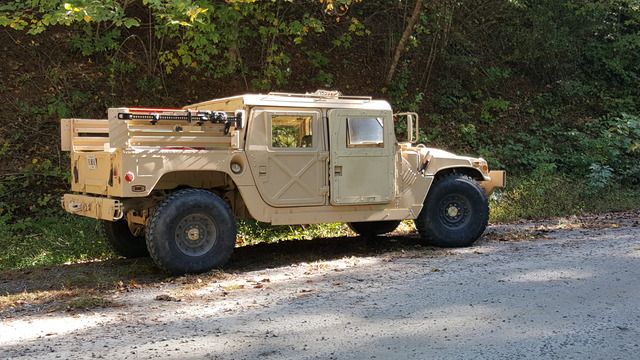
And this guy got his 1st turn behind the wheel. I didn't get any pics inside for the backside of these plates on the rockers, but I snapped a couple better pics. 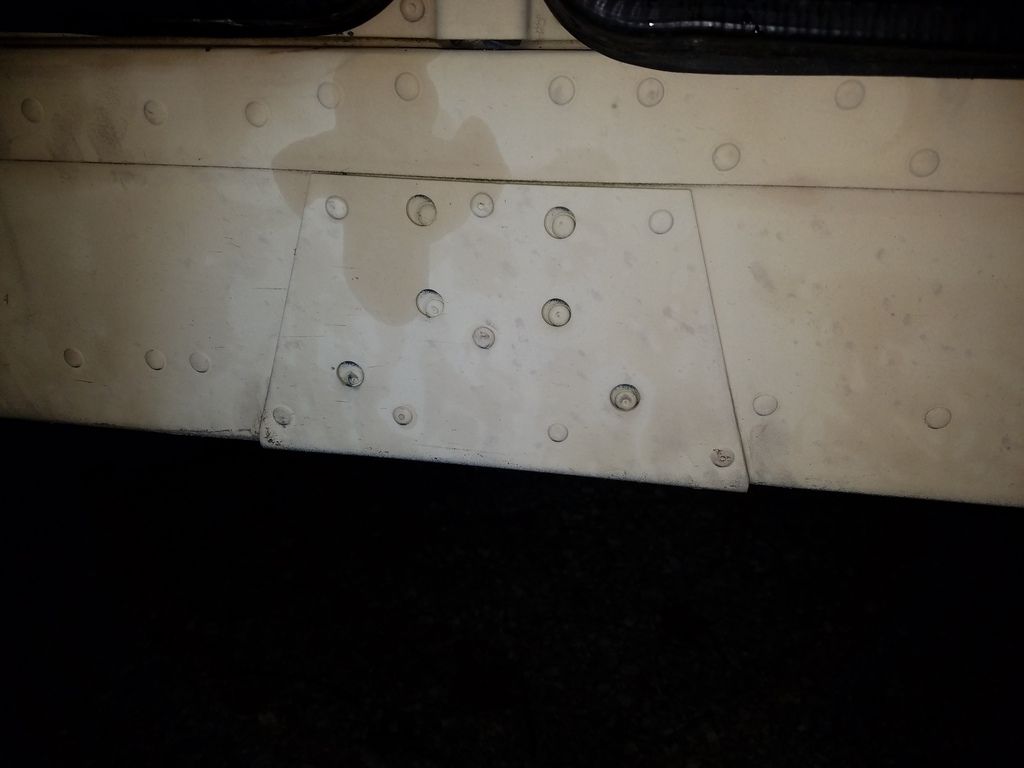
|
|
|
|
[#3]
Originally Posted By RedZ06Vette:
Got the 2 left doors put on, the rear fits pretty well, but the front needs a good bit of tweaking to halfway seal at the top. http://i1238.photobucket.com/albums/ff490/Boosted_Nelson_Inc/Mobile%20Uploads/20161002_202504.jpg http://i1238.photobucket.com/albums/ff490/Boosted_Nelson_Inc/Mobile%20Uploads/20161002_202433.jpg I even rigged up a setup to keep them shut without handles. http://i1238.photobucket.com/albums/ff490/Boosted_Nelson_Inc/Mobile%20Uploads/20161002_202250.jpg Used some regular car wash soap and some spray on siding cleaner to get the tan doors cleaned up. http://i1238.photobucket.com/albums/ff490/Boosted_Nelson_Inc/Mobile%20Uploads/20161002_202317.jpg Swept out the back and organized all the extra nuts, bolts, screws, and washers. http://i1238.photobucket.com/albums/ff490/Boosted_Nelson_Inc/Mobile%20Uploads/20161002_172613.jpg And this guy got his 1st turn behind the wheel. I didn't get any pics inside for the backside of these plates on the rockers, but I snapped a couple better pics. http://i1238.photobucket.com/albums/ff490/Boosted_Nelson_Inc/Mobile%20Uploads/20161002_210237.jpg http://i1238.photobucket.com/albums/ff490/Boosted_Nelson_Inc/Mobile%20Uploads/20161002_210245.jpg http://i1238.photobucket.com/albums/ff490/Boosted_Nelson_Inc/Mobile%20Uploads/20161002_210257.jpg Good job on the PPE headgear for the driver! Interesting about those rocker plates. Don't remember seeing those before and looked them up. Looks like they are for strengthening the B-pillar for when the hard top gun mount is installed and also appears to be a part of the 3 point seatbelt MWO (MWO 9-2320-280-35-2). Always seeing new things on these trucks! |
|
|
|
|
[#4]
Got my pyrometer fully installed and the injection pump tweaked.
Well, actually, I got the pyrometer installed before I went out of town but it wouldn't read anything. Stuck a meter on the thermocouple and found it wasn't putting out nearly enough power in millivolts to register. Got in touch with the eBay seller while I was on the road and he sent me a whole new one, which I got installed today. It looks very much at home with the rest of the gauges. Here's a pic I took as I was wrapping up tonight: 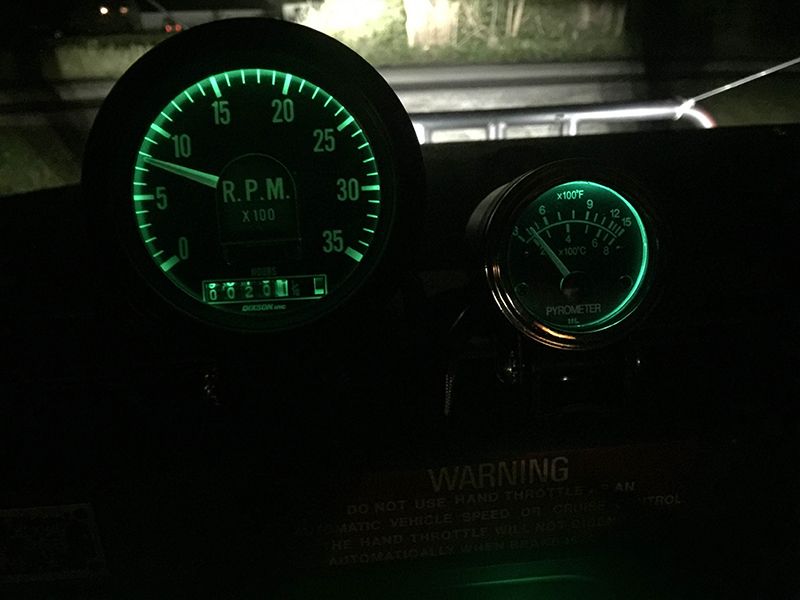
It's 12v so I had to wire in a 24v relay that I got a pack of from Amazon, tied it to the ignition on circuit, and tapped into the 12v lead at the alternator. Once I got the pyrometer working, I dug into the injection pump adjustments. For the injection pump adjustment, I pulled up the instructions here. It's a good reference but it could use some more helpful specifics. First, it mentions a small mirror. You'll definitely need one. Almost impossible to see the hole otherwise. Also, you would do very well to get one of those claw things like this: 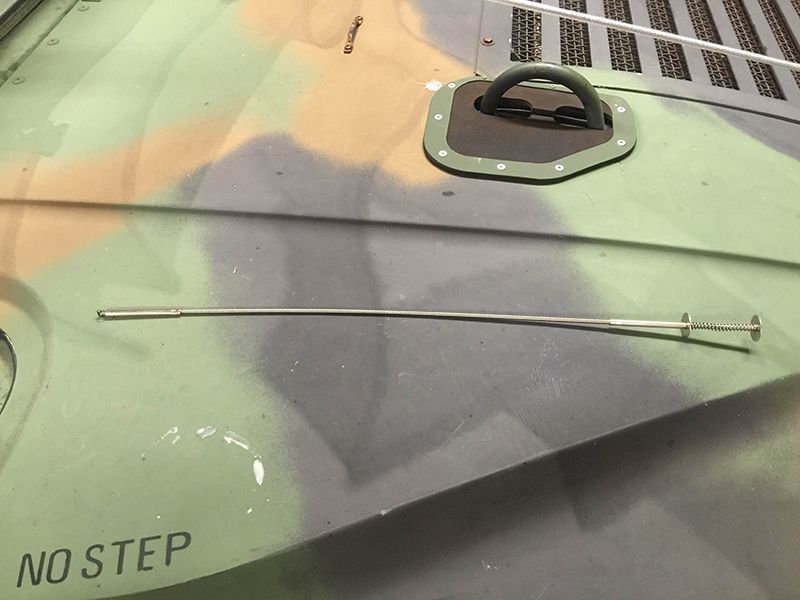
You will drop parts into the engine valley and that is the fastest way to get them out. The directions mention removing the throttle cable bracket mounted on the pump to access the cover plate you need to remove but, they don't mention what a pain it is getting to the 5/8" nut that holds it on at the bottom and how it is nearly impossible to get that nut back on. It is very tight confines and with the bracket's design, you can only take it off and put it on with the nut completely removed because of the slotted mounting hole on the bracket. I figured out if you open up the hole by removing the bottom part of the slot, you can leave the nut on the stud and just slide the bracket onto the stud. Here's a shot of the bottom of the bracket before I removed the small part at the bottom of the slotted hole: 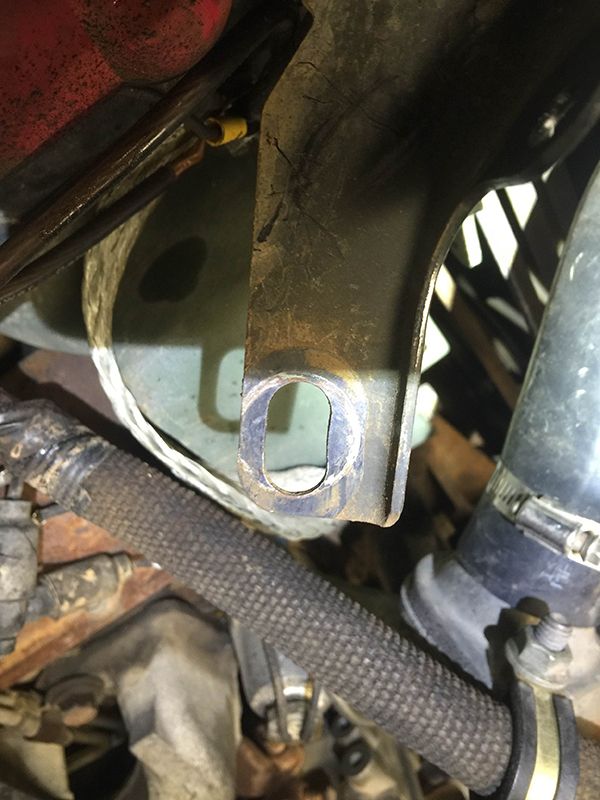
Made reinstallation a lot easier. The screws on the cover plate are 1/4" hex head. I found a regular wrench was the easiest way to get them off. The throttle on the pump is too close to get a socket in there and it is too inset in the valley to get a screw driver bit in there. Once I got the cover off (tedious because of how little wrench movement you get), I stuck the small mirror into the valley and had a perfect view into it. I got very lucky and my adjustment screw was exposed without having to turn the engine any. The directions mention a couple different sizes for the allen wrench you use to adjust the fuel but I can confirm it is 5/32. I found with my allen wrench that the short leg of it was too short to get to the screw and the long leg was too long to fit into the valley. Used a Dremel and trimmed the long leg down until I had clearance. 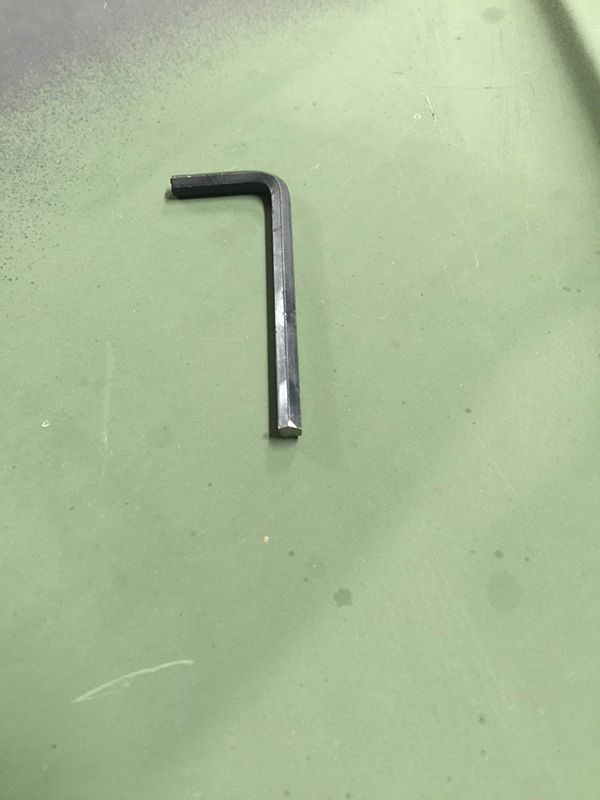
The directions mention turning the screw clockwise to increase the fuel. That would be clockwise if you were looking into the access hole directly, counterclockwise if you're looking into the mirror from the opposite side. Because of the tight confines and how tight the screw is initially, it is really tough to turn with your fingers. I used a set of channel locks. Once it was freed up, it was a bit easier to fine tune. The directions mention no more than 1/4 turn for the turbo engines and 1/8th turn for stock engines. I went in between with the mentioned 1/6th turn. It was dark by the time I finished but I didn't see any black smoke. I'll recheck in the daylight. It's no Banks equipped truck but she's definitely got a lot more pep in her step! Very highly recommend doing this if you want to wake your truck up a bit! I may go back and experiment with turning it up slightly more depending on what I see with EGTs with the current setting. There's a good sized hill near my house I tried out. Previously I had to downshift to 2nd and it would be slow going about half way up. After the adjustment I had a lot more power getting up it but had to back off a bit to keep EGTs under control. Jake, For those measurements I promised, it looks like there is about a 3/8" total gap between the brackets and the divider. There's probably some variability depending on how straight your fenders are. I noticed the driver's side bracket was tighter closer towards the floor on mine with almost no gap at the bottom and full 1/4" near the top. One other thing to consider, I had to grind some welds on the front and back of my divider to even get it to fit into the brackets so my partition could have been surplus because it was out of spec. No idea. Don't know how much that helps... |
|
|
|
|
[#5]
Originally Posted By Ryan_Ruck:
Jake, For those measurements I promised, it looks like there is about a 3/8" total gap between the brackets and the divider. There's probably some variability depending on how straight your fenders are. I noticed the driver's side bracket was tighter closer towards the floor on mine with almost no gap at the bottom and full 1/4" near the top. One other thing to consider, I had to grind some welds on the front and back of my divider to even get it to fit into the brackets so my partition could have been surplus because it was out of spec. No idea. Don't know how much that helps... I came up with about 1/2" when I mocked it up last night. The seller was really quick to ship and the two panels come in tomorrow so we will see then. Has anyone had to do any riveting? Looking for a rivet gun and was recommended either a Cherrymax pneumatic (very expensive) or an FSI D100 manual riveter (still pricey sub $200). Any other suggestions on a rivet gun? |
|
|
|
|
[#6]
Originally Posted By jake-cutter:
I came up with about 1/2" when I mocked it up last night. The seller was really quick to ship and the two panels come in tomorrow so we will see then. Has anyone had to do any riveting? Looking for a rivet gun and was recommended either a Cherrymax pneumatic (very expensive) or an FSI D100 manual riveter (still pricey sub $200). Any other suggestions on a rivet gun? I've been using a plain old Stanley swivel head hand operated unit that I use for work and it has worked fine. I think it's like $30 at one of the big box hardware stores. So far I've used it to replace my tail light buckets, install my ECV air lift hoop grommets on my hood, replace a couple missing soft top fasteners, and to rivet that floor piece to my divider. Like I said, no problems with it at all. I imagine if you were doing a significant amount of structural riveting you'd want to step up to something bigger but I haven't run into anything it couldn't handle yet. |
|
|
|
|
[#7]
The liners came in yesterday and are alot heavier than I was expecting. They are nice with all the holes labeled and the divider with brackets still fit but little room left.
|
|
|
|
|
[#8]
Originally Posted By jake-cutter:
The liners came in yesterday and are alot heavier than I was expecting. They are nice with all the holes labeled and the divider with brackets still fit but little room left. Good deal - can you snap a pic with them mocked up? I mounted my GMV doors this evening. I need to finish drilling holes in the plates so that they're really secure and paint things-hopefully tomorrow. 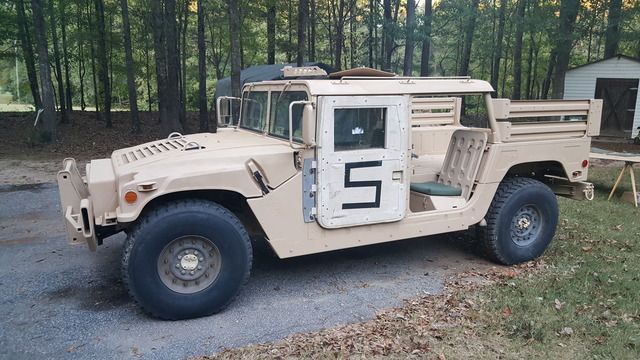
|
|
|
|
|
[#9]
Originally Posted By Lawman734:
Good deal - can you snap a pic with them mocked up? I mounted my GMV doors this evening. I need to finish drilling holes in the plates so that they're really secure and paint things-hopefully tomorrow. http://i28.photobucket.com/albums/c238/Lawdog734/20161006_184833_zps51euowdb.jpg Originally Posted By Lawman734:
Originally Posted By jake-cutter:
The liners came in yesterday and are alot heavier than I was expecting. They are nice with all the holes labeled and the divider with brackets still fit but little room left. Good deal - can you snap a pic with them mocked up? I mounted my GMV doors this evening. I need to finish drilling holes in the plates so that they're really secure and paint things-hopefully tomorrow. http://i28.photobucket.com/albums/c238/Lawdog734/20161006_184833_zps51euowdb.jpg Sharp as usual! You getting much from Matthew where you are? Since we were talking about Scepter MFCs earlier, I went ahead and decided to put together one of the Home Depot MFC spouts but using the updated list of nylon parts from Tractor Supply. Here are the parts to save you from hunting them down in that thread: SKU 2109258: Green Leaf Nylon Reducer Bushing, 2 in. MPT x 1 in. FPT SKU 2108854: Green Leaf Nylon Straight Adapter, 1 in. MPT x 3/4 in. Barb Instead of the clear vinyl 5/8" hose though, I picked up this fuel rated 3/4" hose. The 3/4" hose fits tightly enough on the fitting to not need a hose clamp and doesn't leak when pouring plus allows you to rotate the hose on it if you need to since the hose is going to be curved. Since the plastic parts are nylon and the hose is fuel rated you can use this spout with gasoline too no problem if you want. Poured about 15 gallons into the truck from my MFCs with no leaking at all. Sure beats paying $40-$50 for a Scepter spout! 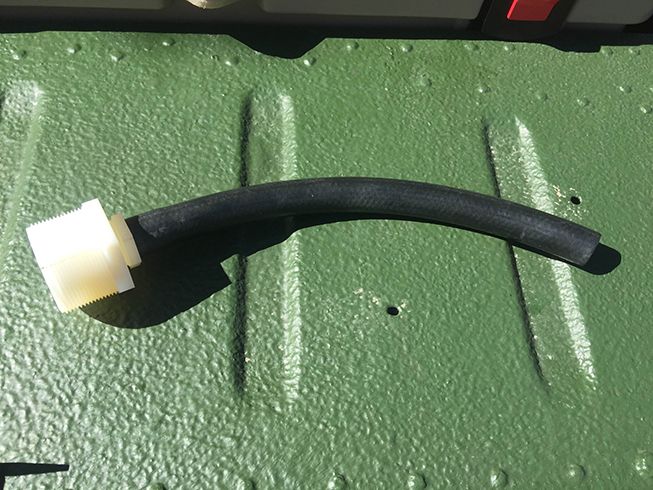
|
|
|
|
|
[#10]
Finally got time to mock up the fender liners today.


|
|
|
|
|
[#11]
On the subject of seat belts, I've been doing some looking and it looks like there are indeed two different length seat belt receptacles.
The longer ones look to typically be paired with the black seat belts while the shorter ones are an older style paired with the green belts. Now it's got me wondering now if the black seat belt assemblies have a longer belt than the green belts. Any chance I could get someone to measure the length of the black belt fully extended to compare to my green belts? Just need to know if more length comes with the black belts and makes it's worth the expense of replacing the whole seat belt assemblies or if I can get away with replacing only the receptacles. |
|
|
|
IN, USA
|
[#12]
The rear seat belt receptacle is 11.5" from bolt hole to end to latch. and the seatbelt itself (rear) was 9'8" I think.
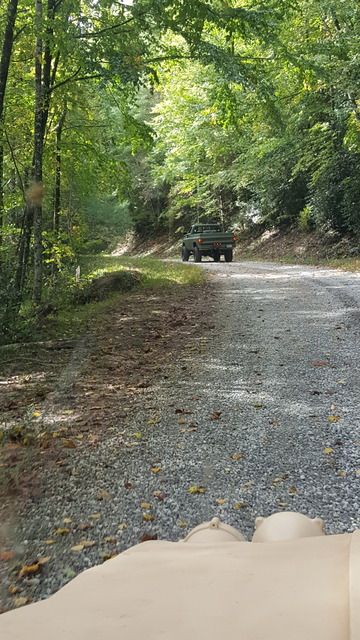
In other news the HMMWV got to do some light offroading [youtube]https://www.youtube.com/watch?v=nx7SKX5AKNY[/youtube] 
The Co-driver wasn't in a great mood today. 
|
|
|
|
[#14]
what do you guys pay for insurance on your HMMWV's?
i was quoted the same price as my daily driver, despite mine having collector plates, ie very minimal miles. |
|
|
|
|
[Last Edit: Ryan_Ruck]
[#15]
Originally Posted By par0thead151:
what do you guys pay for insurance on your HMMWV's? i was quoted the same price as my daily driver, despite mine having collector plates, ie very minimal miles. Through State Farm mine was $350 something for 6 months full coverage being classified as a recreational/occasional use vehicle. I'm 34 with 1 traffic ticket and 1 at fault accident (both the same incident) about 13 years ago if that matters. ETA: It's my only privately insured vehicle too so no multiple vehicle discount. I have a work van that work pays insurance on. |
|
|
|
IA, USA
|
[#16]
Originally Posted By par0thead151:
what do you guys pay for insurance on your HMMWV's? i was quoted the same price as my daily driver, despite mine having collector plates, ie very minimal miles. About $60 a year through Farm Bureau. It is insured for what it is, accurate miles driven and good coverage. About the same as my 1981 pickup and 1986 CUCV. USAA sent me to progressive, they wanted $400 for 6 months. I moved all my vehicles from USAA and pay the same but insure a humvee now. |
|
|
|
[#17]
Originally Posted By Ryan_Ruck:
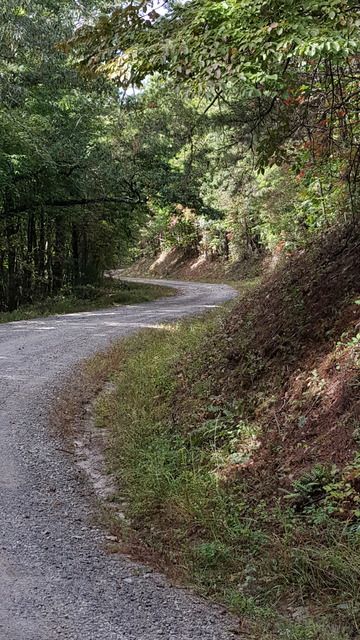
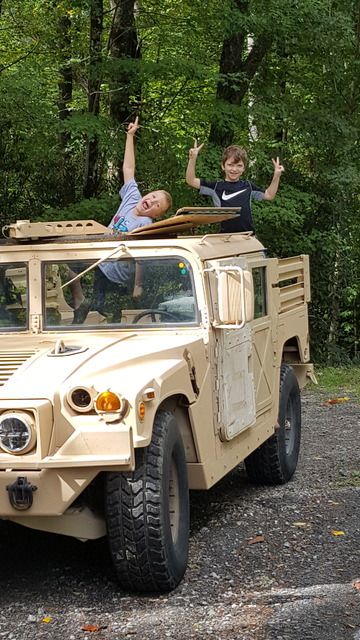
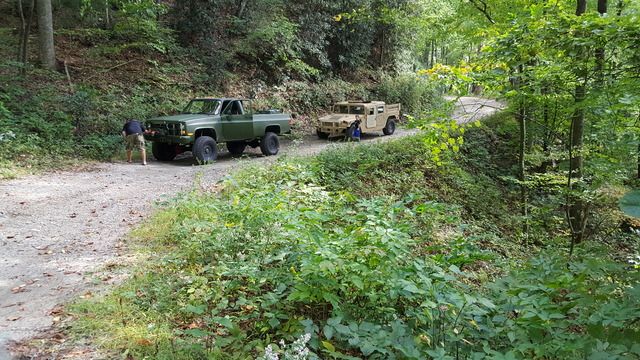
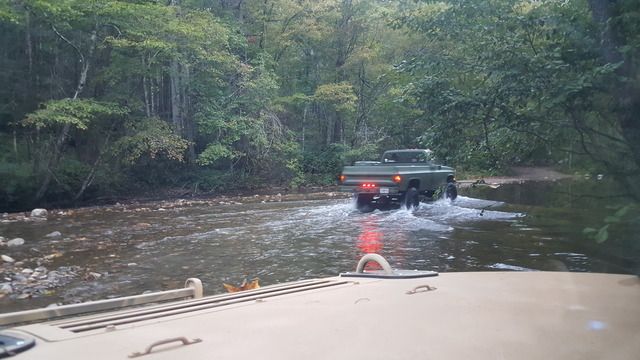
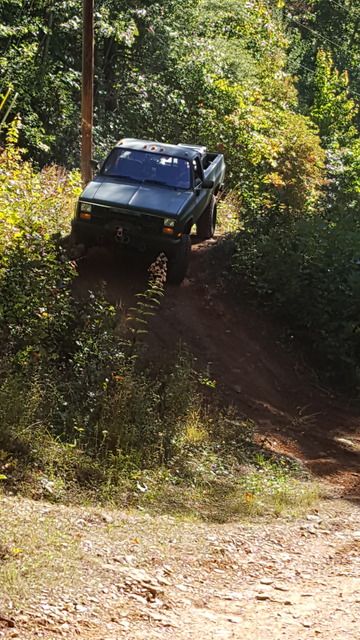
You getting much from Matthew where you are? Since we were talking about Scepter MFCs earlier, I went ahead and decided to put together one of the Home Depot MFC spouts but using the updated list of nylon parts from Tractor Supply. Good on you on the fill spout! I had bought the ribbed Scepter spout - about $50. Sorry for the delay in getting back - we got about an hours worth of light rain on Friday and that's it. I was far enough inland that we didn't really get any effects fortunately. This weekend a friend and I attempted to knock out a portion of the "GA Traverse". It's an interconnecting network of forest service and logging roads about 400 miles long that crosses north GA. It starts near Seneca, SC and ends just over the Alabama/GA line. This trip was straight-up awesome. It was nice to be out doing stuff with the humvee that I feel it was made for. So we started out Saturday morning, camped out Saturday night and wrapped up on Sunday night - we did about half the trip. To keep with the mil vehicle theme, my buddy Joe was driving his 86 Chevy CUCV and I took the GMV. Difficulty ranged from easy, but rough dirt roads that Helen and Gladys could easily traverse if they took a wrong turn to rougher stuff that was a bit more care and skill. We were on some very narrow goat trails on hill sides down to making several water crossings. My freshly painted GMV now looks very well seasoned. Before I get onto pictures, I learned an extremely valuable lesson this weekend that everyone should take to heart. I can only describe it as negligence on my part because I knew better, and nearly payed dearly for this lesson. I've seen talk of people wanting to remove the run-flats from their tires and I never did understand why. They're a pain in the ass to remove and get all the grease out plus they're only so-so tires anyway. I've driven them on my Ford Excursion and they don't ride any better with them out. Like many of you, 99.5% of my driving is on-road, but this incident made me a believer in the run-flat. The last pic in this thread is of my back right tire after 13 miles through some nasty, rocky terrain until I could get to pavement. Joe also runs humvee wheels on his CUCV, but had aired down his tires earlier in the trip for comfort. I felt that I was ok, so didn't bother. Well, when traversing this particularly nasty trail - I blew out the tire on a sharp rock. Like a dumb-ass, I didn't have my spare and neither did Joe - we had everything to change a tire, but the actual tire. Even if I did, it was easily a mile before I was in an area flat enough to actually change the tire but being without one, we continued on the trail. If I didn't have a run-flat, I would have been screwed. There was zero cell reception for most of the trip and AAA wasn't an option. The lesson learned is BE PREPARED. Yes the spare is 150# and a bitch to get in and out of the bed, but it would have been a lifesaver to have it. The other lesson is never to go it alone - always travel in pairs if possible. I was fortunate in that this particular part of the route was within an hour of the house, so my father in law was nice enough to drive up the spare that I didn't bother to take with me. All in all - even with the blown tire, the trip was fun as hell and I'll definitely be doing it again. At the start of the trip: 
On the route: 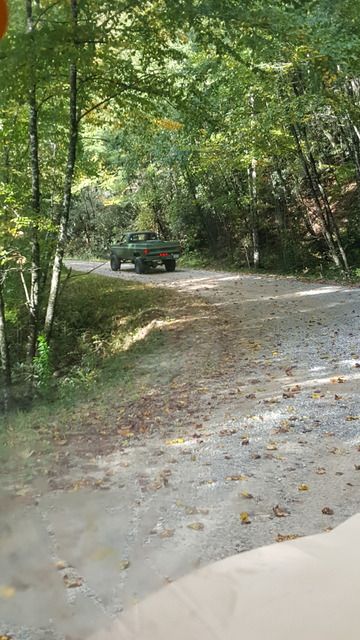
Wilderness refueling: 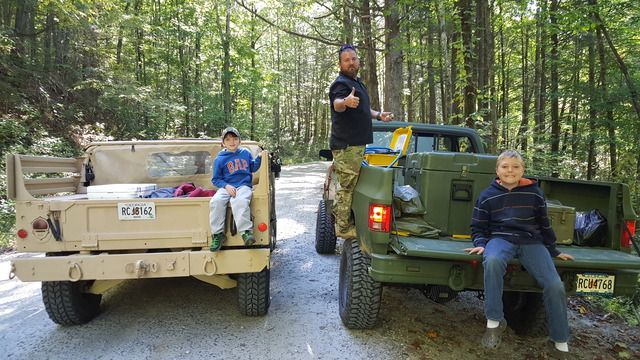
Blown Tire: 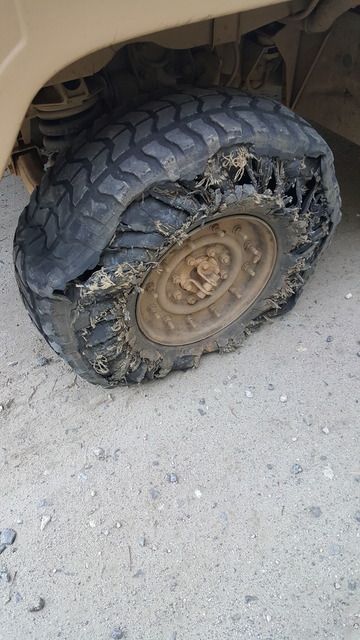
|
|
|
|
|
[#18]
Measured my green seat belts earlier and I got a roughly 8'2" measurement so it looks like the black belts give you an extra 1.5'. Decided to pick up all new hardware for the extra belt length.
Originally Posted By Lawman734:
Sorry for the delay in getting back - we got about an hours worth of light rain on Friday and that's it. I was far enough inland that we didn't really get any effects fortunately. ... Blown Tire: http://i28.photobucket.com/albums/c238/Lawdog734/20161009_182502_zpsmmg8orvu.jpg Good to hear you guys didn't get much of anything from the storm. Looks like it was a fun trip otherwise though! |
|
|
|
|
[#19]
Originally Posted By Ryan_Ruck:
Not much left of that tire! How's the runflat look? Still usable or all chewed up? Good to hear you guys didn't get much of anything from the storm. Looks like it was a fun trip otherwise though! The runflat is still in there, but I didn't get a good enough look at it to tell the condition. I just assumed that when you drive on it for any period of time, it's probably better to just replace it so that is what I'll be doing. |
|
|
|
IN, USA
|
[#20]
Originally Posted By par0thead151:
what do you guys pay for insurance on your HMMWV's? i was quoted the same price as my daily driver, despite mine having collector plates, ie very minimal miles. My insurance is $137 yearly through Grange for full coverage. |
|
|
|
[#21]
Big update for me today, my EUC was approved today.
|
|
|
|
|
[#22]
Originally Posted By kevin101:
Big update for me today, my EUC was approved today. That sir, is outstanding news! When do you go get it? |
|
|
|
|
[#23]
My schedule won't let me get it myself unfortunately. I'm having my neighbor check on his shipping people to see how good of a price I can get on shipping it. He's a car dealer and has lots of contacts.
|
|
|
|
|
[#24]
Originally Posted By kevin101:
Big update for me today, my EUC was approved today. Congrats! Rarely is a Tuesday a special day, unless you're buying a HMMWV! |
|
|
|
|
[#25]
I found a shipping company that quoted me 500 bucks to my front door and I should have it Friday morning. That's less than half the best Veritread offer I got.
|
|
|
|
|
[Last Edit: Ryan_Ruck]
[#26]
My new seat belts got here today. Got them put in when I got home from work.
Definitely a nice improvement over the green belts. The extra length on the belts and receptacles is nice to have! Also, another nice little feature, the housing on the black belts opens up easily to better be able to clean them out and lubricate them. Thanks again RedZ06Vette for the measurement! |
|
|
|
|
[#27]
What was suppose to be an 8 hour road trip to pick up my slantback turned into a 14 hour road trip due to weather and traffic. I got it all plus some. Since it was late last night I unloaded it this morning and its a lot of parts. 86humv on steel soldiers and g503 was awesome. He delivered the kit to Austin and unpacked everything to show me each part and explained how to install it, then loaded it up in my trailer. Also met with Austin who has the ebay store Austin Aviation and goes by beltfed on some of the forums. He had the shield that goes on top. So now the fun begins trying to get this all laid out and then painting before final assembly.
|
|
|
|
|
[#28]
Yesterday was a bit of an adventure for me as well.
Made a trip up to a friend's that lives about 2 hours north of me. This was going to be the longest road trip for the truck since I've had her. The trip up was pretty uneventful. Got to his place, parked in his driveway, did some Q&A with his family, and after a couple of us hopped in for a drive. Found the truck was hard to start. I know it wasn't the glow plugs because the truck was still too warm to fire them. Eventually got it started and during the drive Dave and I decided it was probably because of the steep angle of his driveway. He's had that problem with a couple other vehicles, the worst being a Chevy Uplander which wouldn't start at all if backed in. Truck drove totally fine during the ride. So we got back and I parked on his street. Sat and BS'd around for a couple hours. A couple other family members who didn't go on the first trip wanted a ride so before I left figured we'd do a drive into town. Same hard starting issue as before! At this point a second problem struck. While I was pumping the accelerator to get it started, all of the sudden I felt a pop in the pedal and it went to the floor. There went the accelerator cable... I pulled the old cable out of the sleeve and Dave and I are standing there looking at it trying to come up with a solution for me to get my truck home since there is no way in hell I'm paying for a 2 hour tow! As we're looking at the cable Dave says, "That sure looks like a strand of wire from 18/2." So we pulled some off of his work van and sure enough, the throttle cable is just about the same diameter! So I take a length of the 18ga, run it through the old cable sleeve, tie it to the accelerator linkage, and then we take the eyelet from the old cable that connects to the throttle on the injector pump and drill a hole in it to tie the 18ga to. Gave it a test and sure enough, I've got a working accelerator again! Headed home without issue but I did take it easy on the pedal. About 1/4 of the way into the trip back, it dawned on me we should have put some lube down the sleeve to make it a little less sticky but other than that, the field fix worked perfectly! Going to keep a length of 18/2 in the truck. Should be good for electrical or mechanical field repairs! Already have a new cable on order but, I still need to figure out exactly what caused the hard starting. I think I have it nailed down but I wanted to check with everyone here. When I stopped on the trip back to fuel up after about 30 minutes of driving, when pulling off the fuel cap, I found it was under pretty heavy vacuum. I suspect it was under so much vacuum after the long distance driving that it made it hard to get fuel to the engine until the engine was actually running. Once I got home I let the truck sit for about an hour, went out pulled the cap off and found it under vacuum again, though not as bad since I had stopped for fuel. Left the cap off and went to start the truck. It started right up. No problem starting it a little bit ago either with the cap on. Looking at this fuel system diagram, it looks like the only venting for the fuel tank is through the labeled tank vent and filter. No idea to know how old that filter is or if the line is rotted and, I'm betting it's plugged somewhere putting the whole tank under vacuum after the engine has run for a while. So my question, anyone else have their fuel caps under vacuum when taking it off? I'm guessing not... |
|
|
|
TN, USA
|
[#29]
several things come to mind:
1) condition of your lift pump? 2) condition of your fuel filter? 3) can you test your fuel pressure between the filter and IP? 4) do you have air in the fuel system? Couple weeks back my H1 abruptly shut off on my way home, I quickly changed my PMD on the road, that didn't fix, all it would do is crank so my son towed me home, I narrowed it to fuel related, while inspecting the FFM I popped the water drain lever there was a shit ton pressure built up in the FFM once the pressure was bled off it fired right up, I'm in the process of putting fuel pressure gage inside my H1. |
|
|
|
[#30]
Originally Posted By JohnyRotten:
several things come to mind: 1) condition of your lift pump? Unsure. As far as I know, good. Had been driving great before and after turning up the IP but never for as long a trip as yesterday. 2) condition of your fuel filter? Could probably stand to be changed. Haven't changed it since I got the truck. No idea on last change. 3) can you test your fuel pressure between the filter and IP? I could probably find a way. I'm sure Harbor Freight has a fuel pressure tester. 4) do you have air in the fuel system? I don't believe I do. The truck came with half a tank of fuel and hasn't been run dry since I've had it. Couple weeks back my H1 abruptly shut off on my way home, I quickly changed my PMD on the road, that didn't fix, all it would do is crank so my son towed me home, I narrowed it to fuel related, while inspecting the FFM I popped the water drain lever there was a shit ton pressure built up in the FFM once the pressure was bled off it fired right up, I'm in the process of putting fuel pressure gage inside my H1. See in blue above. Also, when I got home and took the cap off and broke the suction, I could hear the fuel slosh like the tank had possibly contracted a bit. Really seems like I'm getting a lot more vacuum buildup than is normal but being as I only have a sample of 1, I'm not exactly sure what normal is. |
|
|
|
|
[#31]
When was the last time you changed the fuel filter and have you been adding anything to the tank? |
|
|
|
|
[#32]
Originally Posted By jake-cutter:
When was the last time you changed the fuel filter and have you been adding anything to the tank? Filter could probably use a change. I'm actually ordering one right now (along with a tank vent filter since it's so cheap). Alternating with each fill up, a quart of 2 stroke or Diesel Kleen. Diesel Kleen has been added back to back the last 2 fill ups though since I ran out of 2 stroke. |
|
|
|
|
[#33]
I had mine delivered yesterday. I paid 550 for delivery from mid-Kentucky to Rochester NY. The truck didn't start but I wasn't surprised so I put a couple new batteries in it and it fired up nice and strong. Driver's rear tire was very low but I filled it up and it's holding air but there's some dry rot and all the tires are a little low on treat. I'm going to get all the leaves out of it this afternoon but it looks fairly clean inside. I drove it around the block a few times and the brakes are good and it drove well.
I'm planning on changing the oil tomorrow and checking all the other fluids. All the guys on my street ran out when I fired it up today. I think I won the "cool" award for the week. |
|
|
|
|
[Last Edit: Ryan_Ruck]
[#34]
Originally Posted By kevin101:
I had mine delivered yesterday. I paid 550 for delivery from mid-Kentucky to Rochester NY. The truck didn't start but I wasn't surprised so I put a couple new batteries in it and it fired up nice and strong. Driver's rear tire was very low but I filled it up and it's holding air but there's some dry rot and all the tires are a little low on treat. I'm going to get all the leaves out of it this afternoon but it looks fairly clean inside. I drove it around the block a few times and the brakes are good and it drove well. I'm planning on changing the oil tomorrow and checking all the other fluids. All the guys on my street ran out when I fired it up today. I think I won the "cool" award for the week. Very awesome! You go with anything special for the batteries? $550 is VERY reasonable for shipping that distance! Cost me more than that to pick mine up myself. 
ETA: This should help get you started: Lubrication Order 9-2320-280-12 (Forgot to post that for RedZ06Vette!) |
|
|
|
|
[Last Edit: kevin101]
[#35]
Trust me, I was smiling while I wrote out the check. I even tipped him 40 bucks because he pushed it off the trailer himself because it wouldn't start.
Batteries were a different story as I didn't follow the norm of using Ultima red tops like a lot of people are doing. One neighbor is a mechanic and he made some calls so I got some 2 Autocraft batteries. The awesome thing was that he went with me to Autozone and because he's employed at a shop, I only had to pay cost which was equal to about 1/3 the cost. |
|
|
|
|
[Last Edit: Ryan_Ruck]
[#36]
Originally Posted By kevin101:
Trust me, I was smiling while I wrote out the check. I even tipped him 40 bucks because he pushed it off the trailer himself because it wouldn't start. Batteries were a different story as I didn't follow the norm of using Ultima red tops like a lot of people are doing. One neighbor is a mechanic and he made some calls so I got some 2 Autocraft batteries. The awesome thing was that he went to me to Autozone and because he's employed at a shop, I only had to pay cost which was equal to about 1/3 the cost. Yeah, don't bother with Optimas. From what I've seen posted in many places online, they aren't the batteries they used to be and now have pretty high failure rates. I still haven't really decided 100% what I'm going to replace my Hawkers with when the time comes. Was going to go with Die Hard Platinums but they apparently discontinued them. |
|
|
|
TN, USA
|
[#37]
Originally Posted By Ryan_Ruck:
See in blue above. Also, when I got home and took the cap off and broke the suction, I could hear the fuel slosh like the tank had possibly contracted a bit. Really seems like I'm getting a lot more vacuum buildup than is normal but being as I only have a sample of 1, I'm not exactly sure what normal is. Originally Posted By Ryan_Ruck:
Originally Posted By JohnyRotten:
several things come to mind: 1) condition of your lift pump? Unsure. As far as I know, good. Had been driving great before and after turning up the IP but never for as long a trip as yesterday. 2) condition of your fuel filter? Could probably stand to be changed. Haven't changed it since I got the truck. No idea on last change. 3) can you test your fuel pressure between the filter and IP? I could probably find a way. I'm sure Harbor Freight has a fuel pressure tester. 4) do you have air in the fuel system? I don't believe I do. The truck came with half a tank of fuel and hasn't been run dry since I've had it. Couple weeks back my H1 abruptly shut off on my way home, I quickly changed my PMD on the road, that didn't fix, all it would do is crank so my son towed me home, I narrowed it to fuel related, while inspecting the FFM I popped the water drain lever there was a shit ton pressure built up in the FFM once the pressure was bled off it fired right up, I'm in the process of putting fuel pressure gage inside my H1. See in blue above. Also, when I got home and took the cap off and broke the suction, I could hear the fuel slosh like the tank had possibly contracted a bit. Really seems like I'm getting a lot more vacuum buildup than is normal but being as I only have a sample of 1, I'm not exactly sure what normal is. couple things to think about: 1) if your LP is bad your IP is pulling fuel directly from the tank, if this is the case the IP will fail at some point, this is why a pressure gauge is needed to confirm. 2) if you have no idea when the filter was changed, it's time, I was told 5yrs max when mileage wasn't a factor. 3) air in the fuel system can come from everywhere, do you have damp fuel lines, filter, LP, IP, etc? I was told to change my IP return line to a clear line so I can determine if air was present. I'm waiting for my fuel pressure gauge to arrive so I can determine if my lift pump was going bad. |
|
|
TN, USA
|
[#38]
Originally Posted By kevin101:
Trust me, I was smiling while I wrote out the check. I even tipped him 40 bucks because he pushed it off the trailer himself because it wouldn't start. Batteries were a different story as I didn't follow the norm of using Ultima red tops like a lot of people are doing. One neighbor is a mechanic and he made some calls so I got some 2 Autocraft batteries. The awesome thing was that he went with me to Autozone and because he's employed at a shop, I only had to pay cost which was equal to about 1/3 the cost. I've had yellows and reds on my truck they are shit...I currently have AC Delco's for the past 4 yrs no issues yet.. |
|
|
|
[Last Edit: Ryan_Ruck]
[#39]
Originally Posted By JohnyRotten:
couple things to think about: 1) if your LP is bad your IP is pulling fuel directly from the tank, if this is the case the IP will fail at some point, this is why a pressure gauge is needed to confirm. 2) if you have no idea when the filter was changed, it's time, I was told 5yrs max when mileage wasn't a factor. 3) air in the fuel system can come from everywhere, do you have damp fuel lines, filter, LP, IP, etc? I was told to change my IP return line to a clear line so I can determine if air was present. I'm waiting for my fuel pressure gauge to arrive so I can determine if my lift pump was going bad. 1) Looking at the TM diagram of the filter assembly, I noticed there's a fuel pressure transducer installed on top of the filter housing. The transducer ties into the STE/ICE wiring for diagnostic tests (which I do not have an STE/ICE tester to use! Also what pressure ranges are we looking at with these fuel systems. I'm guessing it isn't very high pressure until you get past the IP. 3) How do you mean "damp"? Like fuel saturated? You mentioned clear line to ID air in the line. What type of clear line was recommended and what diameter? ETA: Just went and started the truck again to get some fuel from the filter drain and the truck started right up again like this morning, no problem. Nice steady stream of fuel was coming out and near as I can tell, what came out looks good. Going to let the sample sit for a bit to see if any water settles out. Also, I was going to use my air compressor to put some air down the tank vent line to see if the line itself is restricted in any way but I can't find my air gun. Guess I'm going to have to pick up a new one. I don't think the tank vent line itself is at fault though. It's heavy duty air brake line and doesn't seem like it would rot the way regular rubber line would.
|
|
|
|
TN, USA
|
[#40]
Originally Posted By Ryan_Ruck:
1) Looking at the TM diagram of the filter assembly, I noticed there's a fuel pressure transducer installed on top of the filter housing. The transducer ties into the STE/ICE wiring for diagnostic tests (which I do not have an STE/ICE tester to use! Also what pressure ranges are we looking at with these fuel systems. I'm guessing it isn't very high pressure until you get past the IP. 3) How do you mean "damp"? Like fuel saturated? You mentioned clear line to ID air in the line. What type of clear line was recommended and what diameter? ETA: Just went and started the truck again to get some fuel from the filter drain and the truck started right up again like this morning, no problem. Nice steady stream of fuel was coming out and near as I can tell, what came out looks good. Going to let the sample sit for a bit to see if any water settles out. Also, I was going to use my air compressor to put some air down the tank vent line to see if the line itself is restricted in any way but I can't find my air gun. Guess I'm going to have to pick up a new one. I don't think the tank vent line itself is at fault though. It's heavy duty air brake line and doesn't seem like it would rot the way regular rubber line would.
Originally Posted By Ryan_Ruck:
Originally Posted By JohnyRotten:
couple things to think about: 1) if your LP is bad your IP is pulling fuel directly from the tank, if this is the case the IP will fail at some point, this is why a pressure gauge is needed to confirm. 2) if you have no idea when the filter was changed, it's time, I was told 5yrs max when mileage wasn't a factor. 3) air in the fuel system can come from everywhere, do you have damp fuel lines, filter, LP, IP, etc? I was told to change my IP return line to a clear line so I can determine if air was present. I'm waiting for my fuel pressure gauge to arrive so I can determine if my lift pump was going bad. 1) Looking at the TM diagram of the filter assembly, I noticed there's a fuel pressure transducer installed on top of the filter housing. The transducer ties into the STE/ICE wiring for diagnostic tests (which I do not have an STE/ICE tester to use! Also what pressure ranges are we looking at with these fuel systems. I'm guessing it isn't very high pressure until you get past the IP. 3) How do you mean "damp"? Like fuel saturated? You mentioned clear line to ID air in the line. What type of clear line was recommended and what diameter? ETA: Just went and started the truck again to get some fuel from the filter drain and the truck started right up again like this morning, no problem. Nice steady stream of fuel was coming out and near as I can tell, what came out looks good. Going to let the sample sit for a bit to see if any water settles out. Also, I was going to use my air compressor to put some air down the tank vent line to see if the line itself is restricted in any way but I can't find my air gun. Guess I'm going to have to pick up a new one. I don't think the tank vent line itself is at fault though. It's heavy duty air brake line and doesn't seem like it would rot the way regular rubber line would.
Not sure if the FFM on a V is the same as a H1, probably not....same concept thou. I'm going to Tee into the 5/16" supply line between the FFM and the IP with something like this https://www.summitracing.com/parts/sum-g1710 this is the gauge I bought http://www.glowshiftdirect.com/MaxTow-30-PSI-Fuel-Pressure-Gauge.aspx All I'm talking about is seepage (not a puddle on the floor), if the line is damp it could suck air. I was told clear aviation 1/4" fuel line, good luck finding that, I settled for clear auto fuel line, it will discolor in a couple yrs or so and I'll just change it out, the line on my truck is 3" long before it goes ridged. |
|
|
IN, USA
|
[#41]
Well, I finally bent my driver door in at the top so it would seal. I was a bit surprised how flimsy those frames really are. It took about five seconds to get it right. Hopefully that'll keep out the elements a bit.
Before 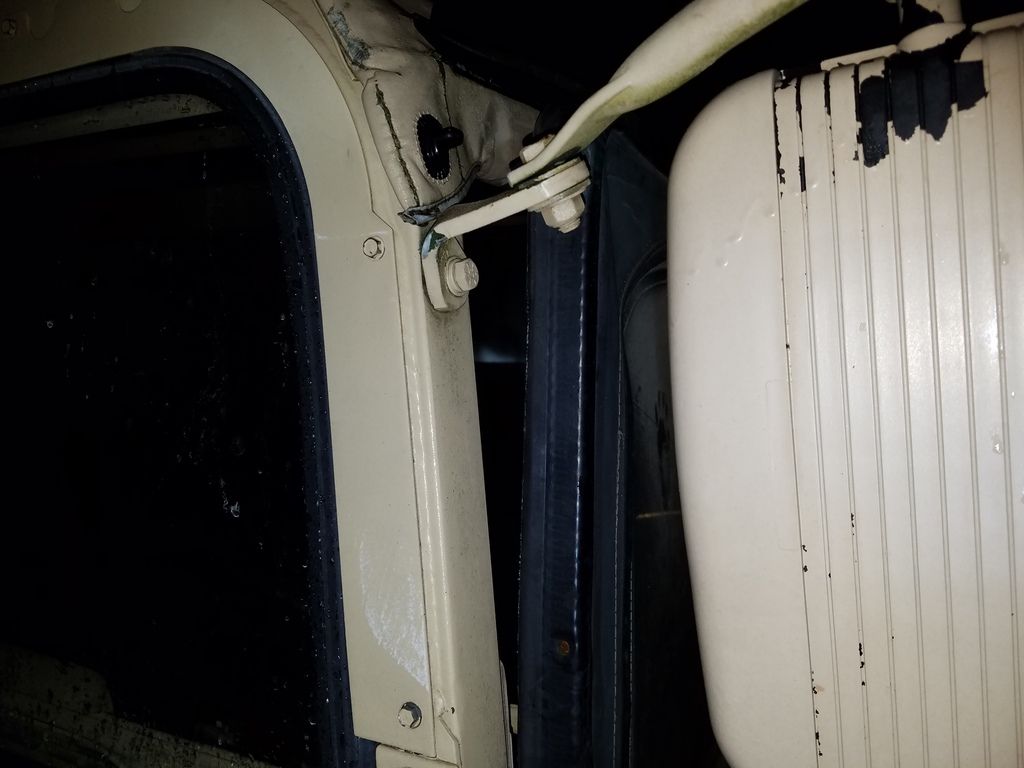
After 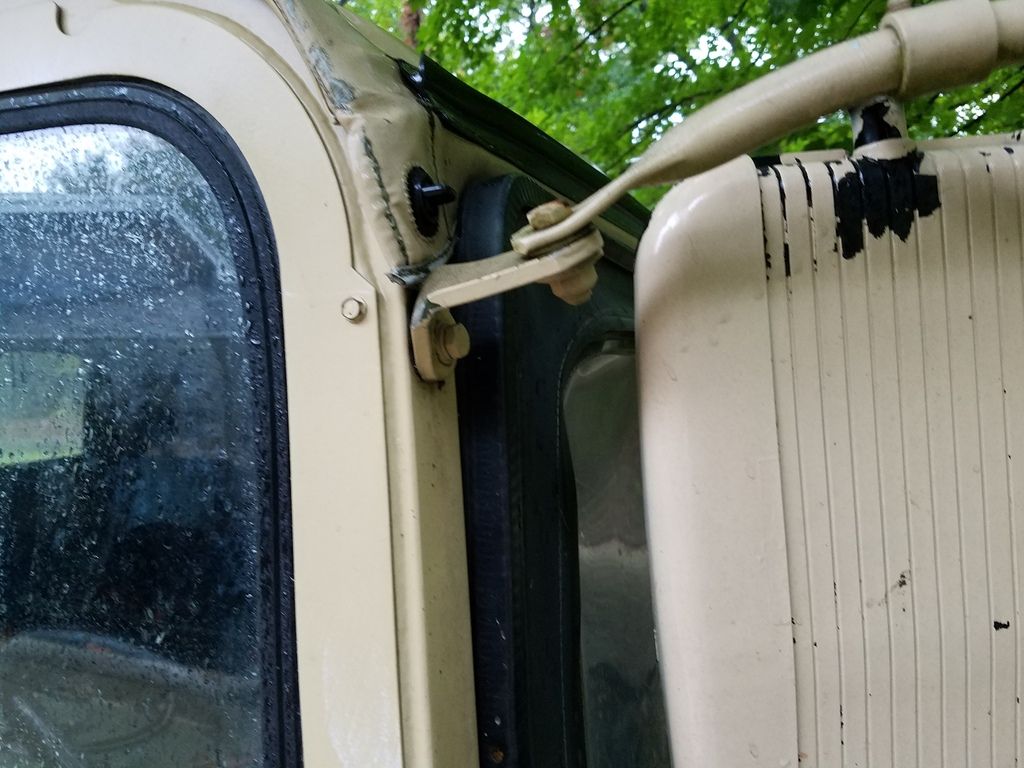
I wanted to try to take off the layer of paint over the unit markings, but after a bonfire mishap (fireball) and a trip to the hospital Saturday night, I didn't have the motivation to work on anything after bending the door. I did learn that even guys in their late 30's need to be carefully supervised when pouring gas for a fire. 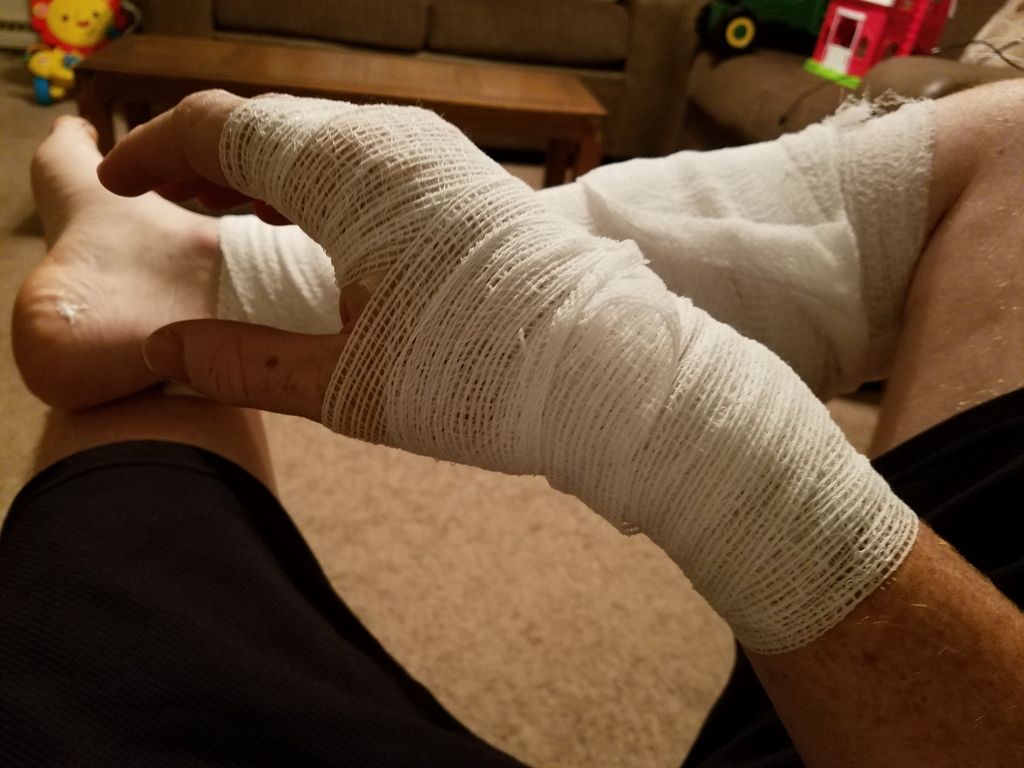
|
|
|
|
[#42]
Originally Posted By RedZ06Vette:
Well, I finally bent my driver door in at the top so it would seal. I was a bit surprised how flimsy those frames really are. It took about five seconds to get it right. Hopefully that'll keep out the elements a bit. Before http://i1238.photobucket.com/albums/ff490/Boosted_Nelson_Inc/Mobile%20Uploads/20161002_202453.jpg After http://i1238.photobucket.com/albums/ff490/Boosted_Nelson_Inc/Mobile%20Uploads/20161016_094532_1.jpg I wanted to try to take off the layer of paint over the unit markings, but after a bonfire mishap (fireball) and a trip to the hospital Saturday night, I didn't have the motivation to work on anything after bending the door. I did learn that even guys in their late 30's need to be carefully supervised when pouring gas for a fire. http://i1238.photobucket.com/albums/ff490/Boosted_Nelson_Inc/Mobile%20Uploads/20161016_000842.jpg A guy in his 30s is supposed to know to NEVER pour gas on a fire...
|
|
|
|
|
[#43]
Originally Posted By RedZ06Vette:
I wanted to try to take off the layer of paint over the unit markings, but after a bonfire mishap (fireball) and a trip to the hospital Saturday night, I didn't have the motivation to work on anything after bending the door. I did learn that even guys in their late 30's need to be carefully supervised when pouring gas for a fire. http://i1238.photobucket.com/albums/ff490/Boosted_Nelson_Inc/Mobile%20Uploads/20161016_000842.jpg Well, I hope the lesson was learned. I learned that a long time ago. I good friend of mine is a Delta Sniper. He managed to do something similar but ended up with pretty bad burns over about 30pct of his body. He ended up getting skin grafts from a pig, he now goes around telling everyone that he's the perfect infidel. |
|
|
|
|
[#44]
Originally Posted By RedZ06Vette:
Well, I finally bent my driver door in at the top so it would seal. I was a bit surprised how flimsy those frames really are. It took about five seconds to get it right. Hopefully that'll keep out the elements a bit. Before http://i1238.photobucket.com/albums/ff490/Boosted_Nelson_Inc/Mobile%20Uploads/20161002_202453.jpg After http://i1238.photobucket.com/albums/ff490/Boosted_Nelson_Inc/Mobile%20Uploads/20161016_094532_1.jpg I wanted to try to take off the layer of paint over the unit markings, but after a bonfire mishap (fireball) and a trip to the hospital Saturday night, I didn't have the motivation to work on anything after bending the door. I did learn that even guys in their late 30's need to be carefully supervised when pouring gas for a fire. http://i1238.photobucket.com/albums/ff490/Boosted_Nelson_Inc/Mobile%20Uploads/20161016_000842.jpg Was this involved and at any time was the phase on the right spoken? 
Do you at least still have your eyebrows?
I too learned a while ago the use of gasoline in fire starting needed to be judicious and preferably only a very little bit mixed with oil, diesel, or kerosene. My learning experience involved some leaves in a burn barrel, a tiny bit of gas, and tossing matches at the barrel from a distance. When I did get one in, it sounded like a cannon went off and burning leaves went everywhere. That's when I learned to respect it, even a little tiny bit like I had used. In my defense, I was still in high school. Now heal up! You've got work on a truck to get done! |
|
|
|
IN, USA
|
[#45]
No booze. I just forgot how dumb my friend could be at times. And how dumb I can be. At least I still have 2/3 of my eyebrows.
The biggest damage is to my pride. |
|
|
|
[#46]
Heal up quick man.
Due to the rain I got nothing done on mine today. Tomorrow morning I'm heading out to order a decent sized shed and once that shows up I'm going to empty my garage. The beast should fit in there really nice Since we're on the subject of accidental fires, do you guys have any thoughts on heating a single car attached garage in a way that won't cause a fire hazard if I'm spraying paint or something like that? |
|
|
|
|
[#47]
Originally Posted By kevin101:
Heal up quick man. Due to the rain I got nothing done on mine today. Tomorrow morning I'm heading out to order a decent sized shed and once that shows up I'm going to empty my garage. The beast should fit in there really nice Since we're on the subject of accidental fires, do you guys have any thoughts on heating a single car attached garage in a way that won't cause a fire hazard if I'm spraying paint or something like that? Rain-schmain - what I want to know is where are the frigging pics? As for heating the garage - just about everything is going to have a heat element, so short of a small spot projects, I'd be really leery of having atomized paint in the air around fire sources. |
|
|
|
|
[Last Edit: Ryan_Ruck]
[#48]
Originally Posted By Lawman734:
Rain-schmain - what I want to know is where are the frigging pics? As for heating the garage - just about everything is going to have a heat element, so short of a small spot projects, I'd be really leery of having atomized paint in the air around fire sources. Originally Posted By Lawman734:
Originally Posted By kevin101:
Heal up quick man. Due to the rain I got nothing done on mine today. Tomorrow morning I'm heading out to order a decent sized shed and once that shows up I'm going to empty my garage. The beast should fit in there really nice Since we're on the subject of accidental fires, do you guys have any thoughts on heating a single car attached garage in a way that won't cause a fire hazard if I'm spraying paint or something like that? Rain-schmain - what I want to know is where are the frigging pics? As for heating the garage - just about everything is going to have a heat element, so short of a small spot projects, I'd be really leery of having atomized paint in the air around fire sources. Only thing I can think of that would fit the bill would be an oil filled heater but I don't know if you could get enough heat out of one without needing more and running short on juice (they're usually 1200w each, I know because I supplement my propane furnace with them). Maybe a couple big electric baseboard heaters? Would probably require some wiring though... Since we're unseasonably warm right now and we're going to wrap up the week with highs in the 50s, I finally relented and installed my top and doors. Time to start counting the days until they can come back off. The paint on the top held up a bit better than I expected during the install. No flaking! It seems to flex pretty well actually. It did scuff up a little bit during the installation thanks to the light bar and precleaner mostly despite trying to cover them with a couple towels (I put the top upside down on the hood, slid it into the track, then flipped it over the truck), however it still looks decent. 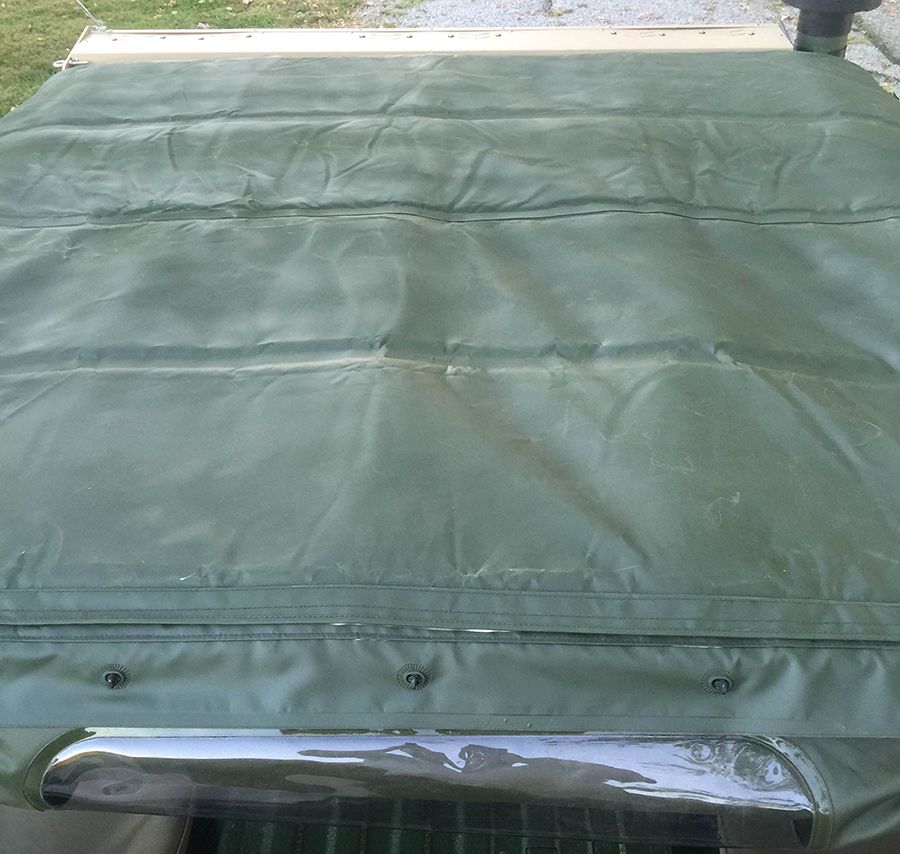
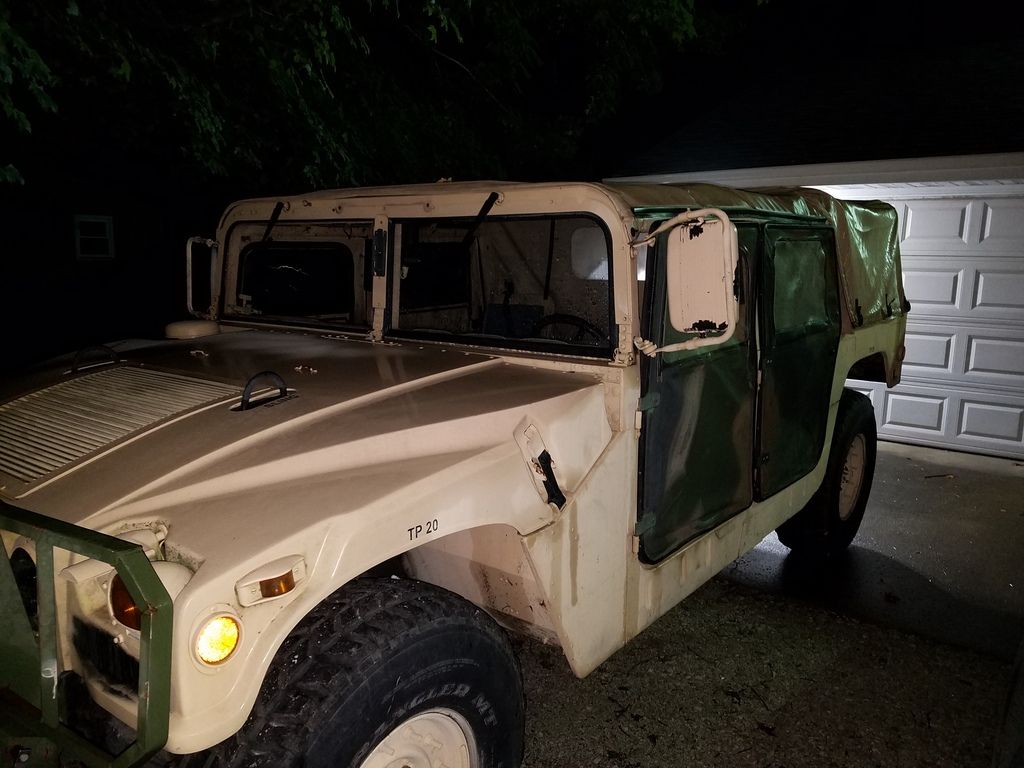
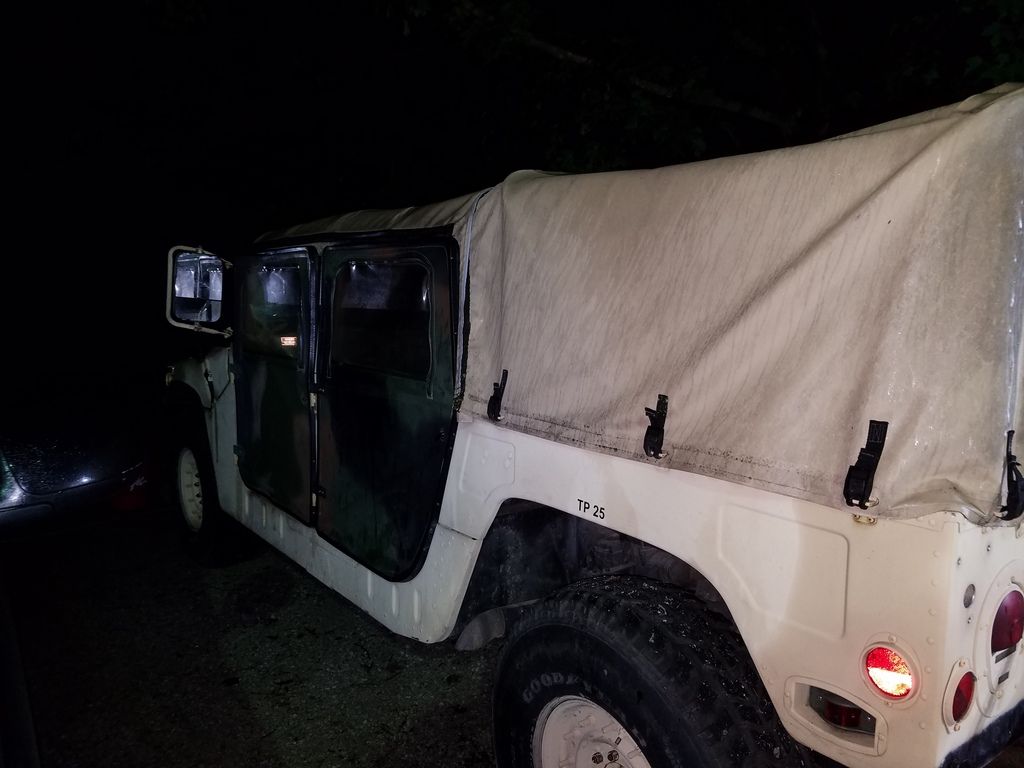
Not a great pic, I know, since the sun was washing it out some but you can see a couple of the scuffs. I may end up spraying a few more coats on come Spring since I've got so much of the Behr left. ETA: Almost forgot, my mounts for the rear heat duct kind of interfere with the door sections on the passenger side of the top. Only able to get the middle fastener at each door unless I put some relief cuts but, I don't think I want to do that since I don't know how it will hold up with them. I think it will be okay with the one fastener on each. Since I had to adjust my doors, I wrapped up after it was dark so no pics of how it looks now. I'll take a couple to show how close a match the Behr on the top is to the Green 383 of the cargo cover. You can kind of see in the pic above with the rear curtain. Also, had to start the truck a couple times to move it. Zero issues starting up which is really making me think the tank vent and vacuum buildup is the culprit. |
|
|
|
|
[#49]
I'll get some pics up tomorrow. I'm slacking....
|
|
|
|
|
[#50]
Originally Posted By RedZ06Vette:
Well, I finally bent my driver door in at the top so it would seal. I was a bit surprised how flimsy those frames really are. It took about five seconds to get it right. Hopefully that'll keep out the elements a bit. Before http://i1238.photobucket.com/albums/ff490/Boosted_Nelson_Inc/Mobile%20Uploads/20161002_202453.jpg After http://i1238.photobucket.com/albums/ff490/Boosted_Nelson_Inc/Mobile%20Uploads/20161016_094532_1.jpg I wanted to try to take off the layer of paint over the unit markings, but after a bonfire mishap (fireball) and a trip to the hospital Saturday night, I didn't have the motivation to work on anything after bending the door. I did learn that even guys in their late 30's need to be carefully supervised when pouring gas for a fire. http://i1238.photobucket.com/albums/ff490/Boosted_Nelson_Inc/Mobile%20Uploads/20161016_000842.jpg When I was fitting my doors back up earlier, I got the gaps pretty well minimized but was still unhappy with the gaps at the B-pillar, especially with the front part of the rear doors. Then it dawned on me a little bit ago I still had some leftover tailgate seal. I put the P section of the stripping on the outside edge of the B-pillar and it seals up awesomely! No more gap except the tiniest of a hole between the seal, the top, and the door. I'll get a couple pics when I take the others tomorrow. It will have to come off when I paint the truck but should work great for now. |
|
|
|
 Win a FREE Membership!
Sign up for the ARFCOM weekly newsletter and be entered to win a free ARFCOM membership. One new winner* is announced every week!
You will receive an email every Friday morning featuring the latest chatter from the hottest topics, breaking news surrounding legislation, as well as exclusive deals only available to ARFCOM email subscribers.

AR15.COM is the world's largest firearm community and is a gathering place for firearm enthusiasts of all types.
From hunters and military members, to competition shooters and general firearm enthusiasts, we welcome anyone who values and respects the way of the firearm.

Subscribe to our monthly Newsletter to receive firearm news, product discounts from your favorite Industry Partners, and more.
Copyright © 1996-2024 AR15.COM LLC. All Rights Reserved.
Any use of this content without express written consent is prohibited.
AR15.Com reserves the right to overwrite or replace any affiliate, commercial, or monetizable links, posted by users, with our own.


