|
Posted: 8/14/2006 6:30:54 PM EDT
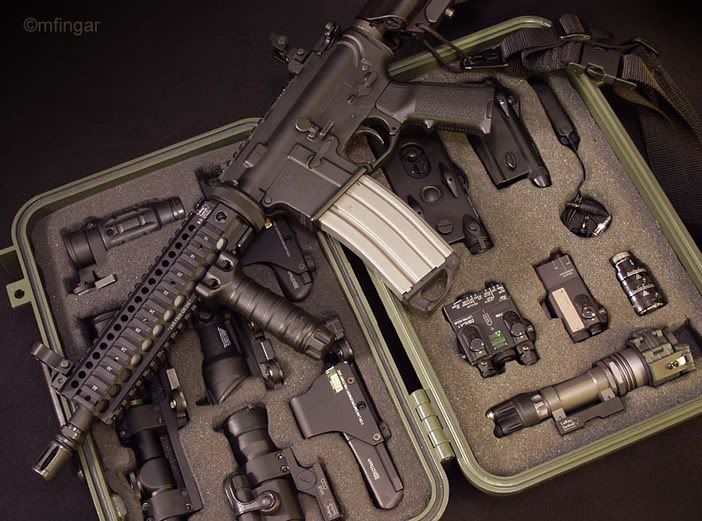
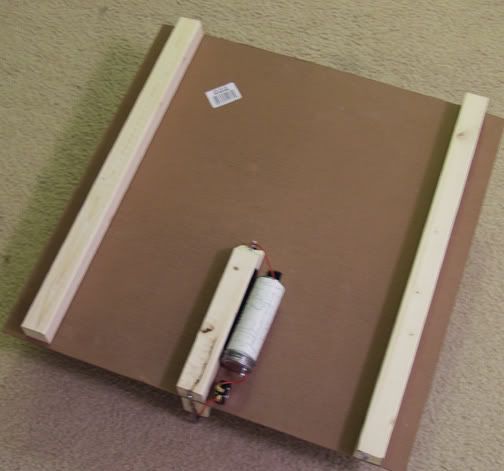
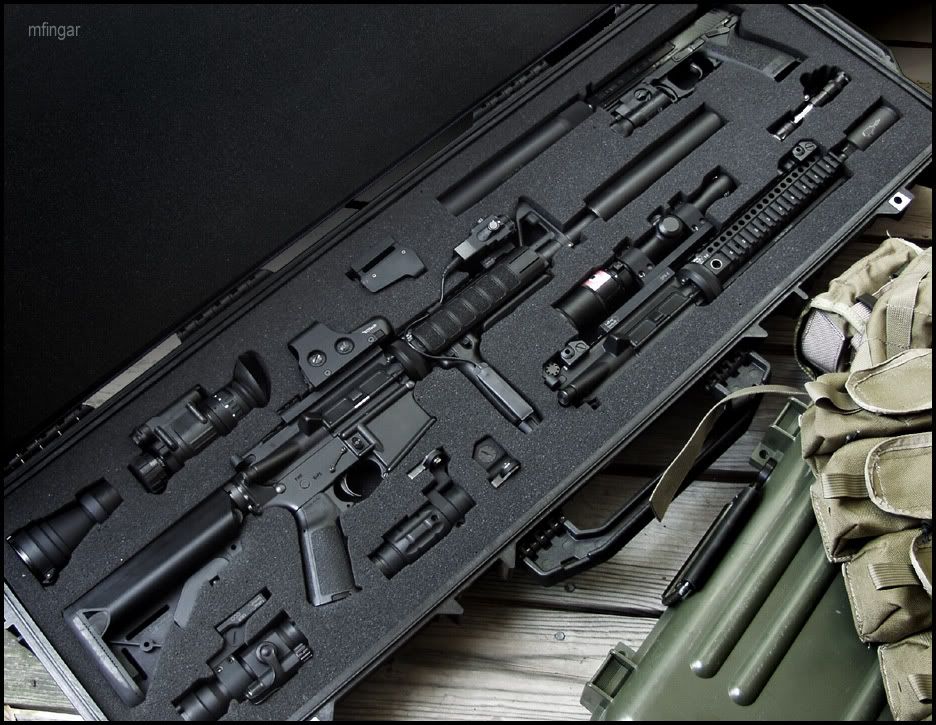   Many folks ask me how I cut my case foam. I follow the "6 P's" Prior Preparation Prevents Piss Poor Performance In other words; the hard work comes before cutting. Razors and electric carving knives are crude...I've used hot wires to cut foam for years. Unfortunately, a handheld hot wire cutter is difficult to keep straight, and 90 degrees to the surface. So I designed the unit shown here. Works Great!  Essentially, it's a 24" x 24" piece of particle board, supported on some 2" x 2" lumber, with a hole drilled in the center to run some florists wire through, connected to a support arm. I modified a Wonder Cutter to handle my electronics. The cutter can be easily made for under $50....Google "Hot Wire Foam Cutter", and you'll get many instructions on how to build one yourself. ____________________________________________________________________________ EDIT 3/7/08 I recently replaced my battery stack with a household light-dimmer switch and a 25 volt, 2 amp transformer I got from RadioShack. I also got some Ni-Chrome wire instead of the steel florists wire...works great!! 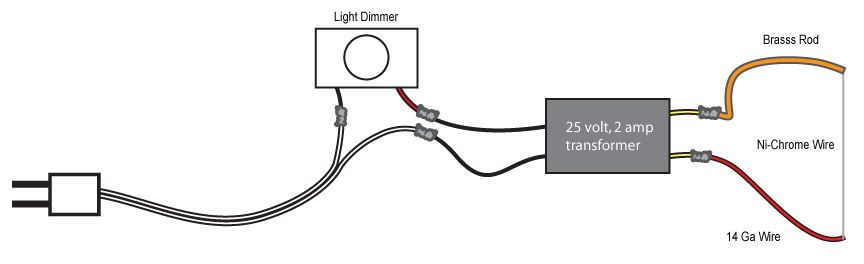 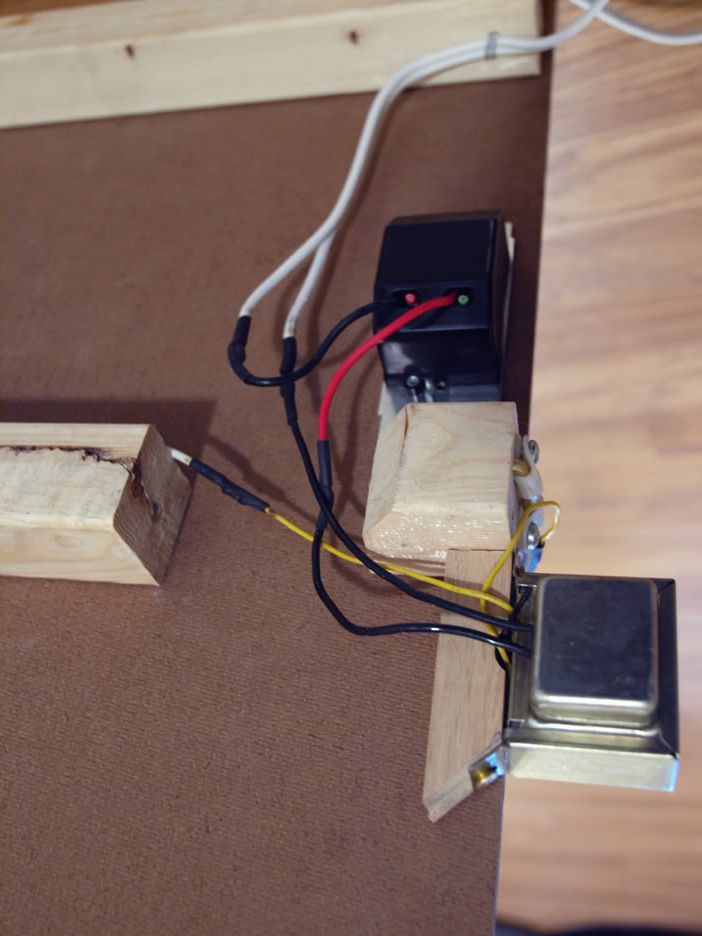 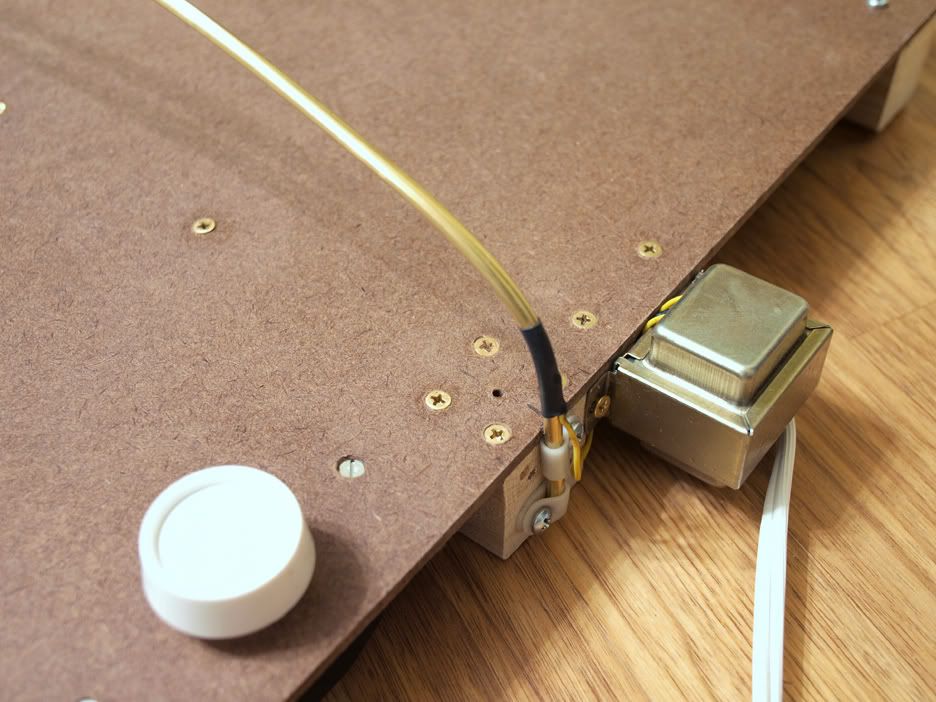 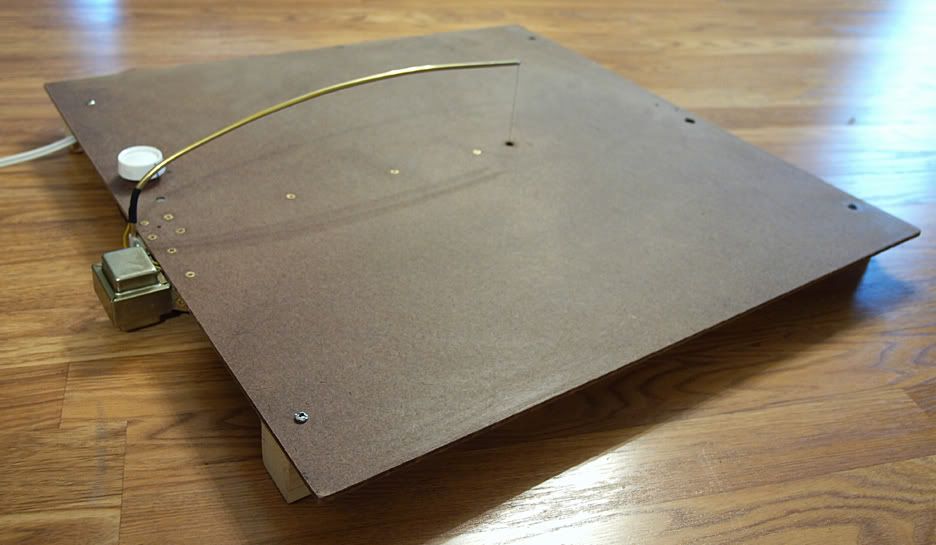 _____________________________________________________________________________ So here's the Prep: First: Trace the item you want in the foam with a Sharpie onto posterboard, or card stock. 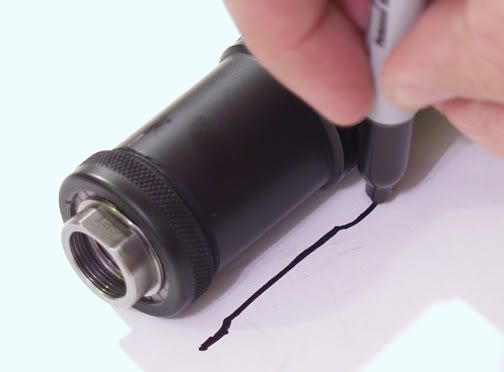 Err on the "inside" to make a tighter fit. Next: Clean-up your lines. Use a straight-edge to make everything parallel.  Then: Cut out your shape, and tack it to the foam. This will allow you to visualize placement of multiple objects. If you're adding multiples...Plan, plan plan. Layout everything before you cut. Make sure it's what you want. You can get creative with your layout at this point. 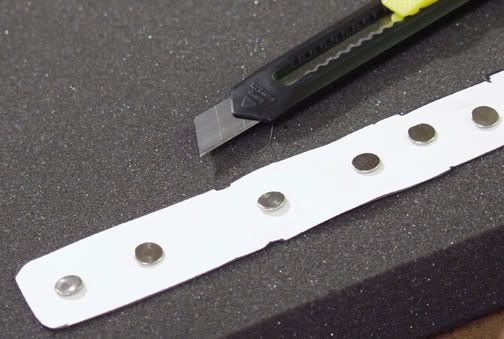 Then: Plunge a "pilot hole" with a box cutter. 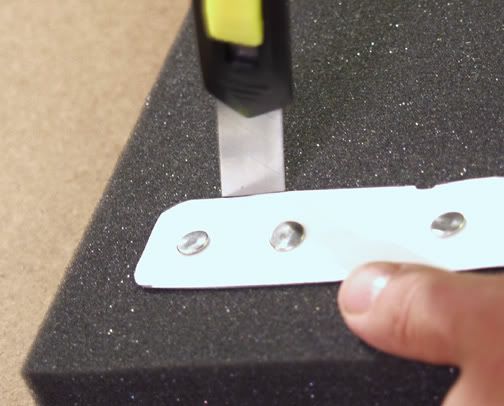 Next: Feed the wire through the pilot hole. 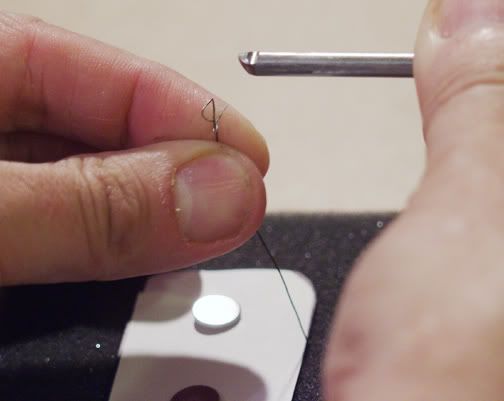 Then: Turn on the cutter and slowly work your way all the way, around the template, like a jigsaw. Ending at the pilot hole. 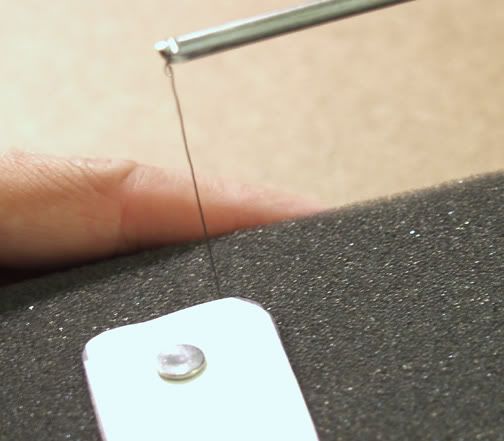 Next: Remove the template and the plug. Keep the template for future projects. 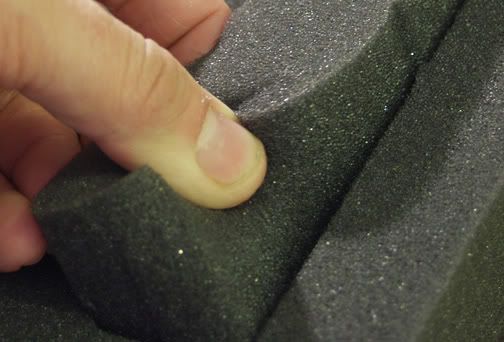 Then: Cross-cut the plug to match the item's height. Re-insert the remaining plug into the hole. 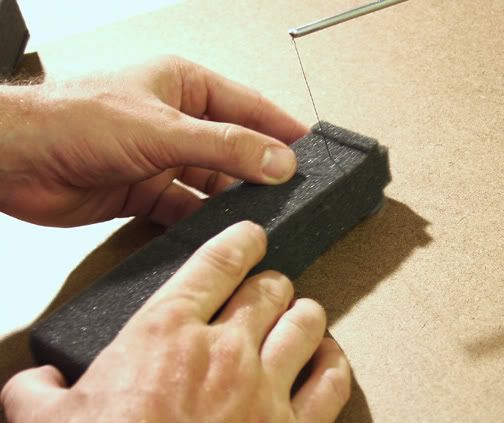 Finally: Assemble, and case the hardware. 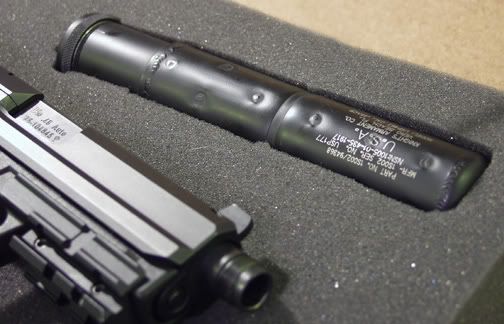 Good luck, and enjoy. Just take your time...It'll work out great. Mark |
|
|
|
[#1]
Thats great!
Thanks for the writeup! |
|
|
|
[#2]
NICE!!! I totally FUBAR'd my last attempt at such a foam layout...

|
|
|
|
[#3]
A man of your intelligence deserves such a fine collection af hardware.
Nicely done! |
|
|
|
[#4]
very nice, just move the foam around like using a band saw
side question: where do you get your foam? |
|
|
|
[#5]
That looks great!!! THANK YOU for the tips.
|
|
|
|
[#6]
Very nice man, two questions.
1, Why do you have a scope on the sbr upper? 2, How do you carry a handgun with a suppressor? |
|
|
|
[#7]
1, It's a QD Tijicon Accupoint...works great on a 10.5" barrel. (1.5-4X) 2, I have a thigh-rig, with a suppressor pouch. Mounting it in the case saves lots of space. |
|
|
|
|
[#8]
These guys are great!!!!!! |
|
|
|
|
[#9]
Really nice write up. Only problem is this is 2 months too late for me. I totally screwed up the one I did for my laptop and printer. Oh well it works for now, I know what to do when I decided to redo it.
|
|
|
|
[#10]
Lol, I have them bookmarked already I thought maybe there might be another game in town |
||
|
|
|
[#11]
GREAT, INFORMATIVE POST! Thanks.
 |
|
|
|
[#12]
My new hero.
Thank you very much. |
|
|
|
[#13]
awesome thx |
|
|
|
[#14]
 I had rounded the sharp edges with a small butane torch on this project...gave it a softer look & feel. A sheet of foam keeps the items separate. |
|
|
|
[#15]
VERY nice write up! Thank you sir!
|
|
|
|
[#16]
very nice job well done
|
|
|
|
[#17]
Great write up. Thank you.
|
|
|
|
[#18]
First your pics and now this. What else do you have...???
Excellent post. MN |
|
|
|
[#19]
I don’t give a shit how you CUT your foam…………………………I wanna know how you afford all those toys to put IN your foam! Just kidding Mark, very nice write-up and VERY sweet toy box! |
|
|
|
|
[#20]
You should tell them you have your servant, Chuck Norris, stare at it until the foam pieces cut themselves out. |
|
|
|
|
[#21]
Very nice, Mark. |
|
|
|
[#22]
You'd be surprised what someone would pay for a 40 year-old kidney. |
|
|
|
|
[#23]
Super walk thru, I am glad you did this, as I am about to start my rifle case in a couple weeks.
|
|
|
|
[#24]
Good job on the write up!!!!
I vote for a Tack. Mods... what do you think? |
|
|
|
[#25]
+1 |
|
|
|
|
[#26]
Hey, I just happen to have an extra 40 year old kidney laying around, maybe I could cash it in! 
|
||
|
|
|
[#27]
What foam is that? Hi Densitiy closed cell?
|
|
|
|
[#28]
Dunno, It's whatever Pelican cases come with. (not sure what it's rated as). If cut correctly, the foam applies equal pressure on all the surfaces, and holds the items tight. It takes a bit of effort to push the items in-place, and remove them. |
|
|
|
|
[#29]
Any chance for a pic of the underside of the board so we can see how the wonder cutter was modified?
|
|
|
|
[#30]
From the looks of it he just made a new hook and relocated the battery pack underneath. I googled like he said and found this: Hot Wire Foram Cutter Also this if you want to go a little extreme. This a cool site: Just look. lol. |
|
|
|
|
[#31]
Tack it.
Nicely done. -MEI |
|
|
|
[#32]
Exactly... I cannibalized the battery pack and the bridge. I'll post pics, later tonight (I'm tied-up until around 9, this evening) |
||
|
|
|
[#33]
Awesome! This is a superb write up.
+1 on being tacked. |
|
|
|
[#34]
Pics of the back side...
 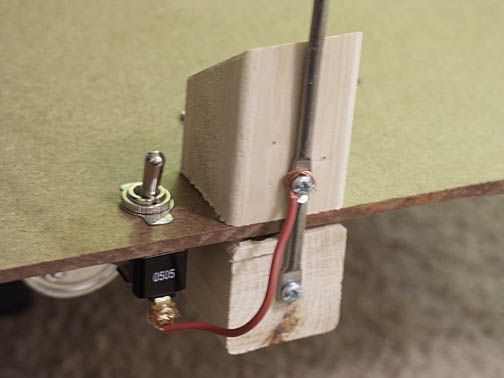  It may be crude, but it works great. (not like I'm making hundreds of foam inserts) |
|
|
|
[#35]
subscribed :) I'll have to redo my case sometime, it looks pretty ghetto!
|
|
|
|
[#36]
BTW,
By varying the length of wire from the battery case, you can control the heat of the cutting wire. ie; a longer wire will give you less heat than a shorter wire (allowing you to cut slower). |
|
|
|
[#37]
I thought that mine looked good...maybe I need to redo too.
|
|
|
|
[#38]
Nice setup!
|
|
|
|
[#39]
That is really good looking im going to have to try this myself. Thanks for writing a simple procedure.
I agree +1 for the Tack |
|
|
|
[#40]
thanks mfingar! nicely done.
|
|
|
|
[#41]
WOW, Out-Freaking-standing! Great Job!!!!
|
|
|
|
[#42]
|
|
|
|
|
[#43]
BTW,
You'll need to glue the cut out layer to the layer below it, if you want maximum durability. 77 Spray dried too fast for good adhesion. I used this stuff Tacky Glue with excellent results. Just run a bead (looks similar to Elmer's white glue) around the cut out shapes and press in place. It'll take about 24 hours to dry. Bestine Rubber Cement also works well. |
|
|
|
[#44]
Thats badass dude, I use a similar technique to cut foam blanks out of blocks to make surf boards..
On another note... where didy ou get those surpressors from? |
|
|
|
[#45]
Nice, I hope I have the patience someday to not do something half assed.
|
|
|
|
[#46]
+1 for the tack
|
|
|
|
[#47]
Yep...and this certainly deserves a tack..... |
|
|
|
|
[#48]
terrific writeup.
I wish I had thought of using the hot wire when I did mine a while back. I made the paper templates and went through a shitload of ex-acto blades to cut the foam. I was constantly reorienting to make sure I stayed at 90 degrees. And getting the proper curve radiuses with a blade was a real pain! Only my meticulous and stubborn nature and generous use of profanity got me through it. I'm gonna use the hot wire next time. I'd re-emphasize your comment about erring on the side of making the holes too small - that way you get a snug fit |
|
|
|
[#49]
Yep. By accurately tracing 90 degrees with a Sharpie, and cutting the template on the "inside" of the Sharpie line, you should be about 1/16 to 1/8" undersize all-around...very important. If the foam presses-in equally on all the edges, the "grip" is surprisingly strong, with minor compression of the foam. This translates to maximum protection. When I put my components in-place...there's a "shwumpf" feeling, and it takes effort. |
|
|
|
|
[#50]
Just a few thoughts for refining the interior case design.
I would suggest first laying all the equipment out in the case and closing it. Then test it for “balance” at the carry handle. Is the handle balance point forward or back heavy so your carrying/balancing most of the weight with you pinkie or index finger? For example, if you have 100 rounds of ammo, do you place it at the heel of the case or somewhere closer to the handle to “balance” everything in the case? Also if you are carrying a weapon, when opening the case can you with your “dominate” hand retrieve the weapon and have it function or do you need to turn it around and switch hands? And give some thought as to the order of components so they can “flow” from one to the other as needed or installed, rather looking around for the next thingie. Just a few thoughts. |
|
|
 Win a FREE Membership!
Sign up for the ARFCOM weekly newsletter and be entered to win a free ARFCOM membership. One new winner* is announced every week!
You will receive an email every Friday morning featuring the latest chatter from the hottest topics, breaking news surrounding legislation, as well as exclusive deals only available to ARFCOM email subscribers.

AR15.COM is the world's largest firearm community and is a gathering place for firearm enthusiasts of all types.
From hunters and military members, to competition shooters and general firearm enthusiasts, we welcome anyone who values and respects the way of the firearm.

Subscribe to our monthly Newsletter to receive firearm news, product discounts from your favorite Industry Partners, and more.
Copyright © 1996-2024 AR15.COM LLC. All Rights Reserved.
Any use of this content without express written consent is prohibited.
AR15.Com reserves the right to overwrite or replace any affiliate, commercial, or monetizable links, posted by users, with our own.


