|
[#1]
Quoted:
How on earth do you guys install the roll pin on your lowers for bolt catch??? I've always tape on the receiver, a small pair of vice grips, a tack hammer and a punch. Yet... No matter how careful I am, the punch and the tack hammer always tend to scratch up the area around the edge of the roll pin hole. So what method do you guys use? What tools? Any places that sell a punch specifically sized for this? Better hammer options? Safe to say... I just want my AR's to look KIND of pretty when i first build them.... sure, it'll only last a day or two till I go abuse them... but damn it, its gonna be a visual masterpiece for those few days! :D Thanks Gents! Clicky |
|
|
|
[#2]
|
|
|
|
[#3]
Try this. I'm doing a set of videos on how to assemble lowers without special tools.
|
|
|
|
[#4]
Adjustable pliers, electrical tape on the jaws, and squeeze the pin in. Couple little taps with a punch to seat it the last mm or two.
Same technique works well for the trigger guard pin. |
|
|
|
[#5]
I assembled 10-12 lowers using the taped up pliers method and it seemed like every time I put a small nick or scratch on every lower. Finally I bought some roll pin starter punches and the punch from Brownell link shown above. I couldn't believe how easy it was to install the roll pin using theses two punches. I always dreaded installing the roll pin until I got the right tools. Now it's a piece of cake.
|
|
|
|
[#6]
I use this punch ^^^ As you can see it's shaved on one side to allow the punch to stay centered on the pin. I drive from the muzzle end of the receiver. A few tips on the bolt catch install : Do before driving.... 1) Check the roll pin fitment through the bolt catch I want the catch to be able to be able to rotate on the pin. If the pin won't go through cull whichever part is out of spec. 2) Check the spring/detent bore for debris.....don't shove the detent in there as a gauge ! (you may not get it out without extreme pain) 3) Install spring and detent in the correct order 4) Using a "slave pin" (correct diameter drill bit shank) check the catch for proper function. 5) Use lube on the roll pin and roll pin bore 6) Tape up receiver for proctection 7) Using slave pin on opposite side, drive roll pin (I will lightly tape slave pin so it doesn't bounce out) 8) Congratulate yourself on successfully installing the bolt catch Edit: I wouldn't use a "tack" hammer.....too many hammer strikes would be required as well as too much head speed. Both of those could lead to collateral damage. As stated below, I swing a 22 oz daily, so I use my 16 oz finish hammer for driving RPs. It feels very light to me and has a superb handle, yet allows the type of impact that I want on the pin. |
|
|
|
[#7]
Quoted:
I assembled 10-12 lowers using the taped up pliers method and it seemed like every time I put a small nick or scratch on every lower. Finally I bought some roll pin starter punches and the punch from Brownell link shown above. I couldn't believe how easy it was to install the roll pin using theses two punches. I always dreaded installing the roll pin until I got the right tools. Now it's a piece of cake. This ^^^ And I swing a 22 oz hammer for a living so using punches is second nature. If you're more comfortable with the plier method, go for it. |
|
|
|
[#8]
Quoted:
I assembled 10-12 lowers using the taped up pliers method and it seemed like every time I put a small nick or scratch on every lower. Finally I bought some roll pin starter punches and the punch from Brownell link shown above. I couldn't believe how easy it was to install the roll pin using theses two punches. I always dreaded installing the roll pin until I got the right tools. Now it's a piece of cake. This..just did two at lunch. |
|
|
|
[#9]
i crush down the leading end of the roll pin a LITTLE BIT, then squeeze it home with channel locks that are wrapped with vinyl. never a scratch––––at least not yet LOL.
|
|
|
|
[#10]
Quoted: Try this. I'm doing a set of videos on how to assemble lowers without special tools. Nice video, thank you! Looking forward to your future videos on the lower. |
|
|
|
[#11]
Any difference between the aim surplus 4 punch set for $20 vs Brownells 5 punch set for $50 besides the extra punch?
|
|
|
|
[#12]
Quoted:
Any difference between the aim surplus 4 punch set for $20 vs Brownells 5 punch set for $50 besides the extra punch? When it comes to tools, you usually get what you pay for. Cheap punches tend to bend/break easily. If you plan to do more than 1 build I would recommend purchasing the better quality tools. Buy once, cry once... |
|
|
|
[#13]
I used one of those one time. It broke so I couldn't use it again. |
|
|
|
[#14]
The easiest, safest method is the slab side bolt catch punch.
The vice grip method works, but as at least one person has noted you risk scratching the left boss when the jaws eat through the protective covering on the pliers. Usually this goes unnoticed until you are finished - too late. The trick to any punch method is putting the front of the lower up against something solid (put a towel in between) so when you tap the roll pin punch it receives the force. If the lower is bouncing around while you are tapping it you're wasting the force and risking slipping off the pin. Also, start the roll pin through the right boss almost all the way through before you try holding the bolt catch, plunger and spring in place. |
|
|
|
[#15]
Quoted:
The easiest, safest method is the slab side bolt catch punch. The vice grip method works, but as at least one person has noted you risk scratching the left boss when the jaws eat through the protective covering on the pliers. Usually this goes unnoticed until you are finished - too late. The trick to any punch method is putting the front of the lower up against something solid (put a towel in between) so when you tap the roll pin punch it receives the force. If the lower is bouncing around while you are tapping it you're wasting the force and risking slipping off the pin. Also, start the roll pin through the right boss almost all the way through before you try holding the bolt catch, plunger and spring in place. Just hold everything in place with a slave pin. The shank end of the correct diameter drill works well. Hold it to the receiver with tape and the roll pin will chase it out from the beginning. I like to drive from the muzzle side....seems like there's more room on that side. |
|
|
|
[#16]
My lower is held in a vice with the block insert in the mag, I then insert a small roll pin punch on the barrel end of the lower to retain the bolt catch, spring and pivot pin. I then take the pin that gets driven in and gently give it a cone edge on a grinding wheel, then drive it in and catch the roll pin as it is driven out.
|
|
|
|
[#17]
If you are going to use pliers, use this type of pliers. The picture shown in another post above shows channel lock (type) pliers and vice grips have the same setup. I have assembled over two dozen lowers with these and have NEVER scratched one.
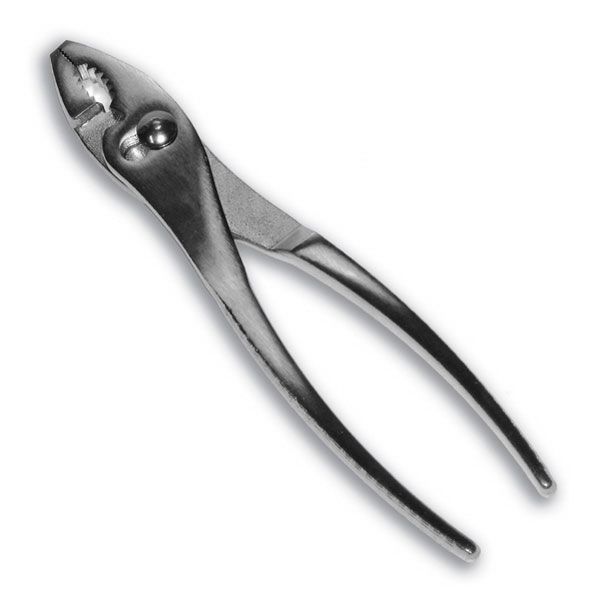
With channel loc or vice grip type you tend to "twist" the handles downwards (that's how they are built) and can scratch the lower before you know it. An actual set of pliers, as shown above, allows you to place even pressure on both sides directly above the pin. In my opinion and experience it is less likely to damage the lower this way. YMMV |
|
|
|
[#18]
I just assembled a lower last night, and the bolt catch roll pin went in with no drama as usual.
I have a punch I made from an injection mold ejector pin for gas tube roll pins that works equally well for the bolt catch pin. The punch is 3/32" diameter and 3" long, and has a 1/16" long pilot ground down on one end that fits inside the roll pin to keep the pin concentric with the punch, and makes it easy to keep the roll pin lined up with the hole. I put the lower on a rag on the workbench and wrap the rag over the front (hinge pin bosses) so that when the lower is slid up against something heavy on the bench (one less thing to hold), it doesn't bitch up the front of the receiver. I lay a rag over the rear of the receiver right up to the bolt catch boss. Because of the pilot engaged in the free end of the roll pin, it is possible to start the roll pin straight even with the end of the punch angled away from the receiver by tapping the punch with a hammer. I use a small ball peen hammer for this, just enough weight... roughly 1/2 the weight of a carpenter's framing hammer. I don't put the spring/plunger/catch in until the pin is far enough in to just start poking into the slot the catch will occupy. Once the end of the pin is slightly protruding into the slot, I install the spring/plunger and catch, then push the catch toward the rear of the receiver, at which point the pin engages a tiny bit into the hole in the catch. It is a little tricky to hold the catch and support the punch with the left hand for a swing or 2 of the hammer but that's all it takes for the pin to engage enough in the catch to then focus on driving the pin home. The lower I assembled last night had 24 hour old DuraCoat on it so I was a little wary as the finish doesn't reach full hardness for weeks but it doesn't have a scratch on it. Joe |
|
|
|
[#19]
This is how i did mine last weekend without any headaches. I made my own starter punch by drilling a hole in the end of a 3/8" bolt. The hole is off center and one edge of the hole is almost touching the outer edge of the bolt. The hole in the bolt is maybe 1/8" deep, and 1 drill size larger than the roll pin. The first hole I drilled was too tight and when I tried to tap the roll pin in it ended up getting stuck in the punch instead of pushing into the lower.
I assembled the bolt catch parts as usual and slid a drill bit into the hole from the barrel end of the receiver. I held everything in place, using a mag block in my vise. I began installing the roll pin using my homemade starter pin. SInce the hole is off center, I have clearance between the punch and the lower, but I did tape things up in case I messed up. As I drove the roll pin in, it pushed the drill bit out and everything stayed aligned. I finished up the last part by using a normal roll pin punch. I can post pictures of the punch if my description was not clear enough, hope this helps you out. Mark |
|
|
|
[#20]
Quoted:
If you are going to use pliers, use this type of pliers. The picture shown in another post above shows channel lock (type) pliers and vice grips have the same setup. I have assembled over two dozen lowers with these and have NEVER scratched one. http://i1092.photobucket.com/albums/i403/espos1111/pliers.jpg With channel loc or vice grip type you tend to "twist" the handles downwards (that's how they are built) and can scratch the lower before you know it. An actual set of pliers, as shown above, allows you to place even pressure on both sides directly above the pin. In my opinion and experience it is less likely to damage the lower this way. YMMV I've used both styles and it really comes down to which you're more comfortable handling. It's really important to keep the jaws as parallel to each other as possible for the initial push to minimize the possibility of slipping off the pin or putting sideways stress on it, so if you're usinf the standard-style pliers, open them up for the first squeeze. |
|
|
|
[#21]
1st time I think I just got lucky
 . I beat the shit out of it until it went in and not one mark somehow. . I beat the shit out of it until it went in and not one mark somehow.
2nd build the kind folks at CMMG preinstalled an extended catch for my 9mm lower |
|
|
|
[#22]
First I put strips of electrical tape on the lower to protect it(the whole side where the punch will be and the hammer swings). Then I lube up the pin holes and the pin itself. I then get a pair of needle nose pliers and small brass head hammer to start the pin in with light taps. Once the pin is started I put in the bolt catch spring, detent pin and bolt catch. While simultaneously holding the lower, bolt catch in place and roll pin punch on the roll pin I lightly tap it all the way through. Sounds difficult but is very easy. The tape and lube makes a world of difference for me. YMMV
|
|
|
|
[#23]
i put a slight bevel on the end of the roll pin.. just enough to let it seat into the ear a tiny bit and then use a punch to drive it thru.. .. ive seen several factory colts that have a tiny spot of paint where the punch scratched or dinged the finish when the roll pin was installed
|
|
|
|
[#24]
just finished my lower build for the first time and i feel your pain. i tried the vice grip trick (wrapped it with a ton of electrical tape on the frame and pliers but still managed to mare off the finish. man i was pissed. tried a hole punch and managed to rip the tip off stuck inside the roll pin...double pissed off. ended up saying damn it to hell and went back to the vice grip and muscle the thing in.
|
|
|
|
[#25]
Pliers
|
|
|
|
[#26]
if you mess up and scratch it, then you have a start on your "truck-gun", if you get it done with no scratch you have your start to your new A build.
|
|
|
|
[#27]
Everyone seems to be missing the best suggestion ! PAINT that bitch with some Camo or FDE !!!! Its a gun to be shot and used ! No matter how special we feel our builds are they will never be collector's pieces......... If your rifle don't have scratches and wear marks you aint doin it right !!!!
|
|
|
|
[#28]
Check this video, and get a pair of these pliers. I did and it makes installation a breeze.
Watch This |
|
|
|
[#29]
Expensive, but well worth it. I just used them on my first build (in progress) and I love these pliers.
Knipex pliers Edit: I just noticed that someone posted a video above my post showing the same pliers. |
|
|
|
[#30]
Just get the correct size roll pin punch, and bend it so that you can hit it from an angle. Works EVERYTIME and no marring up of the receiver.
|
|
|
 Win a FREE Membership!
Sign up for the ARFCOM weekly newsletter and be entered to win a free ARFCOM membership. One new winner* is announced every week!
You will receive an email every Friday morning featuring the latest chatter from the hottest topics, breaking news surrounding legislation, as well as exclusive deals only available to ARFCOM email subscribers.

AR15.COM is the world's largest firearm community and is a gathering place for firearm enthusiasts of all types.
From hunters and military members, to competition shooters and general firearm enthusiasts, we welcome anyone who values and respects the way of the firearm.

Subscribe to our monthly Newsletter to receive firearm news, product discounts from your favorite Industry Partners, and more.
Copyright © 1996-2024 AR15.COM LLC. All Rights Reserved.
Any use of this content without express written consent is prohibited.
AR15.Com reserves the right to overwrite or replace any affiliate, commercial, or monetizable links, posted by users, with our own.


