|
Posted: 1/10/2010 2:03:42 PM EDT
I posted this on a hunting forum due to all the people there asking me about how I camo my firearms. Thought I'd post it over here in case any of you guys have similar questions. Please post pics of your camo or paint jobs on your hunting firearms! I really enjoy seeing what other guys come up with.
**** There have been a number of questions here lately about camo when it comes to firearms. Everyone knows that wearing camo is important when you are out hunting, but for some reason that same consideration does not extend to their firearms. I have an entire section of my book dedicated to the proper use of camo, and part of it extends to firearms. I've not going to do a write-up of the advantages of firearm camo when hunting because that should be pretty obvious. What I am going to do is show you this picture, taken straight out of my book: 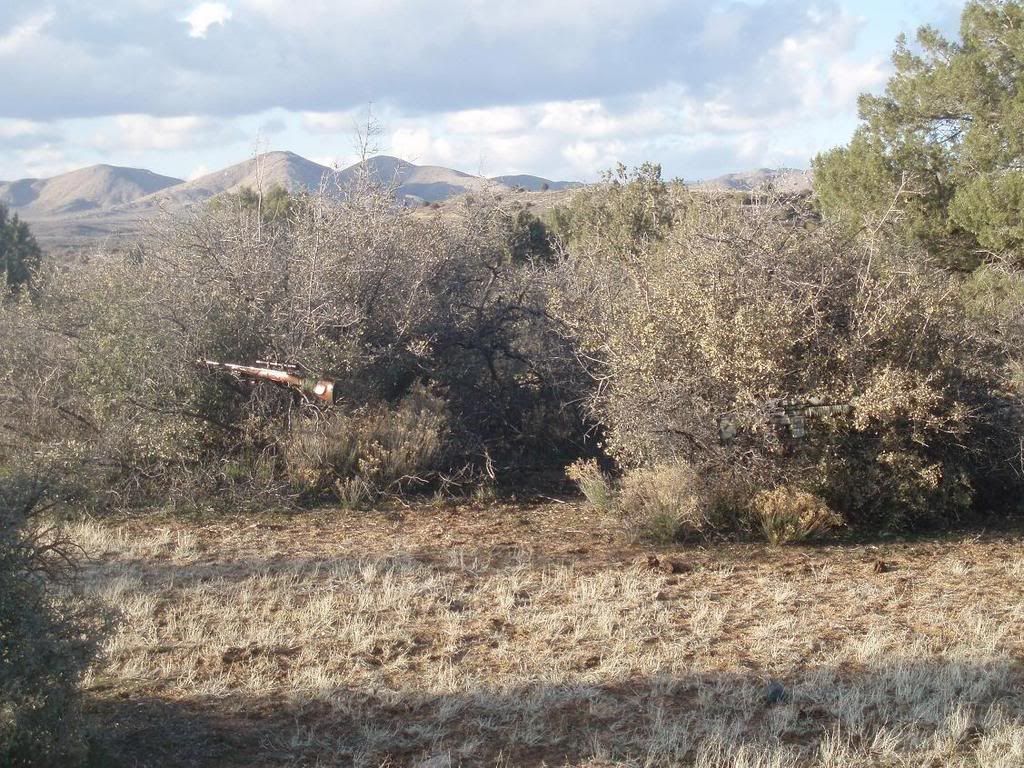
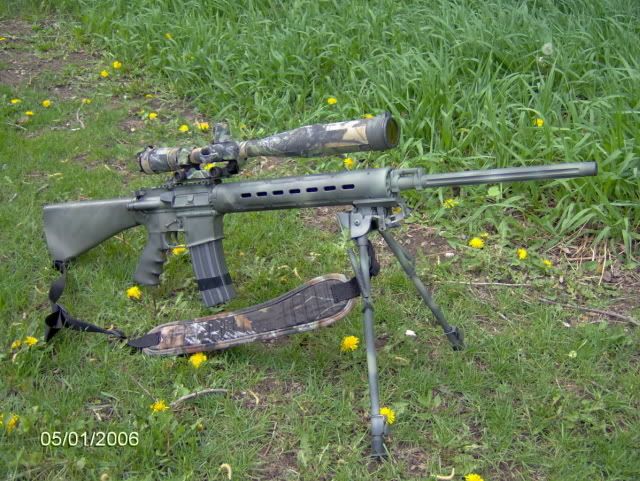
You see my really nice .308 in the bushes there? That thing is a real tack driver, and it's dropped it's share of animals to the dirt. But with a factory stock and no camo it really shines and says "hello - I'm something unnatural!" Now normally I have it draped in camo wrap, but for this picture I took it off to demonstrate how bad it sticks out. In the same conditions, did you even notice my AR in the bush at the right of the picture? Listed below are a few camouflage options for your favorite powder burner, and some advantages and disadvantages of each. Option #1 - Camo Wrap 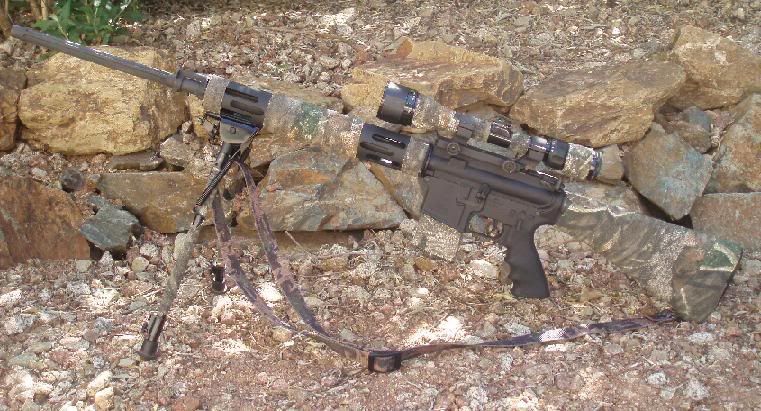
Probably the cheapest, easiest, and least permanent method. Wraps can be had in a few different forms, and you want to make sure you choose something that will not leave a residue. Heat wraps form to your gun with the assistance of a blow dryer and some patience, and then you'll need to trim the excess wrap when drying is complete. These can be a little pricey and a real pain to remove, and when they get scratched you'll need to replace the whole wrap, not just a segment. Probably the most popular type of wrap, however, is the "tape wrap", or the kind that comes on a roll. These types of wrap generally only stick to themselves, which is why they leave no residue on your gun. They are very simple to apply and most of all they are cheap! They come in a variety of camo patterns but also two different styles: the first is a soft tape (the best in my opinion) that easily conforms to contours and bends, like the setup shown above. The second is a more flat tape, like a paper tape. This is still better than nothing at all, but is really tough to apply evenly. For snow camo you can buy basic white Veterinarian's tape and apply it to your rifle or shotgun - this stuff is super cheap and will not leave a residue. Before you apply any type of camo wrap, you'll need to wipe off the surface of your firearm to remove dust and dirt, and then preferably degrease the area to be wrapped with a basic degreasing agent or gun cleaner. Doing this will give your wrap a better chance of staying on longer and conforming better. Once you have applied your wrap it is extremely important that you double-check your zero, as wrap can affect the harmonics of your barrel, especially if it is free floated. Make sure you do not wrap free-floated barrels tightly against the stock or receiver, or else you will eliminate the advantages of a floated barrel! Option #2 - Dipping 
When a firearm comes from the factory with that cool camo finish, there is a very good chance that is was dipped. Dipping consists of using a large sheet of film and applying it by "dipping" the item through the film and into a large container of liquid, utilizing the extreme pressures of water to make sure that every nook and cranny gets filled in. The item, in this case a firearm, is then removed and excess film is trimmed off. You can actually see these trim locations if you look hard enough on your factory gun. You can have this process done after you get the firearm, by someone like Hydro-Dip, but this option is probably the most expensive of them all. Dips are extremely durable, perhaps the most durable, but like a do-it-yourself heat wrap, once they get knicked or scratched there is no way to repair a small area. Any prep work needed for dipping is generally done by the company doing the work - all you have to do is ship your firearm to them. Where dipping really earns it's value is in small items like calls, scopes, and knives. But once a dip is on, it's pretty much on for life. Option #3 - Painting 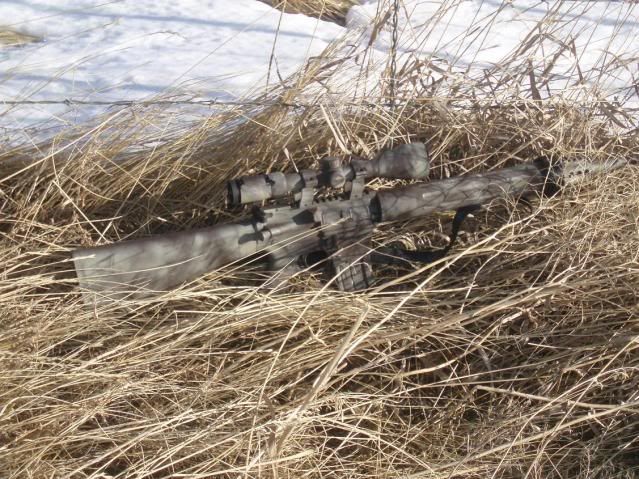
Painting your own firearm gives you complete control over design and color, and is really great for the do-it-yourself kind of guy (or gal). Painting can also be touched up at will, or changed completely, which is what I love so much about it. There are a few types of paint to choose from, and they break into two categories: airbrush and aerosol spray. Airbrush painting options include Duracoat and Cerakote. While these paints are the pricier of the two types, they are the most durable and offer the greatest quality and color selection. Obviously you'll need to have an airbrush setup in order to use them, which is something not everyone may have. Many companies offer amazing templates for Duracoat work, which could also be used for aerosol work, and they range from basic to really amazing. Visit DuraCoat Firearm Finishes for more info. 
Aerosol sprays are by far the cheapest way to paint, and if applied correctly they can also be very durable. After they have seen a few days in the field, if you feel you need to touch them up, then just grab a rattle can and get to work! This is the biggest advantage of this kind of camo job. You'll need to choose your color and brand of paint based on your local availability, or what you can find on the internet. I prefer Krlyon Camo and Rustoleum Camo because I have found these two brands to hold up the best in the outdoors, and they are both designed as matte colors so that they reflect as little sun as possible. Painting requires basic prep work, but it's easy. The process I am about to walk through took me less than 45 minutes to complete - but I was rushing on purpose to see how fast I could do it, and it was in the dead of summer when temps here are close to 100 degrees. Please note that each coat's drying time will vary based on weather and conditions - in the heat of the summer, this paint is designed to dry quickly and be used shortly after application, but in the colder winter months a coat may take an hour to dry completely. When I painted my first rifle I allowed each coat to dry for 12 hours, but many firearms later I have discovered that it is just not necessary to wait that long - when the paint loses it's tackiness, it's ready to go! And as a side note: the first time you hold a spray can above your valuable firearm to hose it down with paint, it can be a bit unnerving. But just get on with it - it will look better when you're done! I decided to turn my ordinary 10/22 into a camo-clad death machine! First I taped off everything I didn't want painted, like front and rear sights, scope lenses, actions, etc. Make sure you tape the barrel crown and muzzle because you don't want paint messing with that. You can also help make patterns with tape if you want to go that route. 
Once the taping is done, you'll need to remove dirt, dust, fingerprints, gun oil, etc with a degreasing cloth or a basic household degreaser. Doing this will help the paint stick better and longer. Allow any wet degreaser to dry, and then apply your first coat. Adding a primer will help the paint to stick better, but I usually just consider my first coat the primer. If you have little or no experience in painting, or you want to try out a pattern, practice your technique on a piece of cardboard or something that's not important, like AR mags. 
Make sure you are applying nice even coats, and don't spray too thick because you don't want a run or a droop in the paint - this looks bad and also weakens the overall paint surface. Apply your first coat, let it dry, then gently flip it over and cover the other side. Make sure to get all the nooks and crannies, and don't forget the top and bottom of the receiver! The closer you hold the can, the more defined the lines will be, and of course the farther away, the more the colors will blend. Your style is up to you - experiment a little before you paint the whole gun. 
You should already have your pattern and color layers chosen by now, and for this 10/22 I decided on the "pinestraw" method, which is using pine needles or an old whisk-style broom as a pattern. 

My first pattern color was brown, and once you remove the needles or straw you can always touch-up small areas that you may have missed or that may not have gotten covered enough. Time for the next color! 
When you are satisfied with your completed project, let it dry overnight someplace warm before taking it out into the field - but make sure the drying area has good ventilation because it's gonna smell a bit like paint. After drying, remove the tape and take her out for a spin! 
There are many ways to apply patterns - I have used cardboard cut stencils for tiger stripes or woodland patterns, I have wrapped rifles in rope for a simple outline breakup, and I have even used sponges dipped in paint to apply a polka dot affect - which looks really cool! If you decide you want to change your pattern or even remove the paint completely, you are in for some work. DuraCoat is much tougher to get off, and I recommend using the DuraCoat brand remover. Standard aerosol is a bit easier, and you can use carb cleaner or brake cleaner and just hose the majority of it off, scrubbing and wiping where needed. It's not an easy or fast process, but it can be done with no or very little damage to the original finish . . . . except on wood finishes. Plan on sanding and re-staining those. Here's a few different Krylon and DuraCoat patterns to give you some ideas: 


And don't forget that painting field equipment is a great way to break up its outline, and painting personal items is a fun way to add a little personality to your stuff! Here's my hunting ladder, painted with basic stripes using Krylon: 
And my glasses case - it just says "rizzo" all over it! I added an RMEF sticker to the paint job and then clear coated the whole thing: 
If you have no other reason to cover your favorite rifle, shotgun, or even handgun in camo, just remember this: camo guns kill more critters! 
|
|
|
|
[#1]
nice write up...thanks
|
|
|
|
[#2]
Quoted: nice write up...thanks +1 Personally, cloth camo tape is foolproof and hard to beat. The downside is that it can hold moisture and rust your firearm. Camo dip looks nice, but chips and scratches easily and still gives off glare when the sun hits it right. I prefer Krylon Camo on my shotguns, where I really feel the need for camo. Multiple light coats work well. If you apply it too heavily you can cause glare. My black rifles, not so much, as black absorbs light, and at the distances that they are employed, I don't feel a pressing need to break up the outline. All those ninjas can't be wrong!  
|
|
|
|
[#3]
Very nice pics. I typically wrap mine in several layers of "3-D" camo material. That is the kind with flaps cut in it so that it moves in the breeze.
I've been wanting to try painting one but haven't made the time. Your pics of painted rifles may push me to go ahead and do it. |
|
|
|
[#4]
|
|
|
|
[#5]
Sonoran Desert style.

Rizzo and the "straw camo" thread are to blame |
|
|
|
[#6]
Quoted:
Sonoran Desert style. http://i46.photobucket.com/albums/f110/vassili67/shotty/DSCN4756.jpg Rizzo and the "straw camo" thread are to blame Looks great! |
|
|
|
[#7]
Awesome write-up Rizzo!
Pic thread, so here's mine: (Krylon Khaki & Brown) 
(edited to add new picture) |
|
|
|
[#8]
Rizzo, thank you for posting this.
My problem is the "ideal camo" varies with season and region, with season being most important where I live. Around here (WI) you want to disappear in winter for coyotes, etc, to optimize pelt value, etc. So I pay attention to where each of the posters is from and relate their pictures to what I encounter. My point is, if people post they should tell why they painted their rifle in this way or that and give colors. Duracoat is nice, but Krylon is doable. I love this type of thread, it solves problems, answers questions, etc... if and only if (IFF) the poster gives more detail of who, what, where, when and why? And how? How did you paint it, color "x", with branch from neighbors tree, etc. Who = Jimmy from CO, what = coyotes/?. when = Nov-March, where = your region,. why = because it is fun and we all know that. I personally need to see more snow/brush patterns to freelance off of. So if you have them, please share. Thanks. |
|
|
|
[#9]
Quoted:
My point is, if people post they should tell why they painted their rifle in this way or that and give colors. . I think the most important part is breaking up an outline. Color is secondary. 

Combinations of light and dark colors give depth and can really trick the eye. IMO 
|
|
|
|
[#10]
We get our fair share of snow here in northern AZ (don't laugh, we do) but I don't bother much with getting too crazy in white camo 'cause I can still always find a green or brown bush to snuggle up against. I have seen plenty of guys wear those mil surp white ponchos and use white camo tape on their rifles. I decorated mine one year with the veterinarian's tape you can pick up for about $3 a roll - comes right off, no residue. Regular medical tape works too. I don't have enough snow in my usual stomping grounds for long enough to dedicate a camo setup to it.
These are not my ARs - some belong to guys here on ARFCOM and others to guys from other forums, but I think they will give you some good ideas on pattern. The first two seem to be done with Krylon and easy patterns. The last one is a pro job but it's a DuraCoat template if you wanted to get it. I also posted some great snow camo pics - the first is Grouse Wing winter camo and the second is Predator winter camo. Hopefully these give you some good ideas. I like this pattern, but it needs an all-over job done. 

This pattern would really break up your outline - and the seal hunting story is here. 

Pro job - more of an urban camo, but change a few colors and you're in business. 
Grouse Wing winter camo 
Predator winter camo 
|
|
|
|
[#11]
Holy crap Glen! I hope that seal was in season!
|
|
|
|
[#12]
Well you know, we've got a big seal problem here in AZ so there is no bag limit during the summer time - the little suckers are very destructive to the native cacti.
|
|
|
|
[#13]
i have a quick question. i have the R-15 vtr stainless barrel 24''. i have never painted a gun before, but i just painted my bi pod and my mono pod and it is kinda addicting. have you heard any downs to painting your barrel? so long as the muzzel is covered it should be fine, right?
http://i1034.photobucket.com/albums/a430/retreaver/0227101245.jpg http://i1034.photobucket.com/albums/a430/retreaver/0227101226.jpg my bipod |
|
|
|
[#14]
Bipod looks good, man! There are no downsides to painting a barrel - just make sure you cover the muzzle, as you said. I paint the barrel on any gun I paint; just make sure you double-check zero afterwards.
|
|
|
|
[#15]
awesome! thank you very much for the info, and the compliment. hehe.
|
|
|
|
[#16]
Great information!
Okay, so was I the only one looking for a person holding the rifles in the first picture rizzo posted in this thread? |
|
|
|
[#17]
Everything I needed to know about painting camo I learned from "Shooter".
Nice jobs guys. |
|
|
|
[#18]
Quoted:
Great information! Okay, so was I the only one looking for a person holding the rifles in the first picture rizzo posted in this thread? Yeah I wish my camo was that good! The real question is - how long did you look for? |
|
|
|
[#19]
here it is after i painted the barrel. i really like it. sorry for crappy phone pics.
http://i1034.photobucket.com/albums/a430/retreaver/0302101705.jpg http://i1034.photobucket.com/albums/a430/retreaver/0302101705a.jpg |
|
|
|
[#20]
Looks good - you gonna do the receivers as well?
|
|
|
|
[#21]
i think i might
|
|
|
|
[#22]
Quoted:
Quoted:
Great information! Okay, so was I the only one looking for a person holding the rifles in the first picture rizzo posted in this thread? Yeah I wish my camo was that good! The real question is - how long did you look for? Uh...ummm...uh, just a few seconds 
|
|
|
|
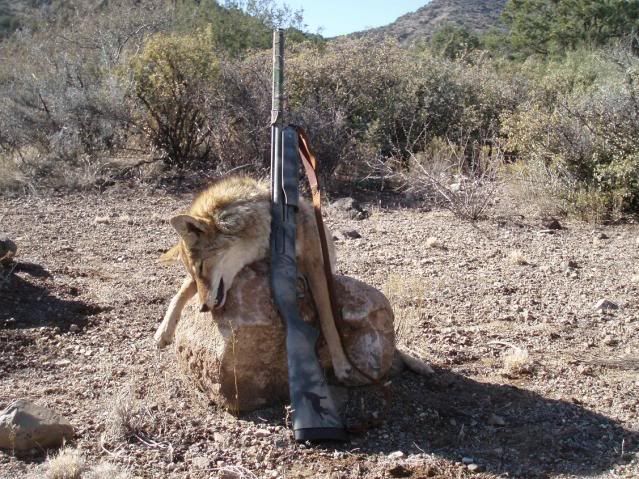
[#23]
I camouflaged my Beretta CX4 to match my dog!
does this count!? 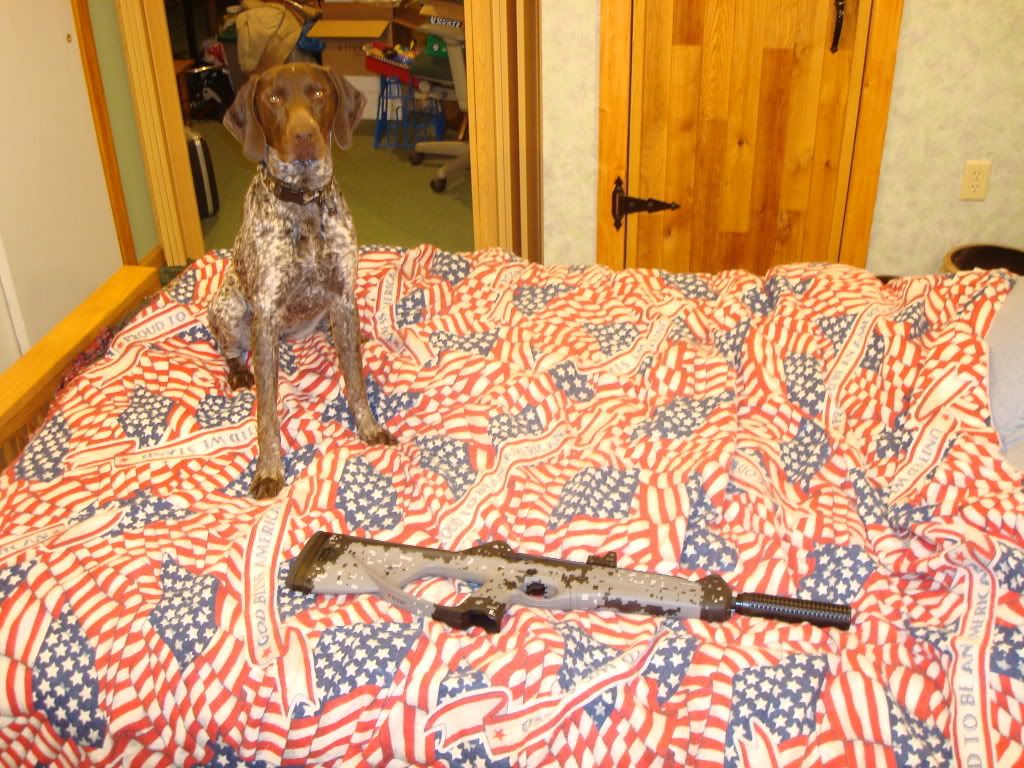 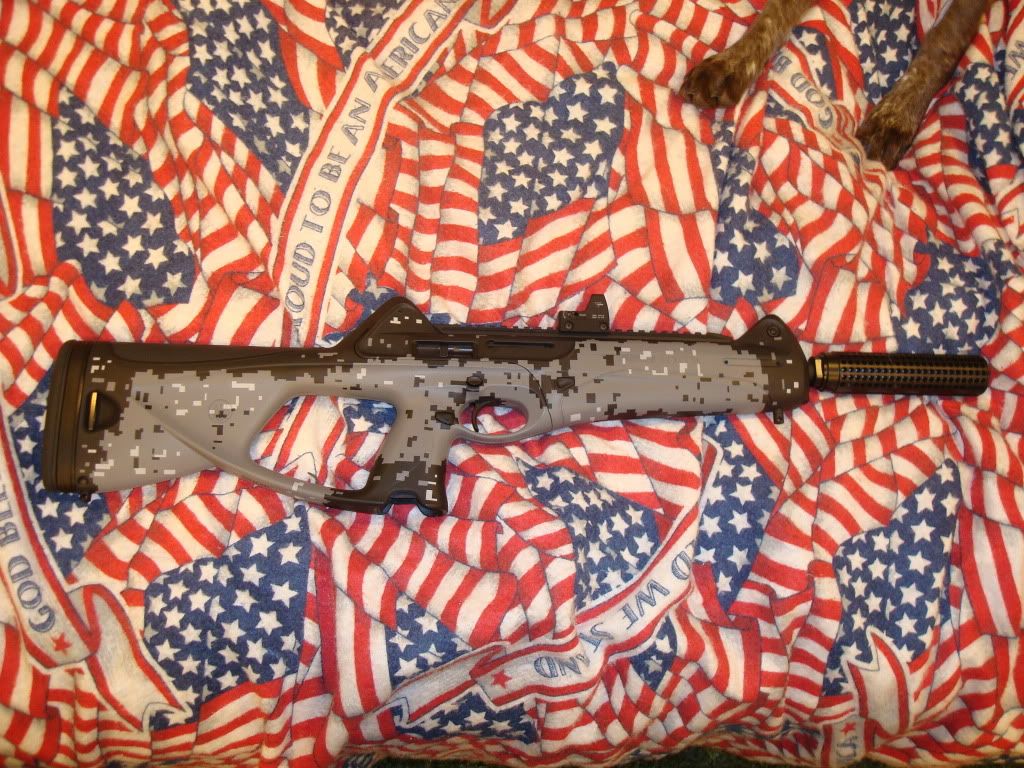
|
|
|
|
[#24]
Quoted:
I camouflaged my Beretta CX4 to match my dog! does this count!? http://i557.photobucket.com/albums/ss11/armedpete/MyARs2003.jpg?t=1267900869http://i557.photobucket.com/albums/ss11/armedpete/MyARs2005.jpg?t=1267900702 You did a great job of taping your dogs head. I don't see any paint on it at all. Thanks Rizzo. Someday I will break down and buy that book. |
|
|
|
[#25]
The Krylon Varminter when the underbrush is still green
And when the underbrush starts to dry and brown up. Minus the other black one of course. 
I really like the loose burlap on it for the 3D effect |
|
|
|
[#26]
I'd like to see that 3D burlap out in the brush . . . . looks good.
|
|
|
|
[#27]
Quoted:
I'd like to see that 3D burlap out in the brush . . . . looks good. I'll try to get a pic of it the next time I have it out. Well and once winter is finally over and the snow is gone. |
|
|
|
[#28]
Have you guys been over to the "Pinestraw" thread yet? Pinestraw strikes again!
It's worth a good look, especially some of the more recent posts. The Pinestraw method is becoming my favorite method for painting guns. |
|
|
|
[#29]
Quoted:
Have you guys been over to the "Pinestraw" thread yet? Pinestraw strikes again! It's worth a good look, especially some of the more recent posts. The Pinestraw method is becoming my favorite method for painting guns. Why oh why did I tag these 2 threads.....now I have a kahki ar15, a couple of "test" magazines 6 different kinds of flat krylon paint....and a cut up broom that donated its life for this project I'll get some pics up when its all done...thanks for the great tip and info rizzo! edit pics are up! I still have OD green and brown on my fingernails but shes finished......decided to do my shooting/ walking stick too..there are 5 different colors on there Khaki base coat OD green, dark brown, boot brown and some touches of grey primer to help blend in with the local trees. and of course the standard coyote footprint... right after the khaki base coat which ended up being too light for my taste so before adding the straw I misted the whole rifle with the OD green to darken it up. now later this fall and winter I will lighten it up with a little more khaki...thats the great thing about spray paint you scratch it up just respray..need to change the color scheme just respray.... 

even in this shot its still a little too light so I added a little more color to it 
a little more addded to the right side and the top of the rifle and scope to finish it off.. 
|
|
|
|
[#30]
I'm bumping this thread because I replaced my old pictures on the previous page & it's worth a look for those who haven't seen it yet.
|
|
|
|
[#31]
I stopped going to the refinishing forum so I didn't paint a rifle. Everytime I see one I want o run to the store and buy then bust open the safe and start painting. I have resisted the desire to everytime. Now that I am thinking of yote hunting you guys are making it a lot harder.
One day I will. MAHA |
|
|
|
[#32]
My long range/ Varmiter.
Valspar paints and pinestraw.     |
|
|
 Win a FREE Membership!
Sign up for the ARFCOM weekly newsletter and be entered to win a free ARFCOM membership. One new winner* is announced every week!
You will receive an email every Friday morning featuring the latest chatter from the hottest topics, breaking news surrounding legislation, as well as exclusive deals only available to ARFCOM email subscribers.

AR15.COM is the world's largest firearm community and is a gathering place for firearm enthusiasts of all types.
From hunters and military members, to competition shooters and general firearm enthusiasts, we welcome anyone who values and respects the way of the firearm.

Subscribe to our monthly Newsletter to receive firearm news, product discounts from your favorite Industry Partners, and more.
Copyright © 1996-2024 AR15.COM LLC. All Rights Reserved.
Any use of this content without express written consent is prohibited.
AR15.Com reserves the right to overwrite or replace any affiliate, commercial, or monetizable links, posted by users, with our own.


