|
[#1]
damp q-tip rub lightly working your way out from the lettering
|
|
|
|
[#2]
get a box of crayolas and a hair dryer
|
|
|
|
[#3]
thats the answer I was looking for, I knew it was something to do with crayons. Can someone give me a quick runthrough on how to go about doing it?? Thanks!
|
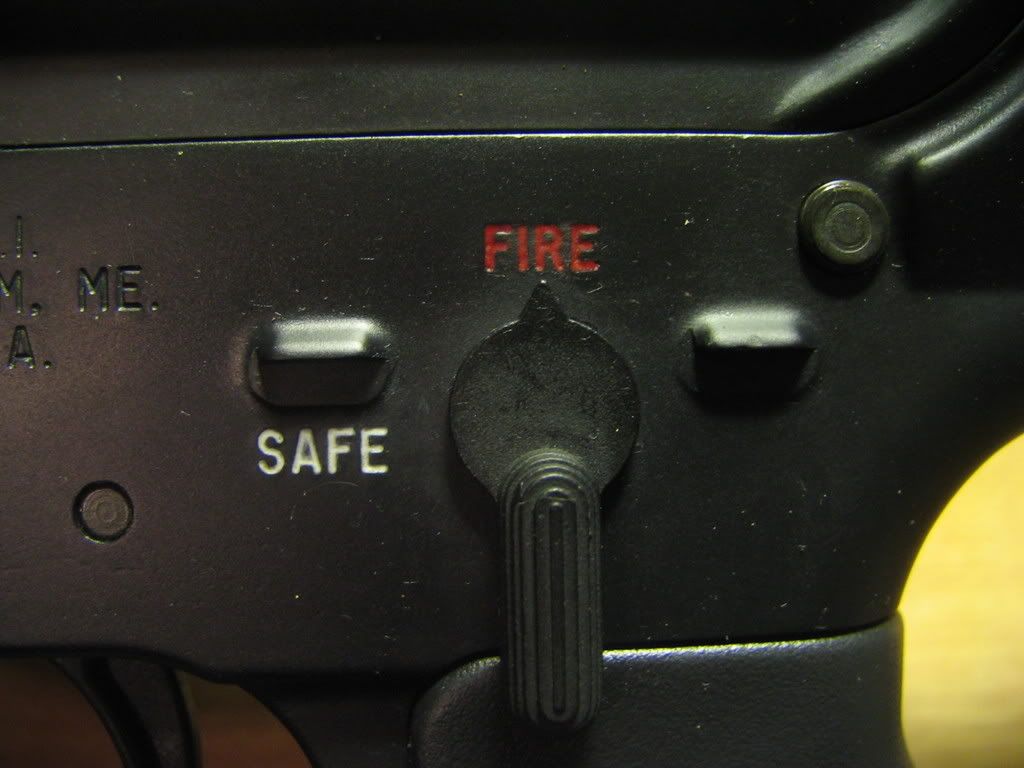
|
|
|
[#4]
I see your Crayolas and raise you a bottle of Testor's enamel...

|
|
|
|
[#5]
always have better results, and lasts longer. |
|
|
|
|
[#6]
+1 
|
|
|
|
|
[#7]
How do you keep get the paint off of the surrounding area?
|
|
|
|
[#8]
+1 I am curious too. |
|
|
|
|
[#9]
I am curious of that also.
|
|
|
|
[#10]
+1
|
||
|
|
|
[#11]
I did mine last nite and gonna do my son's rifle tonite I used water washable craft paint, I took a tooth pick dabbed it in the etching then took a damp paper towel and wiped the excess away,I figured that if crayons worked craft paint would be better than that, but probaly not as good as testors,only time will tell how long it will last but water clean-up is easy.
|
|
|
|
[#12]
I used grease pencils and so far, mo problems with the stuff falling off. Pretty sturdy and the excess is eqasy to remove.
 
|
|
|
|
[#13]
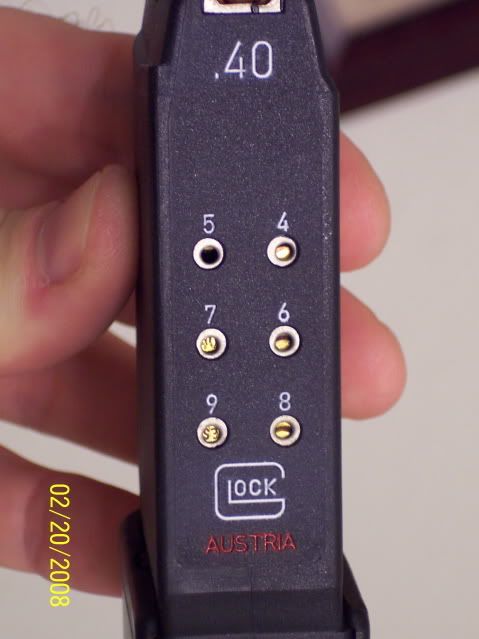
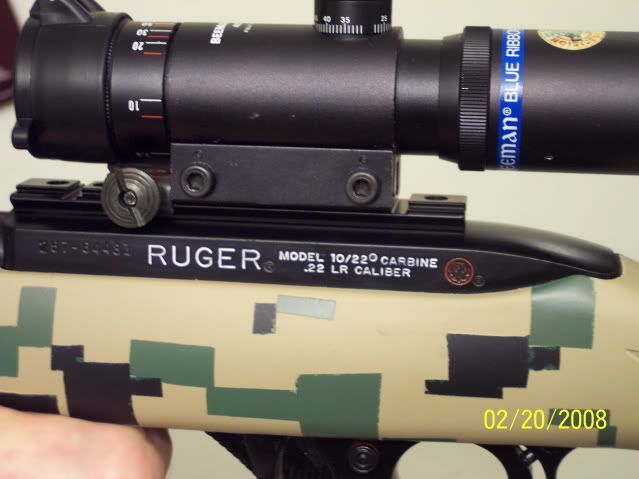
I did my Glock yesterday using a $1.90 bottle of Plasti-Kote "Insignia Red" and a "Gloss White" from Wal-Mart.
Looks real nice. Did my 10/22 also. Will have to post some pics to the refinishing forum when I get around to it. |
|
|
|
[#14]
Crayons are easier and seem to hold up quite well.
|
|
|
|
[#15]
The grease pencil looks good,I like the bright colors.
|
|
|
|
[#16]
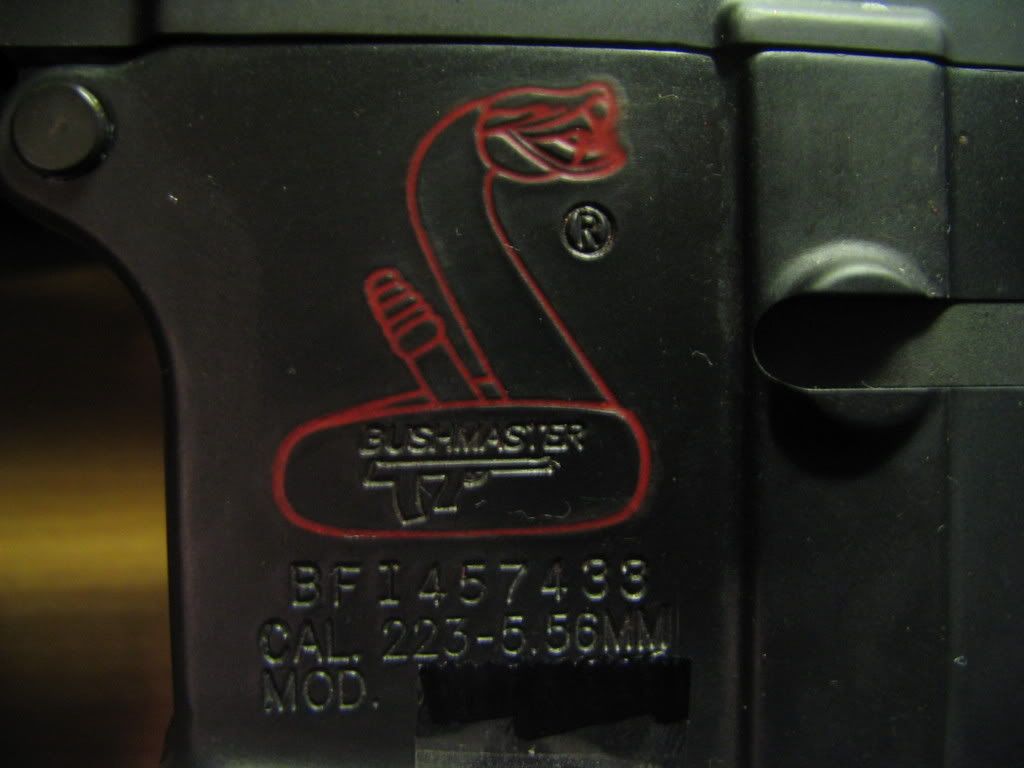
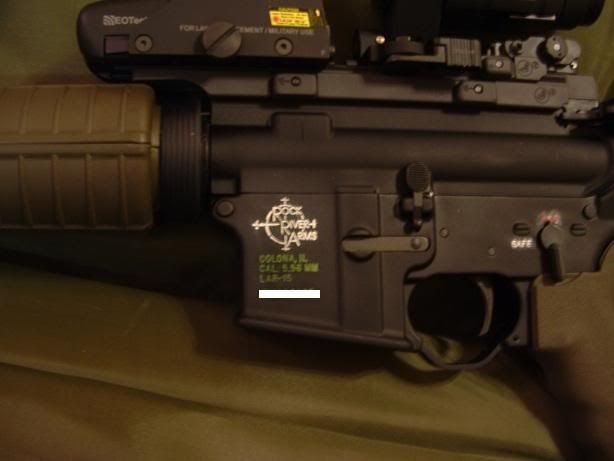
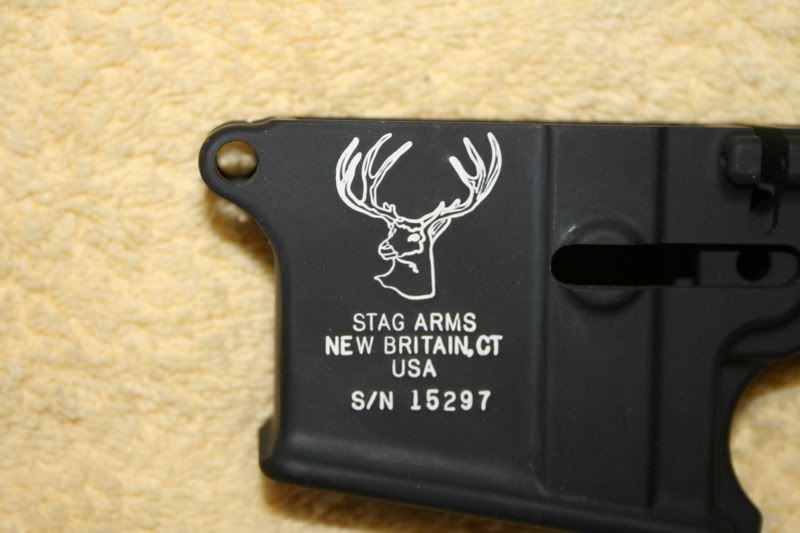
Nope. Good crayon jobs I have seen were done by cramming the crayon in to the rollmarks, carefully scraping away all the excess wax, then using a heat gun to warm everything up until it flows well. The paint method is so simple it is funny. You literally get a drop of paint on a toothpick, then just barely touch the drop to the rollmark. The paint instantly fills the rollmark like water running down a gutter. The only "wiping of excess" needed is just the spot on the receiver where you touched the drop to the rollmark. That's it. It wipes off with a shotgun patch moistened with CLP. The Bushy lower I posted above was done in about 2 minutes from start to finish... |
|
|
|
|
[#17]
All of this sounds good and I want to do it, but what is the life on each method. Will it come off when solvent gets on it, how often does it have to be redone. What about heat shooting at the range. I like to take a good hour or two cleaning my AR, because I'm a freak!, always giving the outside a good Rem oil rub down.
|
|
|
|
[#18]
The rollmarks are deep enough that wiping the receiver with solvent doesn't really upset the paint. My rifles are used at indoor and outdoor ranges only, and don't get dragged through mud or water like duty weapons might. A simple wipe-down is all that is usually needed to clean the surface of the lower. If any paint comes off (hasn't yet), it is easy to touch up. Besides, who paints the rollmarks on a duty gun?
You could seal in the Testor's paint with some clear nail polish or other lacquer paint, but I like to have the option of removing all the paint if I want to. This is easily done with some paint thinner and a toothbrush... |
|
|
|
[#19]
Thanks FYRARMS
and yes it is going on my duty/ instructor rifle, I just want to be the baddest looking mo fo out there |
|
|
|
[#20]
LOL!
|
|
|
|
[#21]
Now this is some good ifo. Thanks bin kicking it around to do some my self.
|
|
|
|
[#22]
+1 |
|
|
|
|
[#23]
Testor paint is the only way to go imo...
|
|
|
|
[#24]
Yeah, I was surprised at how easy it was to do a professional-looking job. FWIW, I found it easier to use paint rather than crayons. I've done both. |
|
|
|
|
[#25]
IF your lower is hard black annodized, (MOST ARE) you can remove the excess paint residue with a fine scotch brite (WHITE) and a little alchohol. the annodize shouldn't scratch. if it does, you are using the wrong Scotch Brite. This might work on composite too but I dunno. The paint on the tooth pick method sounds like the best method. |
|||
|
|
|
[#26]
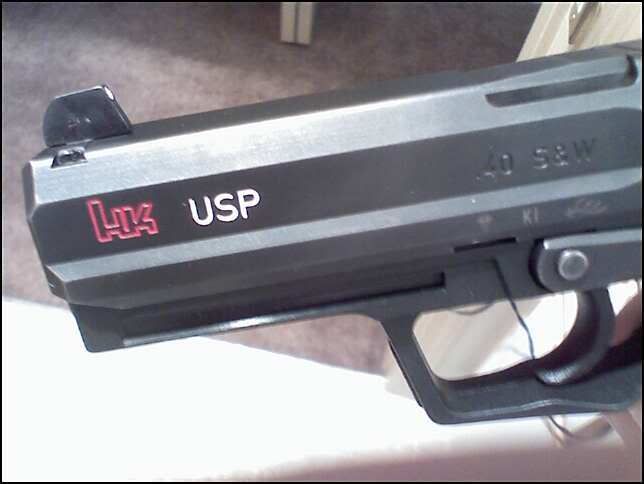
What do POF and the real H&K use? |
|
|
|
[#27]
A couple recent projects using Plasti-Kote paint from Wal-Mart:
|
|
|
|
[#28]
The best way is to let it dry for only about 10 minutes and then just buff it out very lightly with a shotgun pad using a drop of CLP and a drop of paint thinner. buff in a circular motion and do it very very lightly. use a tooth pick to scrape off any thicker stuff 1st. Apply the paint with a very fine paint brush; i tried tooth pick and it didn't work so well for me... |
||||
|
|
|
[#29]
crayons and about 5 min. I tried whiteout but crayons were better...
http://img142.imageshack.us/img142/2940/cimg3551bv9.jpg http://img142.imageshack.us/img142/7091/cimg3550ku3.jpg |
|
|
|
[#30]
http://www.brownells.com/aspx/NS/Store/ProductDetail.aspx?p=7778
LACQUER-STIK Hi-Lights Engraving, Stamped #'s And Names Highly specialized compound wipes on to bring out stamped or engraved impressions on ALL smooth surfaces. Ideal for guns, parts, accessories. Semi-solid in stick form when used, but soon hardens and becomes permanent. SPECS: 4-5/8" (11.7cm) long. Red, White, Gold, Black or Silver. I use these from Brownells, haven't had any problems with them |
|
|
|
[#31]
This is what I did, but I got my lacquer sticks from a local hobby shop. Total came out to ~$5 Here's my result:  |
|
|
|
|
[#32]
not to thread jack, but how do you preform each method, I understand the tooth pick just not the crayons and such.
|
|
|
|
[#34]
wellll i tried the dipping a tooth pic in the paint method and it worked ok....but does someone want to explain to me why part of it turned pink...............................the rest looks kinda sloppy cause i was wiping it off trying to get the pink out. http://img.photobucket.com/albums/v680/FerShazzle/P1010007.jpg
|
|
|
|
[#35]
Crayola time!
|
|
|
|
[#36]
You guys are surely tired of my photos, but here is my Testor's work again...
  
|
|
|
|
[#37]
yeah...the testor's looks like a good idea. what do you use to apply it? just a toothpic?
|
|
|
|
[#38]
Toothpicks wouldn't give me a big enough droplet, and the drop wouldn't stay on the tip very long without falling off early. I ended up using "microbrushes", which will hold a drop of paint all day until you touch the drop to the receiver. Works perfectly! 
|
|
|
|
|
[#39]
Quoted:
You guys are surely tired of my photos, but here is my Testor's work again... www.imageviper.com/displayimage/99411/0/testors7.JPG Looks real good.  |
|
|
|
[#40]
try this out
http://www.micro-tools.com/store/item_detail.aspx?ItemCode=L51120 |
|
|
|
[#41]
mmk. that sounds like a good idea. thanks! i was havin a little trouble with the toothpics anyways. as you can see the spike's symbol is pretty intricate... |
||
|
|
|
[#42]
However I would expect the Crayons to not be very durable. Crayons begin to melt at only 105° Farenheit (according to Crayola). I can leave a crayon outdoors in the summer and when I come back it'll be a puddle of liquid wax. Maybe it's just me but I don't want ANY part of my gun melting just from outdoor temperatures. Even if it's a superficial part. |
|
|
|
|
[#43]
Check my Bushy pic above. The rollmarks are very shallow and thin. The Testor's filled them up nicely. You can even make out the small Bushmaster text and trigger on the bullpup rollmarks inside the snake logo. |
|
|
|
|
[#44]
|
|
|
|
[#45]
I use the brownells lacquer crayons and they work great. Just need some mineral oil to remove the excess
|
|
|
|
[#46]
  ETA- LOL!  Crayola Crayola
|
|
|
|
[#47]
I tried to do my RRA today with the Testers paint. Didn't go so well. I bough thte smallest brush they had at teh Hobby store but when te drop filled in the "S" in Safe, it went outside of the engraved sopt. I cleaned it all up but I'm not sure what to try next. They didn't have any of those microbrushes. So would a toothpick be my next best thing??
Also, I have an older RRA (early 2003) and the engraving on the name is not as deep as the SAfe and Fire. Any tips on how to do it? |
|
|
|
[#48]
a) That's okay if it goes outside the grooves. If you have Q-tips handy, use one like a sponge and touch the excess paint in and around the "S". It will remove a lot of it. b) Dampen (not soak) a shotgun patch with CLP and lightly wipe the residue off of the receiver surface. The only paint left should be inside the "S". |
|
|
|
|
[#49]
How long does the Testor's paint have to dry before removing excess?
|
|
|
|
[#50]
Well, I tried again today. I started with Safe again. Did better using your tips. Unfortunately as I said in my other post, my Rock River Arms text is very shallow on some parts so it looked horrible. So I just removed everything. Guess I need to start looking for another lower. hahhaha |
|
|
|
 Win a FREE Membership!
Sign up for the ARFCOM weekly newsletter and be entered to win a free ARFCOM membership. One new winner* is announced every week!
You will receive an email every Friday morning featuring the latest chatter from the hottest topics, breaking news surrounding legislation, as well as exclusive deals only available to ARFCOM email subscribers.

AR15.COM is the world's largest firearm community and is a gathering place for firearm enthusiasts of all types.
From hunters and military members, to competition shooters and general firearm enthusiasts, we welcome anyone who values and respects the way of the firearm.

Subscribe to our monthly Newsletter to receive firearm news, product discounts from your favorite Industry Partners, and more.
Copyright © 1996-2024 AR15.COM LLC. All Rights Reserved.
Any use of this content without express written consent is prohibited.
AR15.Com reserves the right to overwrite or replace any affiliate, commercial, or monetizable links, posted by users, with our own.


