WV, USA
|
[#1]
|
|
|
TX, USA
|
[#2]
If you remove the break from a 16" barrel does the replacement break have to be permanently fixed, or is it not necessary since the barrel is 16" to start with?
|
|
|
|
[Last Edit: FALARAK]
[#3]
As long as you are sure the barrel 16", the brake does not have to be permanently attached. If your original muzzle break was permanently attached, it would be because it was made during the ban, when threaded barrels were a no-no. The permanent attachment was for AWB ban compliance. As long as you live in a state that does not have any sort of replica ban (TX does NOT), then there is no need to have any muzzle device attached permanently, provided your barrel is 16" or longer. |
||
|
|
|
[#4]
Tag.
|
|
|
|
TX, USA
|
[#5]
Where is the above mentioned guide to building a complete upper? I can't find it in this post. cb |
|
|
|
|
[#6]
That didnt mean building a complete upper *receiver* from a stripped receiver - that meany building a complete *upper*, which is the barreled receiver. |
|||
|
|
TX, USA
|
[#7]
Well, knock me over with a feather - Since when does a complete upper only mean a barreled receiver? Guess I had better go back to screwel and learn to read minds.
cb |
|
|
|
[#8]
tag for future reference.
|
|
|
|
IN, USA
|
[#9]
|
|
|
MO, USA
|
[#10]
One of my officers brought in an upper from a AR pistol he has. He wants to install a YHM ultra light 4 rail handguard in place of what is currently installed.
It currently has a 4 rail gas block that I am not familiar with. I can find the gas tube pin, but I cannot find any other taper pins holding the GB in place. I suspect there's more than just a little locktite involved in keeping it in place. http://pg.photos.yahoo.com/ph/nturavrgcop/detail?.dir=/10a1&.dnm=e3bb.jpg Over all shot http://pg.photos.yahoo.com/ph/nturavrgcop/detail?.dir=/10a1&.dnm=399d.jpg&.src=ph Shot of Gas Tube Pin http://pg.photos.yahoo.com/ph/nturavrgcop/detail?.dir=/10a1&.dnm=9208.jpg&.src=ph Bottom of Gas Block. There appear to be two holes, but for the live of me and my limited vision, I do not see any taper or other form of pins. Anyone have experience with these? |
|
|
|
[#11]
Bump to add new section on SPR project build.
|
|
|
|
|
[#12]
Tag
Thanks for all the good info  |
|
|
|
RI, USA
|
[#13]
Just built my first lower. Thank you Falarak, I could not have done it without you. You made it seem easy, It only took 45 minutes and I was taking my time.
You rock!!! 
|
|
|
NV, USA
|
[#14]
quick question but what is the most acceptable way to install a flash hider permanently?
|
|
|
|
[#15]
tag since I am building a pistol AR with my stripped lower.
|
|
|
|
|
[#16]
 Quoted from page 1 for the reading impaired:
|
|||
|
|
|
[#17]
+1 |
||||
|
|
|
[#18]
tag for all of the great build info
|
|
|
|
|
[#19]
I have been wanting to rebarrel my AR15. Thanks for the information.
|
|
|
|
KY, USA
|
[#20]
Sorry for being such a newbie, but do you really need the stock tool when installing an A2 stock into the lower? I'd rather not waste the $8 if it isn't necessary. Thanks guys.
|
|
|
TN, USA
|
[#21]
|
|
|
|
[Last Edit: FALARAK]
[#22]
No - the stock tool referenced on page 1 is for the carbine stock castle nuts. To install an A2 stock - you just need an ordinary wrench to install the buffer tube, and a philips or slotted screwdriver to attach the stock. |
||
|
|
KY, USA
|
[#23]
Thanks FALARAK!
|
|
|
|
[Last Edit: Carphunter]
[#24]
I thought I've seen a post somewhere where these fine instructions had been compiled into a printer-friendly pdf. Or am I missing a post in this thread?
Well never mind I guess... I got mine assembled tonight without incident. Didn't launch any detents... but have a few choice words for the hammer pin, bolt release pin, and trigger guard pin :) |
|
|
|
|
[#25]
tag
|
|
|
|
|
[#26]
I didn't see this in the other pages so I thought I might add it. I just finished my first lower (sans stock since I'm still trying to decide what I want). I was a little nervous about launching the detent spring for the pivot pin so I setup a white grocery bag and aimed it in there just in case. My tip, though, is to just use your finger to start the pin and once you have it a little ways in the hole, use a small flat tipped screwdriver to compress it the rest of the way as you push the pin into position. Hope this helps someone. No detents were harmed during the buidling of this lower.
|
|
|
|
|
[#27]
I've used a razor blade instead of a screwdriver tip. Made a small dent in the blade with a nail that held the detent in place, was still enough room to slide the pin in over it and remove the razor. 
|
||
|
|
|
[#28]
Wow, that was easy...
Pics to come... |
|
|
|
|
[#29]
Look forward to it! |
||
|
|
CO, USA
|
[#30]
Are there any guides/instructions for assembling a stripped A2 upper in addition to the barrel assembly?
|
|
|
|
[#31]
|
|
|
|
|
[#32]
tag
|
|
|
|
TX, USA
|
[#33]
I would like your advice as to how to go about installing a Daniel Defense 12.0 FSP on my M4gery.
Here is a link : Daniel Defense 12.0 FSP I can only imagine that I will have to take the barrel and FSB off, remove the delta ring assembly and then install the rail and FSB at the same time. Is this correct? I appreciate any advice you may have on this. Thank you. |
|
|
|
[#34]
tag
|
|
|
|
|
[#35]
Thank you very much for the info. Been looking for quite some time. |
||
|
|
NC, USA
|
[#36]
i just got done assembling my M4gery, and it took me a total of an hour to get the entire lower assembled, not a hitch, and these instructions are just awsome, thanks guys.
|
|
|
MA, USA
|
[Last Edit: djsmiles]
[#37]
as i have never put together an AR before, i was wondering if you have instructions for putting together an A2 upper? you know, the A2 sight, forward assist, and dust cover. it looks rather easy, i just want to make sure i'm doing it right. thanx in advance.
|
|
|
TX, USA
|
[#38]
Is it sort of normal for the bolt release to bind on the hammer when the hammer is up?
Or do I just need to lubricate it? So far, so good. |
|
|
|
[#39]
Not really. Typically the bolt release will bind in two common areas... 1. The hole for the roll pin in the bolt release is not drilled out large enough. The roll pin should pass freely through this hole, and often the bolt release is out of spec. This causes the bolt release to be sticky, where it will not be properly pushed up by the mag follower, tend to stay in the open position when pushed, or require too much effort to release a held bolt. This is the most common issue. Seperate the lower from the upper, and work it back and forth. Does it operate freely and return to the lower position with ease? The fix is to drill the hole open larger, or send the part back for one that is in proper spec. Drilling is very difficult as these parts are hardened and will tear those small drill bits up. I use a dremel with a very small bit and just ream it open a bit. Works very well. 2. The bolt release is either out of spec (too wide) or the lower receiver has trash, or over-anodizing left in the release cut-out. This will cause the bolt release to bind up as well. When the lower is stripped, you should test fit the release in the cut-out and ensure it fits freely in the lower. The fix is to lightly scrape out any trash, burrs, or over-anodizing buildup from the receiver area, or lightly sand the bolt release on a flat surface. I suppose when the hammer is down... it creates a bit more pressure on this area.... but I am not sure, since I dont see any reason to operate a bolt release when the hammer is down. The bolt release is operated to release a bolt (hammer back) or to lock the bolt open (hammer back) |
||
|
|
AR, USA
|
[#40]
I am going to replace a low profile gas block with an A2 gas block on a Bushmaster heavy barrel. Do I need to adjust anything with this new gas block, or can I simplly use the same pin holes that are already on the barrel?
|
|
|
|
[#41]
Im not sure what you mean by a "A2 gas block".... if you mean that you are taking off an aftermarket low pro gas block, and wanting to install a standard rifle/carbine front sight base..... then you are in a little trouble. The FSB, when installed on a factory barrel, is taper drilled together, through the FSB and the barrel at the same time. Two barrels are rarely alike here, and therefore you typically cannot install an FSB on a barrel, and expect the taper pin hole to align. They almost never will. Your best option is to re-install the original FSB that was removed from the barrel, if it shipped from the factory like that. Or have a *competent* gunsmith perform this installation for you. With the extra cost involved, many just opt for an aftermarket FSB that uses set-screws for an attatchment, or clamps, like the PRI or YHM models, or install a gas block with a top rail, and then attach a removable front sight blade. |
||
|
|
|
[Last Edit: babob]
[#42]
I'm installing a LaRue 7.0 on my BM 16" Patrolman's Carbine.
Flash hider removed, no problem. Gas tube pin removed w/ small drill bit as described on the first page of this thread. FSB taper pins removed finally after a couple bent brass small punches. I should have used one of the larger ones. Have no idea what I was thinking. Still waiting on my barrel / multi tool / wrench thingy. Ordered a DPMS but they were on backorder. Nice of them to tell me when I call a week later to ask why the wrench did not come w/ the punches. Ordered another, hope it is here by tomorrow. FALARAK, do you still suggest me dremel-ing my BM action block so that I can get the keeper piece in or have you since realized that was not necessary? Also, when I start re-assembeling should I use new taper pins and a new gas tube roll pin or will the old ones still work? I have all new pins just in case and a new crush washer for the flash hider which will def. be used. Finally, I found something disturbing when I removed the flash hider. On very end of the threaded part of the barrel, it looked like rust or part of the barrel had broken. There was also some of this "rust" insid e the flash hider. I will post pics later of the end of the barrel.  Edit to add pic. |
|
|
|
|
[#43]
I would say try it without... see if you can install it. If not... then dremel. It just depends on the action block mold.
I always re-use them... there is no need to use new ones unless something is severely damaged.
That is carbon buildup, and totally normal. It will scrape off, but you must be very careful not do damage your crown. I typically get a small plastic scraper and knock it off. No big deal. |
||||
|
|
|
[Last Edit: babob]
[#44]
Thanks for the reply FALARAK.
I did have to dremel the block. It's not as pretty as your dremel (skillz) though. I'll post some pics later. Thanks. EDITED for PICS! Not too good with my dremel skillz, but hea it worked.  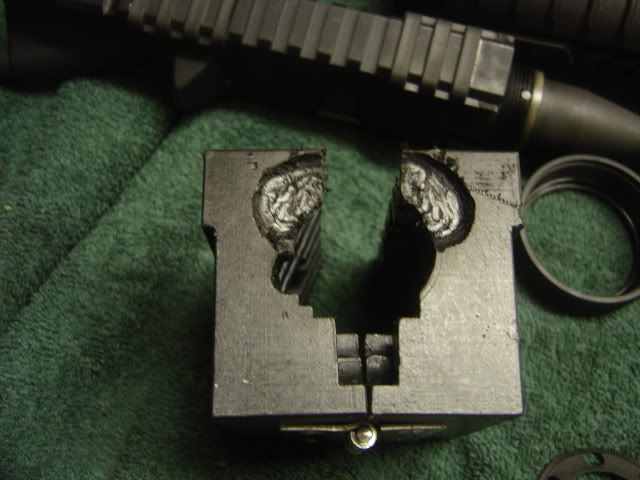 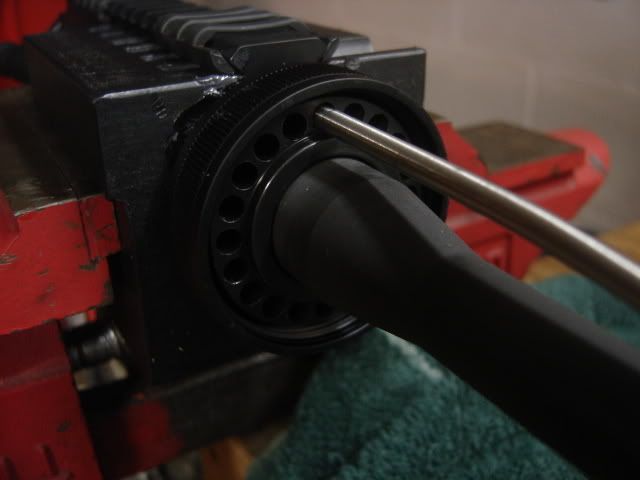 Final product..almost. 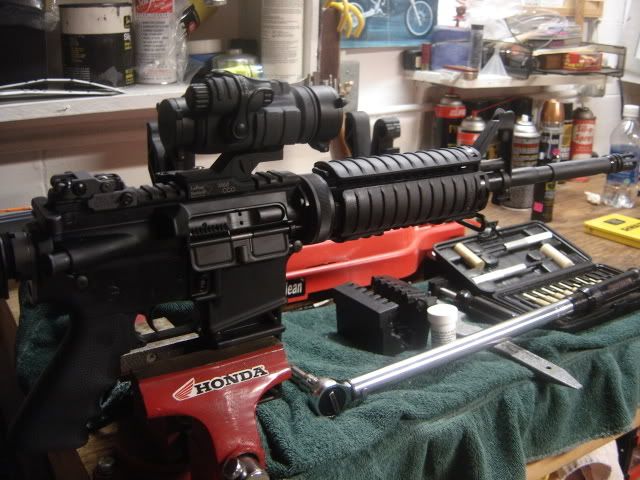
|
|
|
|
USA
|
[#45]
Thanks for the great guides!
Anyone know of a good GG&G 2-pc FF install guide? Thanks, all. sch40 |
|
|
|
[Last Edit: jdmpimp]
[#46]
What is the best way to remove the excess? I am having some issues getting mine to clean up without messing up the filled area. Are you supposed to let this dry a set completely before attempting to remove/clean? |
||
|
|
USA
|
[#47]
I have a question about torquing any of these parts. I have a barrel/castle/armorer's wrench, and I have a torque wrench. Am I missing something? Do you use them together, like put the square ratcheting lug of the torque wrench in the armorer's wrench? Wouldn't that throw off the torque scale?
Any info would be helpful. Thanks, sch40 |
|
|
|
[#48]
I'm not a physics expert but I didn't see a problem connecting the torque wrench and armourers tool to make sure of the final torque. (see pic below ) When I did my first install, the one item that I was unclear on was what the hell did everyone mean by "snug it up" two to three times and then line up the next gas tube holes. It became obvious when I went to tighten the barrel nut and there was NO way the gas tube holes we're going to align without loosening and "snugging it up again". Make sure to clean the threads and then apply a small amout of Moly grease before doing the snug up procedure. I'd also like to add that when doing the "snug it" procedure it's a good idea to check the torque but I'm pretty sure it will be tight enough. Minimum torque is 31 ftlb. You'll get that and then some when doing the procedure and aligning the next gas tube holes. I checked mine with the torque wrench and it clicked right away. 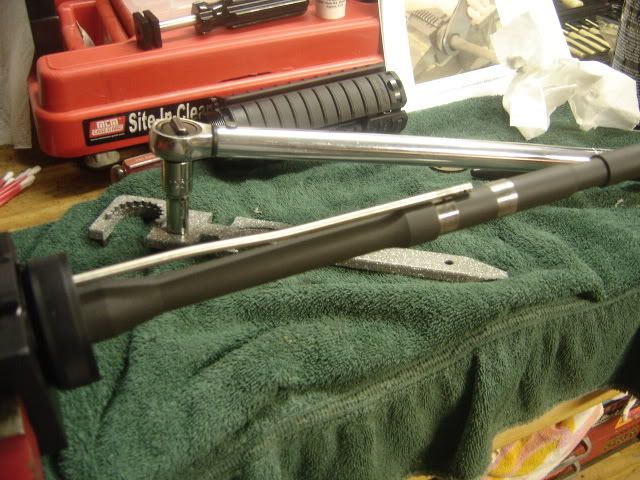 Hope this helps. |
||
|
|
USA
|
[#49]
definitely. thanks for the pic also!
|
|
|
|
[#50]
These instructions are fantastic...
Two things I would add/change: When installing the mag release, I find it's easier to push the button in, then rotate (windmill) the other side. That way the button is reset past the receiver. No chance of it rotating and malfunctioning. I would recommend you add in bold big type on the front page: WEAR SAFETY GLASSES. It's a matter of time before someone's takedown detent or trigger assembly flies out and blind's someone. |
|
|
|
 Win a FREE Membership!
Sign up for the ARFCOM weekly newsletter and be entered to win a free ARFCOM membership. One new winner* is announced every week!
You will receive an email every Friday morning featuring the latest chatter from the hottest topics, breaking news surrounding legislation, as well as exclusive deals only available to ARFCOM email subscribers.

AR15.COM is the world's largest firearm community and is a gathering place for firearm enthusiasts of all types.
From hunters and military members, to competition shooters and general firearm enthusiasts, we welcome anyone who values and respects the way of the firearm.

Subscribe to our monthly Newsletter to receive firearm news, product discounts from your favorite Industry Partners, and more.
Copyright © 1996-2024 AR15.COM LLC. All Rights Reserved.
Any use of this content without express written consent is prohibited.
AR15.Com reserves the right to overwrite or replace any affiliate, commercial, or monetizable links, posted by users, with our own.


