|
Posted: 4/1/2014 7:55:18 PM EDT
[Last Edit: BigWaylon]
Since my other thread went to archive: http://www.ar15.com/forums/t_6_20/405896_New_project_time______Form_1_style_this_time.html
A quick recap....trying to build a Gemtech Oasis style 22/45 with a ported and removable barrel all contained within a monolithic upper. I want to do a bunch of testing with barrel lengths. Ruger platform kind of sucks from the factory, so I tore out the mag safety, and LCI. Fairly Accurate to start with 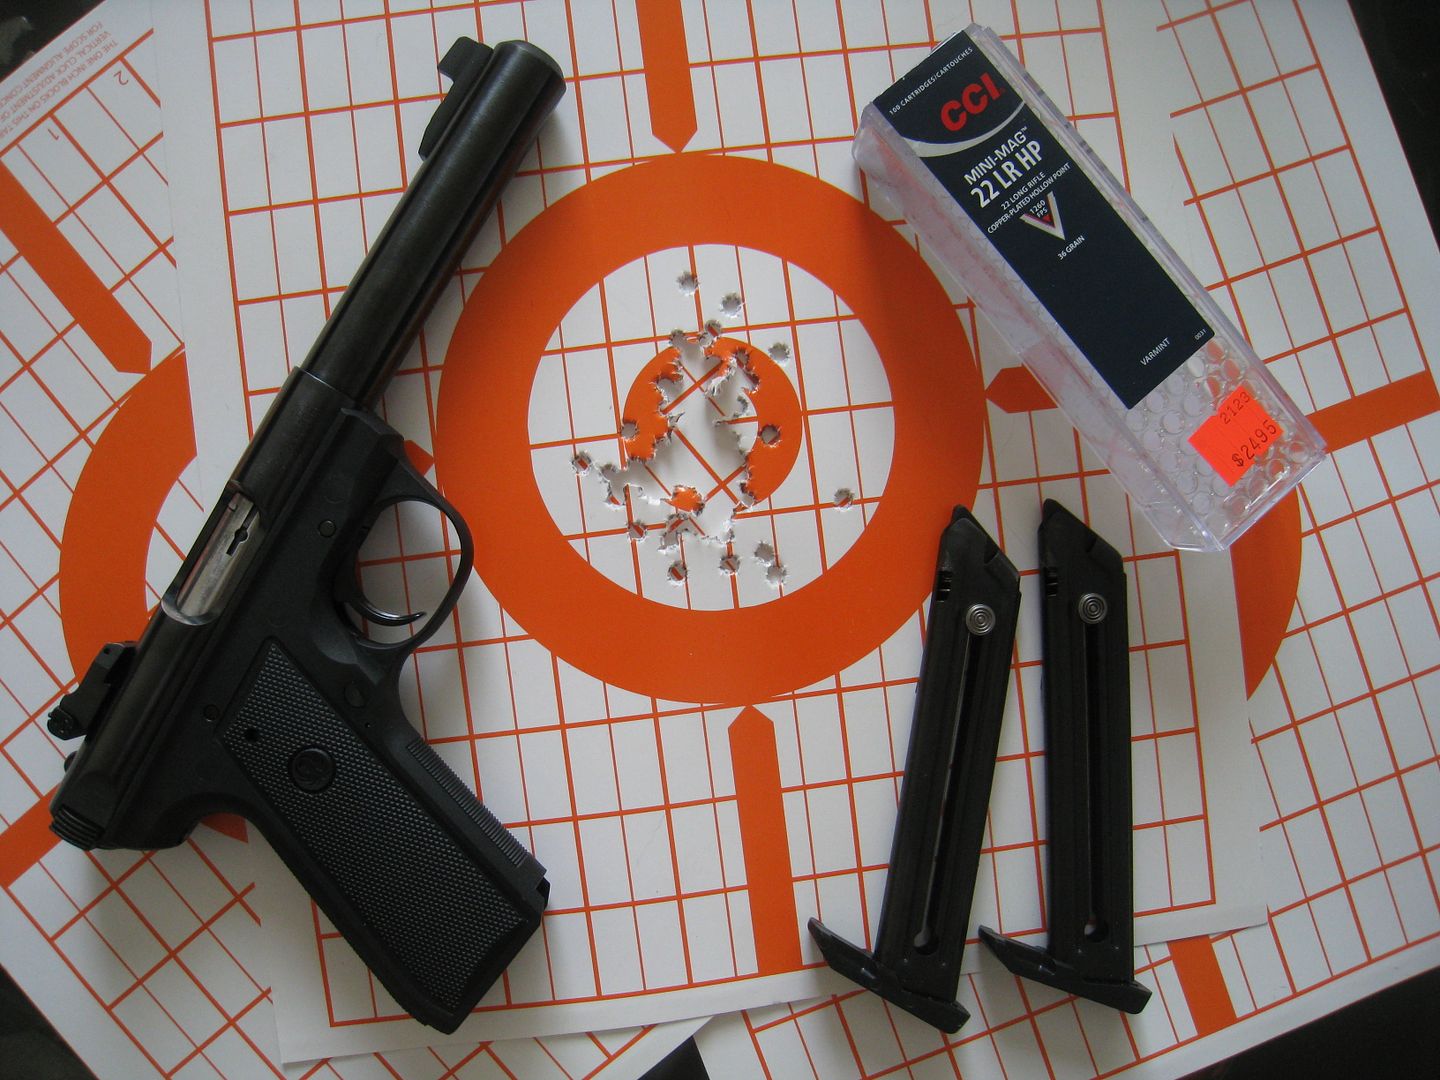
Blah blah blah, want to make it out of Titanium, because well why not? Basic thoughts on design 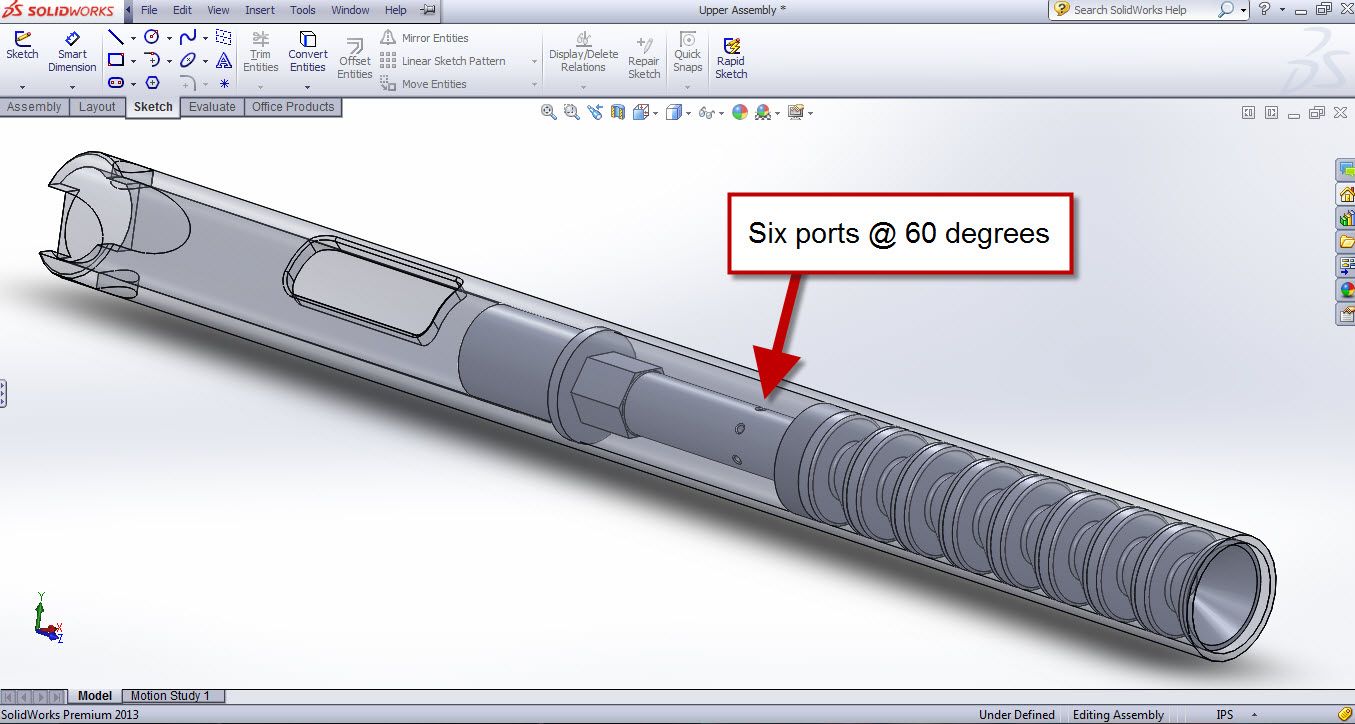
Got a bunch of spare take off barrels for testing 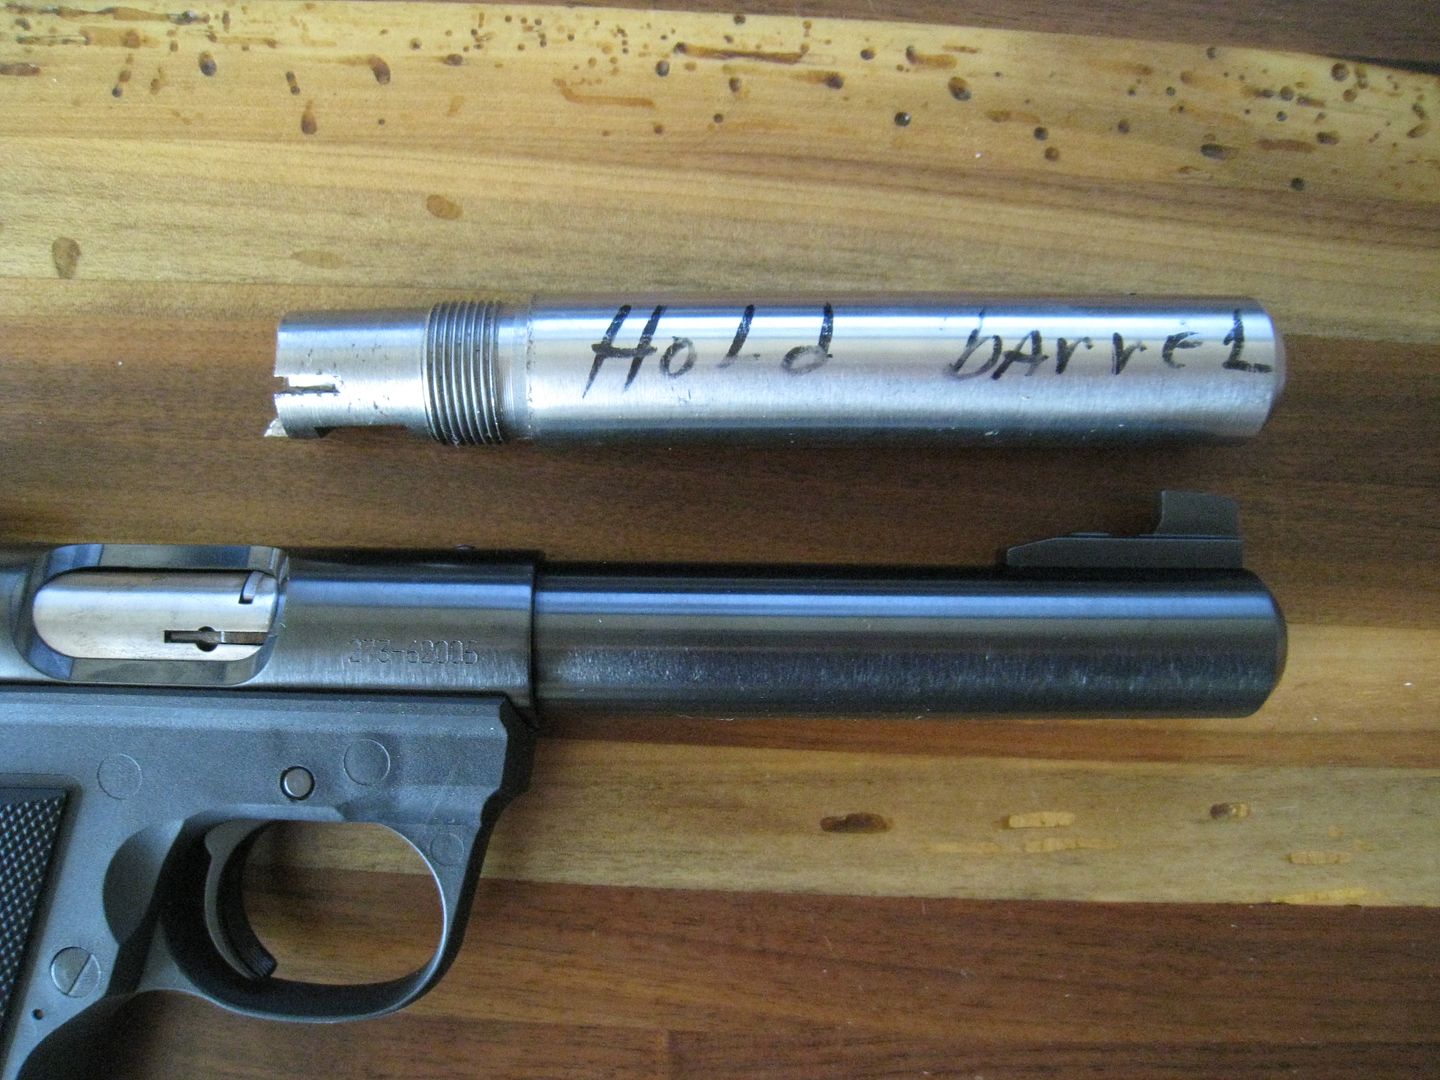
Got distracted with a part time job building BCG's 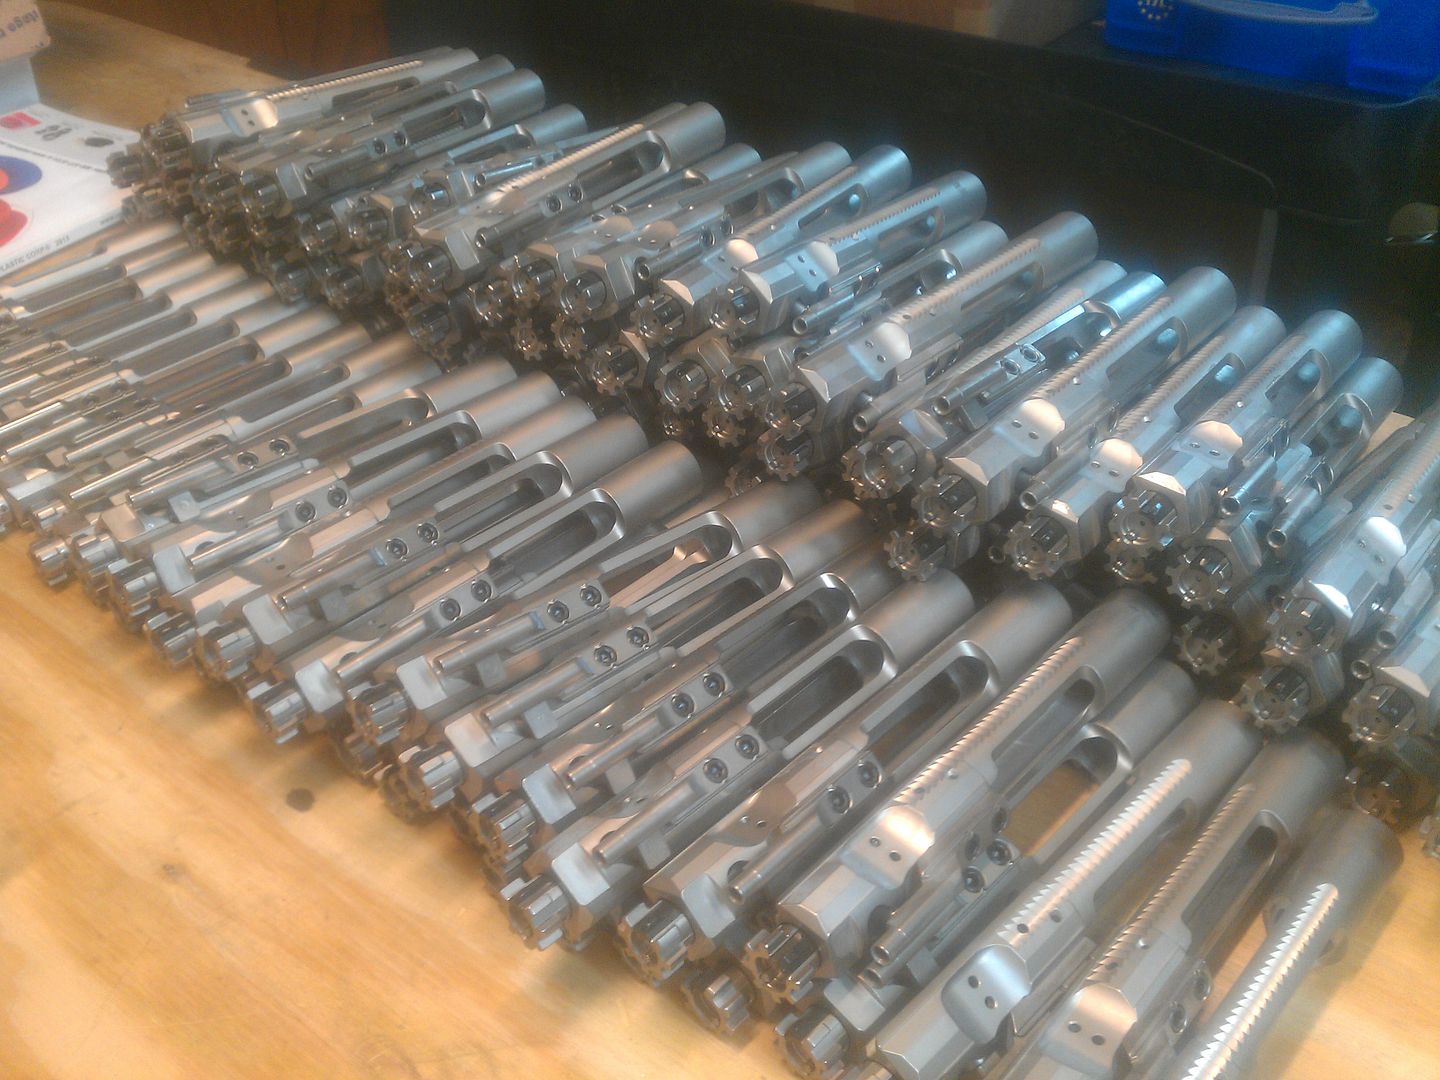
Wrecked my car. 
And now for the last month and a half I've been in Japan working on 7-tons for the Marine Corps. So that brings us to today. |
|
|
|
|
[Last Edit: unclemoak]
[#1]
Today I spend a little bit of time putting together my testing plan. I want to get an idea of what barrel length bullets will stay sub-sonic. My plan is to start at the factory length barrel and cut it down by 0.1" until it's 2.0" in length and record a number of variables along the way using a couple different kinds of ammo. 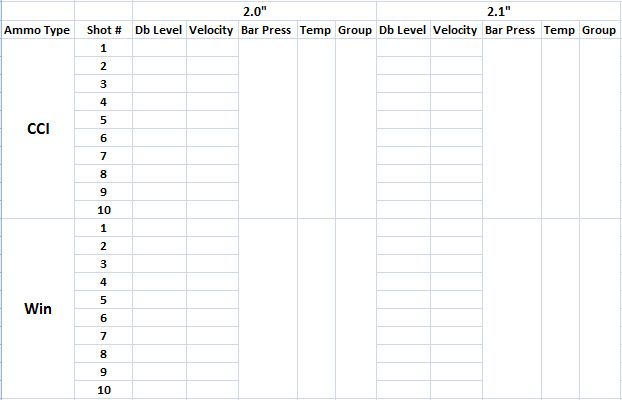 I also called up Ruger today to order a handful of ejectors and rivets for the new receivers I'm going to machine for the test barrels. It was about $50 for 10 of each, which should give me a few extra in case I mess up any. Tore out the LCI, because frankly, who needs that pile of crap? 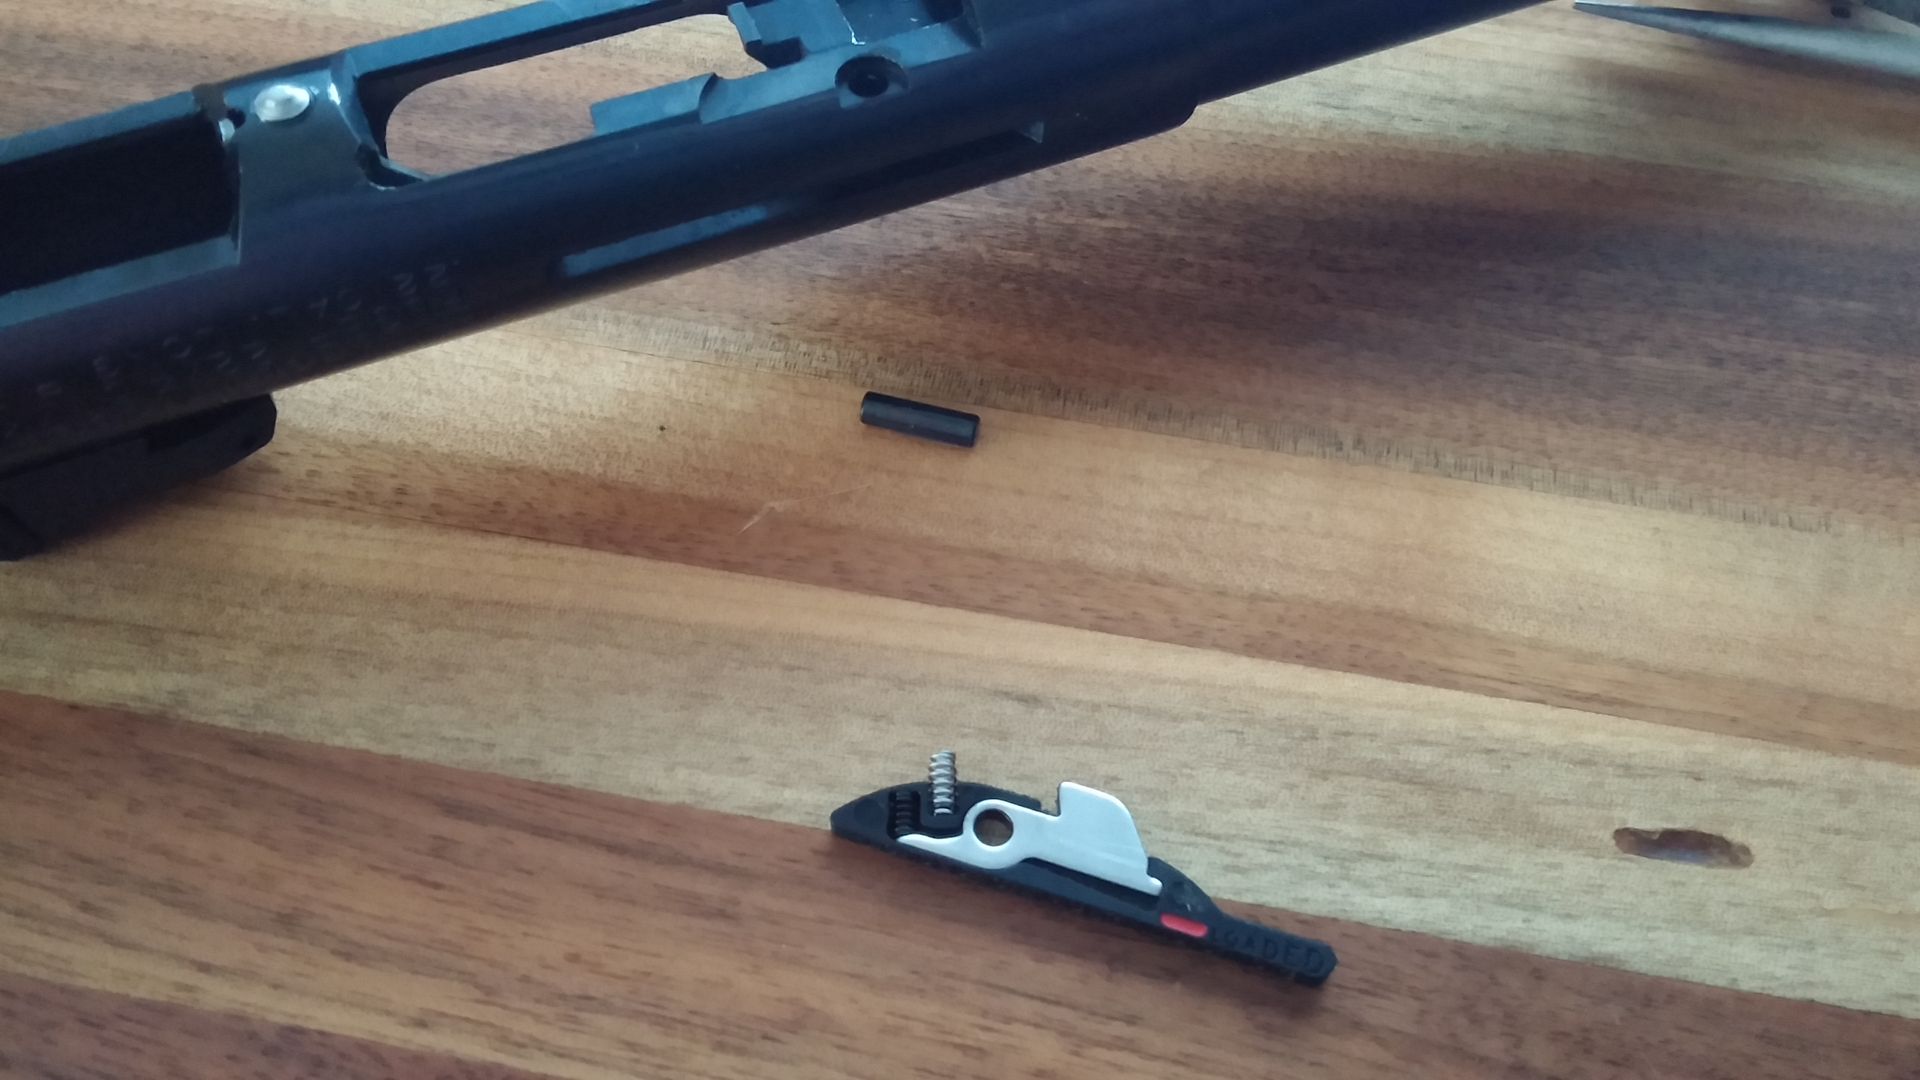 The next order of business was to take the MK II prints that I was able to find online and turn them into a solid model and print for the receivers that I'm going to make. This is the print that I started with 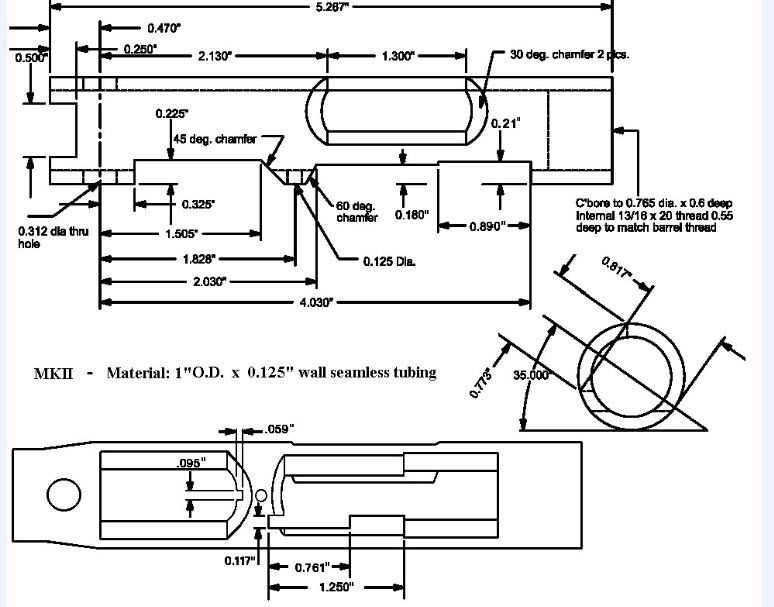 And the horrendous looking receiver it yeilds. 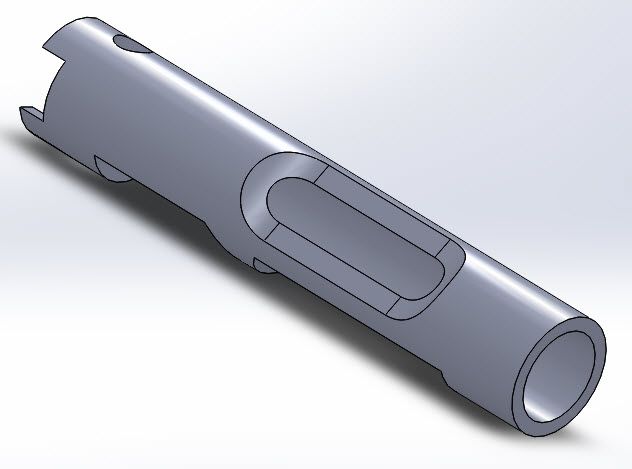 Changed the ejection port a bit to be a little better looking. 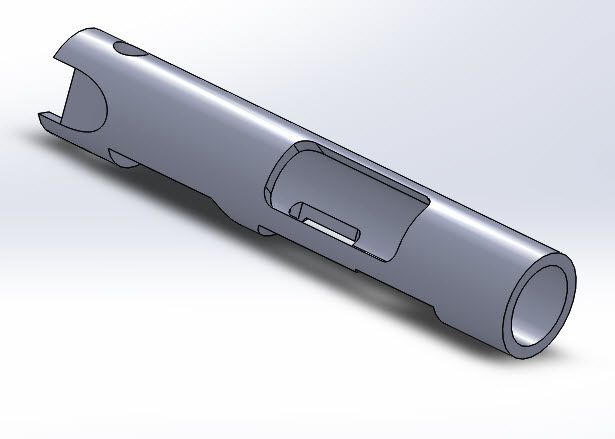 All the cuts in the bottom. 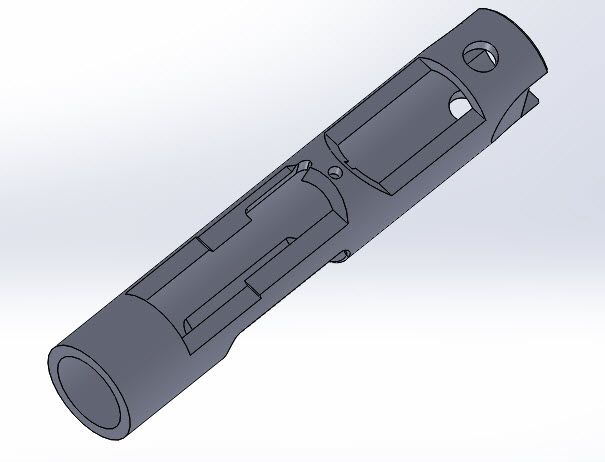 Wire frame to see all the innards. 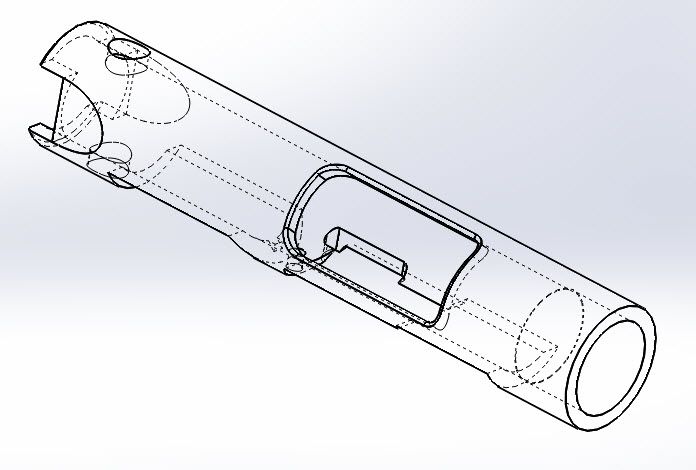 Next up will be to find some material to make the receiver blanks out of, find the appropriate take to cut the barrel threads, and then hopefully start making chips. |
|
|
|
NC, USA
|
[#2]
Interesting. The route I would take would involve a conventional suppressor on the front, with a sleeve that telescopes over the barrel that is the same diameter (1") as both the suppressor and the receiver. A little O-ring groove in the barrel so the sleeve will be sealed at the rear. You could then drill (I would EDM, but I'm not set up for that) holes in the barrel and they would expand into the chamber between the thinned barrel and the inside of the sleeve. Since your suppressor can be conventional, you get all of the advantages of superior suppression but the added benefit of the around-barrel bleed chamber.
If I understand you right, this defeats your purpose of having a monolithic upper but so be it. |
|
|
|
[Last Edit: unclemoak]
[#3]
Originally Posted By BadgerArms: Interesting. The route I would take would involve a conventional suppressor on the front, with a sleeve that telescopes over the barrel that is the same diameter (1") as both the suppressor and the receiver. A little O-ring groove in the barrel so the sleeve will be sealed at the rear. You could then drill (I would EDM, but I'm not set up for that) holes in the barrel and they would expand into the chamber between the thinned barrel and the inside of the sleeve. Since your suppressor can be conventional, you get all of the advantages of superior suppression but the added benefit of the around-barrel bleed chamber. If I understand you right, this defeats your purpose of having a monolithic upper but so be it. Your post and this video I watched (at the 1:00 mark) a while ago: got me to do a little thinking. Instead of trying to squeeze everything into a small 1" OD piece of tubing, why not just fit up the frame to a large diameter receiver? This is a 1.25" OD piece of tubing that I had laying around. 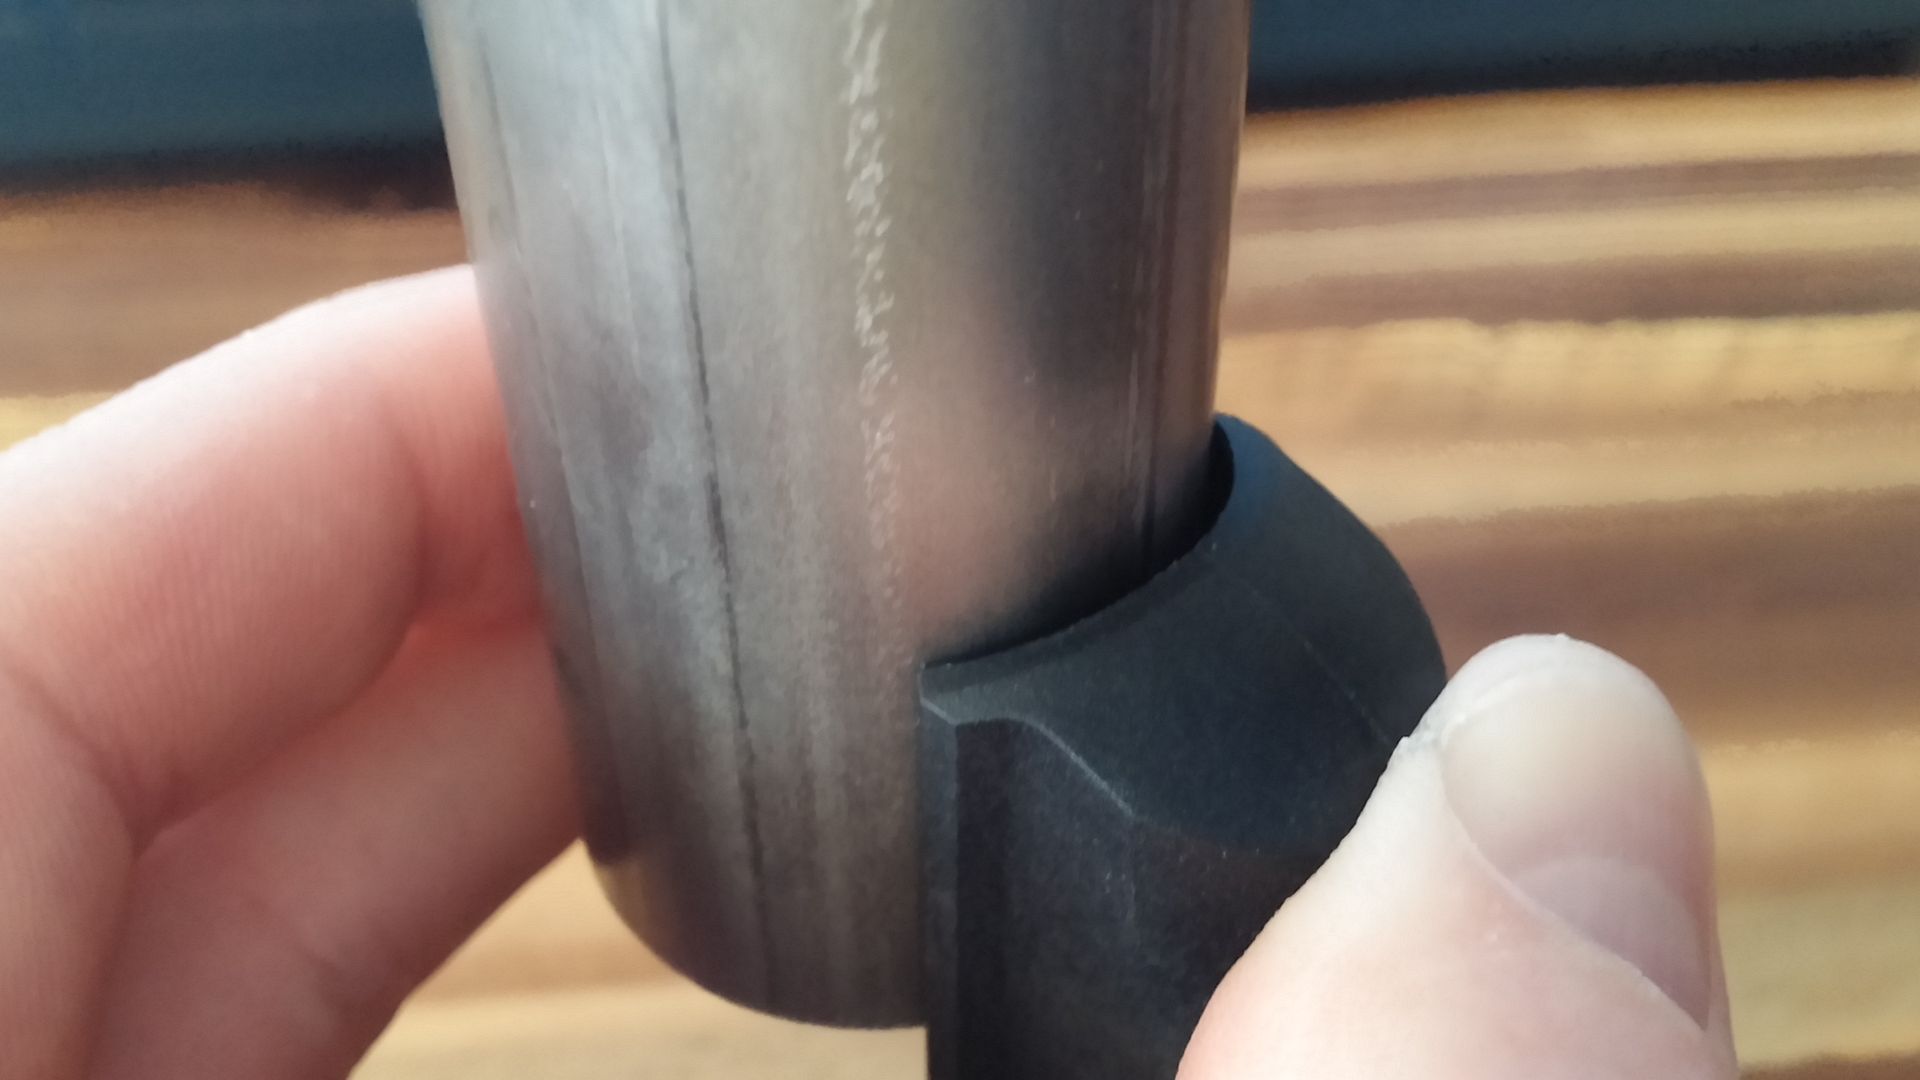 It might cause me to have to make some changes to the mechanicals, but for the increased volume, I think it'll probably be worth it. |
|
|
|
NC, USA
|
[#4]
Originally Posted By unclemoak:
Your post and this video I watched (at the 1:00 mark) a while ago got me to do a little thinking. Instead of trying to squeeze everything into a small 1" OD piece of tubing, why not just fit up the frame to a large diameter receiver? This is a 1.25" OD piece of tubing that I had laying around. It might cause me to have to make some changes to the mechanicals, but for the increased volume, I think it'll probably be worth it. If you start with an existing receiver you could "sleeve" the receiver with a piece of tubing just slipped over the top, right? That way, you wouldn't be modifying the upper or lower. You could cut the bottom of the sleeve to match the outside contour of the lower and cut out just the ejection port and hole for the disassembly pin. I don't think the extra volume will help you that much, but you'd save yourself lots of trouble trying to machine the upper. Just a tube with some openings in it. You could even thread a monocore onto a stub barrel so that you don't have to thread the tubing. Not sure I'm making myself clear enough, but it all works out just fine in my head. |
|
|
|
[#5]
Originally Posted By BadgerArms: If you start with an existing receiver you could "sleeve" the receiver with a piece of tubing just slipped over the top, right? That way, you wouldn't be modifying the upper or lower. You could cut the bottom of the sleeve to match the outside contour of the lower and cut out just the ejection port and hole for the disassembly pin. I don't think the extra volume will help you that much, but you'd save yourself lots of trouble trying to machine the upper. Just a tube with some openings in it. You could even thread a monocore onto a stub barrel so that you don't have to thread the tubing. Not sure I'm making myself clear enough, but it all works out just fine in my head. Originally Posted By BadgerArms: Originally Posted By unclemoak: Your post and this video I watched (at the 1:00 mark) a while ago got me to do a little thinking. Instead of trying to squeeze everything into a small 1" OD piece of tubing, why not just fit up the frame to a large diameter receiver? This is a 1.25" OD piece of tubing that I had laying around. It might cause me to have to make some changes to the mechanicals, but for the increased volume, I think it'll probably be worth it. If you start with an existing receiver you could "sleeve" the receiver with a piece of tubing just slipped over the top, right? That way, you wouldn't be modifying the upper or lower. You could cut the bottom of the sleeve to match the outside contour of the lower and cut out just the ejection port and hole for the disassembly pin. I don't think the extra volume will help you that much, but you'd save yourself lots of trouble trying to machine the upper. Just a tube with some openings in it. You could even thread a monocore onto a stub barrel so that you don't have to thread the tubing. Not sure I'm making myself clear enough, but it all works out just fine in my head. Yeah I know what you're saying. I do think the volume will help. From what I've read, volume is king when it comes to cans. Just doing some quick math, the volume of a 6" long 0.8725" id can is about 3.61 cu in where as increasing to 1.0" id takes you to 4.72 cu in. Obviously there's other things to factor in, but that's about a 30% increase in volume.
|
|
|
|
|
[#6]
Parts are starting to roll in.
On Friday my ejectors and rivets came in from Ruger. 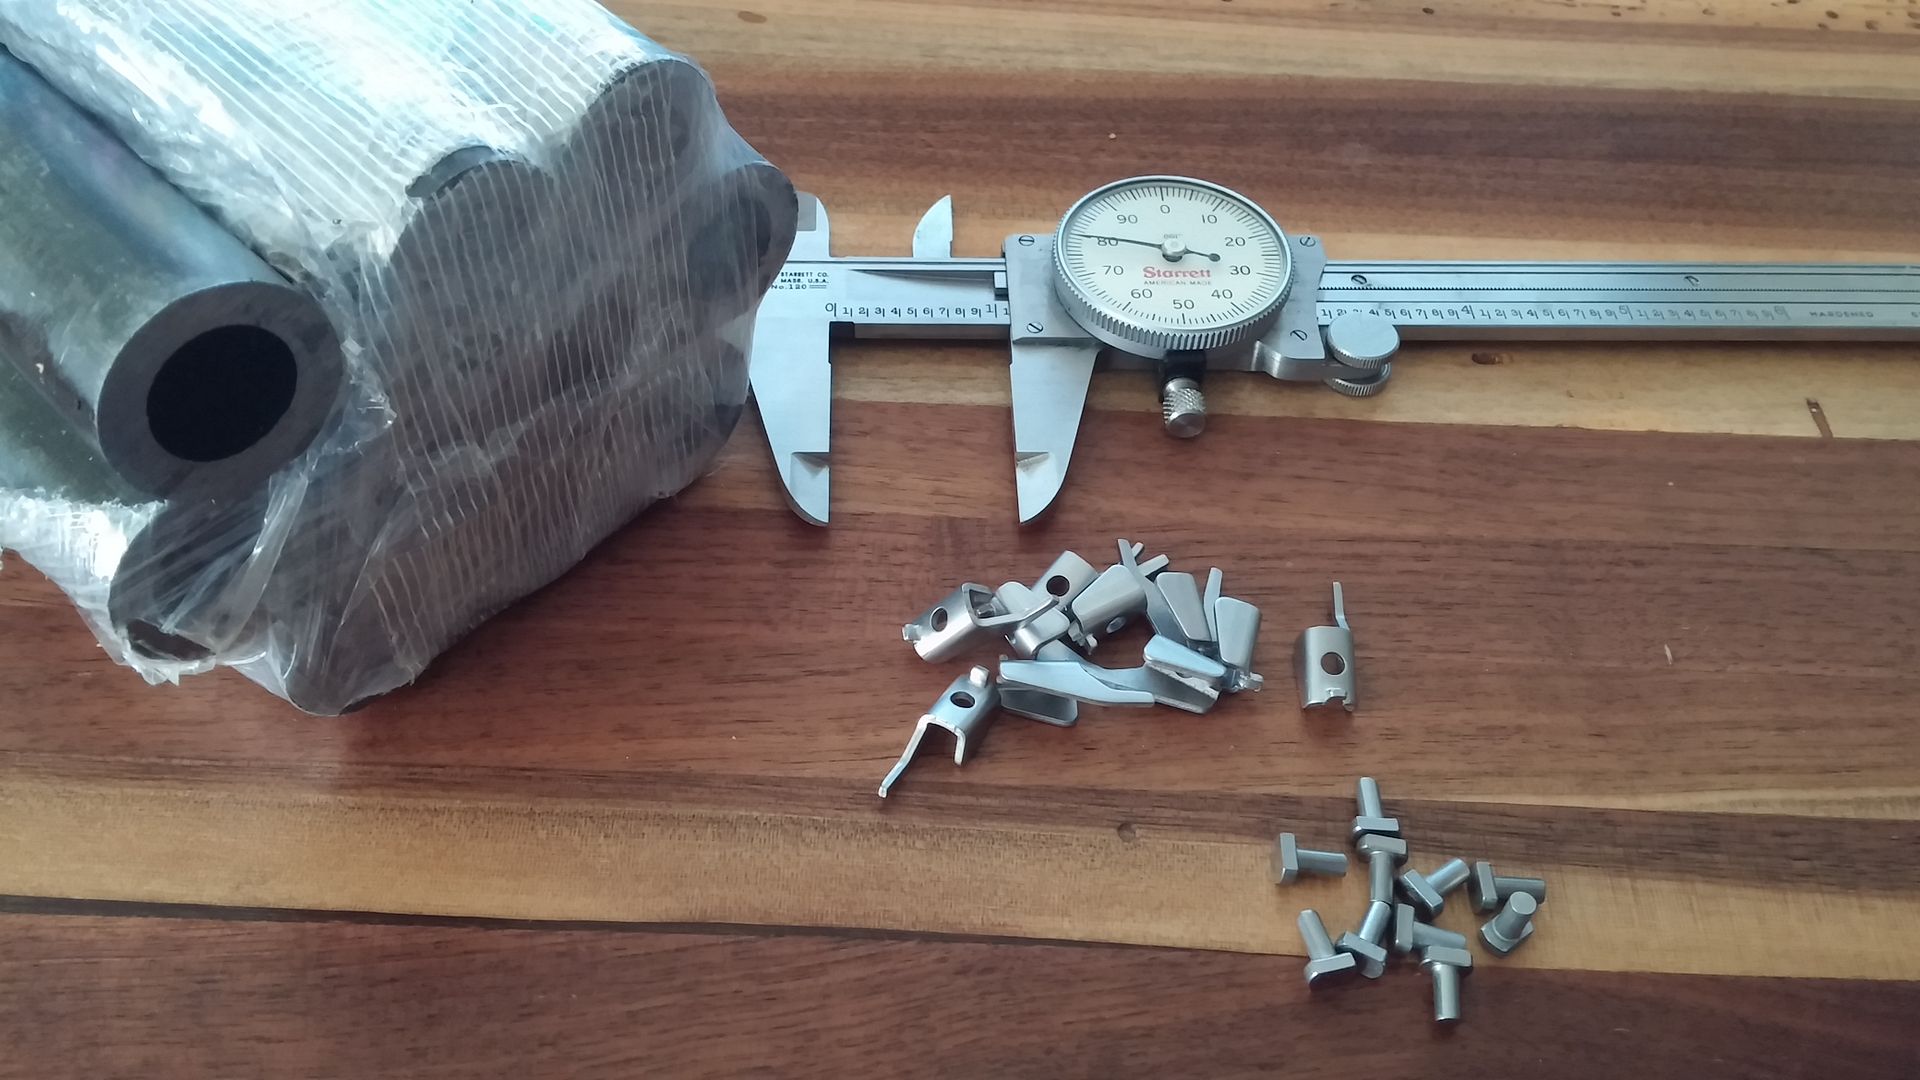 And the UPS man just dropped off the steel for the test receivers.  It wasn't too easy to find correctly sized tubing in anything but aluminum. I could find 1.0" OD x .760" ID, but thought that would be a little sloppy and have a negative affect on accuracy, so I found steel tubing from one of my favorite metal vendors, (http://www.speedymetals.com/) which just happens to be right up the road, in 1.0" OD x 0.624" ID. Because of that I'll have to ream it out most likely with a .749" reamer, then hone it the rest of the way to get it to .750". 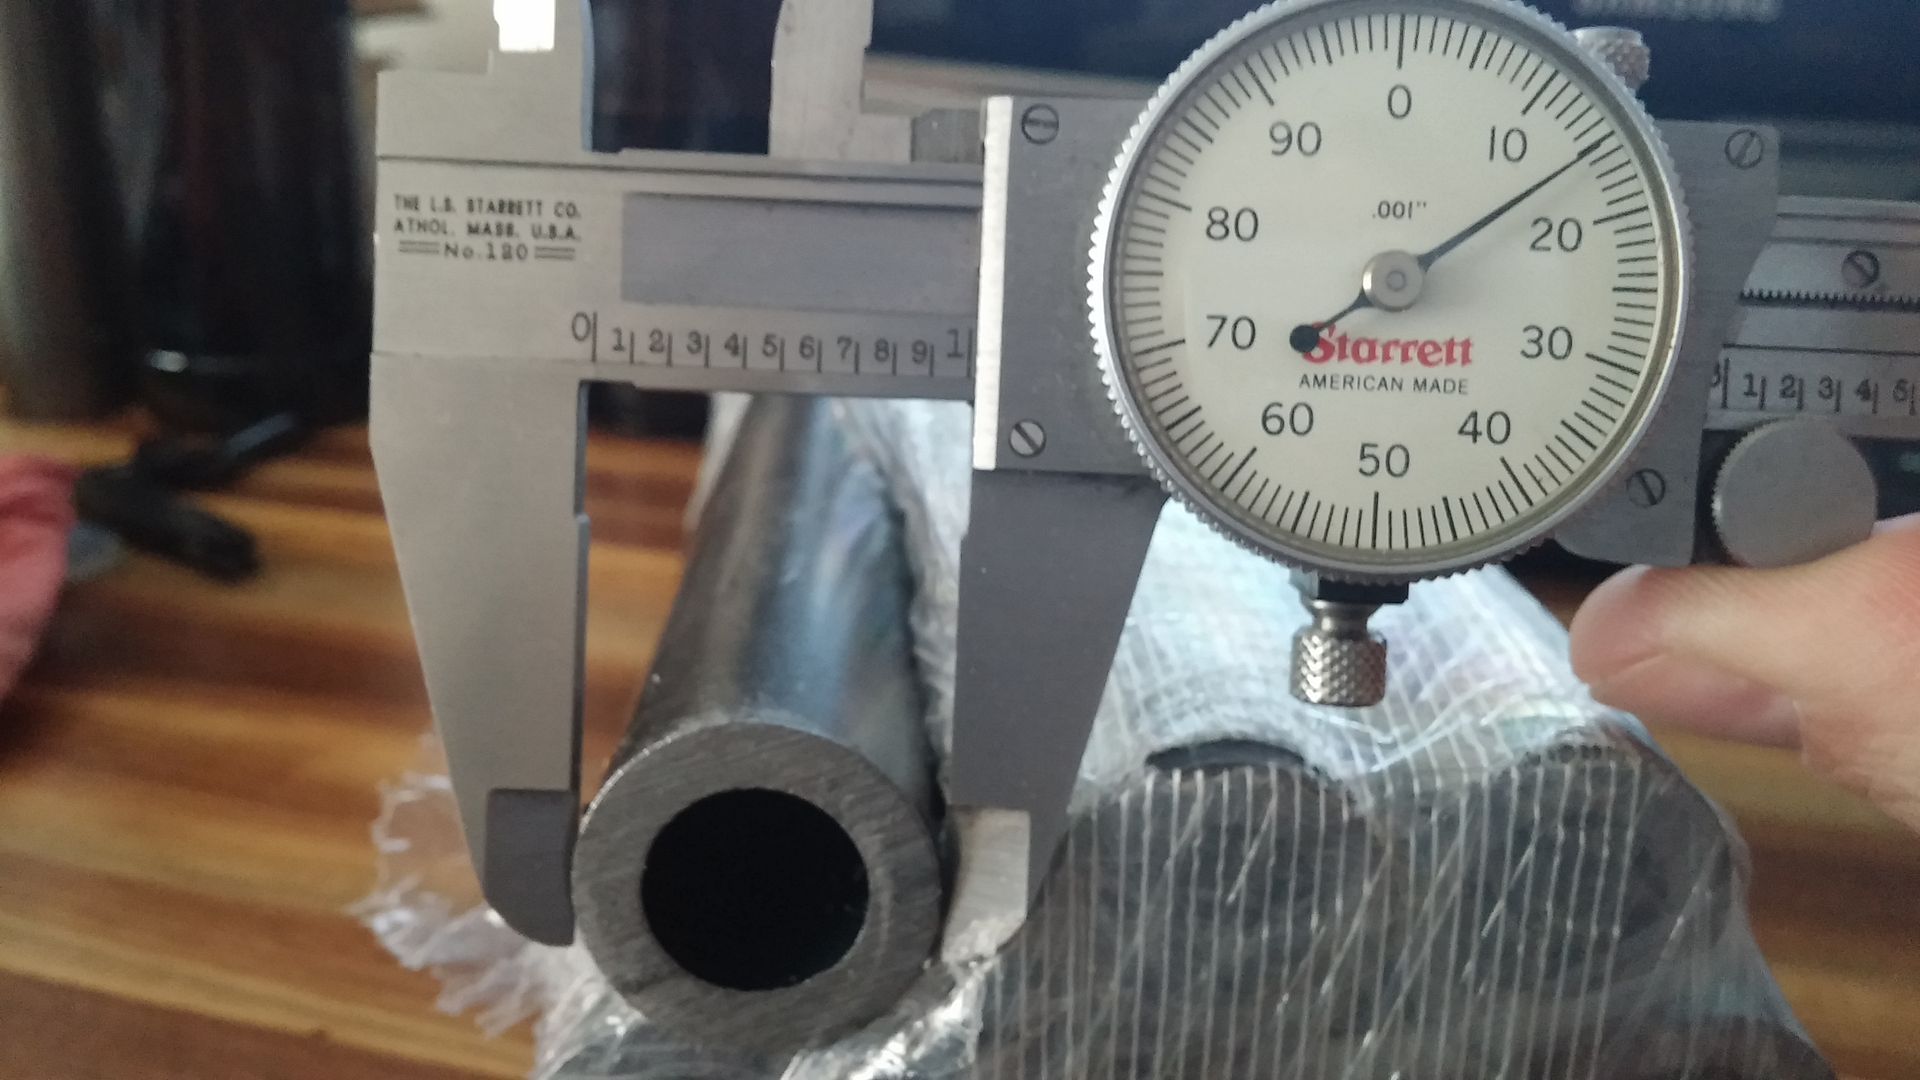 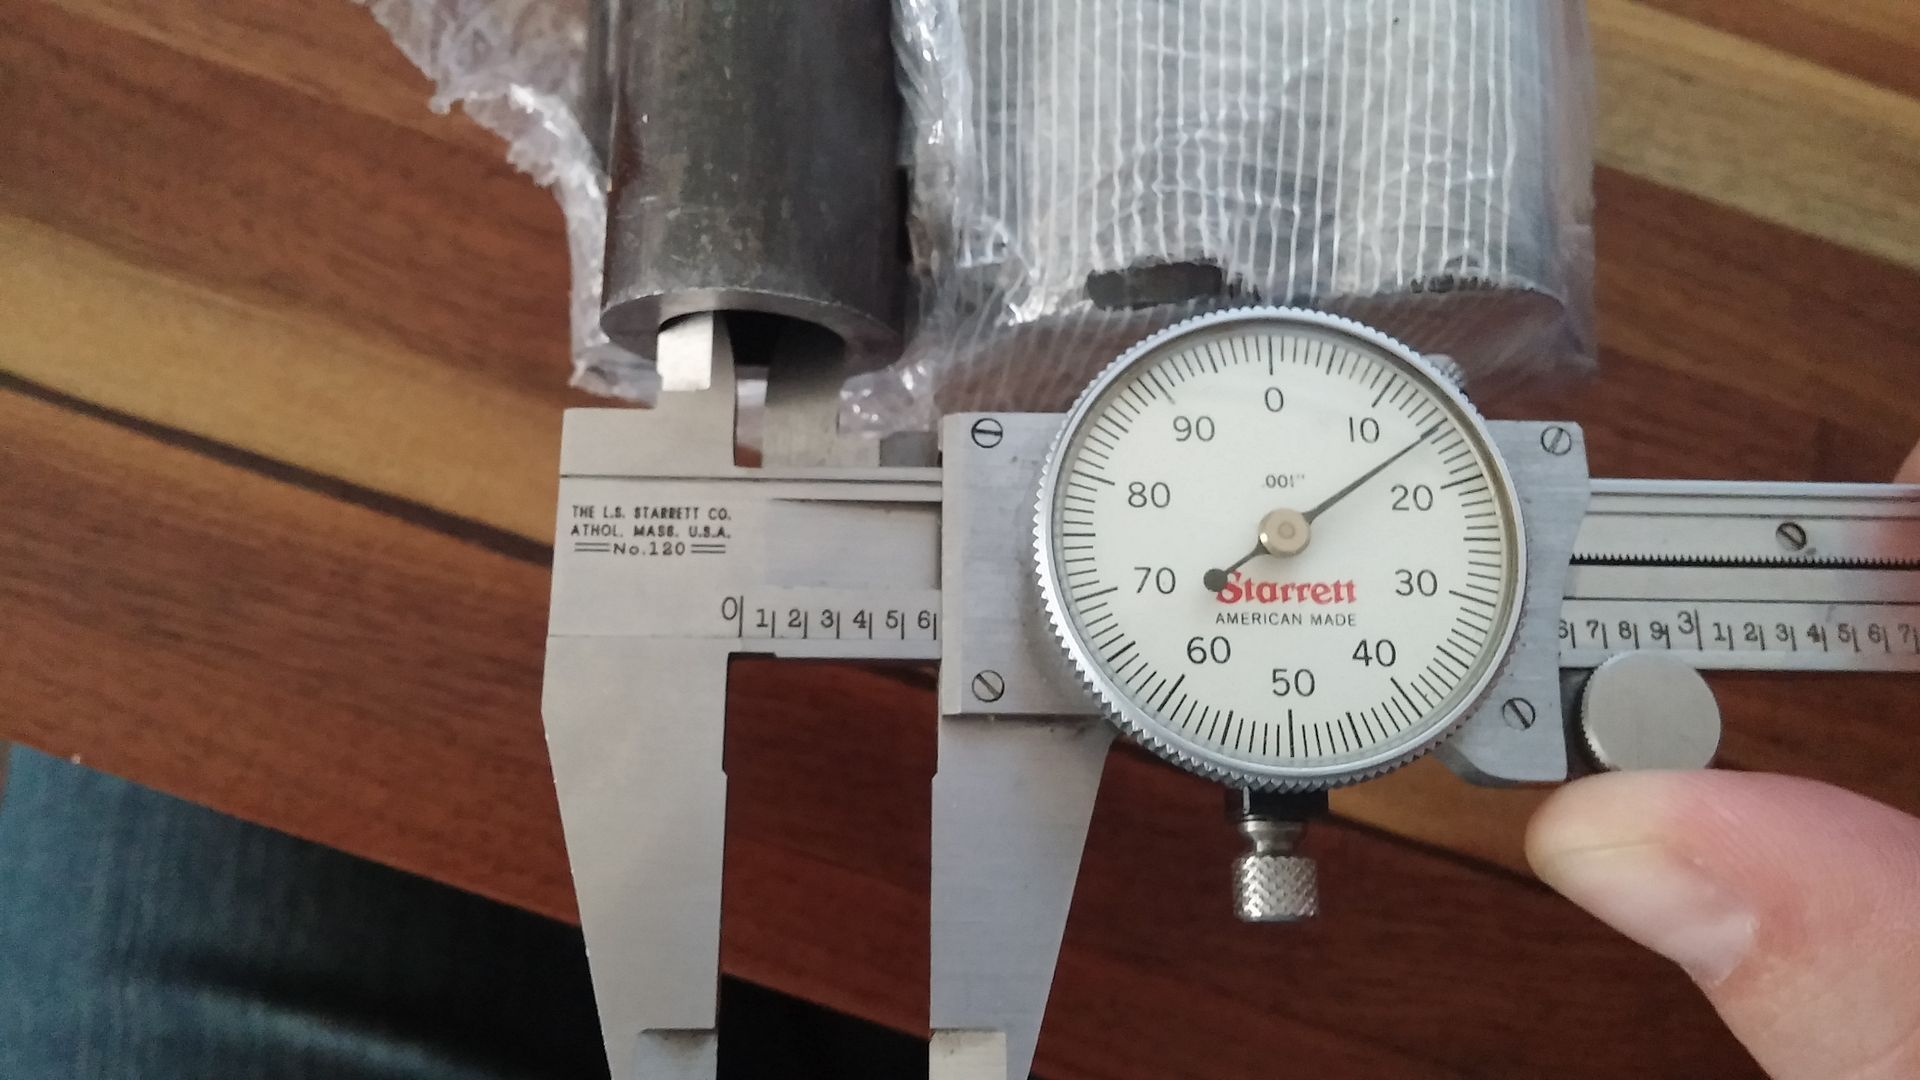 |
|
|
|
|
[#7]
It's not magic people just plan good Ole Math & Engineering

Looks like a great project keep up the updates will follow |
|
|
|
|
[#8]
This is my new thought on going to a sleeve over the receiver design, which is still very conceptual at this point. I would essentially be taking my piece of 1.0" OD x .75" ID material for the receiver and cutting the barrel threads in it, then pressed it into a 1.125" OD x 0.995" ID tube. Then I would finish doing the rest of the machining on the receiver. 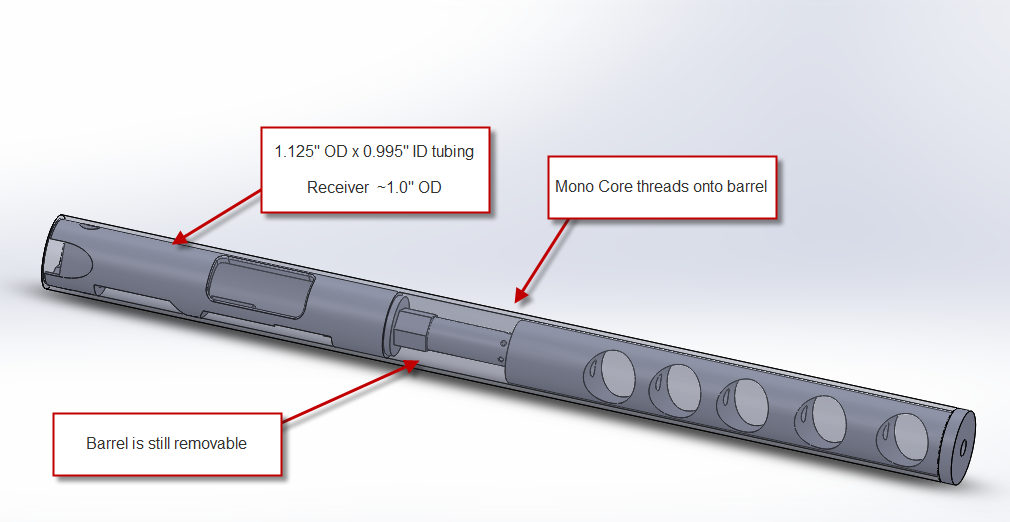 |
|
|
|
NC, USA
|
[#9]
Awesome. That's about what I had in mind. does the monocore shoulder on the front of the sleeve for a tension barrel? If you take the monocore out, can you then dunk the whole assembly in an ultrasonic for cleanup? Maybe an O-ring groove for a 1" nominal O ring right behind the front of the monocore? Maybe two holes for a spanner wrench? I'll illustrate what I mean:

|
|
|
|
[#10]
Originally Posted By BadgerArms: Awesome. That's about what I had in mind. does the monocore shoulder on the front of the sleeve for a tension barrel? If you take the monocore out, can you then dunk the whole assembly in an ultrasonic for cleanup? Maybe an O-ring groove for a 1" nominal O ring right behind the front of the monocore? Maybe two holes for a spanner wrench? I'll illustrate what I mean: https://lh5.googleusercontent.com/-vB_Khpll-LQ/U0SoDQR4VtI/AAAAAAAAAN4/pnSNrlU1cp8/w1043-h431-no/Sleevedesignconcept.png Yes, I'll most likely add an o-ring and a way to loosen the mono core. This was just a quick mock up. I still have a lot of work to do on refining the mono core design.
|
|
|
|
|
[#11]
I'll follow along!
BigDozer66 |
|
|
|
|
[#12]
What an interesting looking project.
|
|
|
|
|
[Last Edit: unclemoak]
[#13]
As I mentioned before, I wasn't able to locate tubing that was exactly what I needed, so I had to bore out the 0.624" ID tubing to close to the right size. I had a little bit of time this evening, so I faced and drilled out the tubing to 47/64ths (just under the final 3/4" size). Later I'll ream it to 0.75" and run a hone through it to clean up the surface.
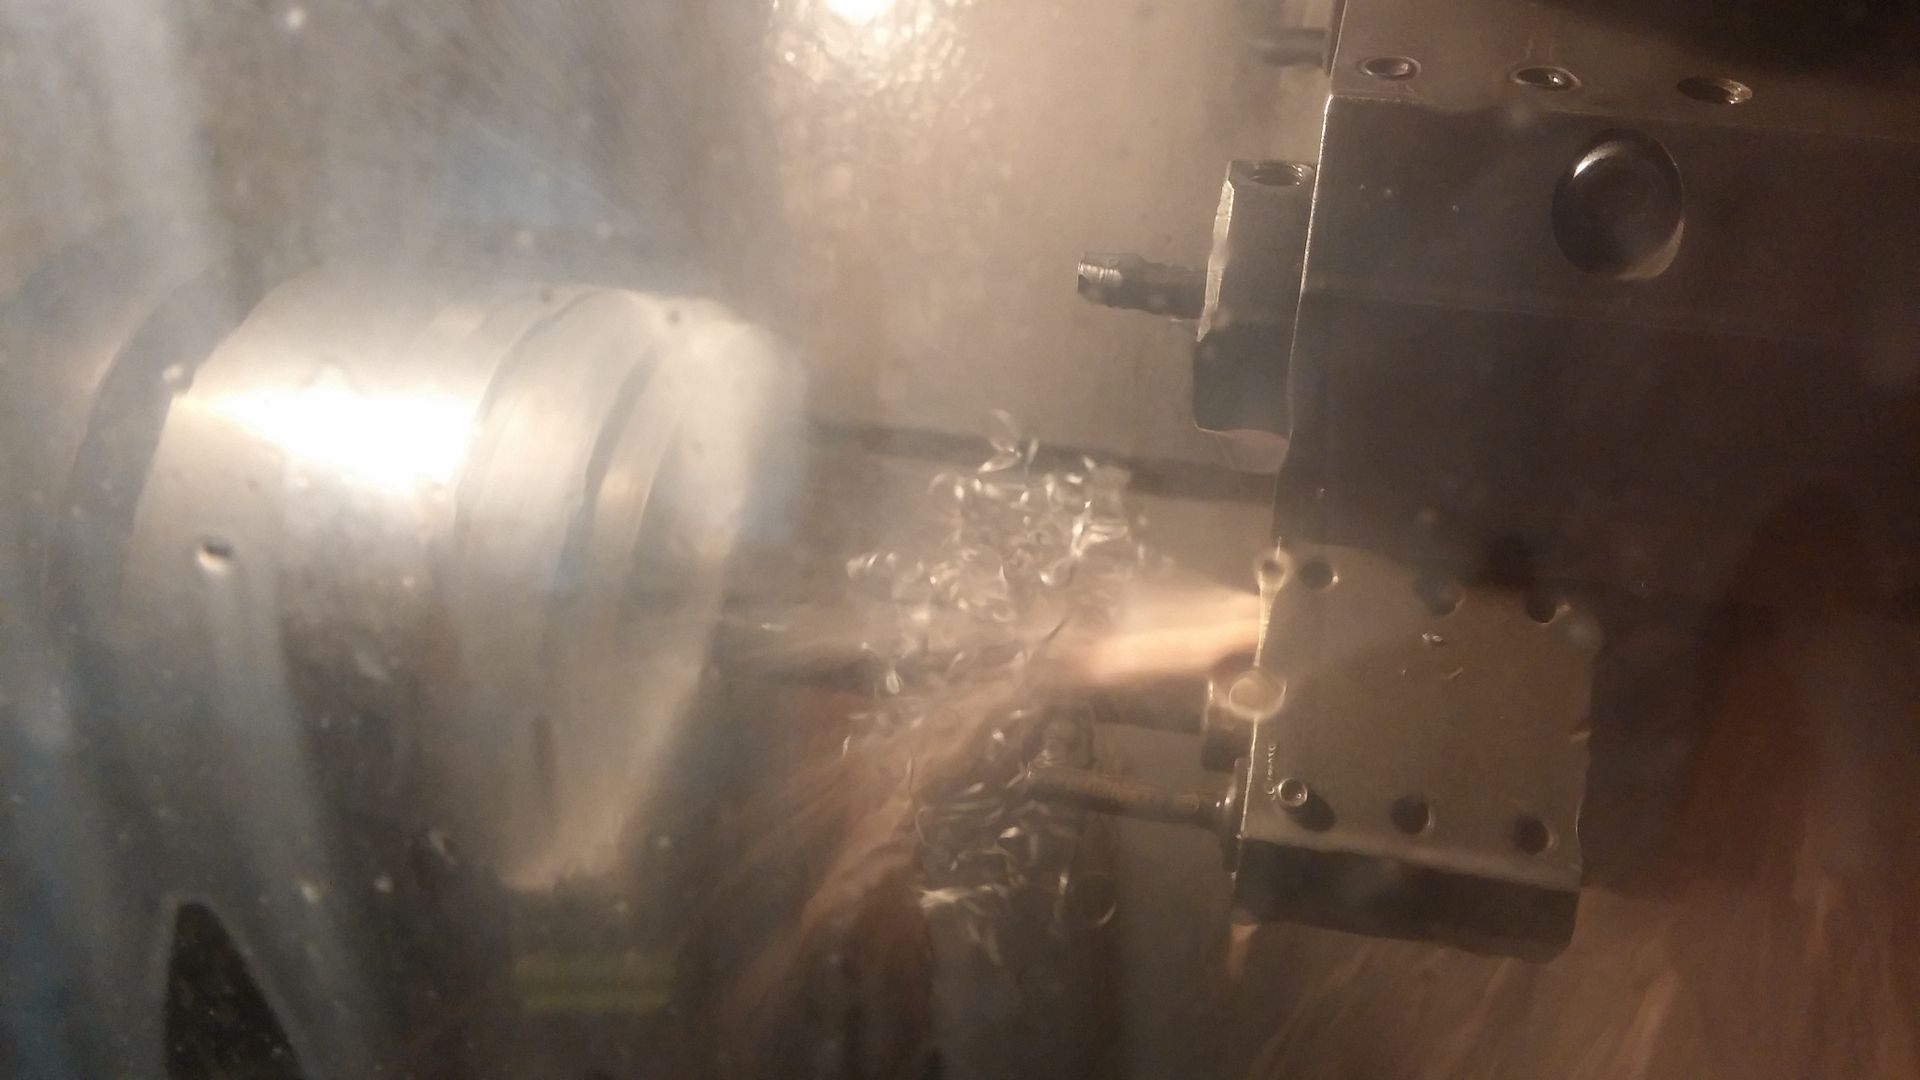 You can see a decent amount of material was removed. 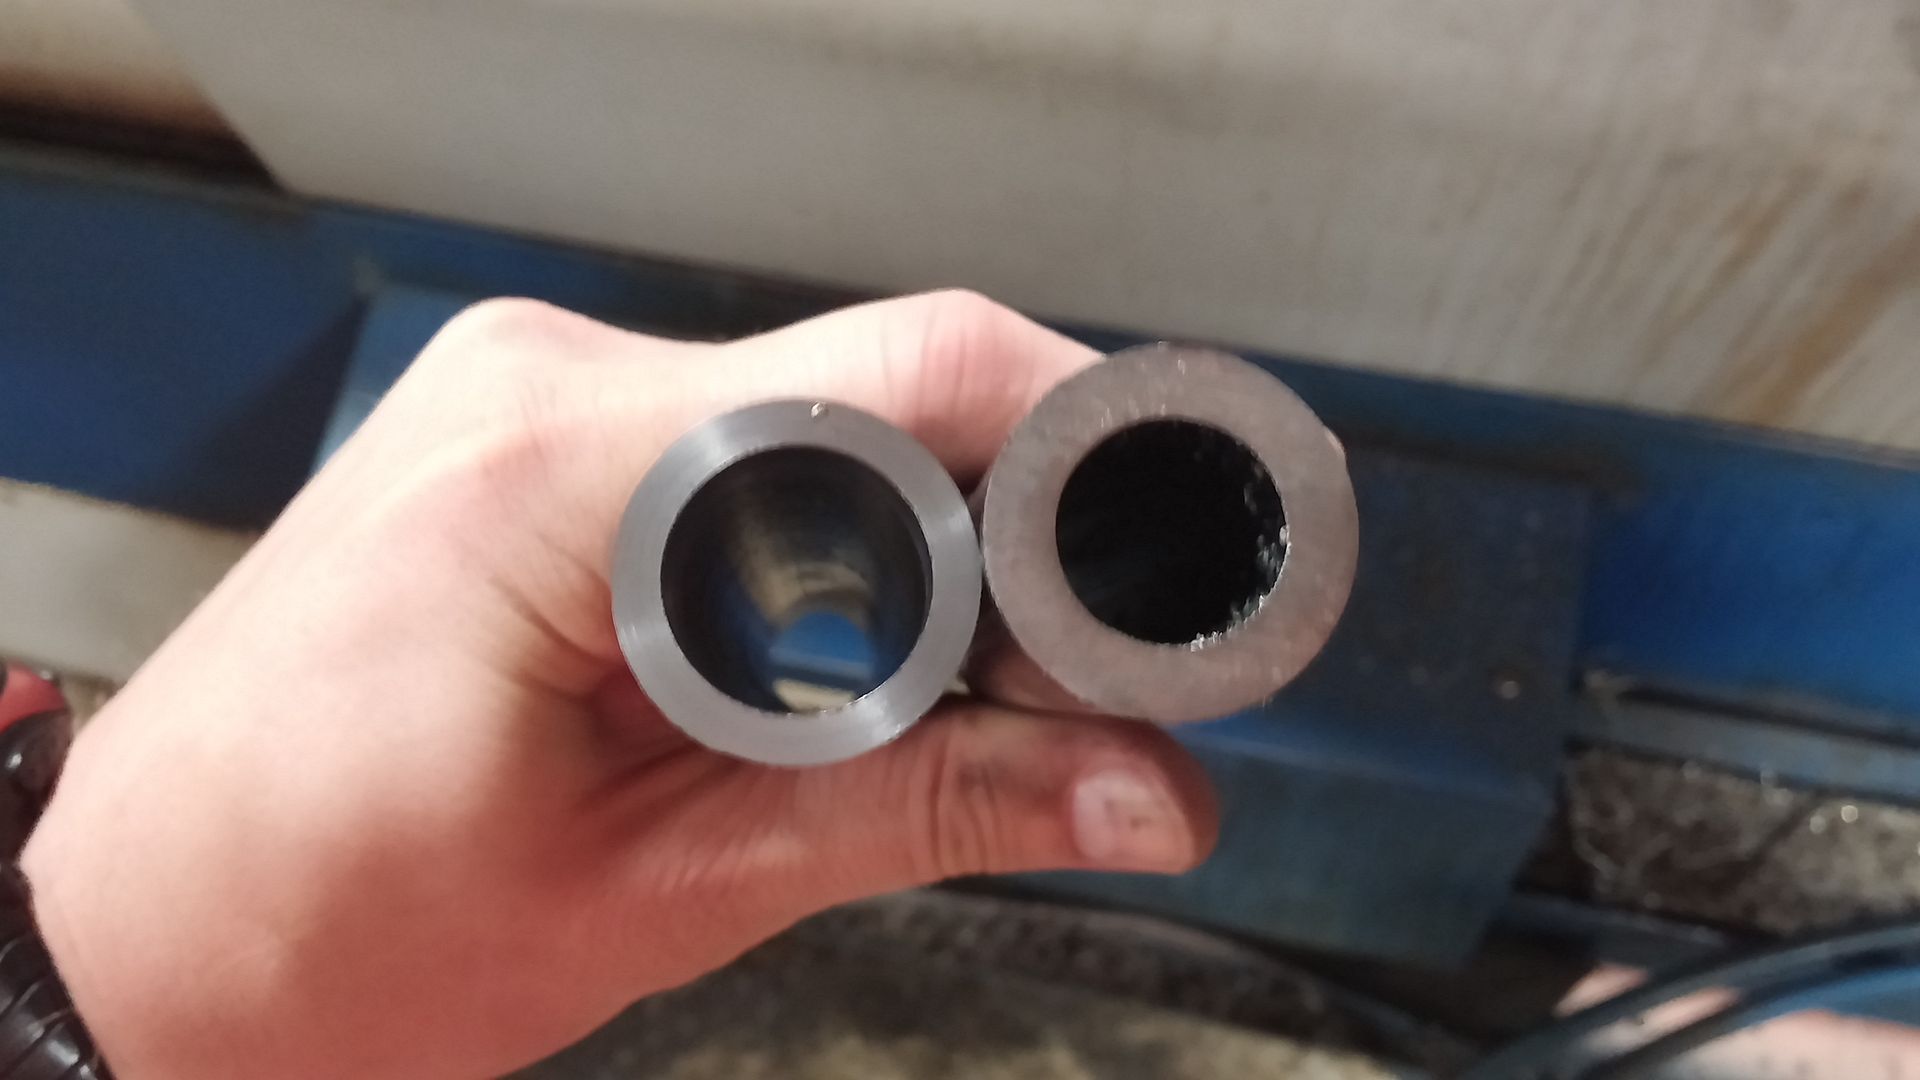 Since I didn't have an +8" long drill bit, I had to drill the tube from both ends. If you look closely, you can see a slight step in the middle. That will come out when the tubes get reamed and honed later. 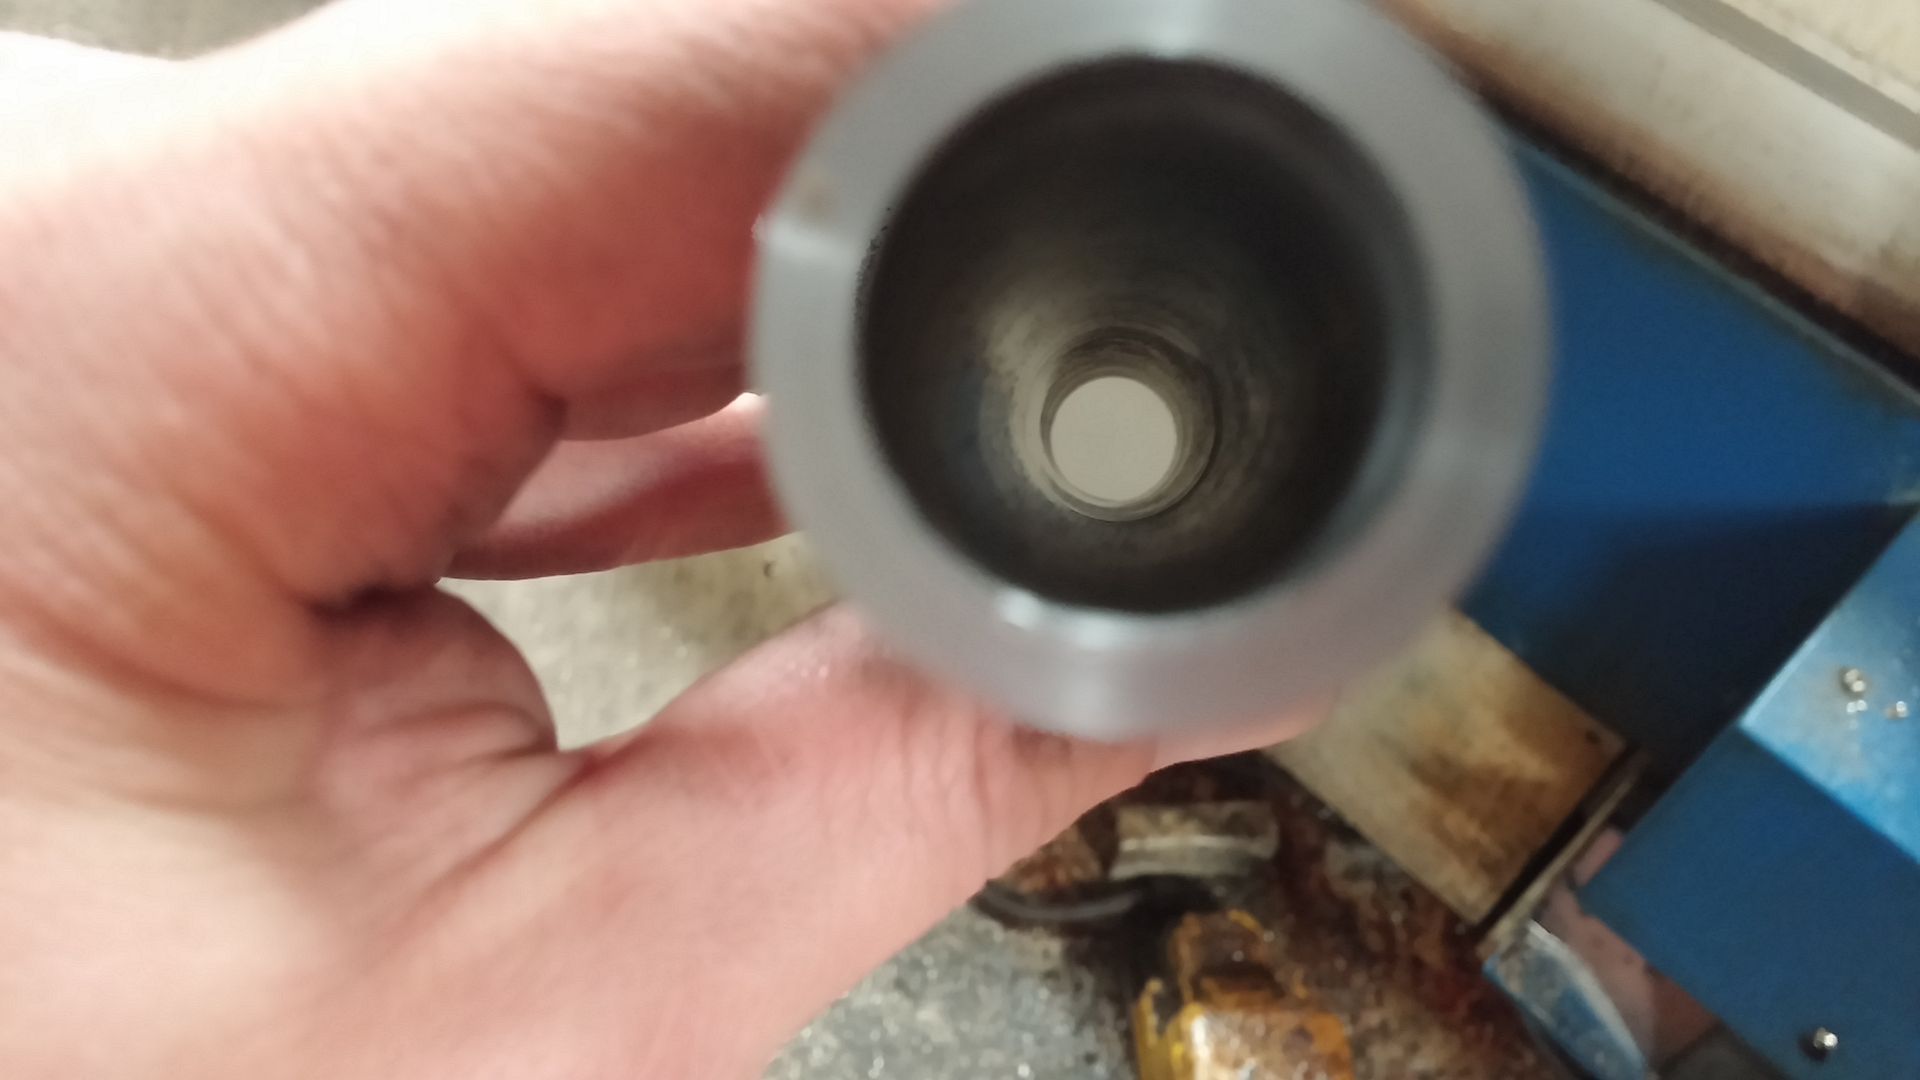 Short video clip.  |
|
|
|
FL, USA
|
[#14]
Fun fact. Starrett gauges are used on some AC-130 Gunships to postion the guns to fire.
Originally Posted By unclemoak:
Parts are starting to roll in. On Friday my ejectors and rivets came in from Ruger. http://i43.photobucket.com/albums/e398/unclemoak/20140407_171847.jpg And the UPS man just dropped off the steel for the test receivers. http://i43.photobucket.com/albums/e398/unclemoak/Mobile%20Uploads/20140407_171332.jpg It wasn't too easy to find correctly sized tubing in anything but aluminum. I could find 1.0" OD x .760" ID, but thought that would be a little sloppy and have a negative affect on accuracy, so I found steel tubing from one of my favorite metal vendors, (http://www.speedymetals.com/) which just happens to be right up the road, in 1.0" OD x 0.624" ID. Because of that I'll have to ream it out most likely with a .749" reamer, then hone it the rest of the way to get it to .750". http://i43.photobucket.com/albums/e398/unclemoak/Mobile%20Uploads/20140407_171511.jpg http://i43.photobucket.com/albums/e398/unclemoak/Mobile%20Uploads/20140407_171446.jpg |
|
|
|
[#15]
Anything new?
MAHA |
|
|
|
|
[#16]
Originally Posted By Mahamotorworks: Anything new? MAHA |
|
|
|
|
[#17]
In...
I have a F1 pending for a similar project but on a 10-22. |
|
|
|
|
[#18]
Sorry there hasn't been an update in a while. I've been a little tied up with other things (work, building a kitchen table, etc). The search for .22 ammo still continues. I have the misfortune of making myself buy another 1930rds for........$204!@$%#^@$% that'll be coming in this week. Hopefully on Sunday/Monday I'll have some time to cut the receivers and get this project back on track. Small ammo fort thus far 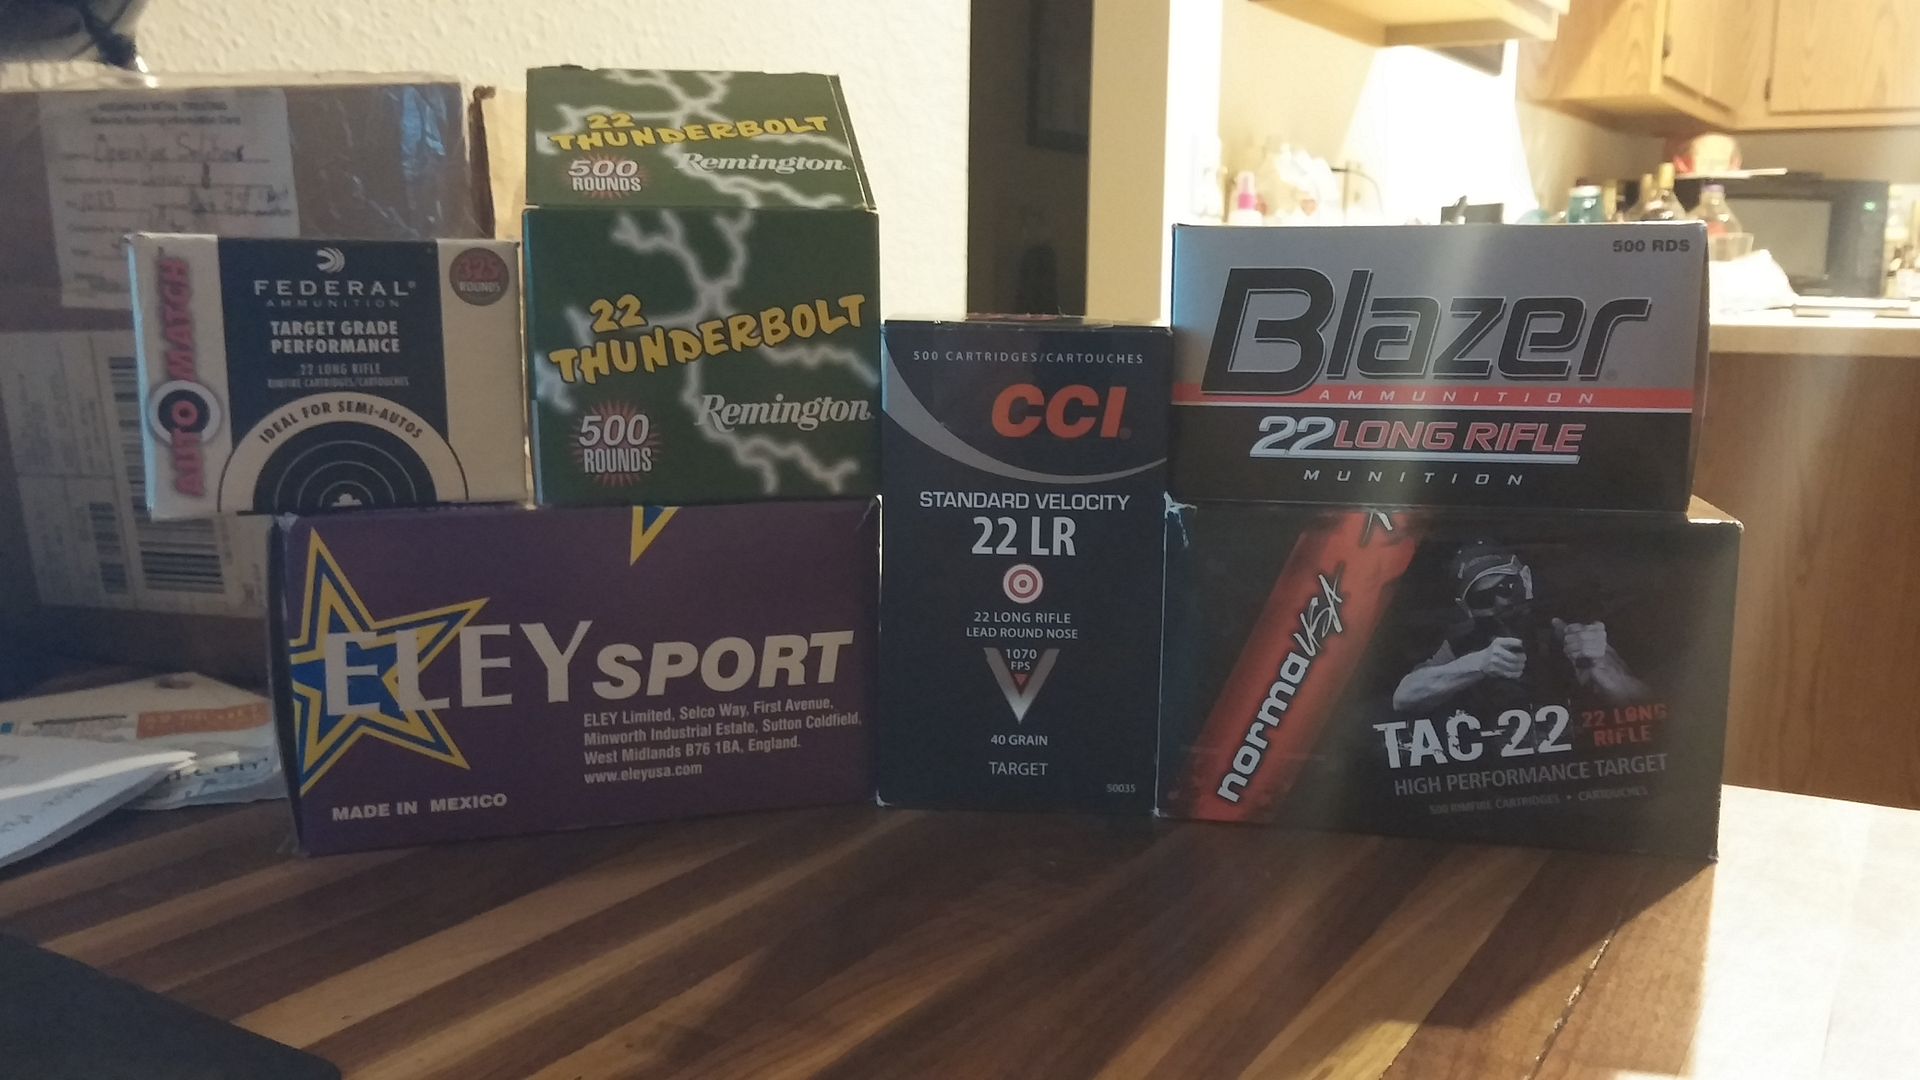 |
|
|
|
|
[#19]
Instead of using the separate tube over the receiver, why not use a single tube. Bore out the suppressor portion for more volume. Rather than threading the barrel, you could just press fit and pin it in place.
|
|
|
|
|
[#20]
Originally Posted By JoshAston: Instead of using the separate tube over the receiver, why not use a single tube. Bore out the suppressor portion for more volume. Rather than threading the barrel, you could just press fit and pin it in place. That's a viable option that I didn't even think of and quite frankly, a damn good idea at that.  |
|
|
|
|
[#21]
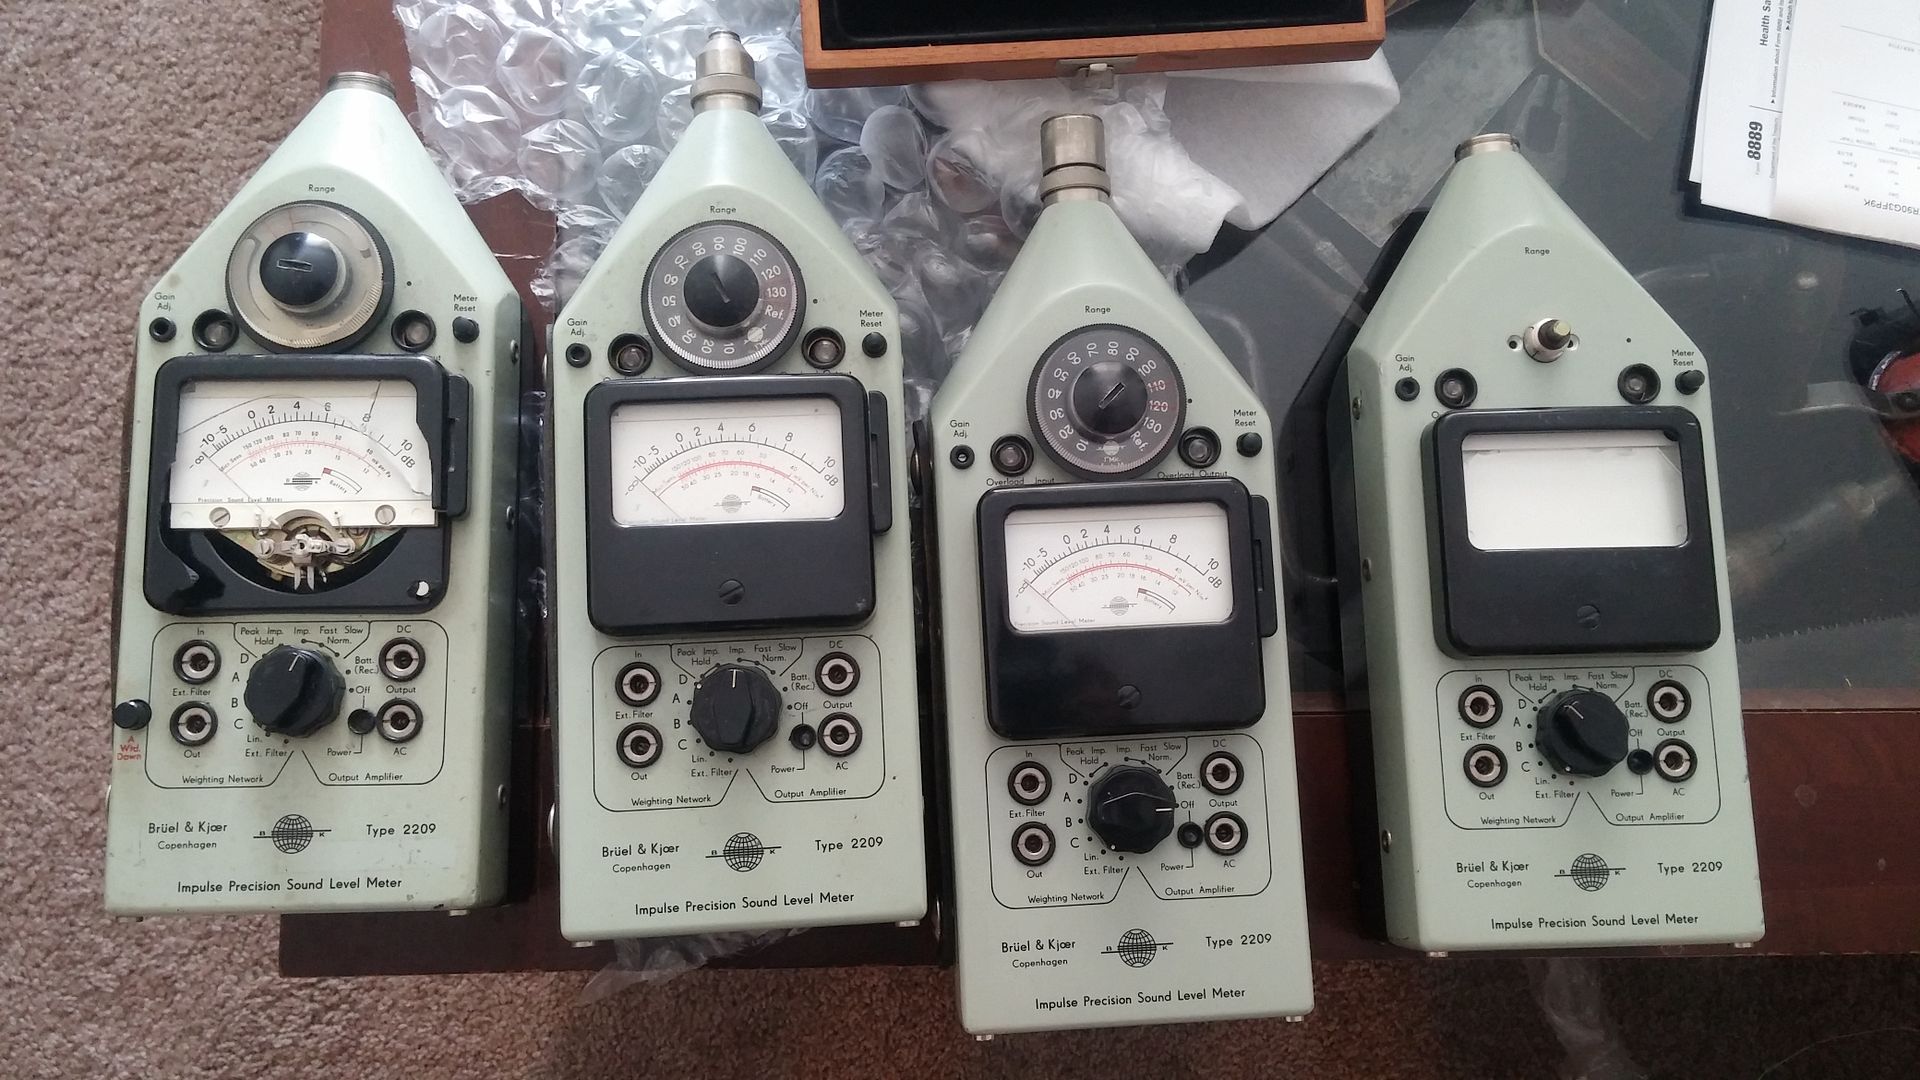
It's been a while. I was waiting in search of a lathe chuck for the 4th axis for my machine as well as finding some sound meters for testing. Looks like I'm almost there. Now I just have to find some microphones.
 |
|
|
|
|
[#22]
Bump for progress.
|
|
|
|
|
[#23]
Topic Moved
|
|
|
|
[#24]
Holy flash back time.
I've moved a few times since this thread was started.....but I unearthed my receiver blanks from this original project during my last move a few weeks ago, so we're going to dust of this project and give it another go. I found my receiver blanks, though a little rusty, they should clean up just fine. 
I think I decided to switch to a monocore design for ease of manufacture and simplicity of the end product. I was playing around with a few designs. Someone told me to move away from flat baffles. 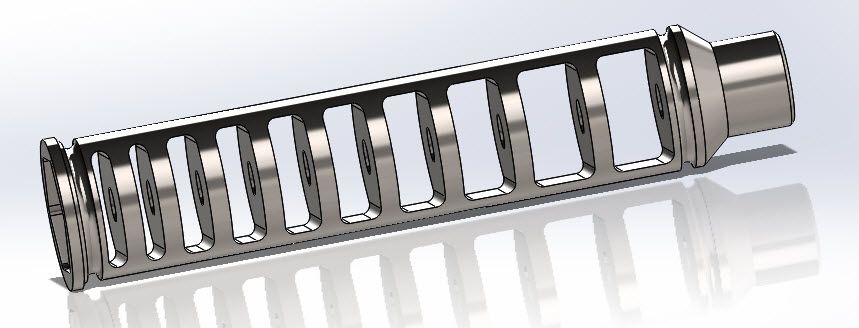
So I switched to angled ones. Then was told to create more volume, so..... 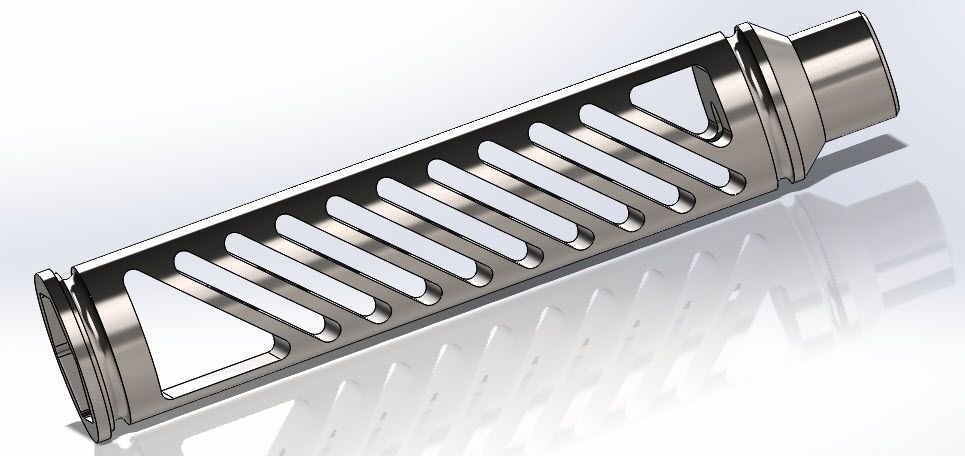
I came up with this. Though I'm sure the design will evolve handful more times. 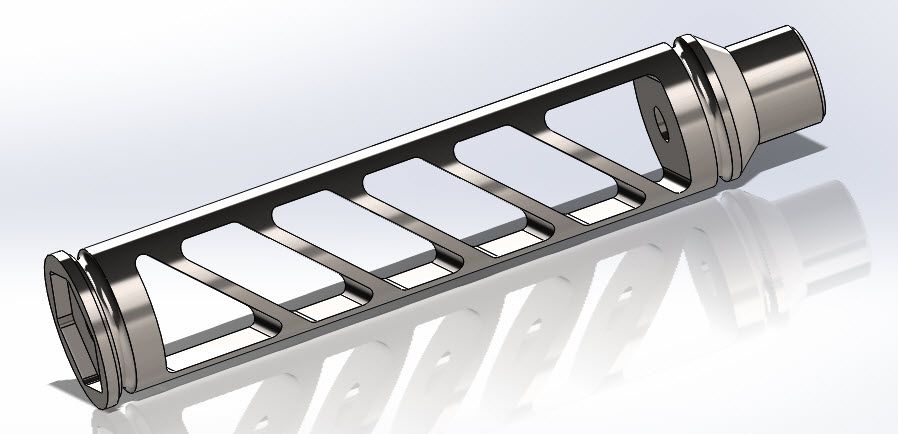
|
|
|
|
|
[#25]
Holy shit, it's back!!!!
This is awesome! |
|
|
|
|
[#26]
So, is that a rebated hex profile on the front to remove the core? Looks great. My only advice on the monocore would be to give it more space between baffles and rounded corners better to make it easier to clean. Also, think your way around what happens when you pull this core out of the outer tube with stuff built up on the sides.
|
|
|
|
|
[#27]
Yes. I hate designs that use a wrench with pins. They always seem to break or get all mangled up.

|
|
|
|
|
[#28]
In.... Wait.... Back?
MAHA |
|
|
|
SC, USA
|
[#29]
Cool, looking forward to more.
|
|
|
NM, USA
|
[#30]
Originally Posted By BadgerArms:
... Also, think your way around what happens when you pull this core out of the outer tube with stuff built up on the sides. |
|
|
|
[#31]
Originally Posted By GAU5-A-A:
How about putting a full wrap of .003 or .005 stainless shim around the core, that comes out when your remove the core. |
|
|
|
|
[#32]
bumpstock
|
|
|
|
|
[#33]
Slight change in plans. I decided to upgrade my MK III that I originally had earmarked for this project to an MK IV.
 I've also been working on getting some better equipment for my shop to help with the build. The small mill and lathe that I had would certainly have been suitable for the job, but the two newer ones will make it a cake walk. I got them home and off loaded yesterday. So it'll take me a week or two to get them shoehorned into the basement and some 240v drops run. The lathe is a Grizzly G4003G and the mill is an Enco geared head. Nothing earth shattering by any means, but an upgrade from the 9x20 lathe and pulley head, round column mill I did have. 
|
|
|
|
|
[#34]
Getting excited!
|
|
|
|
ID, USA
|
[Last Edit: Polarbear31]
[#35]
Cool project. I have two Ruger grip frames with no uppers. If you made some 80% MK2 recievers I'd buy a couple.
Jake Never mind I made my own: Ruger 22 Pistol- IT'S ALIVE! |
|
|
|
[#36]
Originally Posted By Polarbear31:
Never mind I made my own: Ruger 22 Pistol- IT'S ALIVE! |
|
|
|
UT, USA
|
[#37]
Bump.
|
|
|
|
[#38]
in.
|
|
|
|
PA, USA
|
[#39]
Bump
|
|
|
|
[#40]
Holy smokes!
No wonder the green arrow didn't show up. My last post was 4 years ago?! Still a cool project. Can't wait too see it through. |
|
|
|
|
[#41]
I guess I should get cracking on this project. I've been spending the last couple weeks doing a lot of lathe work, so I will be plenty ready to take on the threading for this project.
With ATF E-forms back online now is the time to do it with turn around times reported as taking as few as 12 days. 
|
|
|
|
|
[#42]
I see you have a honey badger now....
|
|
|
|
|
[#43]
Originally Posted By Dodge223:
I see you have a honey badger now.... |
|
|
|
|
[#44]
Originally Posted By unclemoak:
No Honey Badger, it's a .308 KAC barrel off a MOD2 upper that someone wanted it re-threaded to 5/8-24. |
|
|
|
USA
|
[#45]
I wonder if I will die before we actually see some progress on this.
|
|
|
|
[#46]
Originally Posted By CTM1:
I wonder if I will die before we actually see some progress on this. 
I did efile my form 1 yesterday. I've read reports of them taking as little as 12 days, so fingers crossed! |
|
|
|
|
[#47]
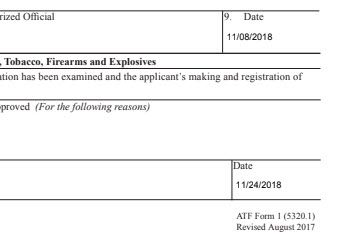
Looks like it's time to get cracking on this. Form 1 came back approved 3 hours ago.
|
|
|
|
|
[#48]
Originally Posted By unclemoak:
Looks like it's time to get cracking on this. Form 1 came back approved 3 hours ago. https://i43.photobucket.com/albums/e398/unclemoak/2018-11-24_11-57-28.jpg I’m still waiting on my two submitted on 11-1 and 11-8. |
|
|
|
|
[#49]
Originally Posted By Naporter:
They work Saturdays? I'm still waiting on my two submitted on 11-1 and 11-8. Originally Posted By Naporter:
Originally Posted By unclemoak:
Looks like it's time to get cracking on this. Form 1 came back approved 3 hours ago. https://i43.photobucket.com/albums/e398/unclemoak/2018-11-24_11-57-28.jpg I'm still waiting on my two submitted on 11-1 and 11-8. |
|
|
|
FL, USA
|
[Last Edit: ripro]
[#50]
Congrats on the F1 approval, can't wait to see the next update
|
|
|

AR15.COM is the world's largest firearm community and is a gathering place for firearm enthusiasts of all types.
From hunters and military members, to competition shooters and general firearm enthusiasts, we welcome anyone who values and respects the way of the firearm.

Subscribe to our monthly Newsletter to receive firearm news, product discounts from your favorite Industry Partners, and more.
Copyright © 1996-2024 AR15.COM LLC. All Rights Reserved.
Any use of this content without express written consent is prohibited.
AR15.Com reserves the right to overwrite or replace any affiliate, commercial, or monetizable links, posted by users, with our own.


