WI, USA
|
[#1]
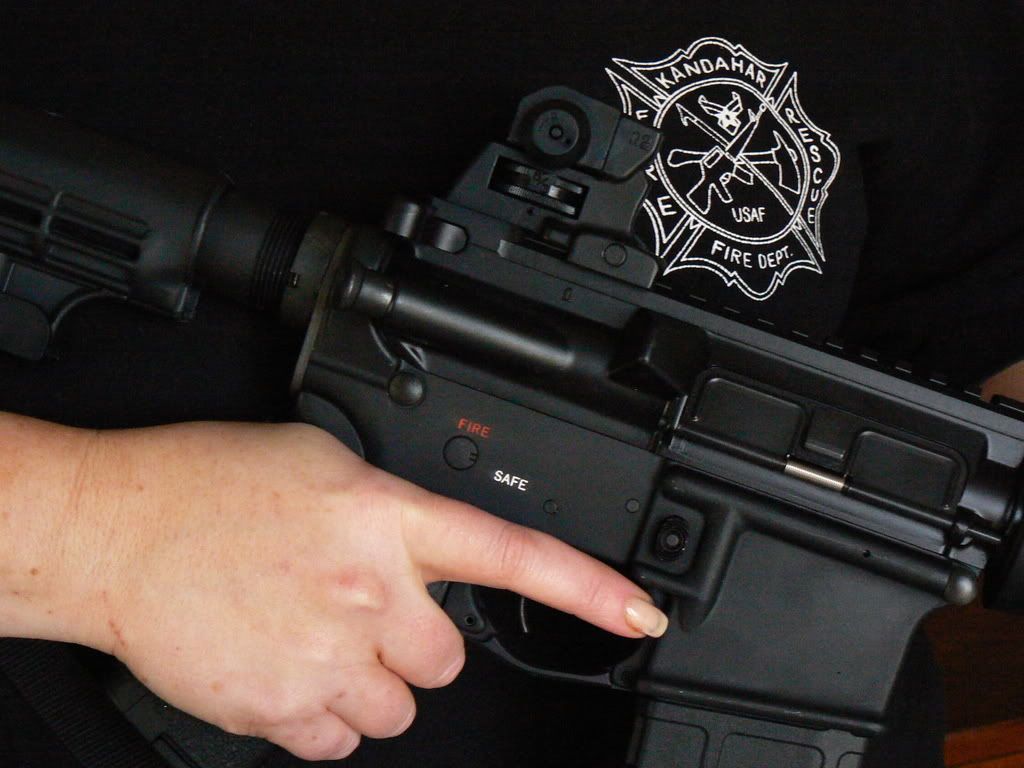
I figured that slant would be the biggest bone of contention. But I didn't want to go that far with the belt sander. So, I'm lazy I guess. I don't think it looks that bad either. Someday I'll paint her totally. but for now, the sharpie works. I may paint all my furniture a dark brown and at that time, I'll do the sight too. I just don't know if I have the heart to paint all the metal.
Thanks for noticing my work though. Your post made it easier for me to do it. I'm thinking that saw will cut it wont it? And I saw you did it with a hack saw so I'm like, I'm doin it!! |
|
|
WA, USA
|
[Last Edit: duncan]
[#2]
Thanks superbee24! You were my inspiration. Additional tips: Get a reconditioned belt sander ($20) with fine belts ($3). Used a Rotozip with a 4" metal cutting wheel - slices metal like budder! Heat gun - use only low setting to skin up the paint in between coats Dupli-Color Trim Paint ($6) - Yes, auto store spray paint for your handles, door trim, and bumpers. It offers great adhesion and its made for car door handles that will be grabbed repeatedly. The high temp BBQ paint did not do well with BreakFree CLP. Started to run off. Don't use BBQ paint! Will let you know how it holds up. After you make you big cuts, you can radius and smooth with the belt sander. Then ultra fine sand with auto body sandpaper (500-800 grit) - really smooth finish. No grind marks! Thanks. |
|
|
|
OR, USA
|
[#3]
The original pics seem to have disappeared. Any chance of getting them back? It sounds like a really clever project.
|
|
|
|
[#4]
Looks like my host went down, reuploading them now. |
||
|
|
MD, USA
|
[Last Edit: Changed]
[#5]
I just cut down a carry handle for a 11.5" flat-top +Aimpoint build and when I took it to the range it was only 2 clicks off at 25yds. I had a flip up rear sight on it, but I definately like the cut-down CH buis. I'll get a pic up later today. I cut it by hand with a hacksaw and used some small files to clean it up.
 
|
|
|
BC, CAN
|
[#6]
will doing this mode work on a stag arms with no rail?
|
|
|
FL, USA
|
[#7]
The LMT, and even DPMS version, have two clamps, not just one. |
|
|
|
FL, USA
|
[#8]
The LMT has one clamp. RRA and DPMS have two. |
||
|
|
USA
|
[#9]
Sure you can - BC makes 'Aluminum Black'. |
||
|
|
|
[#10]
Hacksaw for 3 minutes, file for 5 minutes, paint applied soon after. Came out wonderful for a 15 minute job.  - BG |
|
|
|
|
[#11]
I used the band saw and dremel tool to do the rough cuts. The rest was dun with hand files. I do not know how long it took but it was not to long. I finished it with flat black spray paint.
|
|
|
|
CA, USA
|
[#12]
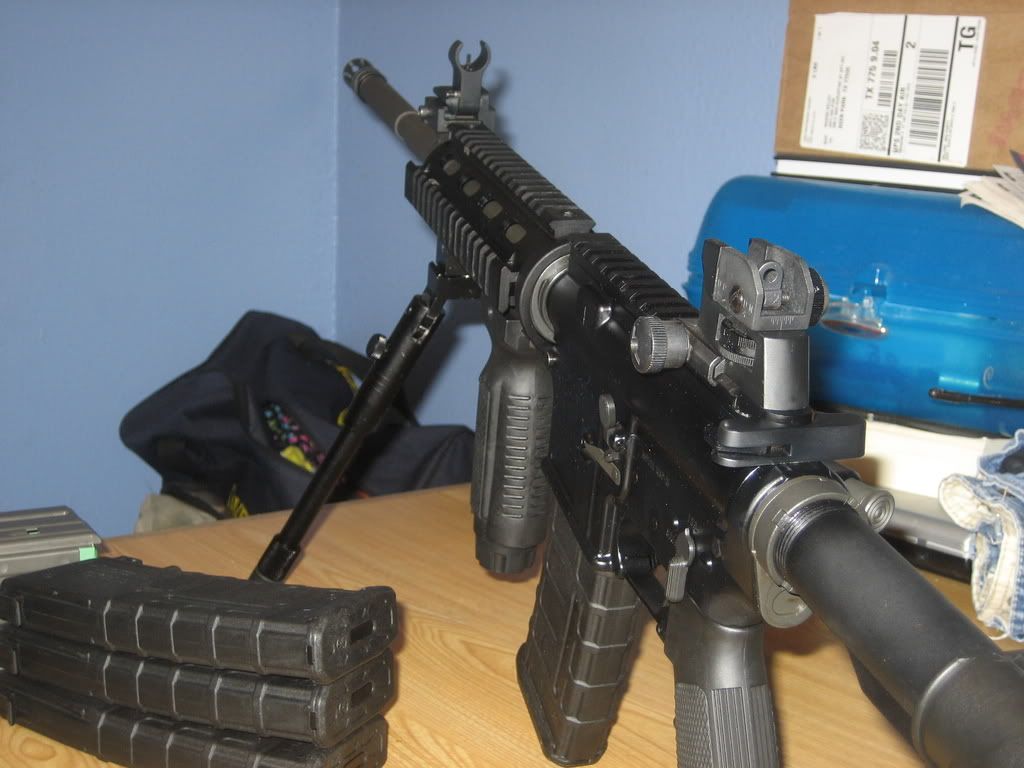
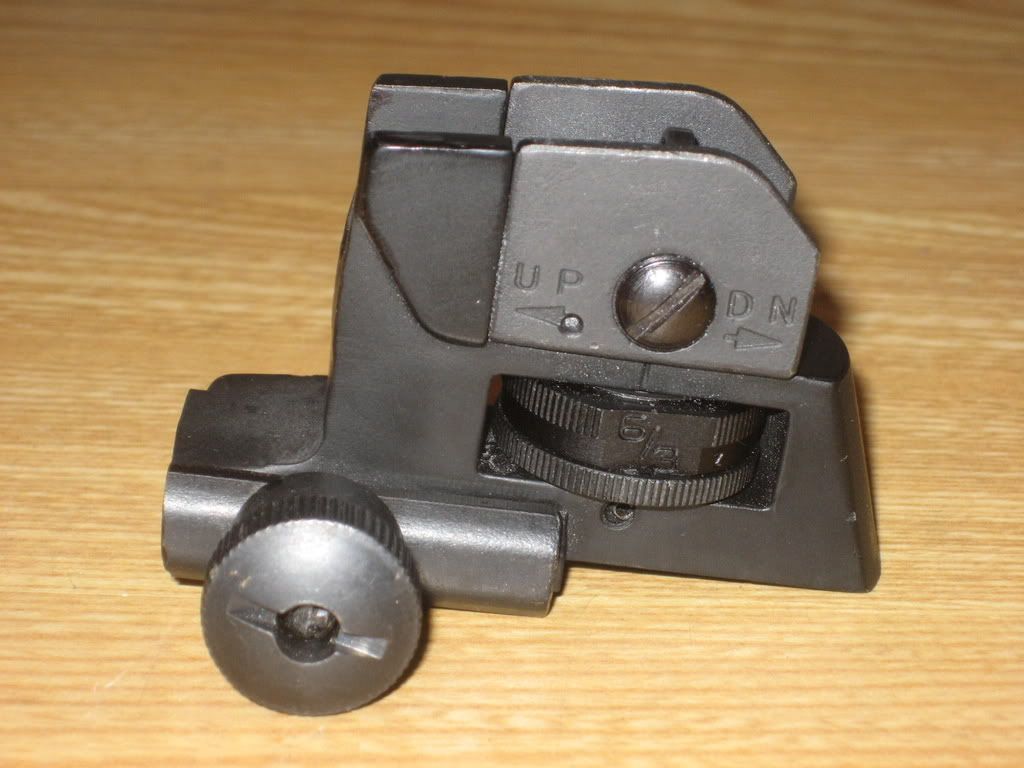
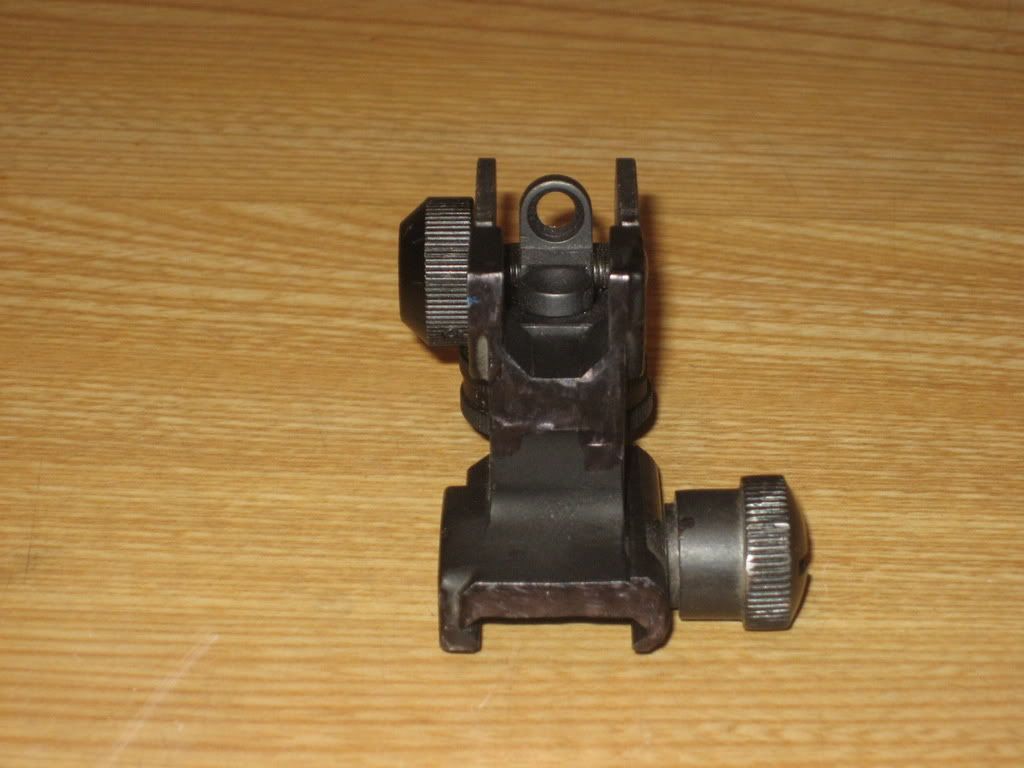
I cheated I just use the one that came with my rifle it a little bit smaller and dosen't have a big thumb screw hanging off the side
http://i117.photobucket.com/albums/o56/mikegigabyte/IMG_0002.jpg http://i117.photobucket.com/albums/o56/mikegigabyte/IMG_0001.jpg |
|
|
TX, USA
|
[#13]
 I chopped my carry handle and made a BUIS it took about 35 min. to do, I showed it to a guy i work with and he said it looked bad. So whay do you guys think. |
|
|
|
[Last Edit: fly223]
[#14]
Seems to look pretty damn good to me, nice job! Joe.... |
||
|
|
|
[#15]
choped the carry handle. used dremel to score it first then followed through with saws all then smoothed out with dremel again and hit it with flat black.
  
|
|
|
|
KS, USA
|
[#16]
I have chopped my carry handle, and would now like to mount a scope over the top of the carry handle. I want to treat this like the buis it now is. If the scope has to go, I can yank it off and utilize iron sights. I looks like I need to mount the scope an 1 3/4" high to clear. Does anyone have success with this?
|
|
|
|
[#17]
think I can chop a 1st generation rra dominator?
the cross bolts just tighten, e.g. they don't really locate the piece on a rail. |
|
|
|
WI, USA
|
[#18]
Maybe he just doesn't like the look of a CCH. Yours looks fantastic!!! I think it improves sight picture too. No long metal thing to look down. |
|
|
|
|
[#19]
What happened to the pics?
|
|
|
|
GA, USA
|
[#20]
Great Idea! To go one step further. Is it possible to chop the fixed handle from an A2 upper and attach a picatinney rail with JB weld and screws into tapped holes?
|
|
|
USA
|
[Last Edit: mtoomey79]
[#21]
I'm with this guy. I got that awful Bushmaster upper with mini-Y comp, in the process of grinding that bad boy off, replacing with a phantom, but that doesn't solve the carry handle issue. Anyone brave enough to attempt this yet? |
|
|
|
CA, USA
|
[#22]
|
|
|
|
|
[#23]
Bring back the pics!

|
|
|
|
CO, USA
|
[#24]
Back in the 90's some friends cut them off and then drilled and tapped for a weaver rail. As long as you are not going to try and use iron sights it can be done. If you want to use irons I would want to set it up on a mill to make the cut so that the final deck height was correct. |
||
|
|
|
[#25]
dremels not enough to do ti alone?
I'm about to go to town on my cardinal forge ch with a dremel alone. will report back. |
|
|
|
VA, USA
|
[#26]
dremel, milling machine from work, and testers flat black paint. next time, im using hand files! but i think it looks pretty good.
|
|
|
|
[#27]
You can do it with dremels alone if you have a very steady hand with the dremel. I lacked such skill though. I used a hacksaw on my carry handle, and then sanded down all the ugliness with 100 grit sandpaper. I used a dremel to polish away the sharp edges, but not much else. I used it to cut at the steel mounting plate thing for a while, but a hacksaw worked better. I hit my sight with just black primer, and the color match was scary good. |
||
|
|
MD, USA
|
[#28]
It look good! now i'm thinking i might do the same thing on my AR.
|
|
|
|
[Last Edit: testudo]
[#29]
Here is my go at it.

This was done in an apartment kitchen with no vice, just a hacksaw and a rotary tool. |
|
|
|
UT, USA
|
[#30]
That looks sweet..I guess I found a use for my carry handle. love the thread
|
|
|
|
[#31]
       
|
|
|
|
GA, USA
|
[#32]
Thats excellent. I am jealous of the machine shop!!!
I just discovered DIY Tactical also. I am going to chop a handle just because!!!! I have YHM sights and a truglo red dot and they co-witness great with a QD throw riser. Cool part is I can take the red dot off and use it on my .22 MkI Ruger for steels. |
|
|
FL, USA
|
[#33]
So I know this message is old and all, but could someone re-upload the how-to pics? imageshack.us is free and the pics last a long time, a lot longer than the other hosts on this thread did.
|
|
|
NV, USA
|
[#34]
Yes, please re-upload the pictures. It is free as stated above. |
|
|
|
|
[Last Edit: zentradi]
[#35]
recycle = chops carry handles
|
|
|
|
|
[Last Edit: PantherArms762]
[#36]
BTW< if anyone want theirs done and is willing to pay 2way shipping, I would be glad to do it for free.
ETA: Just shoot me an IM. |
|
|
|
|
[#37]
Hmm..... that's quite the offer. And you did great work. |
||
|
|
|
[#38]
Great job. What color / type of paint did you use. |
||
|
|
|
[Last Edit: testudo]
[#39]
Thanks! The paint was rattle-can Rust-Oleum. "Nutmeg" for the base and then I used a fine mist of "oregano" for the second layer. The picture did not pic up the green specks. I know the color names sound questionable, but the results worked. |
||
|
|
IA, USA
|
[#40]
I'm curious, could one leave the long bottom portion of the carry handle in place and tack a section of rail on there to simulate "Tactical Carry Handle" from RRA? Also, does that thing, or any raised rail platform on the upper for that matter, really do anything special for you? Allow you to use a lower mount an Aimpoint or something? I've always been curious about that. Still fairly new to the accessories and such.
|
|
|
|
[#41]
A+++ thread, would read again!
I have some time today and I believe I'm gonna tackle this! Will post pics. |
|
|
|
|
[Last Edit: topknot]
[#42]

Shelter from the coming storm, complete with ARFCOM! 
Removing carry handle. 
Flattop. 
Cuts marked. 
Cuts made. 
Filed and sanded. It's primed and painted, now waiting to dry. OK, I'm going to have to get some better (and flat) paint. Suppose I could use my combat black Duracoat... Other than the shiny paint, I'm very happy with it, and it'll do until I have an extra $100+ for a real BUIS... 

|
|
|
|
WA, USA
|
[#43]
+1`for what this guy said
I'm curious, could one leave the long bottom portion of the carry handle in place and tack a section of rail on there to simulate "Tactical Carry Handle" from RRA? Also, does that thing, or any raised rail platform on the upper for that matter, really do anything special for you? Allow you to use a lower mount an Aimpoint or something? I've always been curious about that. Still fairly new to the accessories and such. The problem i would see is how you would keep it even close too level with any other rail section cool article |
|
|
|
[#45]
Originally Posted By acidman:
Originally Posted By theoriginalrecon:
So I know this message is old and all, but could someone re-upload the how-to pics? imageshack.us is free and the pics last a long time, a lot longer than the other hosts on this thread did. Yes, please re-upload the pictures. It is free as stated above. That might be difficult since Hemi is a banned member (unless someone saved the pics). |
|
|
|
WA, USA
|
[#46]
Yeah!! Sticking it in a mill it way cool, I work in a machine shop too, and that's how I'd do it.
|
|
|
TX, USA
|
[Last Edit: jaguar2803]
[#47]
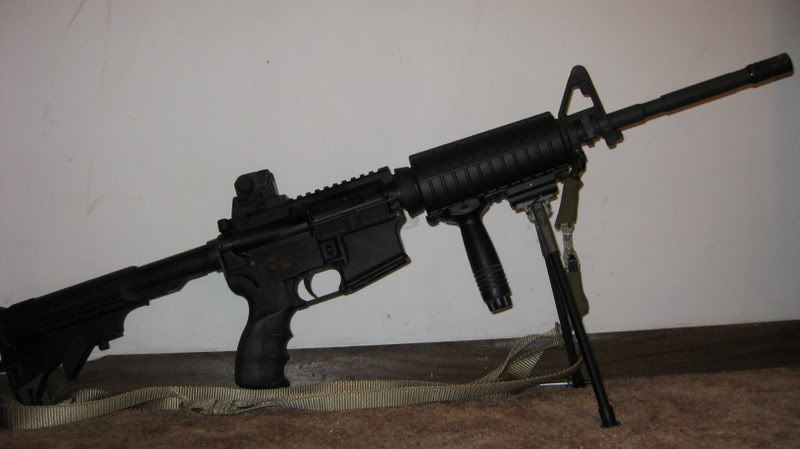
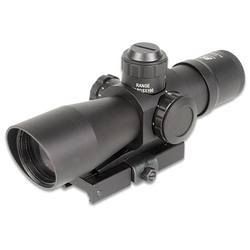
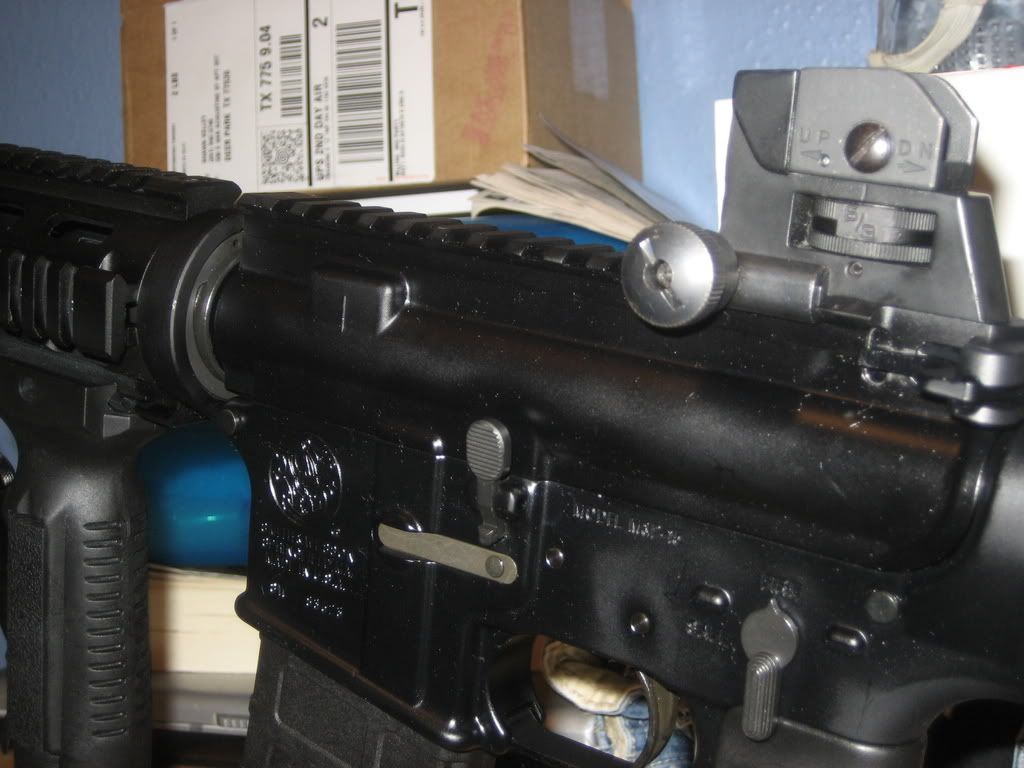
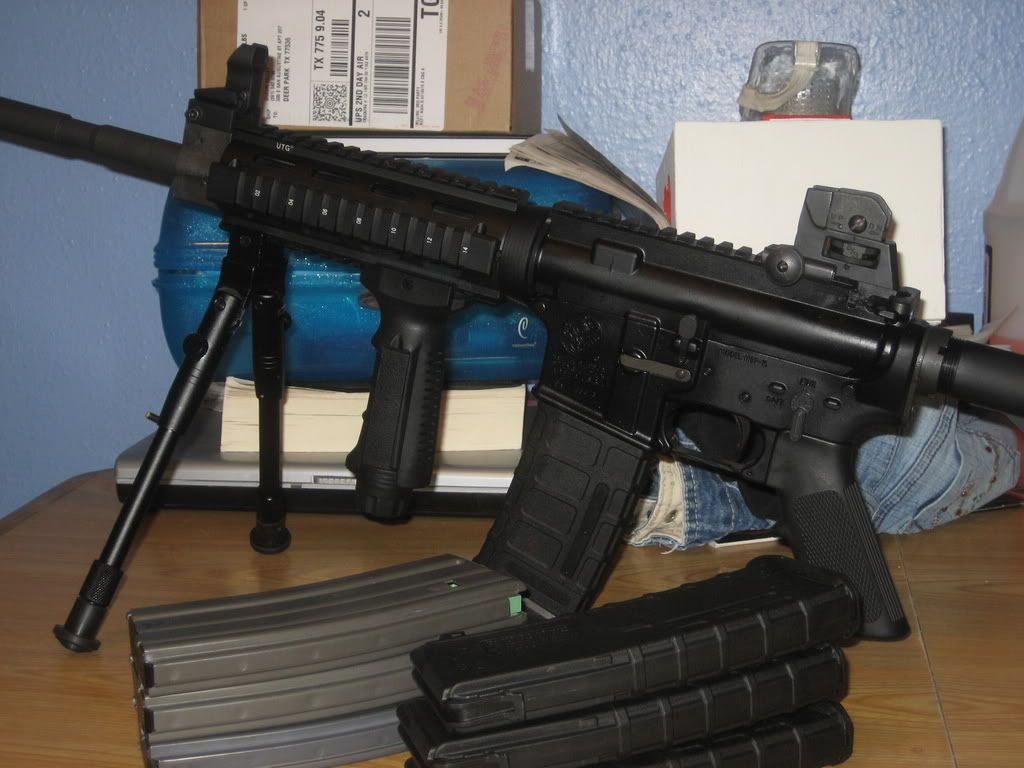
I made the chop today and have a scope on the way as well.Heres the scope im getting, nothing high dollar but its all I need for now.Could somebody tell me how this scope is gonna work with my iron sights,am I gonna need a riser to even see through the scope?Heres a few pics of my chop job and a pic of that scope.Another thing,are my front and rear sight even compatible?

|
|
|
|
[#48]
Fixed sights like yours are best for non magnified optics that have unlimited eye relief. The 4x you posted really needs a folding rear iron sight. With that fixed one, you'll have a heck of a time getting the scope high enough or far back enough.
BTW, do you want to sell me the front cut part of the handle? |
|
|
|
TX, USA
|
[#49]
I see what your saying.Could you post a link to a rear iron sight that might work with this scope.Yeah ill sale it,whats it worth to you?
Thanks, Jeremy |
|
|
|
[Last Edit: Skillshot]
[#50]
Since you are economically minded, I recommend the YHM rear flip from brightflashlights. He also carries a YHM riser rail (YHM227a) if you end up needing one. I use it with my cheap 4x and it works just fine.
I spoke too soon about the carry piece. I'm trying to build a brass catcher with mine, so if I'm successful I'll make an offer on yours. |
|
|
|
 Win a FREE Membership!
Sign up for the ARFCOM weekly newsletter and be entered to win a free ARFCOM membership. One new winner* is announced every week!
You will receive an email every Friday morning featuring the latest chatter from the hottest topics, breaking news surrounding legislation, as well as exclusive deals only available to ARFCOM email subscribers.

AR15.COM is the world's largest firearm community and is a gathering place for firearm enthusiasts of all types.
From hunters and military members, to competition shooters and general firearm enthusiasts, we welcome anyone who values and respects the way of the firearm.

Subscribe to our monthly Newsletter to receive firearm news, product discounts from your favorite Industry Partners, and more.
Copyright © 1996-2024 AR15.COM LLC. All Rights Reserved.
Any use of this content without express written consent is prohibited.
AR15.Com reserves the right to overwrite or replace any affiliate, commercial, or monetizable links, posted by users, with our own.


.jpg)


