|
[#1]
I use those acrylic paste they sell at hobby stores we have Michaels down here, but its the ones they use to paint like the warhammer 40k figurines and stuff.
Quoted: What would you use for green? I'm looking at making the stag deer head green and it doesn't come in the lacquer sticks. |
|
|
|
[#2]
The last one I did I used automotive touch up paint. It worked well. Holds up forever too.
ETA, the colors will look identical to whatever it's supposed to look like, so any color you see on a car or truck, you can have. |
|
|
|
[#3]
Received My New AR today just finished cleaning it. and did the color fill with Crayons I like it looks good will see what I think after a little bit may do the paint if I still like the look
|
|
|
|
[#4]
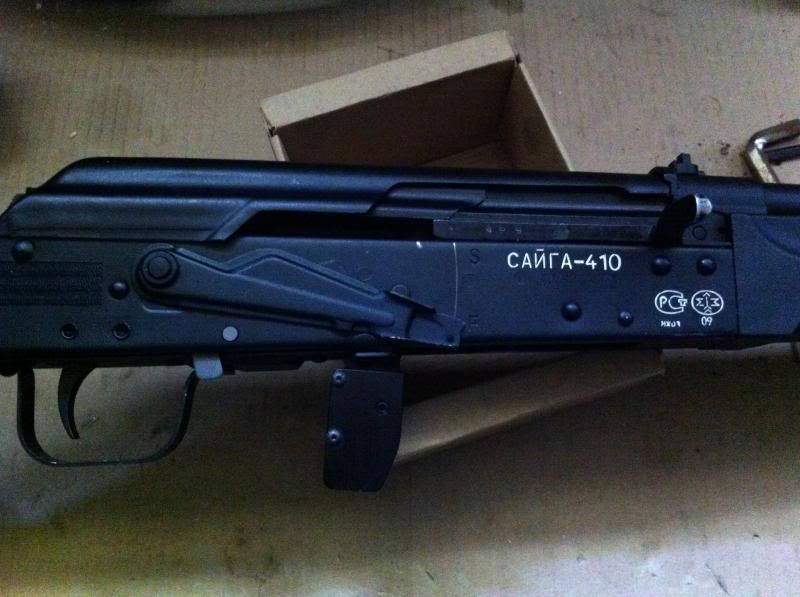
I know it's not an AR, but I did this on my Saiga. Came out looking OK, will be running it this weekend, can't wait to see if it all melts off!
|
|
|
|
[#5]
I tried the Crayon…..looked great, melted out on the first warm day left in the truck. I don’t see how anyone who uses their rifle , especially in warm weather can recommend it
Went to Testors Enamel and it has been bomb proof The barrel has been through a shitload of barrier drills, this is after its been scrubbed……and it has got HOT ……..the receiver has been tossed around a little, dropped a little cleaned a lot. 


|
|
|
|
[#6]
Just did a couple lowers with lacquer-stiks. For those of you who are on the fence, they are easy to use and can look great! However, if you apply the lacquer stik and are pulled away right after and have to leave the sloppy white paint on for 12 hours or so before you are able to clean it off, you might end up with a stained lower that you cannot get the paint off of that is so stained you might have to send it out to get cerakoted or something... So, if you are going to use lacquer stiks make sure you are only letting it sit for a couple hours before cleaning off excess! Learn from my mistake that's going to cost more than the receivers themselves to fix!
|
|
|
|
[#7]
Quoted:
Just did a couple lowers with lacquer-stiks. For those of you who are on the fence, they are easy to use and can look great! However, if you apply the lacquer stik and are pulled away right after and have to leave the sloppy white paint on for 12 hours or so before you are able to clean it off, you might end up with a stained lower that you cannot get the paint off of that is so stained you might have to send it out to get cerakoted or something... So, if you are going to use lacquer stiks make sure you are only letting it sit for a couple hours before cleaning off excess! Learn from my mistake that's going to cost more than the receivers themselves to fix! That is not true about it staining the lower and not getting it off. |
|
|
|
[#8]
Quoted:
Quoted:
Just did a couple lowers with lacquer-stiks. For those of you who are on the fence, they are easy to use and can look great! However, if you apply the lacquer stik and are pulled away right after and have to leave the sloppy white paint on for 12 hours or so before you are able to clean it off, you might end up with a stained lower that you cannot get the paint off of that is so stained you might have to send it out to get cerakoted or something... So, if you are going to use lacquer stiks make sure you are only letting it sit for a couple hours before cleaning off excess! Learn from my mistake that's going to cost more than the receivers themselves to fix! That is not true about it staining the lower and not getting it off. Then please tell me how to get it off (seriously)! I'll take some pics of what I mean. There's a haze that I can't get off no matter what I've tried... |
|
|
|
[#9]
Quoted:
Quoted:
Quoted:
Just did a couple lowers with lacquer-stiks. For those of you who are on the fence, they are easy to use and can look great! However, if you apply the lacquer stik and are pulled away right after and have to leave the sloppy white paint on for 12 hours or so before you are able to clean it off, you might end up with a stained lower that you cannot get the paint off of that is so stained you might have to send it out to get cerakoted or something... So, if you are going to use lacquer stiks make sure you are only letting it sit for a couple hours before cleaning off excess! Learn from my mistake that's going to cost more than the receivers themselves to fix! That is not true about it staining the lower and not getting it off. Then please tell me how to get it off (seriously)! I'll take some pics of what I mean. There's a haze that I can't get off no matter what I've tried... 
That is all the materials you need, if it is ruined and you do not want it anymore I will gladly take it off of you. |
|
|
|
[#10]
I haven't tried the heat gun yet, but I tried 91% alcohol and let it soak in mineral oil overnight.
Here's what it looks like: http://i578.photobucket.com/albums/ss223/amcardon/8a3892b1-7148-47da-aefd-33d109d1b274_zpsea93fd4a.jpg |
|
|
|
[#11]
I have left 3 lowers on accident sit for a whole weekend before, I paint lowers a lot and I only use lacquer stiks. It can't permanently stain the metal, you apply enough heat after cleaning with 91% alcohol then use swabs and mineral oil to clean it, and it will come out.
|
|
|
|
[#12]
I just used acrylics and some solvent to get it off. |
|
|
|
[#13]
Still no dice, Shooter - sending you an IM...
|
|
|
|
[#14]
Quoted:
Still no dice, Shooter - sending you an IM... Try Hoppes #9 powder solvent (or brake cleaner) and a nylon toothbrush. When you're done, wipe the area with CLP. |
|
|
|
[#15]
I've done several lowers and have found that model paint, a bit of paint thinner & the smallest needle diabetes syringes work really well. You will have to thin the paint a bit but it fills well and you don't risk the hazing around the markings.
|
|
|
|
[#16]
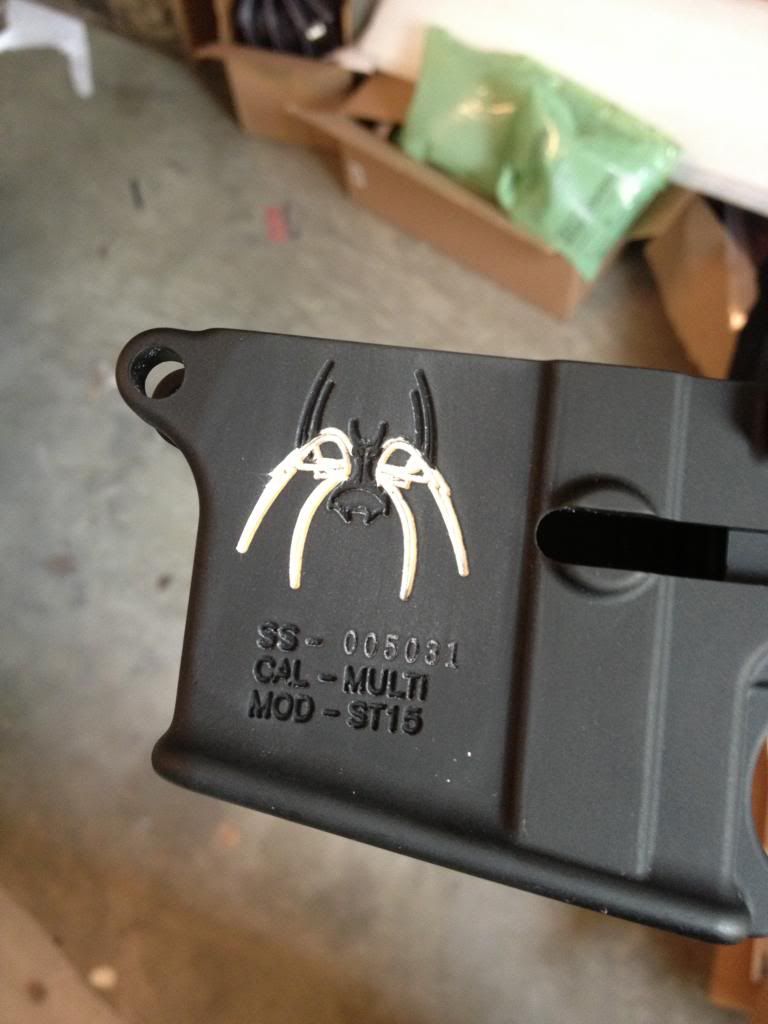
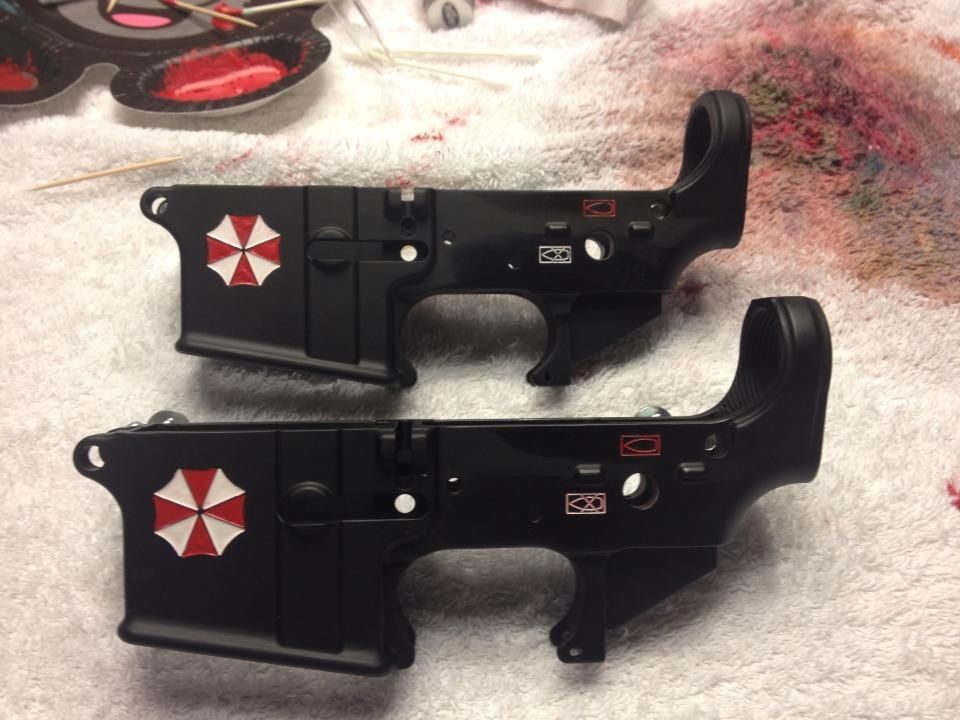
I just knocked out these 2, waiting for dry and clean up the small amount of haze left over.


|
|
|
|
[#17]
I have testers, acrylic paint, lacquer stiks, etc.....I still stand behind Lacquer stiks 100% because I have not had one gun come back with any wear or color fade yet. It is all about prep work, tape, etc...
The only thing that really works good besides Lacquer stiks, is the acrylic paint that is made for the Warhammer 40k figurines, it comes in little small bottles from most hobby stores. I use that on handguns instead of Lacquer stiks. |
|
|
|
[#18]
Here are some Aero Blems with orange, gold, and white crayons. Very easy application, and even better...easy to remove if you don't like the color
href=http://i1101.photobucket.com/albums/g429/jayflat/aerpic1.jpg" /> href=http://i1101.photobucket.com/albums/g429/jayflat/aeropic2.jpg" /> href=http://i1101.photobucket.com/albums/g429/jayflat/aeropic4.jpg" /> href=http://i1101.photobucket.com/albums/g429/jayflat/aeropic3.jpg" /> |
|
|
|
[#19]
Can someone recommend a testers that would match colt gray? Want to test something out on a lower i'm working on.
|
|
|
|
[#20]
Quoted:
... Shooter, After reading up on your described method for doing color fill on a lower receiver's engraving, I took the leap. I followed your description pretty closely. My (actually SWMBO's) oven starts at 170 degrees, so the lower was probably hotter than what you describe. The lacquer sticks "melted" on contact, and seemed to fill the engraving well. Because the lower was pretty warm (and Underworld was on the tube) the lower sat for about four hours before I started cleaning it. I ran into a couple of minor problems in the process. First, I taped over a small portion of the logo, and I over-scrubbed a portion of the manufacturer's name, thinning the lacquer in the lettering. Second, I'm noticing a small amount of "haze" in the areas that were exposed to fill the lettering. My question: Is it safe to reheat the lower to refill the areas I screwed up, or will I be setting the haze I noticed? I'm assuming (for what that's worth) that the haze I'm seeing is what you refer to when you talk about boxing in the painted areas for the over-night soak in step 14. Since this is my first build and will be going to the range and the dirt, I'm not too seriously concerned if things stay the way they are. I appreciate you taking the time to give us your write up, and for answering our questions. Brian |
|
|
|
[#21]
I'm going to be doing this to my AR I just build but figured I'd try it on my cheaper Glock Mags first and my Glocks since I've wanted to do this for a while.
I know others have said the cryaon method is great and won't melt but I've red and spoken to some people who have said they have seen it melt right off. So I tried Testors first. I can tell you at least for the Glock mags it did not work well at all. I would paint. Let dry for several hours and then wipe off and it would pull it all off every time. So I went and got some thick nail polish and non-acetone nail polish remover. On the Mags I had to do a couple of spots double and triple coat as it didn't get down in the groves enough but worked A LOT better then the testors for me. I did not try the testors on the slides so it might work great on metal I only used the nail polish and on the metal it was even easier then the mag's so I'll be using the nail polish on the AR as well since it worked so well on the Glocks. |
|
|
|
[#22]
Quoted:
Here are some Aero Blems with orange, gold, and white crayons. Very easy application, and even better...easy to remove if you don't like the color http://<a href=http://i1101.photobucket.com/albums/g429/jayflat/aerpic1.jpg</a>" /> http://<a href=http://i1101.photobucket.com/albums/g429/jayflat/aeropic2.jpg</a>" /> http://<a href=http://i1101.photobucket.com/albums/g429/jayflat/aeropic4.jpg</a>" /> http://<a href=http://i1101.photobucket.com/albums/g429/jayflat/aeropic3.jpg</a>" /> Wow those look amazing! I am so tempted to order the aero blem right now |
|
|
|
[#23]
I used One-Shot enamel the last time I painted lowers.
 |
|
|
|
[#24]
That mega look clean!
|
|
|
|
[#25]
I have painted a number of lowers. I use Tamiya acrylic paint to do mine.
I paint the logo and lettering on a de-greased lower then let it flash About 30 minutes - 2 hours later I clean it with 91% alcohol, careful not to get too much alcohol on the lower. Just enough to clean the surface, not enough to pull from the engraving. Also try to use a low absorbent cloth or applicator. Then I let it flash dry again (Alcohol is the thinner for tamiya. It has to harden up again) and clean up again until I am happy. If I ever want to strip the lower (even years later) I use 91% iso alcohol and let it sit on the lower for a few minutes then microfiber it out. Back to black in 5 minutes tops. C http://www.tamiyausa.com/items/paints-amp-finishes-60/tamiya-color-acrylic-paint-59000 |
|
|
|
[#26]
The best method I've found is testers paint and diabetic syringes.
|
|
|
|
[#27]
Looks great!
|
|
|
|
[#28]
I don't know how many colors are available but I used liquid White-Out on my Vepr and it not only looks great but it's held up quite well through a few cleanings. It's easy to touch-up too and there's no haze or anything like that.
|
|
|
|
[#29]
|
|
|
|
[#30]
Look sick!!
|
|
|
|
[#31]


|
|
|
|
[#32]
|
|
|
|
[#33]
|
|
|
|
[#34]
Nice, I have an ATI polymer lower. Is there anything I should now about before taking to coloring it in?
|
|
|
|
[#35]
Quoted:
Still pretty hot, but as you can see almost all the haze is gone just have to touch up the normal spots on PSA lowers. The lettering toward the top of the receiver and the safe/fire are engraved IMO bad. The safe/fire is too thick, and the lettering is not thick enough....its always the two spots I have to touch up. When it comes with the bullet symbols its engraved just like the logo and serial number. Anyway, one more quick touch with a swab and then let it cool off and toss another bake on it.....my digital camera is a samsung wifi and its been doing that weird shit with the colors on me, trying to fix my manual mode settings...I guess my fiance or I messed with it. *edit* when I was asking people in the picture thread what camera they were using I should have just bought the DSLR or whatever it was...... my S3 takes better pictures than this thing. It is hit or miss I guess when it was 65% off on amazon.com I should have known lol. I want to color part of my new lower, but it is assembled now. Short of stripping it down to bake it, what can I do? Will a heat gun or hair dryer work? 
|
|
|
|
[#36]
This was done by High Standard on a limited production for Houston Gun Collector's Association a couple of years ago. I have no idea what they used, and the man who did the wortk has passed away.

|
|
|
|
[#37]
I haven't done my lower yet and I'm not sure that I will since its coated/painted and not anodized. Not sure exactly what Mag-Tactical uses on theirs but I don't want to risk it w/ thinner.
But if you take a lighter to the surface and get it warm and then melt the tip of the crayon it makes it go in very well. I did my Springfield XD-9 which has a lot of little details on the logo. I've put probably 100-200 rounds through it and cleaned it w/ frog lube but not aggressively on the coloring. http://i204.photobucket.com/albums/bb128/tealm0nsta/sticks/IMG_4942.jpg |
|
|
|
[#38]
I don't do much color fill but when I do I use testers paint and a tooth pick-
|
|
|
|
[#39]
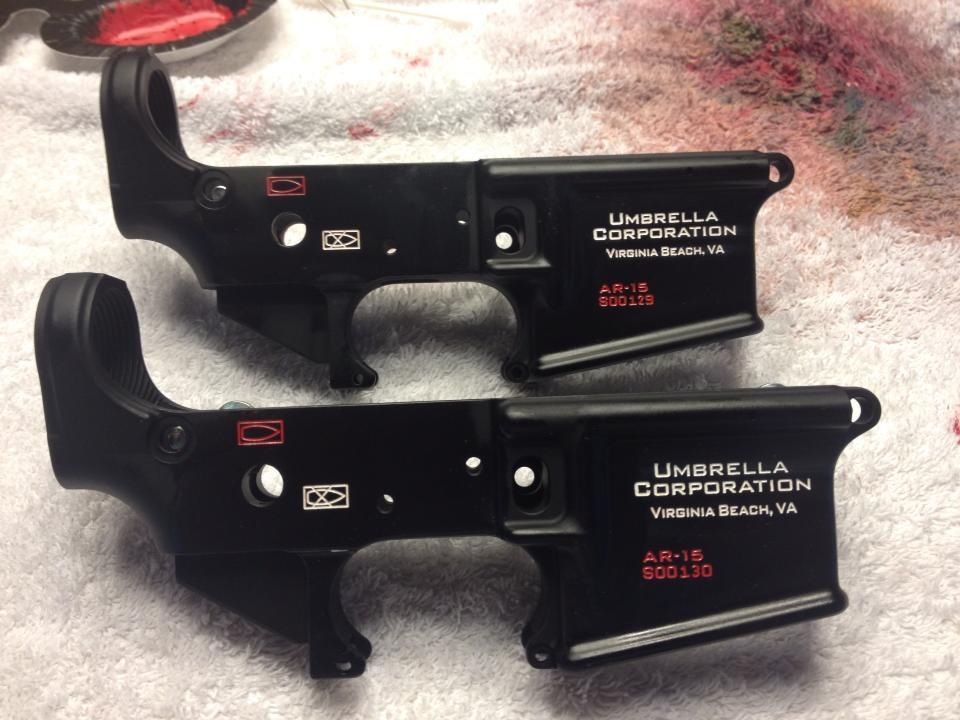
Quoted:
I don't do much color fill but when I do I use testers paint and a tooth pick- http://i300.photobucket.com/albums/nn38/rccox/Guns/de4a972a5fc1e86c8ba0cb01f7f745a0.jpg http://i300.photobucket.com/albums/nn38/rccox/Guns/036f326cad31cfd28c1ac43555cc38a7.jpg Thanks for the pic! I've been thinking about getting an umbrella receiver, and wondering about how the logo would fill. Brian |
|
|
 Win a FREE Membership!
Sign up for the ARFCOM weekly newsletter and be entered to win a free ARFCOM membership. One new winner* is announced every week!
You will receive an email every Friday morning featuring the latest chatter from the hottest topics, breaking news surrounding legislation, as well as exclusive deals only available to ARFCOM email subscribers.

AR15.COM is the world's largest firearm community and is a gathering place for firearm enthusiasts of all types.
From hunters and military members, to competition shooters and general firearm enthusiasts, we welcome anyone who values and respects the way of the firearm.

Subscribe to our monthly Newsletter to receive firearm news, product discounts from your favorite Industry Partners, and more.
Copyright © 1996-2024 AR15.COM LLC. All Rights Reserved.
Any use of this content without express written consent is prohibited.
AR15.Com reserves the right to overwrite or replace any affiliate, commercial, or monetizable links, posted by users, with our own.


