


AR Sponsor


Posted: 12/21/2011 12:59:30 AM EDT
[Last Edit: SCW][Edited]
|
Here are a few posts from a thread I made a few years ago that can be found in the archives- I've pasted over the posts with the pictures and a few relevant comments, but please take the time to read the entire post if you are interested. Apparently it's impossible to resurrect a post from the archives, so we'll have to do with some pasting and the pictures again. I'd like to use this (this one, not the archived) post to update this thread and take some pics of the hammer and sear after a few thousand additional shots and dryfire trigger pulls.
Here is the original thread- http://www.ar15.com/forums/t_3_118/493214__ARCHIVED_THREAD____AR_Hammers_and_trigger_wear_polishing_w_pics__COMPLETED_______for_now____.html&page=1 Now we begin the old stuff. I'll try to get some pics tomorrow and update this thread if there is any interest, I was going to do it today but it took quite a bit of time to salvage a few posts and images from the old thread, and I'm now out of time. Thanks- So here are some pics of the wear patterns on my rifle. There really isn't any serious problems, it could be cleaned up pretty quickly with a stone which I intend to do, but I was hoping for some technical discussion beyond 'Send it to Bill Springfield". I realize that Bill can do fine work on it, but humor me, please. Here is the basic geometry. The BACK side of the hammer hook, where it hits the TOP of the trigger/sear is wearing because of contact. Is this normal/acceptable? I don't see a problem with it, it stops the movement of the hammer as it's going down but is not in contact when the trigger is reset and ready to fire again. 
A pic of the backside hammer wear 
Hammer Hook wear- 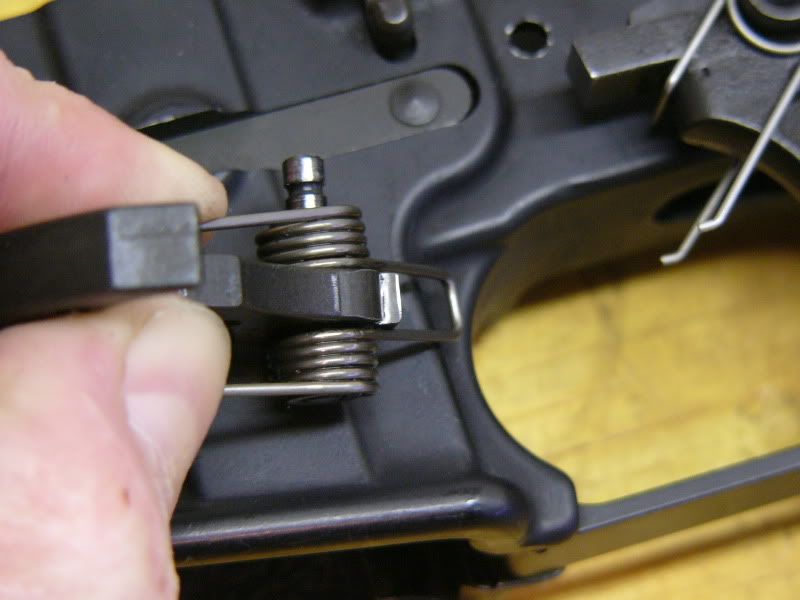
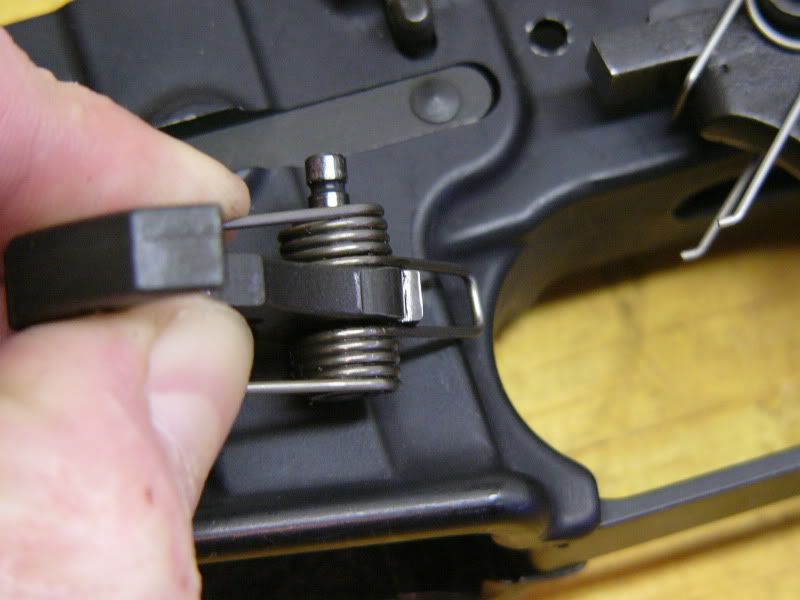
Trigger/Searwear from contact with the backside of the hammer 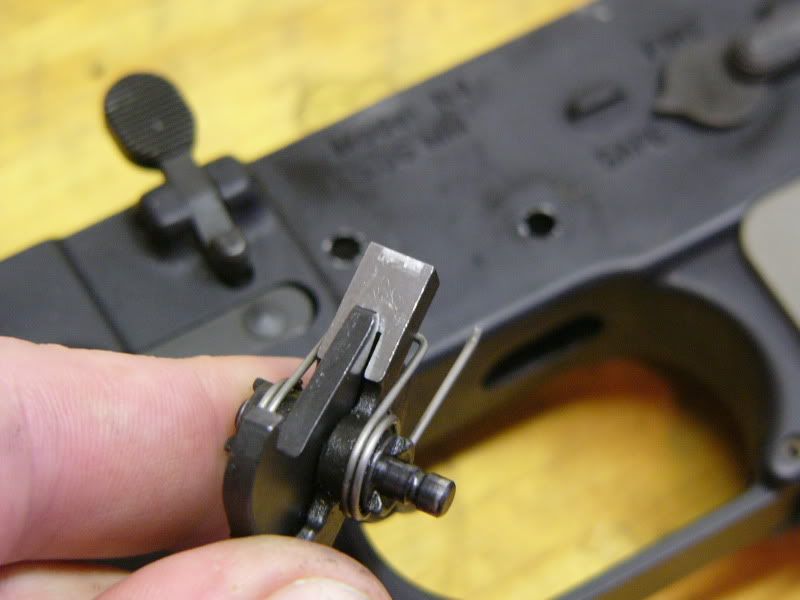
Trigger wear 
So the questions are this- Is there any benefit from stoning down the backside of the hammer? Like a CZ pistol, the trigger/sear is undercut forcing the hammer to move slightly as the sear drops. Anyone re-cut the sear angle to make it flat What were your results? Thanks- Back in the early 90's I bought one of these (earlier version, basically the same:)
http://www.brownells.com/.aspx/pid=9875/Product/SERIES_II_STONING_FIXTURE Back then I could go to the local gun show and a guy there had triggers and hammers that I would get 3 for $10, so I would experiment. I found that changing the sear angle on the hammer and polish to the engagement surface of the trigger would result in a no load / no creep trigger (after ruining 3 or 4 before finding the right angle.) Ink the hammer sear surface and watch for square contact with stone. Then assemble and reassemble until you find engagement correct (or throw it out and start again.). You can also re-harden surfaces (case harden,) albeit I never had trouble with excessive wear after stoning (especially with Hard Arkansas.) Before anyone jumps in, the mil-spec would have a hardness rating depth to the surface which I have never seen published so I can not give the measurement or depth of hardness or the amount of material removal before reaching past hardened surface, but if anyone has ever tried to lighten a hammer by grinding the hook off, they are pretty freakin' hard all the way through. Frankly I have a difficult time explaining to anyone why a surface hardened trigger or hammer would have machine marks on it without removing enough of the surface to reach past hardened surface anyways. If they were re-hardened after machining there would most likely be a discoloration to those machined surfaces. I always thought that they were through hardened by heat treatment and then machined, this would make the hardness the same in the center mass as it was on the surface. That would be another thread I guess... Removing any considerable amount of material can and will put the engagement contact points far enough away from each other to cause unintentional fire. For the hobbyist polishing as mentioned above by others improves the feel, but actual material removal and alteration of sear angles should be considered EXTREMELY DANGEROUS! But then again if you wanted to play safe you would have bought an ice cream cone. OK, Here is the update- This is how I cut the top of the sear removing all the burrs and irregularities. I cut this with a fine crystolon stone (about 400 grit) then polished it with the hard Arkansas (about 1200 grit). 
Here is the results of the polishing on the sear face, there is still a slight amount of damage from the hammer, but most of it is now gone. 
Hopefully these show the remaining contact patch after cutting the sear. I measure the change to be about .020", so from .065 to .042" of contact with the hammer. 


The results were.....Mixed. The trigger pull is decidedly shorter and cleaner. Less creep, WAY less grit and significantly shorter pull before the hammer drops. It also appears to be quite safe as I beat the crud out of it 'mortaring' the rifle to get it to set off the trigger, with no hammer drops. That part is all quite good. The bad part is the pull is still quite hard from a poundage point of view. I think re-cutting the angle of the sear would clean up a bit of that, and I might try that after I get another trigger to put in if/when I screw up this one. I'm still running stock springs, yellow springs might help as well but I'd like to see what I can get from better geometry and finishing first. OK, you guys who have experimented and got good results changing the geometry of your triggers and hammers, where did you cut and to what angles? This is what I've come up with after thinking about it some more. Obviously my trigger and hammer are not meeting at flush angles, or the bottom corner of the hammer would not be cutting into the face of the sear. Decreasing the undercut of the sear would cause this problem to be worse, but would probably lower the trigger pull by not camming the hammer back as the sear drops. Overall I think changing the sear angle will not get me what I want. So that leaves hacking on the hammer hook (Bob you mentioned that you typically work over the hammer, right?) I'm thinking about altering the angle of the hammer hook to cause it to be more flush with the sear. This would allow the hammer hook to bear evenly on the sear face and reduce some of the caming that occurs as the sear drops, but not all of it unless both angles were perfectly straight up and down (like all the good triggers in the world were originally designed...). I don't know if I can get them straight without removing so much material that the hammer starts to sit pretty high when locked back, but maybe that's not a problem either. This is a sketch of what I'm thinking would be the best step at this point. The red area would be stoned off so that the hammer and sear faces are flat against each other. I will also likely stone the sharp edge of the hammer hook similar to the sear to make it a little more robust and resistant to eventual damage- possibly keeping a nice clean trigger for longer. Thoughts? 
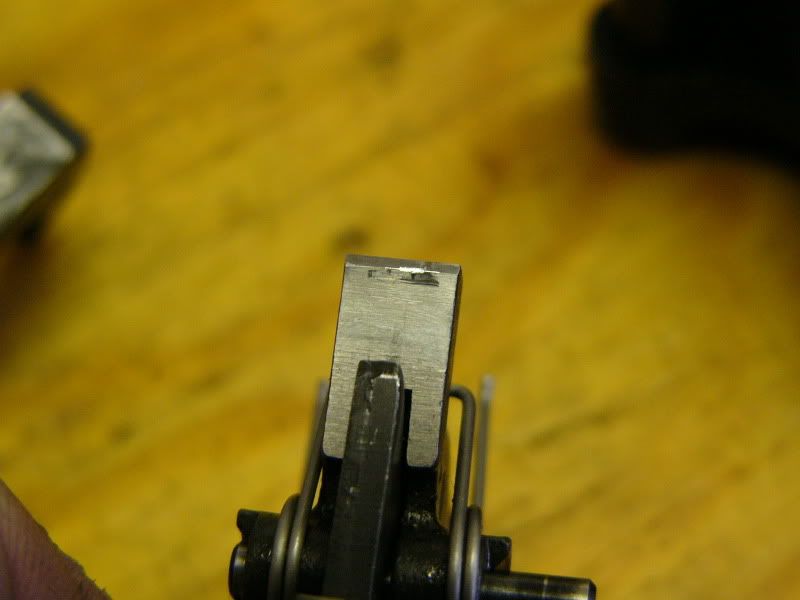
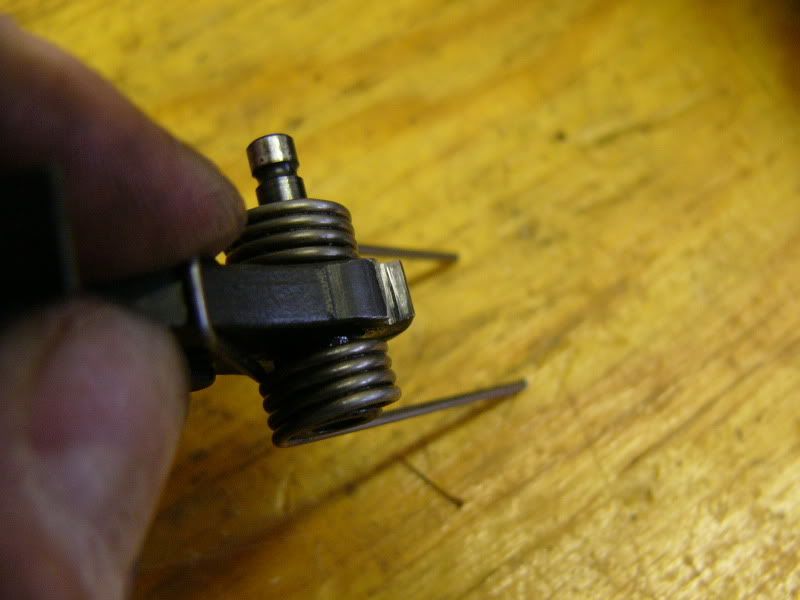
Very good results today. Other than forgetting to parkerize the mag catch screw and losing the trigger axis pin, the Hi-Power is back together and the AR trigger is finished- WITHOUT HAVING TO BUY A NEW ONE!!!!! I re-cut the face of the hammer hook with the Arkansas stone, which is very slow and gives a great polish as it cuts. I changed the angle on the hook and nipped the end of the hook off just the smallest amount to give it a new clean edge that is slightly thicker and hopefully stronger. Also interesting is the damage done to the top of the sear just through a few dozen dry fires, I think my sear re-cut is going to save the actual sear edge from any further damage, but I was surprised at what I found on the sear. RESULTS–––– FANTASTIC!! The trigger pull is just about 5# now, I'd like it to be slightly less but I'll wait to cut any further until I have a back-up FCG in case I screw it up. I'm convinced that cutting the hammer is a huge help, and based on what I saw with the mexican dykem (sharpie) the hammer is now hitting very flat on the sear face, so damage should be minimized as well. Here are a few more pics, cuz I know this is arfcom and 78.3% of the people who click on this thread only look at the pics. 


|
|
Hmm, not sure why most of the pictures won't show, so here's another shot at it-
OK, Here is the update- This is how I cut the top of the sear removing all the burrs and irregularities. I cut this with a fine crystolon stone (about 400 grit) then polished it with the hard Arkansas (about 1200 grit). 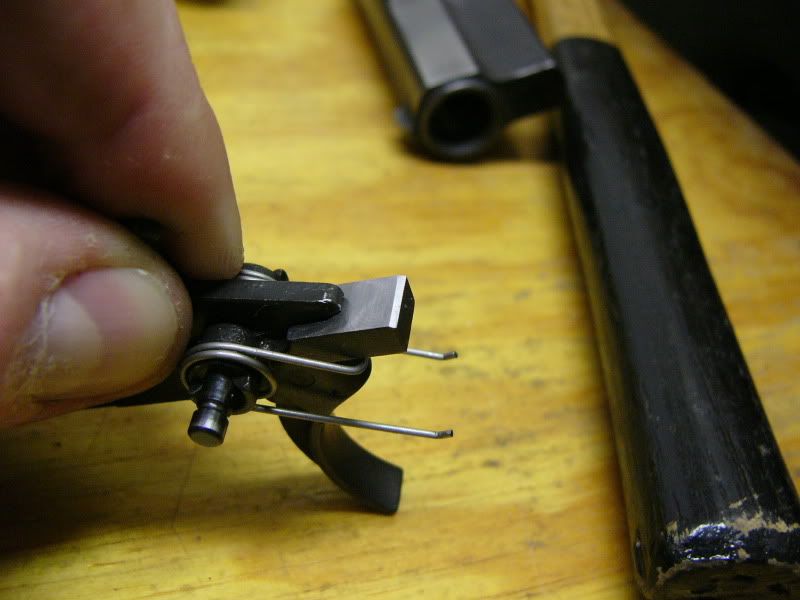
Here is the results of the polishing on the sear face, there is still a slight amount of damage from the hammer, but most of it is now gone. 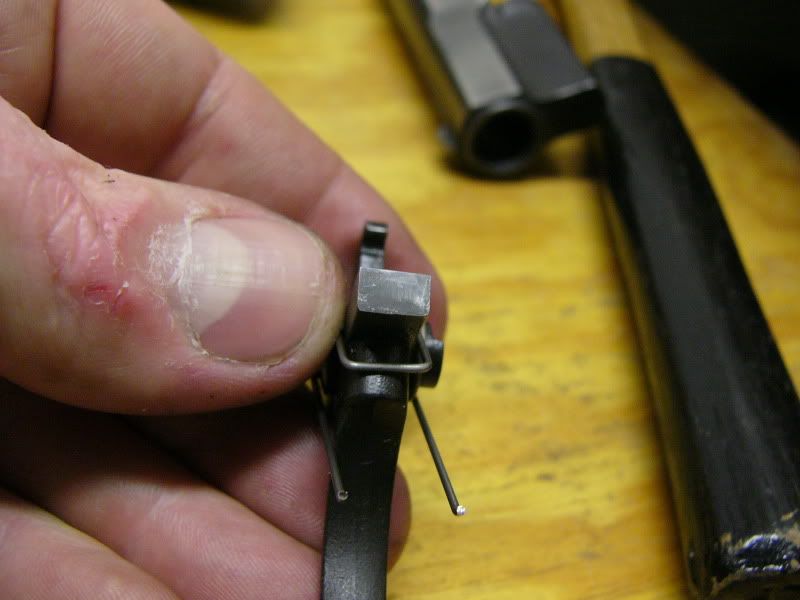
Hopefully these show the remaining contact patch after cutting the sear. I measure the change to be about .020", so from .065 to .042" of contact with the hammer. 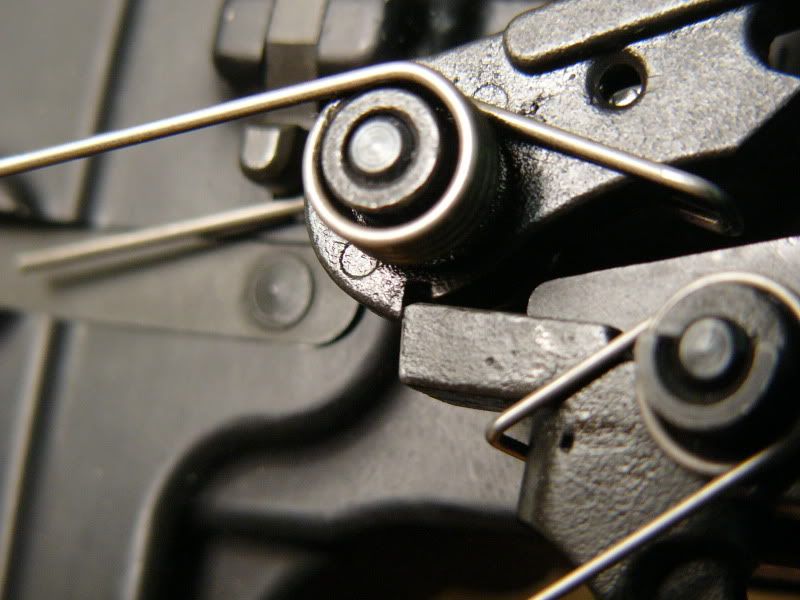
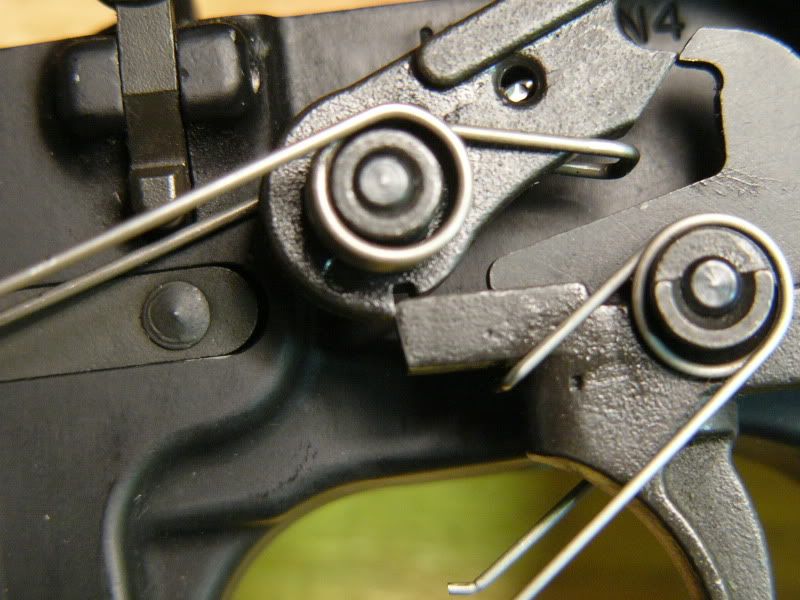
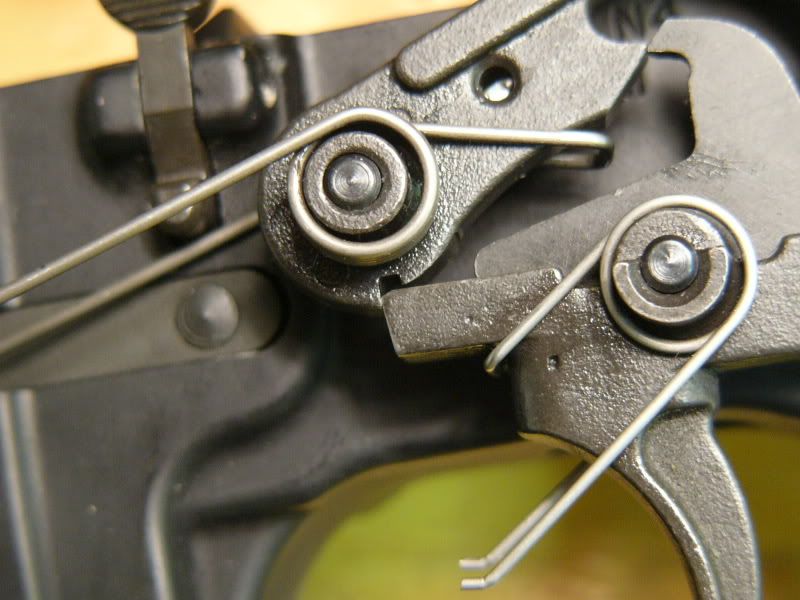
The results were.....Mixed. The trigger pull is decidedly shorter and cleaner. Less creep, WAY less grit and significantly shorter pull before the hammer drops. It also appears to be quite safe as I beat the crud out of it 'mortaring' the rifle to get it to set off the trigger, with no hammer drops. That part is all quite good. The bad part is the pull is still quite hard from a poundage point of view. I think re-cutting the angle of the sear would clean up a bit of that, and I might try that after I get another trigger to put in if/when I screw up this one. I'm still running stock springs, yellow springs might help as well but I'd like to see what I can get from better geometry and finishing first. |
|
More pics again-
OK, you guys who have experimented and got good results changing the geometry of your triggers and hammers, where did you cut and to what angles? This is what I've come up with after thinking about it some more. Obviously my trigger and hammer are not meeting at flush angles, or the bottom corner of the hammer would not be cutting into the face of the sear. Decreasing the undercut of the sear would cause this problem to be worse, but would probably lower the trigger pull by not camming the hammer back as the sear drops. Overall I think changing the sear angle will not get me what I want. So that leaves hacking on the hammer hook (Bob you mentioned that you typically work over the hammer, right?) I'm thinking about altering the angle of the hammer hook to cause it to be more flush with the sear. This would allow the hammer hook to bear evenly on the sear face and reduce some of the caming that occurs as the sear drops, but not all of it unless both angles were perfectly straight up and down (like all the good triggers in the world were originally designed...). I don't know if I can get them straight without removing so much material that the hammer starts to sit pretty high when locked back, but maybe that's not a problem either. This is a sketch of what I'm thinking would be the best step at this point. The red area would be stoned off so that the hammer and sear faces are flat against each other. I will also likely stone the sharp edge of the hammer hook similar to the sear to make it a little more robust and resistant to eventual damage- possibly keeping a nice clean trigger for longer. Thoughts? 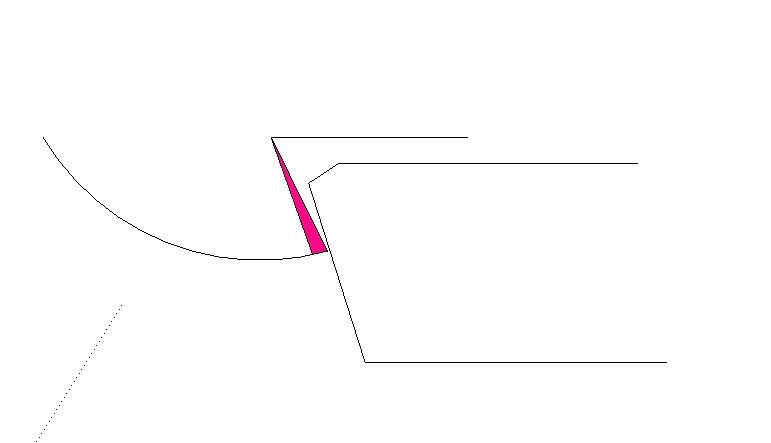
|
|
Last one-
Very good results today. Other than forgetting to parkerize the mag catch screw and losing the trigger axis pin, the Hi-Power is back together and the AR trigger is finished- WITHOUT HAVING TO BUY A NEW ONE!!!!! I re-cut the face of the hammer hook with the Arkansas stone, which is very slow and gives a great polish as it cuts. I changed the angle on the hook and nipped the end of the hook off just the smallest amount to give it a new clean edge that is slightly thicker and hopefully stronger. Also interesting is the damage done to the top of the sear just through a few dozen dry fires, I think my sear re-cut is going to save the actual sear edge from any further damage, but I was surprised at what I found on the sear. RESULTS–––– FANTASTIC!! The trigger pull is just about 5# now, I'd like it to be slightly less but I'll wait to cut any further until I have a back-up FCG in case I screw it up. I'm convinced that cutting the hammer is a huge help, and based on what I saw with the mexican dykem (sharpie) the hammer is now hitting very flat on the sear face, so damage should be minimized as well. Here are a few more pics, cuz I know this is arfcom and 78.3% of the people who click on this thread only look at the pics. 


|
|
Most of the pics in this post are red x's, but the ones in the linked archive thread are still there.
If you wouldn't mind, how about adding your info the the tacked thread in the build it yourself forum titled "trigger work". That way it won't get archived and will help more people. |
|
Originally Posted By jplewis:
Been there. Done that. Those parts were induction hardened. If you don't reharden the surfaces you modified you will eventually be "doubling you fun". Be careful. This thread is an update to that exact comment. I'm not sure what you've done or how you did it (please detail how you did your trigger, I'd like to compare) but this one has nearly 2,000 rounds plus dry-fire through it over the last 18 months or so since I did this work. The trigger is still very good and I have not had any issues with doubling. This experiment is partially to test the idea of the surface hardened trigger and see what my own experience can tell me. Thanks- |
|
Well, Here are the updated pics. Very little wear showing, I think the slight undercut on the hammer hook and the large cut on top of the sear really protect the actual release point of the trigger and keep a nice clean edge. I'm wondering if most trigger work skips this and 'sharpens' the mating surfaces such that in a short period of time they will roll over and deform under the stresses, and heat treatment get the blame? I'm curious how others have gone about this and had bad luck.
None of the wear patterns are significant enough to feel an edge when I run my fingernail over them, but you can see a slight polish under the right light. The hammer hook and sear face are worn nearly evenly across their respective surfaces, so I must have been pretty close to parallel (or at least pretty flat) on my cuts. Overall I'm very happy with how this one turned out. I also did a friends Bushmaster and his has held up very nicely, but he started having trouble igniting some primers and put a high-poundage spring in it to see if that was the problem. It wasn't, we've tried the primers in three different rifles including mine and had trouble in every one, so the (Wolf) primers have been blamed for those problems. I have not had any trouble, the trigger still feels great and works like it should. I really like having the shorter pull with the relatively heavy (for a match or tuned) trigger. This trigger is just good enough that I don't notice anything about it when I shoot, and most of the time I'm distracted by a bad trigger or surprised by a really good one. I guess this one is for Goldilocks, it's just right. 


|

I polished my trigger surfaces with a felt wheel and compound and now 800 rounds later the hammer will fall when you reset the trigger  so I broke down and bought a Geissele. Maybe I was a bit too aggressive with the polishing since the engagement surfaces had such bad burr marks. so I broke down and bought a Geissele. Maybe I was a bit too aggressive with the polishing since the engagement surfaces had such bad burr marks.
|
Thanks for posting all of that again and the update. I've got a couple of triggers & hammers I want to do myself. I'm thinking I may sacrifice a part or two by stoning them and then popping the surface with an automatic center punch to check the hardness afterward. If the tip shatters (been there done that) I'll know the surface is still GTG. If it leaves an indentation, I'll try breaking out the Kasenit and the smoke wrench.....  Edit to add: My first guinea pig has quite the hammer hook on it, with a LOT of cam action.   |

|
Originally Posted By NissanGuy08:
i just buy Geissele Do it the right way. You cant polish a turd. No matter how nice a WECSOGS trigger feels at first. That soft exposed metal will wear pretty quick. |
I'm no good at telling people what they want to hear when I dont believe it myself :)
|
Originally Posted By chuckd840:
I polished my trigger surfaces with a felt wheel and compound and now 800 rounds later the hammer will fall when you reset the trigger so I broke down and bought a Geissele. Maybe I was a bit too aggressive with the polishing since the engagement surfaces had such bad burr marks.You polished through the surface hardening. Once that is gone, the contacting parts wear like butter. |
I'm no good at telling people what they want to hear when I dont believe it myself :)
|
I have a post over on the retro side inquiring about a clean single stage trigger. I've gone to a Geissele in an A1 replica (mea culpa, mea culpa...) because I like to shoot the damn thing and wanted a good trigger. Gone the Bill Springfield route and still have one of his prepped triggers. It had a nice clean release but not at a terribly high round count. Had trouble with one of his prepped triggers in another gun.
Any suggestions of a source for a good single stage trigger? Moon |
|
Originally Posted By bigbore:
Originally Posted By chuckd840:
I polished my trigger surfaces with a felt wheel and compound and now 800 rounds later the hammer will fall when you reset the trigger so I broke down and bought a Geissele. Maybe I was a bit too aggressive with the polishing since the engagement surfaces had such bad burr marks.You polished through the surface hardening. Once that is gone, the contacting parts wear like butter. Please define 'like butter'. I've got probably 3,000 trigger pulls on this one which was a factory Noveske trigger, my friend has over 2,000 on his Bushmaster trigger that I did a few days after this one about 18 months ago. My theory/conjecture is that many people like the poor soul above simply grab the Dremel and start making some shiny metal without paying attention to how much they are altering the sear/trigger engagement or the interface angle. Further, it's pretty easy to get parts much too hot with rotary tools, make faces dishes or domes and who knows what else. Geometry is everything in a hammer/sear relationship, some are as little as .014" of engagement and won't follow or fail, others are a lot (LOT) more and can still be sketchy. Most of the WECSOG trigger jobs have not clue what their engagement was before or after, and they typically don't change it- but they do change the geometry of the faces. The conventional wisdom is that touching a factory trigger at all is going to cause problems within a few hundred shots. I've proven (to myself at least) I can go to 3,000 rounds and still have a fair trigger with the factory springs. If it dies tomorrow it will still have been a good experiment. I really don't expect any problems from this trigger in the near future. After the last 18 months there is only slightly discernible wear on the faces, this is far better from a wear perspective than the factory configuration and governed by that I should have increased the life of the trigger. Did I actually do that? I doubt it, but I won't know for another half a million rounds or so. Maybe someone out there would be willing to torture test this method? I'd be willing to work over a trigger if someone would be willing to put as many rounds through it as they can and report back. Chuckd840, may I please have the ruined trigger? If nothing else I'd like to see why it's failing and what the geometry looks like compared to mine. I'll pay shipping if you like. Thanks- |
Here are a few pics of the bushmaster trigger I worked over. Notice how the cut across the top not only reduces the engagement (making a shorter pull) but also drops the breaking point of the sear down so that the top of the sear will protect the edge from the backlash of the hammer. In both trigger sets this area has taken a lot of abuse, but the breaking edge is still in great shape.

Here you can see a slight amount of wear from use after I had re-cut the geometry and polished the faces. 
The hammer hook recut and polished. 
|
|
This topic, word for word, has been repeated many, many times over the last 30yrs; at gun clubs, gun shows, buddies basements, and now on the internet. The stock GI trigger is an excellent combat carbine trigger. There is no problem, squeezing a gritty 7lb trigger and hitting a target you would be shooting at with a carbine. It is not a nice, smooth, match type trigger, for precision shooting. People have been messing with these triggers for years, and the result is always the same. They shit the bed, for any myriad of reasons from lack of case hardening, to springs too light to catch disconnecters, or ignite primers. The story has been the same the last 30yrs. 3K rounds isnt a drop in a bucket for what should be considered a lifespan of a trigger. If your AR is no more than a toy, that you play with off a bench at the range - grind/polish/bend springs all day long. replacement AR FCGs are around $20. Have fun. If you think there is a remote chance you will ever use your AR, for defensive purposes, you're a fool to mess with the stock trigger. If you want a nicer trigger, they are out there - buy one which was designed to do what you want. RRA 2 stage triggers are around $100, and they last about 4K rounds. For around $200, you and Get a Geissele, which should last about 250K rounds. |
I'm no good at telling people what they want to hear when I dont believe it myself :)

|
Originally Posted By bigbore:
This topic, word for word, has been repeated many, many times over the last 30yrs; at gun clubs, gun shows, buddies basements, and now on the internet. The stock GI trigger is an excellent combat carbine trigger. There is no problem, squeezing a gritty 7lb trigger and hitting a target you would be shooting at with a carbine. It is not a nice, smooth, match type trigger, for precision shooting. People have been messing with these triggers for years, and the result is always the same. They shit the bed, for any myriad of reasons from lack of case hardening, to springs too light to catch disconnecters, or ignite primers. The story has been the same the last 30yrs. 3K rounds isnt a drop in a bucket for what should be considered a lifespan of a trigger. If your AR is no more than a toy, that you play with off a bench at the range - grind/polish/bend springs all day long. replacement AR FCGs are around $20. Have fun. If you think there is a remote chance you will ever use your AR, for defensive purposes, you're a fool to mess with the stock trigger. If you want a nicer trigger, they are out there - buy one which was designed to do what you want. RRA 2 stage triggers are around $100, and they last about 4K rounds. For around $200, you and Get a Geissele, which should last about 250K rounds. Excellent post. Thanks. I had a RRA two stage trigger that was crap right out of the package. I also had a bill springfield dpms trigger job that I wouldn't trust for anything other than plinking into a hillside. Like you said: "If you think there is a remote chance you will ever use your AR, for defensive purposes, you're a fool to mess with the stock trigger." |
I'll save my thoughts on the people who can spend any amount of dollars on a rifle but can't devote 20 minutes to getting their body in shape for another thread. -skinnysarge79
|
Originally Posted By bigbore:
Originally Posted By chuckd840:
I polished my trigger surfaces with a felt wheel and compound and now 800 rounds later the hammer will fall when you reset the trigger so I broke down and bought a Geissele. Maybe I was a bit too aggressive with the polishing since the engagement surfaces had such bad burr marks.You polished through the surface hardening. Once that is gone, the contacting parts wear like butter. BigBore - how thick is the hardened portion? I polished the engagement surfaces lightly by hand for about 15 seconds each with brasso metal polish and a rag. I made a point to not be aggressive and honestly Im not sure it made a bit of difference. Do I need to be concerned? |
|
Originally Posted By Fooboy:
BigBore - how thick is the hardened portion? I polished the engagement surfaces lightly by hand for about 15 seconds each with brasso metal polish and a rag. I made a point to not be aggressive and honestly Im not sure it made a bit of difference. Do I need to be concerned? Not all triggers are the same. It all depends on who you bought it from. Some are hardened deeper than others. |
I'm no good at telling people what they want to hear when I dont believe it myself :)
|
Originally Posted By Fooboy:
LMT Depends on the lot number, and who they bought the triggers from. Take 10 triggers out of 10 guns, hit each with a file and you'll see some will be harder than others. To an extent, there is no reason to worry about consistent hardening depth - because the triggers aren't supposed to be filed on. |
I'm no good at telling people what they want to hear when I dont believe it myself :)
|
Nobody talks about RE-hardening after filing or polishing ... I know it's not the 100% best way to do it, but induction hardening by heating the parts and quenching in water or oil will re-harden most carbon steel parts. In any case, it's better than not doing anything!
. . |

|
The real problem with the trigger pictured above is that the sear contact point is in front of the trigger pin and just below the hammer pin, most all S/A AR triggers are like this, bad leverage created by bad geometry and design , a real turd. All the files, stones , polish in the world won't fix that problem.
The best fix is to use a trigger set that has moved the sear point to the rear of the trigger/hammer pins,for example, 2 stage triggers from Armalite, RRA,LMT,ect, and of course the AR trigger taken to a very high level of perfection, Geissele. |
|
Originally Posted By MikefromTX:
Nobody talks about RE-hardening after filing or polishing ... I know it's not the 100% best way to do it, but induction hardening by heating the parts and quenching in water or oil will re-harden most carbon steel parts. In any case, it's better than not doing anything! . . Done a little heat treating in my time. There is a lot of misinformation floating around on the subject. You might get away with re heat treating the trigger/sear by heating it above the critical temperature, quenching, and then tempering. The hammer is another matter. You want a hard surface, but the rest of the hammer should be softer in order to resist fracture. Induction hardening is the method often used to achieve this result. It involves placing the part inside a copper coil and passing current through the coil. The depth of heating can be precisely controlled and the resulting surface hardness will resist wear and the ductility of the part is preserved. For the do it your-selfer Kasenit is a better option. |


AR Sponsor