|
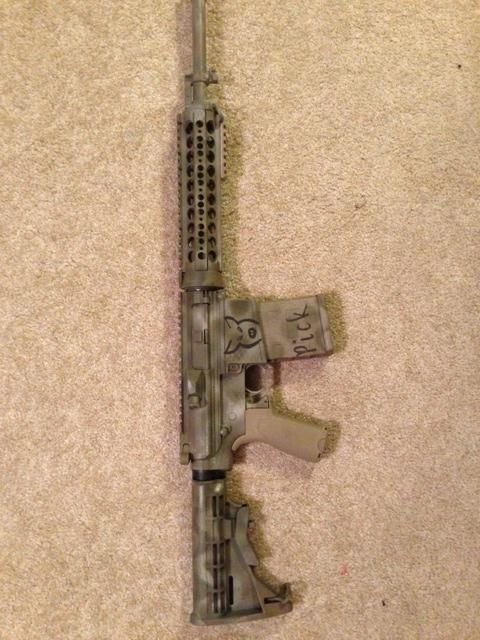
[#1]
Splinter camo.
  |
|
|
|
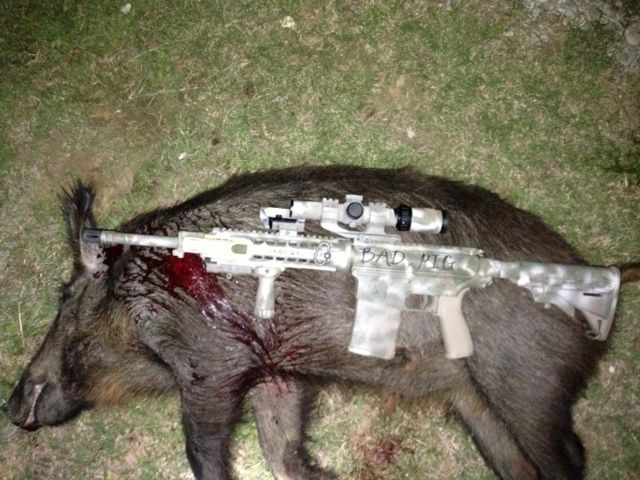
[#2]
Just a quickie desert pine straw job. |
|
|
|
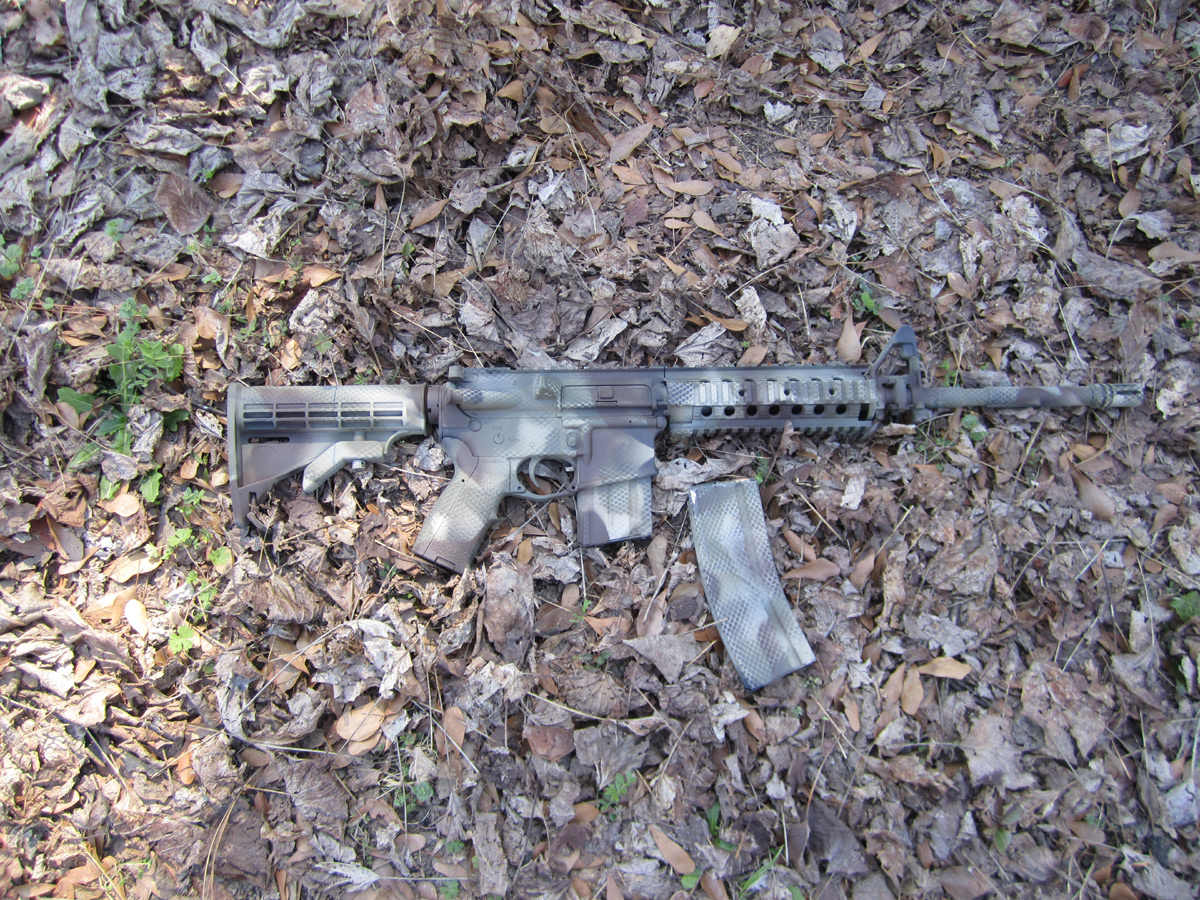
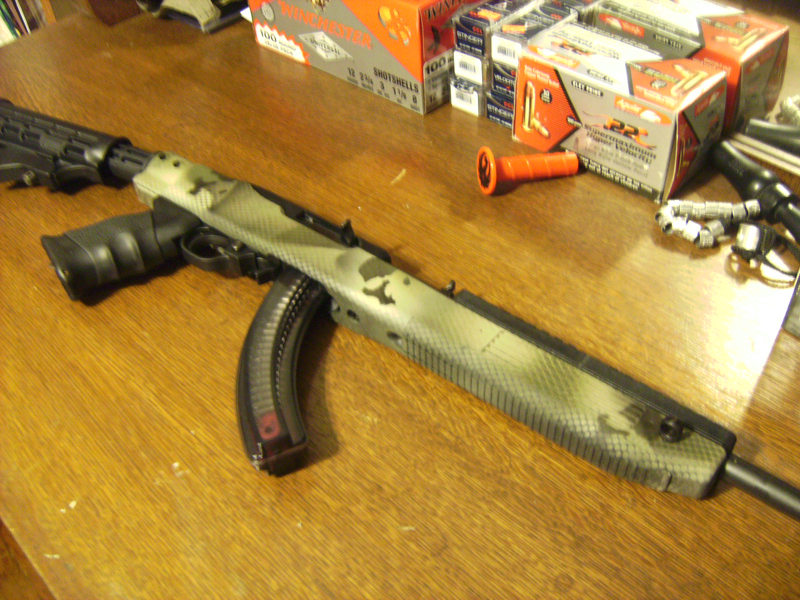
[#3]
Rustoleum Camo - Khaki, Earth Brown & Black - WASR 10/63 AK

|
|
|
|
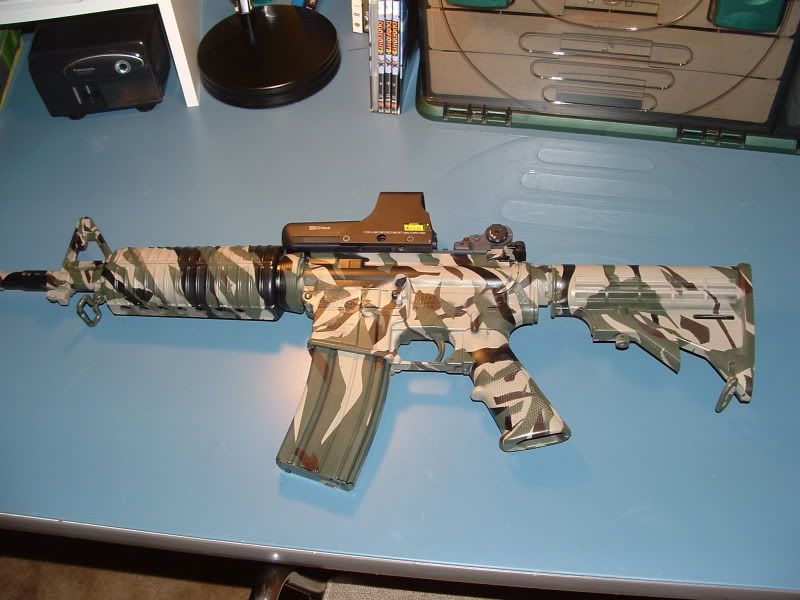
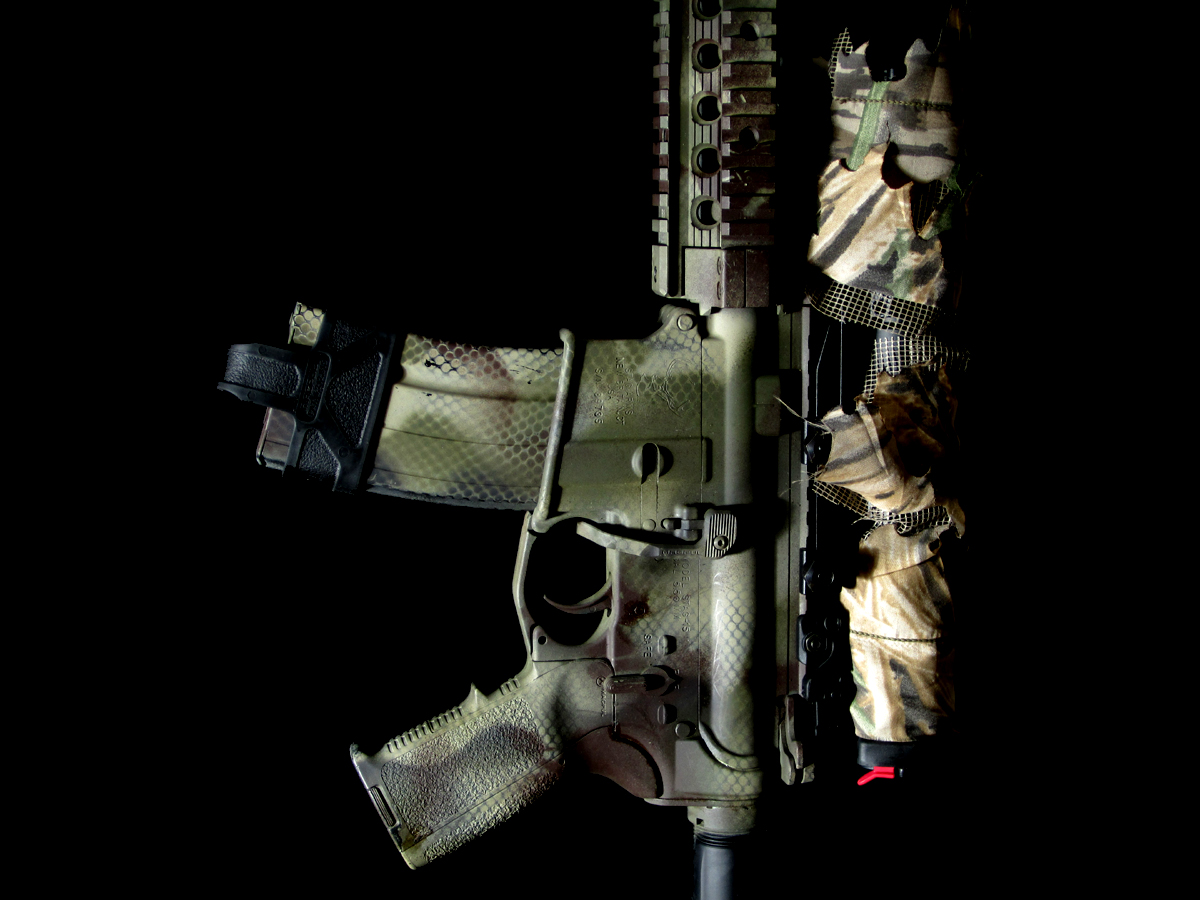
[#4]
http://i50.tinypic.com/2dahhsk.jpg
http://i46.tinypic.com/29wwx2b.jpg http://i50.tinypic.com/2dahhsk.jpg http://i49.tinypic.com/2wemfjq.jpg http://i48.tinypic.com/1govba.jpg http://i45.tinypic.com/2ihba4y.jpg I love painting my AR I like trying new designs/patterns/color schemes. Plus, it gives me something to do while I wait for my funds to build back up |
|
|
|
[#5]
Krylon and pinestraw always work.
   |
|
|
|
[#6]
what kind of rattle can paint are you guys using?
|
|
|
|
[#7]
Quoted:
what kind of rattle can paint are you guys using? Rustoleum and Krylon, matte/ultra flat colors. Krylon has a camo line that I have used, with a variety of colors. Krylon http://2.bp.blogspot.com/-wZCsHymz7uI/Teu7kViYIvI/AAAAAAAAAa0/kJ8BM2hwTBw/s1600/Imgp9933.jpg Use a matte clear coat for a little added durability. |
|
|
|
[#8]

|
|
|
|
[#9]
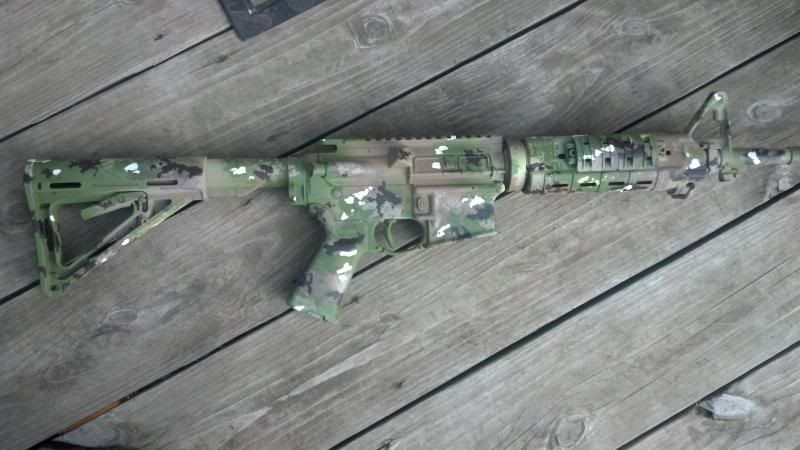
Quoted:
http://i50.tinypic.com/2dahhsk.jpg http://i46.tinypic.com/29wwx2b.jpg http://i50.tinypic.com/2dahhsk.jpg http://i49.tinypic.com/2wemfjq.jpg http://i48.tinypic.com/1govba.jpg http://i45.tinypic.com/2ihba4y.jpg I love painting my AR I like trying new designs/patterns/color schemes. Plus, it gives me something to do while I wait for my funds to build back up More info on your technique. Excellent job! Here's my first attempt. I used Krylon with a base coat of Khaki, moving on to OD Green, brown then black. I used some broom bristles fanned out in my hand held at different angles for the stencils. 

|
|
|
|
[#10]
Sponge Method

|
|
|
|
[#11]
Quoted:
http://i50.tinypic.com/2dahhsk.jpg http://i46.tinypic.com/29wwx2b.jpg http://i50.tinypic.com/2dahhsk.jpg http://i49.tinypic.com/2wemfjq.jpg http://i48.tinypic.com/1govba.jpg http://i45.tinypic.com/2ihba4y.jpg I love painting my AR I like trying new designs/patterns/color schemes. Plus, it gives me something to do while I wait for my funds to build back up I would like to see a write up on your technique if you have some time. That looks like a professional job. Very well done |
|
|
|
[#12]
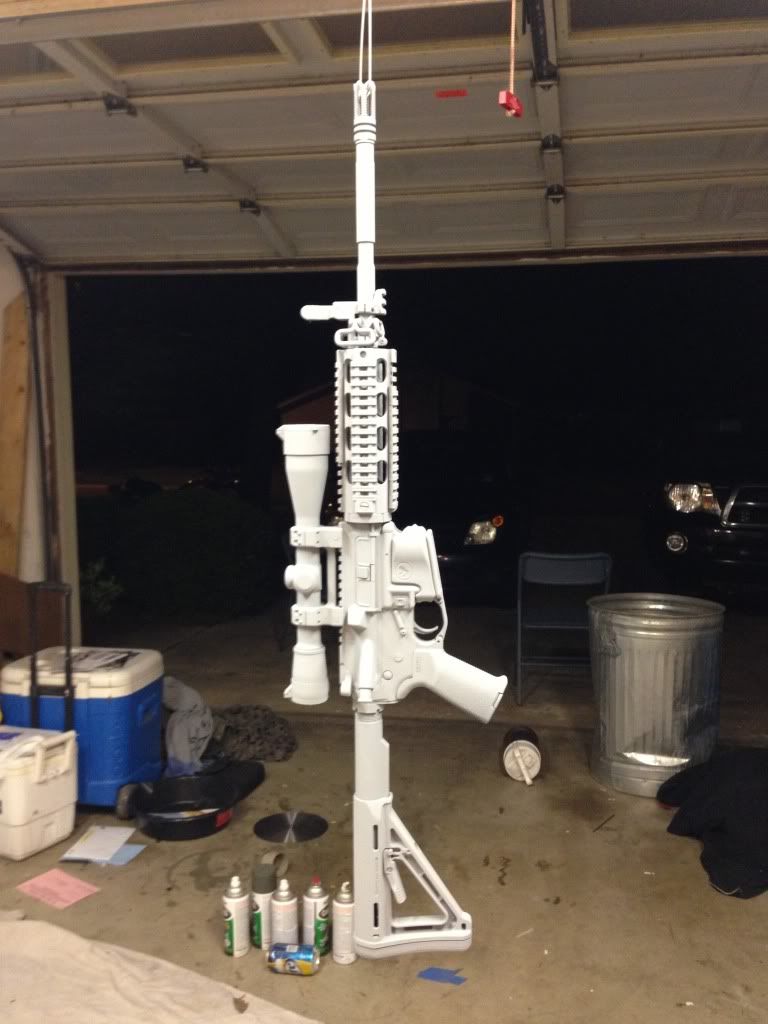
I use the same method as the pine needle method, only I combine bigger "stencils" (larger grasses, smaller leafs/branches.. anything you find out in your environment) with more dark colors and use the sponge method after to blend and break up patterns randomly.
First thing is make sure you clean your weapon down, I use standard paint thinner or 91% Iso rubbing alcohol. Wipe down every surface you want paint to stick to, make sure all the oil and any dust/dirt/lent is off the gun. Try to use some cloth that doesn't leave a bunch of fuzzy crap. I wear latex gloves throughout the whole process to ensure no oil from my hands can contaminate it. If you don't do a good job it can cause the paint to chip off after you are done, and that can be frustrating, so save yourself from having to deal with fixing cover ups. After the weapon is cleaned and stripped down, tape off things you don't want camo'd, as you can see on mine I wanted all the buttons, handles, fh, trigger, ejection port, and all the caps to be black to give it a nice "pop" (not quite practical, I was going for looks though  ). I would fill the ejection port with cloth/paper towels if you take off the cover so you don't get a bunch of paint in the inside. I'm not sure if the little bit that would get inside has any negative effects. I forgot on this paint job, so some got into my upper but it still fires with no problem. Worst case you just have to clean the inside after you are finished, but it's easier to remember to cover everything . I would plug your barrel as well, I used a foam ear plug and it works great. Make sure to allow enough time for the paint to dry before applying coats on top of each other, at least letting it dry til the stickiness is almost completely gone (time depends on temp, fan or no fan, etc. you can usually see by just looking at it, it will have a dull/flat look when it is dry enough). ). I would fill the ejection port with cloth/paper towels if you take off the cover so you don't get a bunch of paint in the inside. I'm not sure if the little bit that would get inside has any negative effects. I forgot on this paint job, so some got into my upper but it still fires with no problem. Worst case you just have to clean the inside after you are finished, but it's easier to remember to cover everything . I would plug your barrel as well, I used a foam ear plug and it works great. Make sure to allow enough time for the paint to dry before applying coats on top of each other, at least letting it dry til the stickiness is almost completely gone (time depends on temp, fan or no fan, etc. you can usually see by just looking at it, it will have a dull/flat look when it is dry enough).
Now for the painting. Base coat of Rustoleum Khaki, I usually do minimum 2 coats, using a sweeping pattern about 8-12 inces from the surface. I try to "build up" the coat (so it doesn't go on to thick and it helps reduce streaking or runs) with multiple coats using this method gives it a nice, full coat and will help hold up to wear over time: http://i50.tinypic.com/ndi07.jpg]http://i50.tinypic.com/ndi07.jpg Adding in the Krylon Camo Brown & Green, you can see the type of stencils I used in the picture. I lay them on the weapon going the same direction, leaving smaller streaks of the khaki inbetween in alternating patterns. I use thicker, more deliberate coats to get a good cover around the stencils: http://i50.tinypic.com/15wkz9y.jpg]http://i50.tinypic.com/15wkz9y.jpg http://i49.tinypic.com/wrl4x3.jpg]http://i49.tinypic.com/wrl4x3.jpg After you get your contrasting base layers the way you want them it's time to switch to the sponge pattern. I used black, brown, and khaki sponge patterns, I went light on both at first then added more til I was satisfied with the patterns. I used a typical house sponge, I have not tried a natural sponge but from what I have seen it gives a good pattern as well. I put black sponge marks throughout the weapon, in all colors and khaki over all non-khaki colors, same with brown sponge marks: http://i50.tinypic.com/hvpkc9.jpg]http://i50.tinypic.com/hvpkc9.jpg http://i50.tinypic.com/34xhn5f.jpg]http://i50.tinypic.com/34xhn5f.jpg http://i47.tinypic.com/5yb15f.jpg]http://i47.tinypic.com/5yb15f.jpg Clear coated with Rustoleum Matte Clear Coat, I use the same method I used for applying the paint, building up to get two even coats : http://i45.tinypic.com/blted.jpg http://i46.tinypic.com/29wwx2b.jpg http://i34.tinypic.com/urg4x.jpg |
|
|
|
[#13]
Very nice write up!
Thank you |
|
|
|
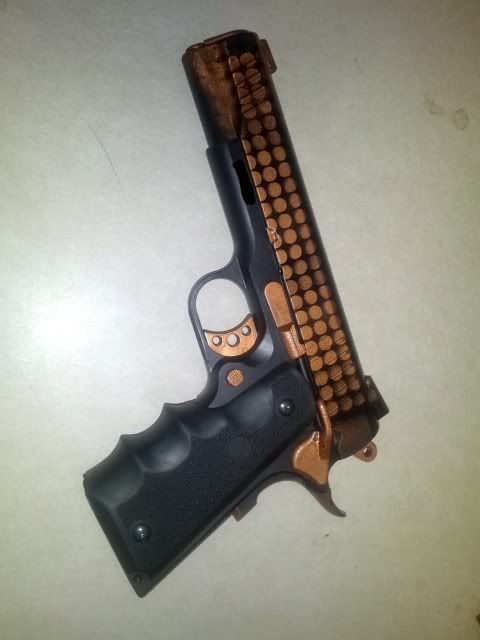
[#14]
Disabled furniture. Washed furniture in dishwasher. Lightly sanded furniture per-primer and after 1st coat primer. Light even coats. 2 coats per color.
Rustoleum (tape/sponge) Flat White Primer Green Apple Satin Eden Satin Flat Grey Primer Flat Mat Primer 1" vinyl bio hazard I was bored. I had the parts lying around. Booze and the Walking Dead marathon was on. I'm not sure what I'm going to do with this one. 


|
|
|
|
[#15]
Quoted:
Disabled furniture. Washed furniture in dishwasher. Lightly sanded furniture per-primer and after 1st coat primer. Light even coats. 2 coats per color. Rustoleum (tape/sponge) Flat White Primer Green Apple Satin Eden Satin Flat Grey Primer Flat Mat Primer 1" vinyl bio hazard I was bored. I had the parts lying around. Booze and the Walking Dead marathon was on. I'm not sure what I'm going to do with this one. http://i537.photobucket.com/albums/ff339/000002s/Web%20Link%20Images/IMG_0973_zpseceaedee.jpg http://i537.photobucket.com/albums/ff339/000002s/Web%20Link%20Images/IMG_0978_zps5e9c673d.jpg http://i537.photobucket.com/albums/ff339/000002s/Web%20Link%20Images/IMG_0975_zpsb7800302.jpg That looks pretty damn awesome! Well Done! |
|
|
|
[#16]
Quoted:
That looks pretty damn awesome! Well Done! Thank you |
|
|
|
[#17]
Quoted:
Very nice write up! Thank you Thanks, and no problem! I plan on doing some more rattle can projects and will post the results when I do them. |
|
|
|
[#18]
Rustoleum Camo Earth Brown

|
|
|
|
[#19]
|
|
|
|
[#20]
Krylon OD green basecoat with tan and black straw pattern I took the pic on my boat because it was funny how close the colors came to matching. |
|
|
|
[#21]
Quoted:
http://i85.photobucket.com/albums/k57/hotrod7687/IMG_0397_zps6b20e68f.jpg Krylon OD green basecoat with tan and black straw pattern I took the pic on my boat because it was funny how close the colors came to matching. Nice, makes me want to try Krylon Camo Brown as a basecoat and see what happens. |
|
|
|
[#22]
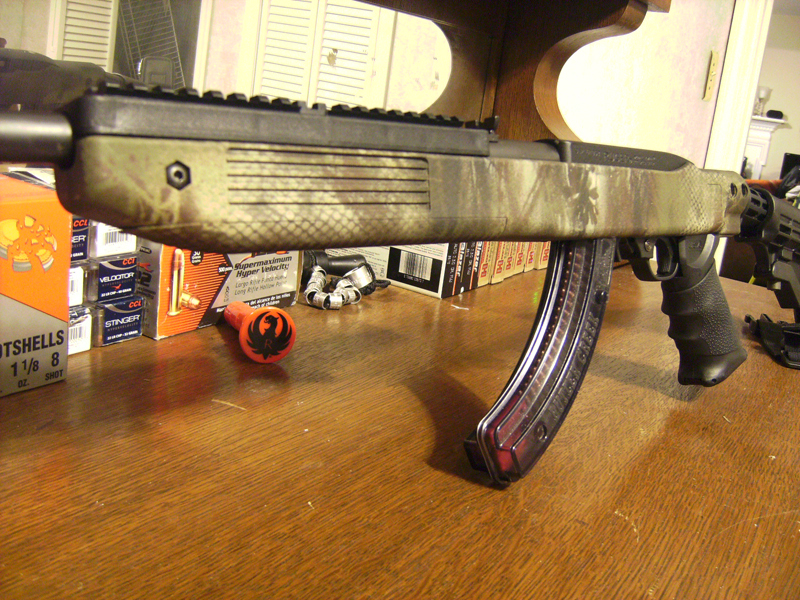
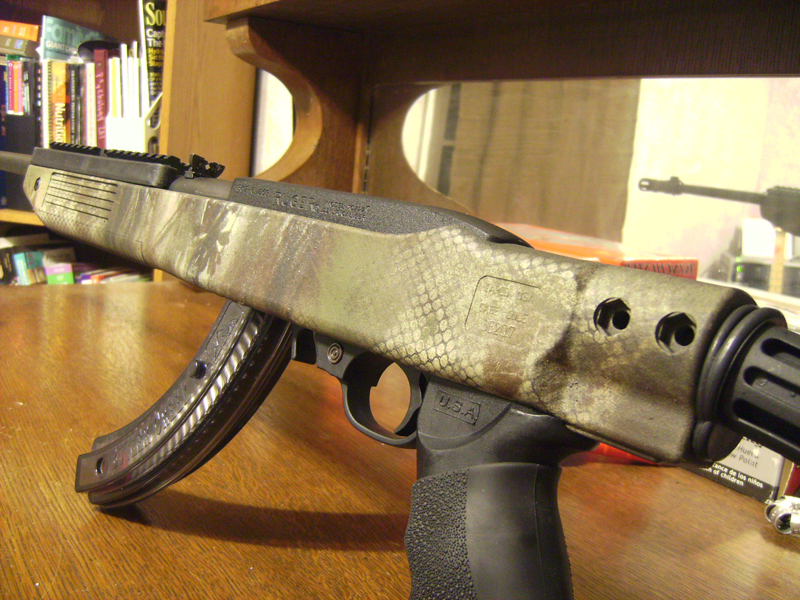
Some of the Camo jobs i've done the last few years.


|
|
|
|
[#23]
OOOOH I wanna play! I have done 2 versions so far in the last 2 weeks. Krylon fusion ultra flat on both. The first one was just tan base and green overlay, my first attempt. it was OK. Rifle is a Savage FV-SR in .22LR
  Tonight I did the Boyds Tacticool stock setup and bipod and used green & black over a tan base coat with ferns and a laundry bag. (waiting on a variable scope and rings to paint, 10x is being sold)   |
|
|
|
[#24]
|
|
|
|
[#25]
I kinda went apeshit trying different stuff
 |
|
|
|
[#26]
Do Like!
|
|
|
|
[#27]
http://www.flickr.com/photos/95389019@N03/8698446951/
Here is my first paint job on my first at build. It turned out better than I could imagine! |
|
|
|
[#28]
Quoted:
http://www.flickr.com/photos/95389019@N03/8698446951/ Here is my first paint job on my first at build. It turned out better than I could imagine! Looks good! |
|
|
|
[#29]
Anyone have a multicam rattle job?
|
|
|
|
[#30]
Got my paint here...http://dsgarms.com/Category/44_1/Spray_Paint.aspx They have kits for different paint jobs |
|
|
|
[#31]
Both of my rattle can jobs together. The only way my rifles will ever have paint of them is if I do it myself. As nice as some look, I'm not going to spend hundreds on it.
ETA: DirtDivision, I really like your 10.5 paint. Good job. 
|
|
|
|
[#32]


|
|
|
|
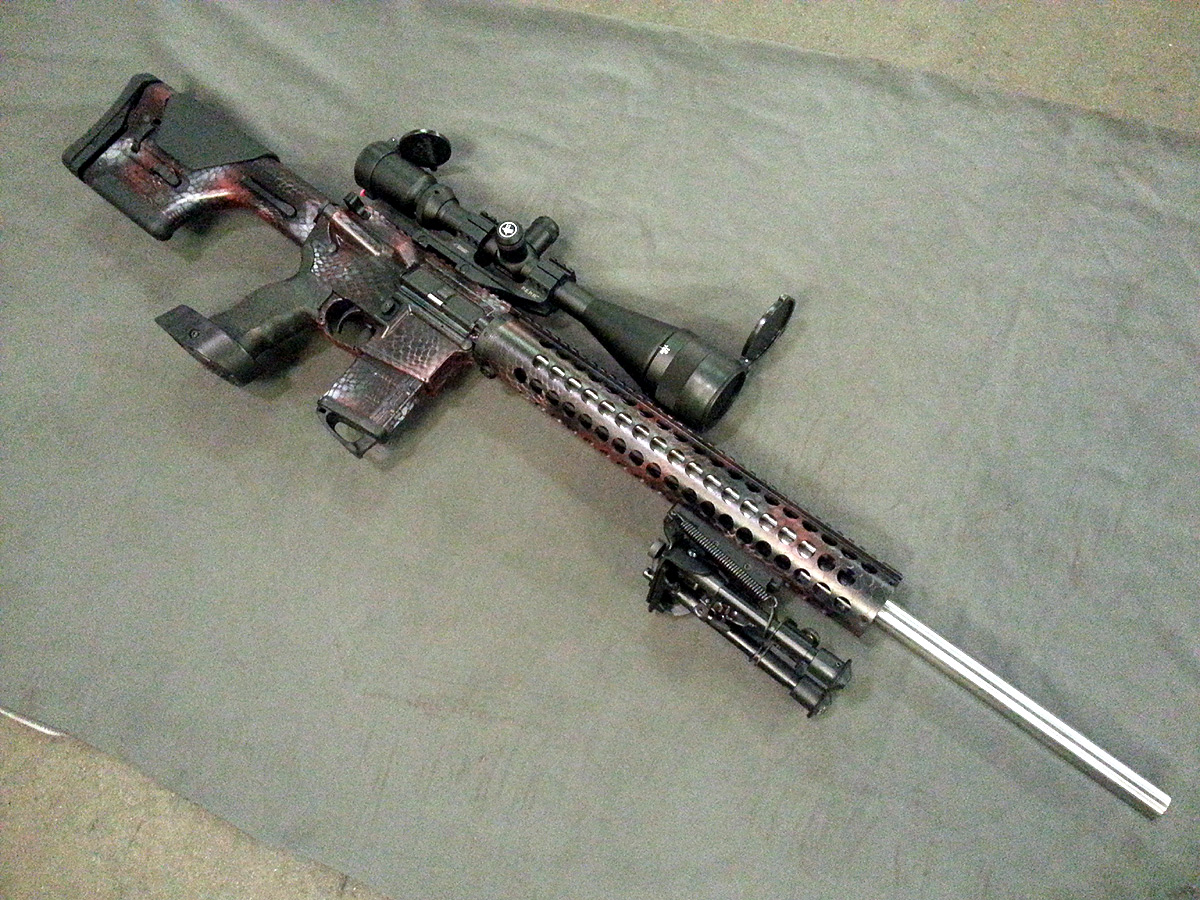
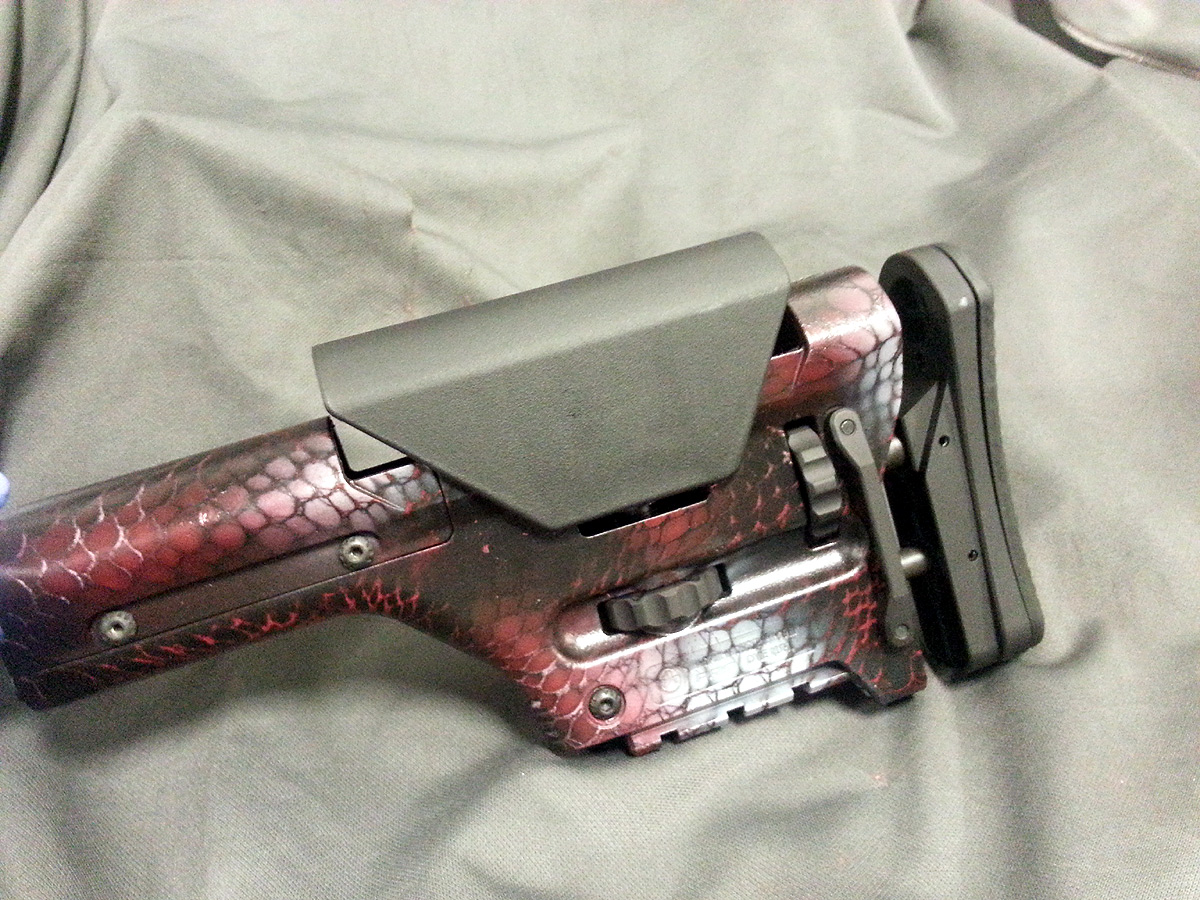
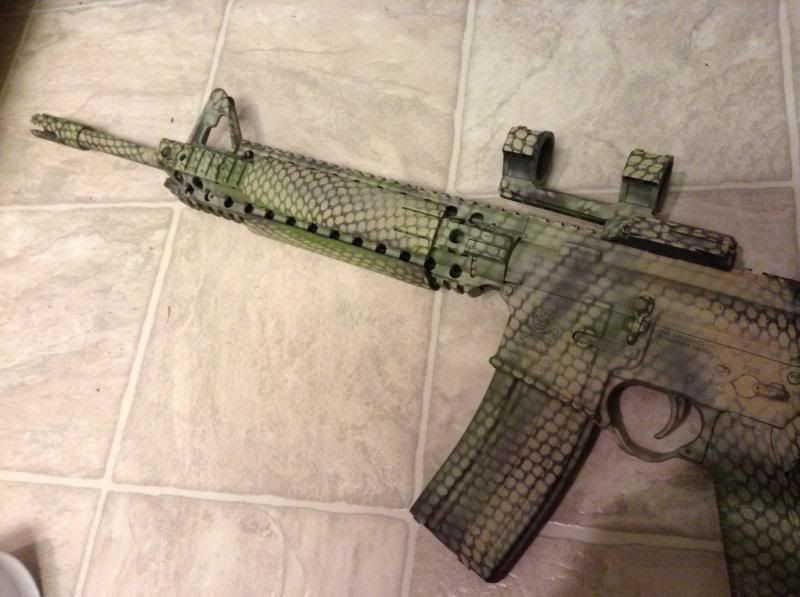
[#33]
Snake skin camo
My latest rattle can job: http://i63.photobucket.com/albums/h139/Vic229/20130505_160855-1.jpg http://i63.photobucket.com/albums/h139/Vic229/20130506_185909-1.jpg |
|
|
|
[#34]
think i'm finished now.......
 |
|
|
|
[#35]

Rustoleum Nutmeg Satin and Valspar Flat Clear. Dark Brown Rit Dye on the Vltor Modstock. |
|
|
|
[#36]
Primer
Tan 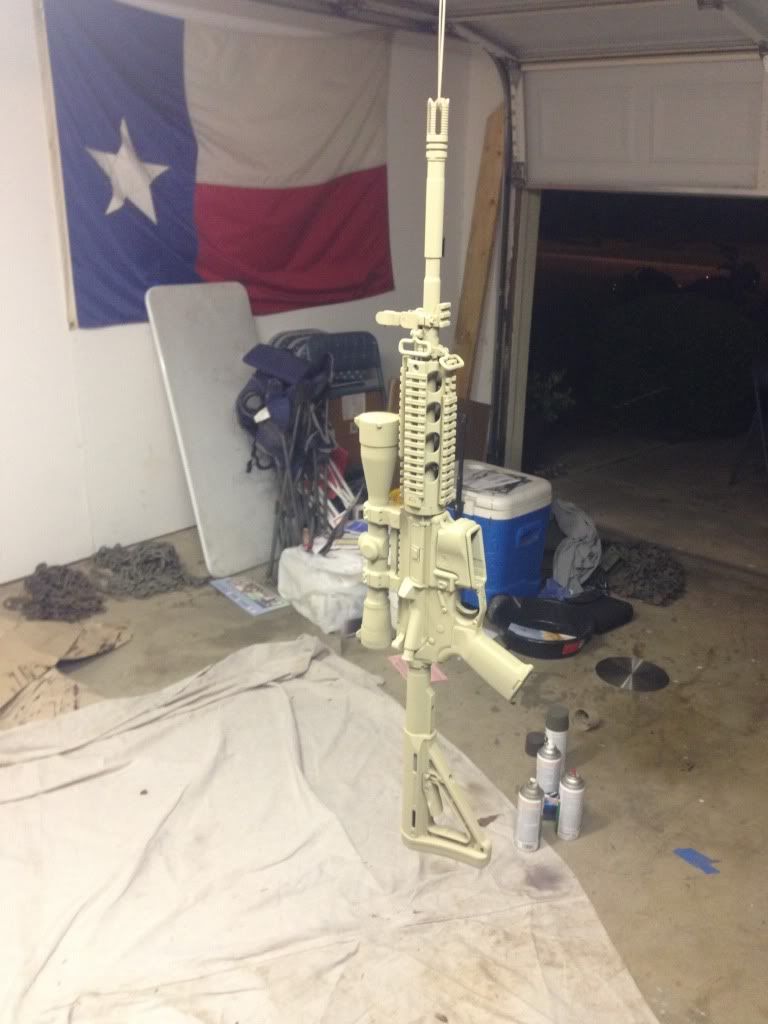
Light Green 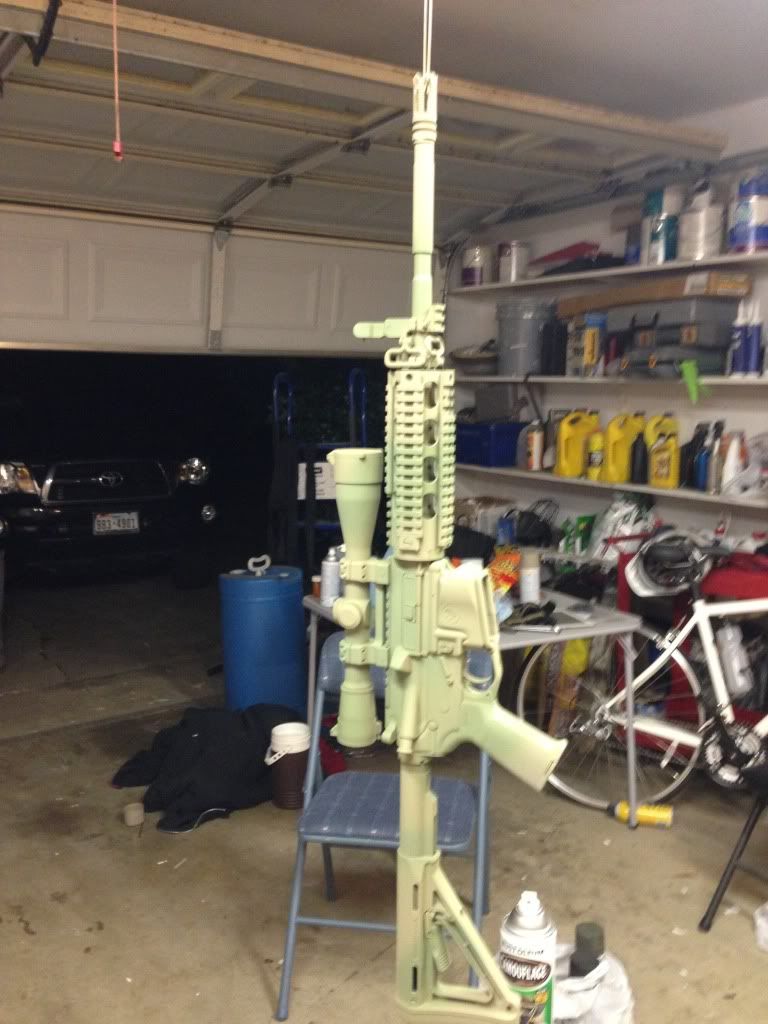
Brown 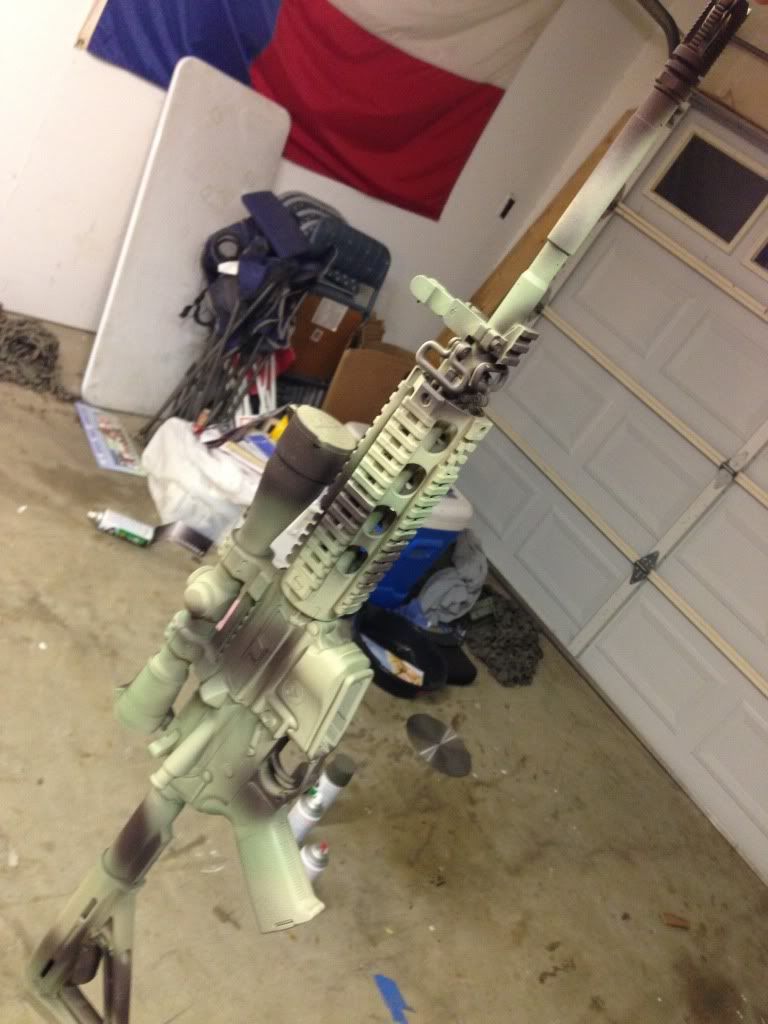
Olive Drab and very small amount of black to finish 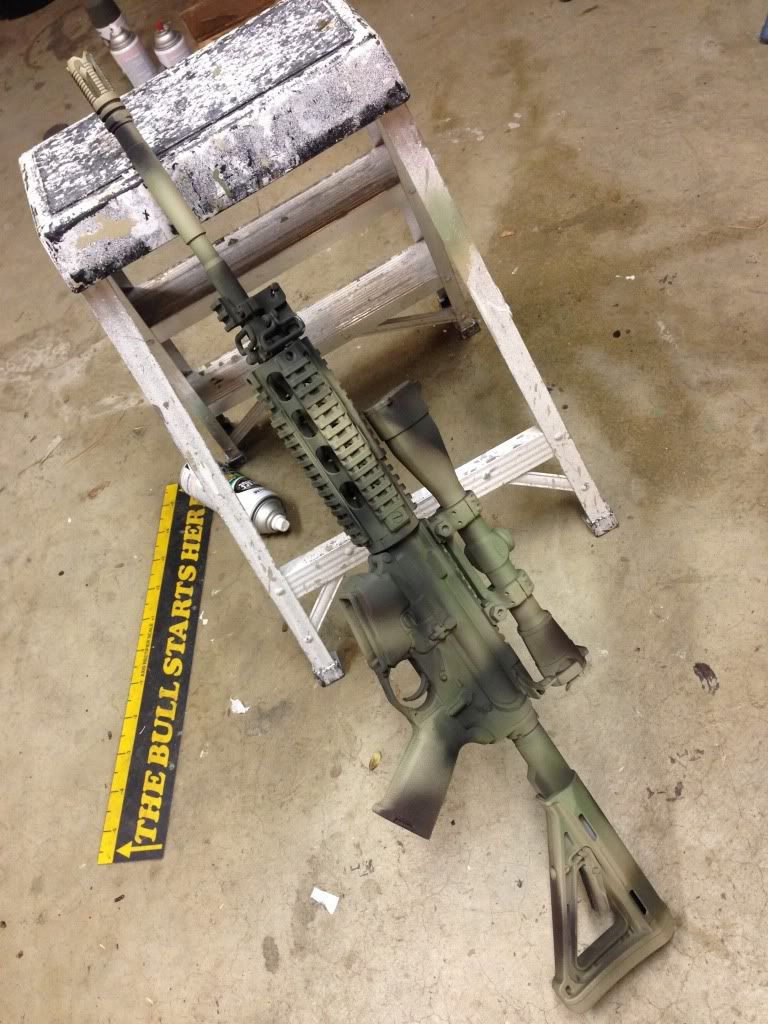
|
|
|
|
[#37]


|
|
|
|
[#38]
Quoted:
http://farm9.staticflickr.com/8255/8759765294_f6839f1a57_b.jpg Rustoleum Nutmeg Satin and Valspar Flat Clear. Dark Brown Rit Dye on the Vltor Modstock. That looks really sharp! Does the clear coat help with the scratch factor? |
|
|
|
[#39]
|
|
|
|
[#40]
Quoted:
Quoted:
http://farm9.staticflickr.com/8255/8759765294_f6839f1a57_b.jpg Rustoleum Nutmeg Satin and Valspar Flat Clear. Dark Brown Rit Dye on the Vltor Modstock. That looks really sharp! Does the clear coat help with the scratch factor? Thanks! It adds a little bit of protection but I used the flat clear to eliminate the sheen from the Nutmeg satin. |
|
|
|
[#41]
Quoted:
Quoted:
Quoted:
http://farm9.staticflickr.com/8255/8759765294_f6839f1a57_b.jpg Rustoleum Nutmeg Satin and Valspar Flat Clear. Dark Brown Rit Dye on the Vltor Modstock. That looks really sharp! Does the clear coat help with the scratch factor? Thanks! It adds a little bit of protection but I used the flat clear to eliminate the sheen from the Nutmeg satin. I've also found that a flat/matte clear coat will help hold the color up over time. I didn't apply clear coat on my first job, and while most of the paint was fine, the places where I handled it a lot (butt stock, handle, handguards, mag release, bolt catch) started fading some. My last paint job I applied a clear coat and it has held up much better, with no fading so far. |
|
|
|
[#42]
My first go round. I learned a lot from this one.
|
|
|
|
[#43]
So I went to buy some Krylon today and I'm not sure which kind I should get? I want to spray my shotgun receiver, barrel and mag tube but there are many different types. Which one do you go with? I know to get the satin (I think that's the most flat one), but it seems like there's several different types. Any and all help is appreciated, thanks!
|
|
|
|
[#44]
Quoted:
So I went to buy some Krylon today and I'm not sure which kind I should get? I want to spray my shotgun receiver, barrel and mag tube but there are many different types. Which one do you go with? I know to get the satin (I think that's the most flat one), but it seems like there's several different types. Any and all help is appreciated, thanks! This is what i use with great success. Its available at Walmart. |
|
|
|
[#45]
Quoted:
<a href="http://s1264.photobucket.com/user/guncrazy72/media/IMG_2216_zpsc2dded57.jpg.html" target="_blank">http://i1264.photobucket.com/albums/jj492/guncrazy72/IMG_2216_zpsc2dded57.jpg</a> <a href="http://s1264.photobucket.com/user/guncrazy72/media/IMG_2220_zpsf3133394.jpg.html" target="_blank">http://i1264.photobucket.com/albums/jj492/guncrazy72/IMG_2220_zpsf3133394.jpg</a> <a href="http://s1264.photobucket.com/user/guncrazy72/media/IMG_2221_zps6f213b70.jpg.html" target="_blank">http://i1264.photobucket.com/albums/jj492/guncrazy72/IMG_2221_zps6f213b70.jpg</a> what color is that brown? |
|
|
|
[#46]
Just took apart my brand new Savage precision model 10 LE. The digital camo wasnt for me. PICS COMING SOON AS ITS DONE!!
|
|
|
|
[#47]
Well I had to get drunk as shit to do it. But, I used krypton brown, green and tan and used a Afghanistan mesh laundry bag.

|
|
|
|
[#48]
Just posted this in the "sponge paint" thread but what the hay.
My shot at multicam via sponging on krylon. Still deciding if it's done

|
|
|
|
[#49]
Quoted:
Just posted this in the "sponge paint" thread but what the hay. My shot at multicam via sponging on krylon. Still deciding if it's done
http://i35.photobucket.com/albums/d156/tkwildcat/image_zpsff0e881c.jpg http://i35.photobucket.com/albums/d156/tkwildcat/2098a32a-a8b1-4504-a0b9-701e8dcc46ff_zps72867c3e.jpg I like it... 
|
|
|
|
[#50]
Quoted:
Just posted this in the "sponge paint" thread but what the hay. My shot at multicam via sponging on krylon. Still deciding if it's done
http://i35.photobucket.com/albums/d156/tkwildcat/image_zpsff0e881c.jpg http://i35.photobucket.com/albums/d156/tkwildcat/2098a32a-a8b1-4504-a0b9-701e8dcc46ff_zps72867c3e.jpg Looks great! What kind of sponges did you use? |
|
|
 Win a FREE Membership!
Sign up for the ARFCOM weekly newsletter and be entered to win a free ARFCOM membership. One new winner* is announced every week!
You will receive an email every Friday morning featuring the latest chatter from the hottest topics, breaking news surrounding legislation, as well as exclusive deals only available to ARFCOM email subscribers.

AR15.COM is the world's largest firearm community and is a gathering place for firearm enthusiasts of all types.
From hunters and military members, to competition shooters and general firearm enthusiasts, we welcome anyone who values and respects the way of the firearm.

Subscribe to our monthly Newsletter to receive firearm news, product discounts from your favorite Industry Partners, and more.
Copyright © 1996-2024 AR15.COM LLC. All Rights Reserved.
Any use of this content without express written consent is prohibited.
AR15.Com reserves the right to overwrite or replace any affiliate, commercial, or monetizable links, posted by users, with our own.


