|
[#1]
I've always used Simplify 3D as a slicer with good results. But now with their BS idea of wanting you to pay for updates, they aren't awesome enough to warrant the cost. The free slicers out there are catching up quickly.
|
|
|
|
[#2]
Quoted:
Made some more changes on the Ender 3. I used some green e-sun PETG to make tensioners for the the x & y axis and to pretty much completely redo the extruder. A while back I had some layer shifts that I tracked down to being caused by a slack Y axis belt slipping on the drive pulley. I tightened it up by loosening the roller end, levered the roller to get things snug the tightening the T-nut screws back again. I figured I'd like a better handle on that, so found some tensioner designs on Thingiverse. http://www.skhowell.com/images/green-fix-3.jpg The Y tensioner: http://www.skhowell.com/images/green-fix-5.jpg The X tensioner: http://www.skhowell.com/images/green-fix-4.jpg While the spool was mounted, I went ahead & did a complete set of extruder feed updates: http://www.skhowell.com/images/green-fix-2.jpg This consisted of a new top plate for the stepper plus the extended adjustable lever arm I had printed earlier in PLA. The new top plate fits a bit closer to the drive gear and also has a provision to insert a short piece of 4mm teflon tube (bowden tube material) that has been cut to a V point on the end by the gear (relief to clear the gear & tension wheel). The lever arm got it's filament feed hole enlarged to allow the same tube material to pass all the way through. It also has a V point to clear the gear & tension wheel. The use of the two pieces of tube serve to keep the filament captive all the way through. The idea is to be able to later print flexible filaments without them bunching up between gear & outlet hole on the extruder. A benefit already noted is that when feeding new filament in, I can just push it to the gear then turn the wheel & have it feed itself into the outlet (which was not so easy with the stock setup). A small change on the spring tension was to use a socket head screw instead of a printed button to fit between spring & adjustment screw end (partially visible in the following pic:). http://www.skhowell.com/images/green-fix-6.jpg The other new thing for me was getting to try out some Hatchbox wood PLA. It took a few tries to find the temps I needed, but once I had a good first layer going I was pretty impressed. Still printing but it is looking pretty good so far. http://www.skhowell.com/images/wood-pla-4.jpg |
|
|
|
[#3]
Thanks for the warning. That has been the alignment since delivery (bed carriage being part of the pre-delivery assembly).
Going from the original hardware to the printed tensioner did not change things. As things stand, the belt is just barely touching the edge of the 2020. I think I will have to redo the bed carriage adjustments to make any difference (the stepper pulley has the belt close on the other side - left vs right). Any attempt to manually change the belt position on either pulley gets undone after one bed move cycle. Figured as long as things were printing square OK, & the bed doesn't seem to have any side to side or rotational play, it could wait. If/when the belt wears enough to be a problem (or breaks) I'll try to get the replacement on with better alignment since it will mean pulling the machine out & inverting it anyway. |
|
|
|
[#4]
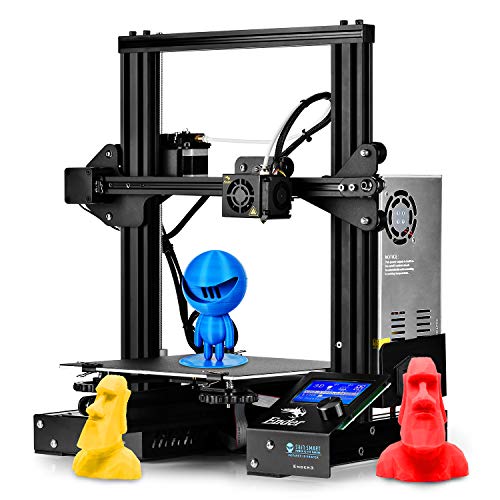
Woot.com has the Sainsmart ender 3 for $179 today.....
|
|
|
|
[#5]
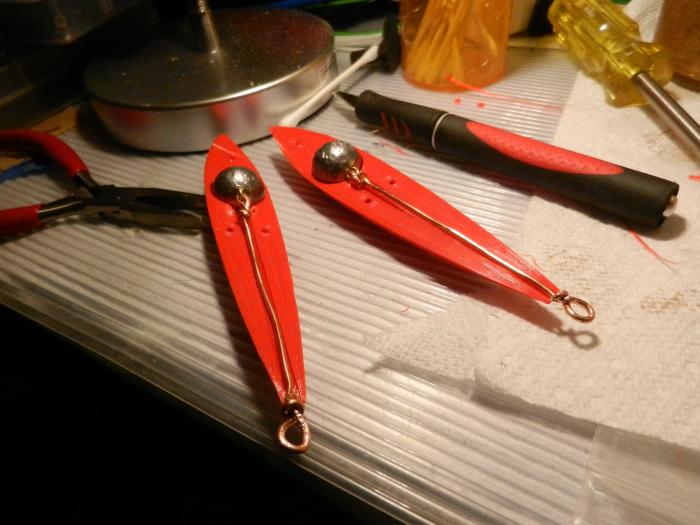
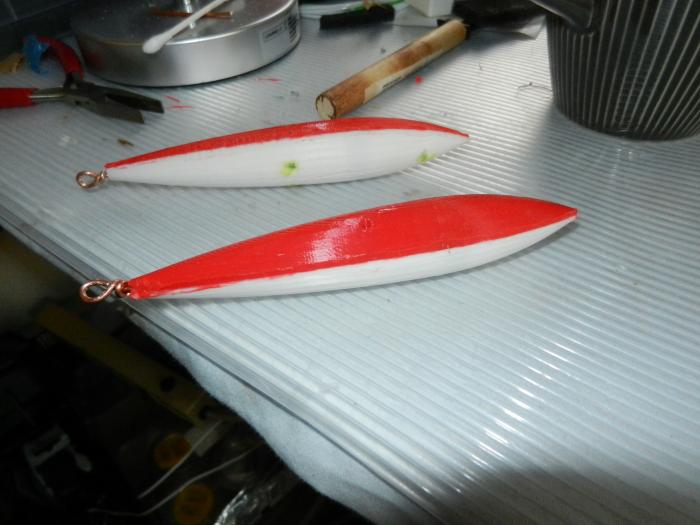
Winds broke the haul up line for one of my wire antennas (ham radio) when a moving limb sawed through the paracord. I needed to get a new one up & I generally use a fishing pole to launch a weight over a convenient limb & pull back the haul up line. The problems I run into are the weight being hard to see when I would need to add line for it to reach the ground, or whipping around a twig/limb when being retrieved following an unsuccessful placement.
This time I figured I'd try a different approach & print something up that would be easy to see & unlikely to catch on tree parts. I ended up with something long enough to make the pendulum wrap up less likely & sleek enough to go in or out without catching, a double ended torpedo shape that could hold a 1 oz. weight positioned to put the center of gravity forward for straight flight. I did the model on Tinkercad, downloaded it then printed 1/2 via CURA (dropping Z position by 50% of model height) then printed a mirror of that same 1/2 image for the mating side. I printed one side red PLA, the other white PLA. The halves were joined by welding with a flat tipped wood burning tool, slowly passing the tip over the joint (with a little wiggle). Once put in service, it worked well. It never got snagged to the point of having to break the line & was easy to spot following the cast. 
|
|
|
|
[#6]
Today I removed the kapton tape I had used around the perimeter of my Ender 3 bed so I could remove the glass build surface & cover the aluminum base with a silicon thermal pad material. The glass now sits on top of the pad. It is tacky enough that there is no need for perimeter tape or clips to keep the build surface from moving on the base. Although the silicon material is tacky, there is no adhesive. I can remove the glass by just inserting the edge of the putty knife (print separation knife?) at a corner & giving a little twist to break the suction. Once air gets by, it comes right up. The material is the same kind of stuff you put between a chip & a heat sink and is about 0.5 mm thick and should do a good job of transferring heat to the glass. It was about $8 via amazon prime for a big enough sheet to cover the bed & have some left over. Only time will tell how it holds up, but I'm optimistic it will do OK.
|
|
|
|
[#7]
I'm starting to get some results from the Ender 3 now that you folks pointed me in the right direction.
For some reason the PLA has to run around 220 -225 with the bed at 65 to get decent results. Anyhow A project has been started. I will attempt to build a clock using the 3D printer and a laser cutter. Will try to get some pictures as I go along to post here. Here are some hands that were just printed and a couple of bushings 4mm and 9 mm OD. 
And a short video of one of the clock gear proof prototypes that was cut yesterday.  Clock gear prototype The plan is to use a CNC Router to cut the wood parts for the clock. Here is a screenshot of the project. 
|
|
|
|
[#8]
Just an FYI. The TH3D unified firmware package is up to version U1.R2.9 (I originally installed U1.R2.7). In addition to including marlin bug fix updates, this current version has built in support for the BL-Touch ABL probe.
I just downloaded the new version to test & it installed with no issues after just doing the defines for Ender 3, disabling the boot screen, BL-Touch and the probe grid count I preferred (5 vs 3) in the configuration.H file. My earlier install required a few more edits in other files to make it play well with BL-Touch so this was much easier & straight forward. Everything loaded OK. I ran a new PID autotune so I could include the values in my configuration.H file for future use. From the printer I ran an auto-level sequence from SD card & a small print (also from SD card) to test things out. Everything worked OK. The only negative is that only the full package w/Arduino IDE (~500MB) is available for download. They don't (yet?) have a download option for just the firmware source by itself (which would be about 5MB). Link to download: https://th3dstudio.freshdesk.com/support/solutions/articles/43000460446-th3d-unified-firmware-package |
|
|
|
[#9]
A few recent builds:
This is a small jewelry box done in hatchbox wood PLA as a gift for our grand-daughter: 

It was a scaled down version of this item on Thingiverse: https://www.thingiverse.com/thing:3304456 The box components were sanded, stained & coated in polyurethane. I printed a liner for the box bottom in red. As I recall, scaling down 30% reduced print times by more than half. I replaced my use of individual silica packets in sealed filament storage (i.e. buckets w/Gamma Seal lids) with these printed containers for loose silica beads. (I made 4 in all) 
The container was this item on Thiniverse: https://www.thingiverse.com/thing:3164954 The Carolina blue screws on the black box were replacements for originals whose infill had not been set for 100% (meaning they broke easily). The choice of desiccant beads used (3-5mm) was based partially on the bead size to make sure I wouldn't have leakage. I used these: https://www.amazon.com/gp/product/B01G5NTFGU/ref=ppx_yo_dt_b_asin_title_o02_s00?ie=UTF8&psc=1 The slots are about 1.5mm, so 2mm beads would probably have been OK, but went bigger anyway. Each container can hold roughly 1/4 lb. of beads. |
|
|
|
[#10]
Nice job on the heart box. I haven't tried the wood filament yet.
Also thanks for the links to the desiccant. I've been meaning to dump all of the small leftover packs and go with something more official. |
|
|
|
[#11]
I printed these up in white PLA for a friend who is putting his cats on a diet but does not want hem fighting over unequal shares.
Top is a render of the cutter which makes 6 servings and the bottom render is of the cutter guide which fits snugly on the can and prevents the cutter from touching the can edges. Sorry no real pic, once the cutter was finished I dropped it off about an hour later without taking any pics. Guide took about 9hrs, Cutter was about 22 hrs. |
|
|
|
[#12]
Found files for a steel Prusa frame so going to see if I can work out a deal at work to get it cut so I can rebuild my busted acrylic machine.
|
|
|
|
[#13]
Just upgraded/replaced a bunch of parts on my Monoprice Mini Delta. Mirrored print bed has made a huge improvement in my prints, as well as dialing in the Z offset. Right now I have to print at 102% for X and Y axis to get accurate print sizes, which I think is pretty good considering the base cost was $150. Besides the small print area (110x120mm), the only real limitation I've encountered is 5 amp power supply not supplying enough power to keep the bed heated at target temp when printing. Even with a 10 amp power supply, my understanding is there is a limitation built into the printer.
Printed a couple of these magwells this weekend as a test print for the upgrades: Thingiverse - Kwongkan AR15 Magwell It actually fits well with minimal forward to back play. I printed the "V5" model, but am currently remixing/redesigning the wedge inserts that are used to secure the magwell in place. Hope to have the remix up this evening. EDIT: Here's my remix so the magwell is secure on an AR. So far it has worked on an LWRC lower and a Spike's lower. Thingiverse - V5 Wedge Remix - AR Magwell |
|
|
|
[#14]
Looks like I need a two part magnetic sticker/build surface. I printed another magwell last night and it will not come off without destructive removal.
Can anyone recommend a magnetic build sticker/surface? |
|
|
|
[#15]
No source suggestion, but if your current build surface is removable you could try putting it in the freezer for a bit & see if differential contraction might pop it loose ...
|
|
|
|
[#16]
Quoted:
No source suggestion, but if your current build surface is removable you could try putting it in the freezer for a bit & see if differential contraction might pop it loose ... |
|
|
|
[#17]
Quoted:
Unfortunately it's not removable. The mirror is stuck to the metal bed via kapton tape and a large thermal pad... I really didn't think it all the way through when I did that. Quoted:
Quoted:
No source suggestion, but if your current build surface is removable you could try putting it in the freezer for a bit & see if differential contraction might pop it loose ... How about spraying the surface at the edge of the print with a can of upside-down canned air? |
|
|
|
[#18]
Quoted:
I see FLORIDA, so going outside to get a lower temp is not an option. How about spraying the surface at the edge of the print with a can of upside-down canned air? Quoted:
Quoted:
Quoted:
No source suggestion, but if your current build surface is removable you could try putting it in the freezer for a bit & see if differential contraction might pop it loose ... How about spraying the surface at the edge of the print with a can of upside-down canned air? |
|
|
|
[#19]
Trying out a new filament (for me) today. Silk Copper Filament PLA 1.75 mm by CC3D that I picked up on Amazon. When the first lines were going down, the wife said "it looks like you're printing copper wire!". It laid down really nicely just using the same PLA settings I had been using for a previous print (210° C, 0.2mm layer, 60° C bed for first layer).
The sheen is really there, it really does look like new penny copper. These pics don't really convey that as well as seeing it directly.   I'm about 10 hours in on that first print & no problems. Extrusion looks good, no glitches and layers look to be tight w/good bond. I didn't pick it for this particular print, it was just a good opportunity for a test (I'm printing a 45 cell sharpie box for our daughter's desk). 
|
|
|
|
[#20]
Quoted:
Looks like I need a two part magnetic sticker/build surface. I printed another magwell last night and it will not come off without destructive removal. Can anyone recommend a magnetic build sticker/surface? |
|
|
|
[#21]
Quoted:
Trying out a new filament (for me) today. Silk Copper Filament PLA 1.75 mm by CC3D that I picked up on Amazon. When the first lines were going down, the wife said "it looks like you're printing copper wire!". It laid down really nicely just using the same PLA settings I had been using for a previous print (210 C, 0.2mm layer, 60 C bed for first layer). The sheen is really there, it really does look like new penny copper. These pics don't really convey that as well as seeing it directly. https://www.skhowell.com/images/copper-filament-1.jpg https://www.skhowell.com/images/copper-filament-2.jpg I'm about 10 hours in on that first print & no problems. Extrusion looks good, no glitches and layers look to be tight w/good bond. I didn't pick it for this particular print, it was just a good opportunity for a test (I'm printing a 45 cell sharpie box for our daughter's desk). https://www.skhowell.com/images/copper-filament-3.jpg |
|
|
|
[#22]
Is anyone printing ABS? I have an ender 3. PLA has printed well so far. I’m making the jump to ABS. Any suggestions? I’m looking into enclosures but may temporarily use a cardboard box.
|
|
|
|
[#23]
Quoted:
Is anyone printing ABS? I have an ender 3. PLA has printed well so far. I'm making the jump to ABS. Any suggestions? I'm looking into enclosures but may temporarily use a cardboard box. |
|
|
|
[#24]
Quoted:
I print exclusively in abs, but not on an ender, but a modified r1+. |
|
|
|
[#25]
I'll hit it up tomorrow when I'm on a computer.
Hatchbox is gtg. |
|
|
|
[#26]
OK.
I typically use either Hatchbox or eSun. I upgraded to an E3D extruder and hot end, helps a lot with consistency and ooze/stringing. I have a Robo R1+, heavily modified. The plastic shell is still stock, which is about it  . Another BIG upgrade of note for ABS printing was a 24v heater bed. You need that bed HOT, and evenly hot. A stock 12v heater will be warm enough in the middle to do a small print, but will quickly cool off on the edges. . Another BIG upgrade of note for ABS printing was a 24v heater bed. You need that bed HOT, and evenly hot. A stock 12v heater will be warm enough in the middle to do a small print, but will quickly cool off on the edges.I don't even have a parts cooling fan. Also, had to take off the heat break fan upgrade I did: too much air blowing on the parts causing warping/adhesion issues. I have a PEI printing surface. For adhesion: Wolf Bite works very well for when it HAS to stick, otherwise glue stick for non-crucial or small prints. Make sure you bed temp is up to about 110-115, but play with it for your machine/filament combo. You want to keep that bed temp as high as possible and still maintain print-ability. I tend to do a small retraction and then haul ass to the next printing position, using the 'avoid crossing outlines' movement as much as possible, which basically wipes as it travels. Lifting functions with retractions just take too much time: avoid. Try to arrange your travel movements (such as part to part) as close as possible, and adjust your nozzle temps to just where it doesn't ooze during a 1-2 second travel movement. I also stop the extrusion short by about .2mm before a travel, helps avoid blobs and stringing. Heat control is crucial. I actually put a simple bath towel (100% cotton) over the entire machine as a simple, yet effective, insta heat chamber. Works very well, actually. Avoid bridging. ABS doesn't like bridging. It can be done, but try to avoid it and just use supports. Avoid z axis fillets. That is blanket advice for 3D printing in general. Use z axis chamfers instead. I use a lot of X/Y axis fillets (rounded corners) as changing direction is always the easiest way to get "ghosting" or "ringing" in your prints. Slow is smooth, smooth is fast. The slower you change directions (say by a rounded corner vs square edge), you actually can go faster and get better quality prints. ABS won't look as clean as PLA, at least not w/o LOTS of practice and fine tuning not only the machine and temps and speeds, but the design as well. Warping with ABS is always a bitch. It also shrinks as it cools, so keep that in mind. Don't every try to print one small part. The layers need to be laid down hot, and cool JUST ENOUGH to be stable for the next layer, otherwise you will end up with a mess. Print multiple small parts, or print a "cooling tower" next to your part. You can also play with slowing down the printing speed on fast layers, but that nozzle heat will heat up the previous too, so that only works to a point. Slow down your first layer to about 20% speed. Let that layer get a good grip. Make sure your bed is HOT before starting your print. I will sometimes pre-heat the bed (leave the nozzle cold) for 10-15 before starting the print, just to heat up the machine and its environment (remember the bath towel heat chamber), and make sure everything is even in temp. That is all I've got at the moment, feel free to ask any questions you like of course. ETA: I've printed with layer heights from .1 up to .3, depending on the nozzle size. ABS seems to print as you would expect. I use a .5 nozzle, and typically a .16 layer height, but sometimes up to .28 for "rough" prints where I don't need much definition (such as functional parts for stuff). |
|
|
|
[#27]
Quoted:
OK. I typically use either Hatchbox or eSun. I upgraded to an E3D extruder and hot end, helps a lot with consistency and ooze/stringing. I have a Robo R1+, heavily modified. The plastic shell is still stock, which is about it . Another BIG upgrade of note for ABS printing was a 24v heater bed. You need that bed HOT, and evenly hot. A stock 12v heater will be warm enough in the middle to do a small print, but will quickly cool off on the edges.I don't even have a parts cooling fan. Also, had to take off the heat break fan upgrade I did: too much air blowing on the parts causing warping/adhesion issues. I have a PEI printing surface. For adhesion: Wolf Bite works very well for when it HAS to stick, otherwise glue stick for non-crucial or small prints. Make sure you bed temp is up to about 110-115, but play with it for your machine/filament combo. You want to keep that bed temp as high as possible and still maintain print-ability. I tend to do a small retraction and then haul ass to the next printing position, using the 'avoid crossing outlines' movement as much as possible, which basically wipes as it travels. Lifting functions with retractions just take too much time: avoid. Try to arrange your travel movements (such as part to part) as close as possible, and adjust your nozzle temps to just where it doesn't ooze during a 1-2 second travel movement. I also stop the extrusion short by about .2mm before a travel, helps avoid blobs and stringing. Heat control is crucial. I actually put a simple bath towel (100% cotton) over the entire machine as a simple, yet effective, insta heat chamber. Works very well, actually. Avoid bridging. ABS doesn't like bridging. It can be done, but try to avoid it and just use supports. Avoid z axis fillets. That is blanket advice for 3D printing in general. Use z axis chamfers instead. I use a lot of X/Y axis fillets (rounded corners) as changing direction is always the easiest way to get "ghosting" or "ringing" in your prints. Slow is smooth, smooth is fast. The slower you change directions (say by a rounded corner vs square edge), you actually can go faster and get better quality prints. ABS won't look as clean as PLA, at least not w/o LOTS of practice and fine tuning not only the machine and temps and speeds, but the design as well. Warping with ABS is always a bitch. It also shrinks as it cools, so keep that in mind. Don't every try to print one small part. The layers need to be laid down hot, and cool JUST ENOUGH to be stable for the next layer, otherwise you will end up with a mess. Print multiple small parts, or print a "cooling tower" next to your part. You can also play with slowing down the printing speed on fast layers, but that nozzle heat will heat up the previous too, so that only works to a point. Slow down your first layer to about 20% speed. Let that layer get a good grip. Make sure your bed is HOT before starting your print. I will sometimes pre-heat the bed (leave the nozzle cold) for 10-15 before starting the print, just to heat up the machine and its environment (remember the bath towel heat chamber), and make sure everything is even in temp. That is all I've got at the moment, feel free to ask any questions you like of course. ETA: I've printed with layer heights from .1 up to .3, depending on the nozzle size. ABS seems to print as you would expect. I use a .5 nozzle, and typically a .16 layer height, but sometimes up to .28 for "rough" prints where I don't need much definition (such as functional parts for stuff). |
|
|
|
[#28]
No problem.
But I will say this: unless you need a specific property of abs, I would avoid using it. Sometimes it's just required for some applications though. |
|
|
|
[#29]
Quoted:
No problem. But I will say this: unless you need a specific property of abs, I would avoid using it. Sometimes it's just required for some applications though. |
|
|
|
[#30]
We DLP/SLA guys can get back in the action, apparently.
https://www.amazon.com/Blu-Strong-Precise-Resolution-Printing/dp/B07KSYRW34 is Siraya Blu, a rugged resin. I'm going to try some on my Anycubic Photon. Inspiration from this article... 
Man Makes Silencer From 3d Printer- RecoilWeb And here's the embedded video, if you don't want to go to the Recoil link. Best, JBR  Tough 3D Prints from Resin |
|
|
|
[#31]
Quoted: My plan is to make parts to be used for a steering and throttle assembly for a kayak. The parts will used in the sun, in a humid/wet environment, and at times under a load. From what I've read ABS is the best fit for a part that will see this type of use. Am I on the right track? |
|
|
|
[#32]
Quoted:
Yes, that would be a good application for abs. Keep the temps hot to get good layer adhesion. |
|
|
|
[#33]
Quoted: Ok will the ABS need to be treated with a uv protector, sealer, or any other post print treatment? |
|
|
|
[#34]
Quoted: My plan is to make parts to be used for a steering and throttle assembly for a kayak. The parts will used in the sun, in a humid/wet environment, and at times under a load. From what I’ve read ABS is the best fit for a part that will see this type of use. Am I on the right track? |
|
|
|
[#35]
The Sainsmart Ender 3 is on sale at amazon for $179...
|
|
|
|
[#36]
And bought. My first 3D printer, been waiting for the right time. 40 bucks off normal pricing sounds good. Thanks for the head's-up!
|
|
|
|
[#37]
Quoted:
Nope. Quoted:
Quoted: Ok will the ABS need to be treated with a uv protector, sealer, or any other post print treatment? |
|
|
|
[#38]
Thinking of finally building a new printer. Looking at a linear railed version of the CoreXY. The 500X500X500 build volume has my interest.
|
|
|
|
[#39]
Quoted:
Thinking of finally building a new printer. Looking at a linear railed version of the CoreXY. The 500X500X500 build volume has my interest. |
|
|
|
[#40]
Quoted:
Rails are getting less expensive. Do you have a source for rails that are long enough for 500mm cubed volume? Right now is finding everything/pricing out on the BOM, printing out the parts needed in Nylon, and machining the other parts that are needed. Taking everything that I've learned over the years upgrading this old MendleMax 1.5, and apply it to the new build. |
|
|
|
[#41]
I like the idea of something with a fixed build plate (maybe have it on the Z axis like an ultimaker), and with Prusa MK3 type running gear, but with dual/multiple extruders (one specifically for water soluble support material) and a large build volume.
Combine that with the new experimental docking head system that E3D is developing, and you will have something AWESOME. Imagine the ability to run multiple filaments, pick-and-place heads, milling heads, etc. Well, really the E3D proto with better software and the new stepper drivers I guess is what I am thinking of... |
|
|
|
[#42]
I put a smoke detector in the Ender 3 enclosure a while back, but recently got to thinking about the times when I am not in the general area while a print is running. After doing some googling & looking at components I figured I could put together a pretty cheap combo that would interrupt the printer power if the smoke detector was to go off.
The battery only detector would be replaced with a 120v version with provision for multi-unit linking. A basic model can be had on Amazon for about $12. The manufacturer also sells a smart relay that can work in conjunction with the inter-connect cable. The relay is intended for use in turning on (or off) other devices like lights, pumps, etc. during an alarm event. It sells on Amazon for about $17. The relay has NC & NO contacts rated for a 120v 15 amp resistive load or a 1/3 HP motor. The only other materials I'd need is wiring supplies, plug & outlet, to make a unit to sit between the UPS and the printer. I could pretty much get away with a sacrificial 3 wire extension cord, some wire nuts & a small enclosure (to protect the wire nut splices & relay) plus some solder & shrink wrap for the wires connecting to the detector plug. The smart relay only trips for the duration of the detector alarm period, but at power resumption the machine should be in stand-by mode with no heaters enabled (& if not, the alarm goes off again & the power cuts...). Anyway, parts are ordered. I'll post some pics once things are together. |
|
|
|
[#43]
Did you consider an Arduino unit with smoke sensor? You could also rig up the Arduino to send you an email that something happened, even a picture.
|
|
|
|
[#44]
Quoted:
Did you consider an Arduino unit with smoke sensor? You could also rig up the Arduino to send you an email that something happened, even a picture. |
|
|
|
[#45]
auto shutdown with a smoke detector would be great but it only solves half the problem.
If the smoke alarm goes off, there probably is already fire. I'd love to have one of these. Can only find them in the UK though, ones I have found in the US are 5-6x the price.. Auto Fire Extinguisher |
|
|
|
[#46]
Quoted:
auto shutdown with a smoke detector would be great but it only solves half the problem. If the smoke alarm goes off, there probably is already fire. I'd love to have one of these. Can only find them in the UK though, ones I have found in the US are 5-6x the price.. Auto Fire Extinguisher In case you didn't notice, there is an Arduino application for nearly everything |
|
|
|
[#47]
Quoted:
Couldn't you use an arduino controlling a linear actuator or push/pull solenoid to set off a standard fire extinguisher? Namely one of those canned ones instead of dry chem? In case you didn't notice, there is an Arduino application for nearly everything The one I really want is a AMFE bottle with the 3M Novec agent designed specifically for electrical fire. These. Cheapest I've found so far is 600 bucks. Granted thats cheap considering the potential of a fire burning down my home. As of now, I just don't print anything while I'm away. |
|
|
|
[#48]
Ordered a magnet flexible build plate for my Tevo Tarantula a couple days ago from Aliexpress. Now we play the waiting game.
Felxible Buld Plate 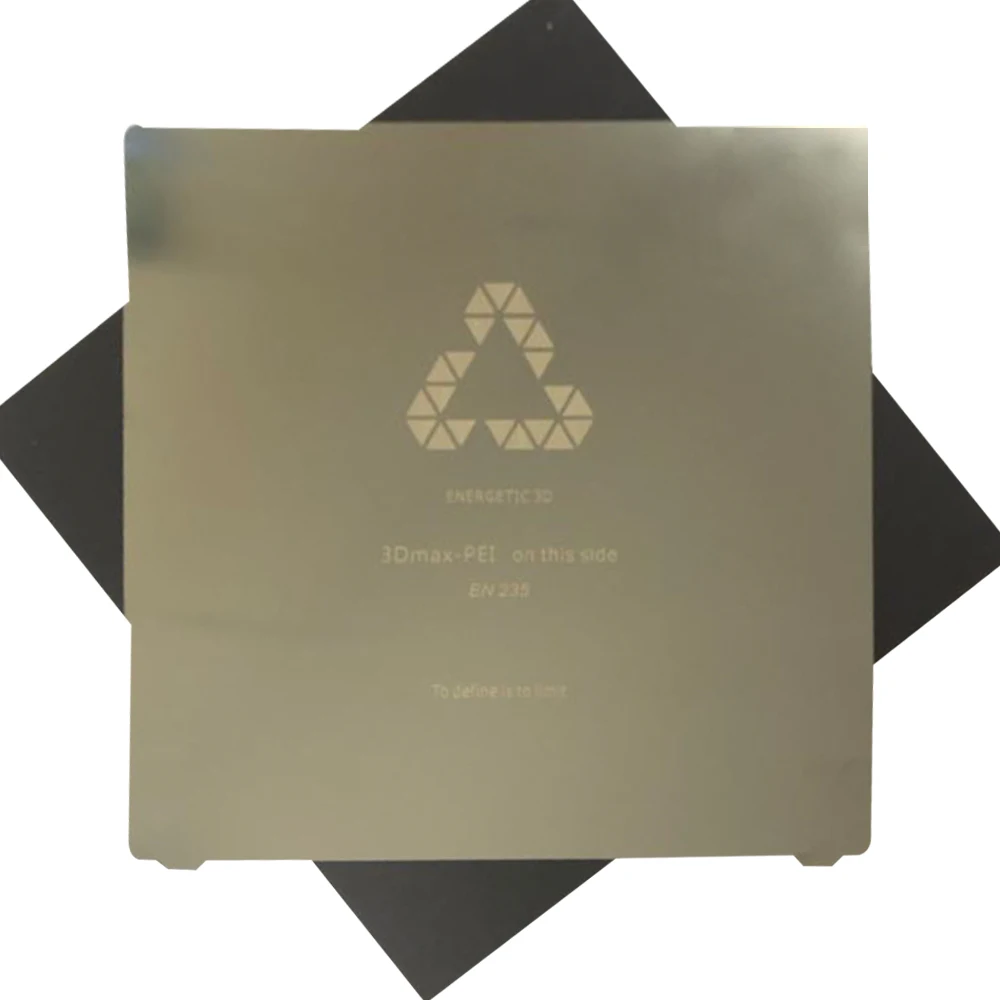
|
|
|
|
[#49]
Quoted:
Ordered a magnet flexible build plate for my Tevo Tarantula a couple days ago from Aliexpress. Now we play the waiting game. Felxible Buld Plate https://ae01.alicdn.com/kf/HTB1bb_iM7voK1RjSZFDq6xY3pXag.jpg You should let us know how it works out. |
|
|
|
[#50]
Quoted:
Kick ass! You should let us know how it works out. Quoted:
Quoted:
Ordered a magnet flexible build plate for my Tevo Tarantula a couple days ago from Aliexpress. Now we play the waiting game. Felxible Buld Plate https://ae01.alicdn.com/kf/HTB1bb_iM7voK1RjSZFDq6xY3pXag.jpg You should let us know how it works out. |
|
|
 Win a FREE Membership!
Sign up for the ARFCOM weekly newsletter and be entered to win a free ARFCOM membership. One new winner* is announced every week!
You will receive an email every Friday morning featuring the latest chatter from the hottest topics, breaking news surrounding legislation, as well as exclusive deals only available to ARFCOM email subscribers.

AR15.COM is the world's largest firearm community and is a gathering place for firearm enthusiasts of all types.
From hunters and military members, to competition shooters and general firearm enthusiasts, we welcome anyone who values and respects the way of the firearm.

Subscribe to our monthly Newsletter to receive firearm news, product discounts from your favorite Industry Partners, and more.
Copyright © 1996-2024 AR15.COM LLC. All Rights Reserved.
Any use of this content without express written consent is prohibited.
AR15.Com reserves the right to overwrite or replace any affiliate, commercial, or monetizable links, posted by users, with our own.


