


AK Sponsor

Posted: 3/10/2015 4:39:30 PM EDT
|
Hello all.
I miraculously got ahold of another NIB Saiga, so my question is... What parts would i need to convert a it to look like an AKM? I already know where to get the furniture and FCG, so thats not a problem, but I'm not sure about the rest of the parts. If this has already been touched on I apologize. I tried searching and didn't find anything, though I might have used the search function wrong. Thanks in advance for the help everyone. |
|
What exactly do you mean by "look like an AKM?"
An AKM has a 45 degree gas block, the Saiga has a 90 degree. Do you want to replace that? A Saiga has a spring loaded AK74 gas tube, an AKM does not. Do you want to modify an AKM tube? Are you going to use an AK74 gas tube with the 45 degree gas block? If so you'll probably have to shorten the tube. I don't know about the piston. What are you going to do with the front end? An AKM has a 14mm threaded barrel with a front sight block that pins at the top. The Sagia will more readily take a 24 mm AK74 threaded front sight block that pins at the bottom, same as the Saiga front sight block. On the rear of the rifle the Saiga will take all stamped Euro AK pattern buttstocks and pistol grips, i.e. Polish, E.German, Romanian, Russian. Here are the typical parts for the Saiga conversion, this off the top of my head so forgive me I forget something: The three part trigger group; Save yourself the headache and install the shepherd's hook when you reassemble the FCG. A bolt on trigger guard. Pistol grip and grip screw; Buttstock; Most people keep the 90 degree Saiga gas block. But if you want to replace that go with the AK74 90 degree gas block. The only advantage of replacing the gas block is that you can use a standard AK handguard retainer instead of the bolt on retainer. You also get a guide hole for your cleaning rod, which the Saiga gas block lacks. Either the 24 mm AK74 style front sight block or an AKM front sight block - which requires that you thread your barrel. The advantage of the 24 mm block is that one 24 mm muzzle devices are better, and two you don't limit yourself to a slant brake because your thread job sucked and isn't center with the bore. AK74 gas tube. Modifying an AKM tube for the Saiga is a PITA - been there done that. The end product will not really look like an AKM. It will look like AK103 if you use the AK74 front sight block. If you use an AKM front sight block it will kinda of sorta look like an AKM. Unless you love slant brakes there is no reason to use an AKM fsb. |
|
It's totally feasible
Apex sells front sight block, pins, cleaning rod, and furniture, muzzle attachments. Carolina shooter supply sells bolt on hand guard retainer, bolt on trigger guard, pistol grip screw, shepherd hook, fire control group. Ak 74 gas tubes are hard to find. Sometimes Apex has them. Sometimes Carolina has them. There are other vendors who have them from time to time. You might want to check out the Saiga web forum for more information. Make sure you understand 922r. You need 6 US made parts on your rifle - FCG = 3, pistol grip 1, muzzle attachment 1, magazine baseplate 1 = 6. That will let you use foreign furniture. |
|
the gas port holes are in different locations if you wanted to change out the 90 to a 45. You can still make it look like an AKM if you reuse the 90 and just install a standard FSB. It will look somewhat off to some, but it's your weapon not anyone else's. Do as you please. |
|
So I lied about posting last week... still I can give some feedback.
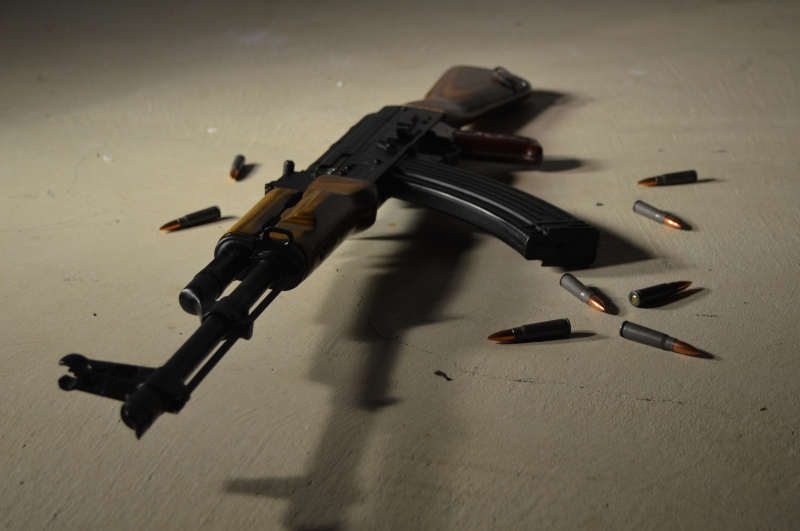
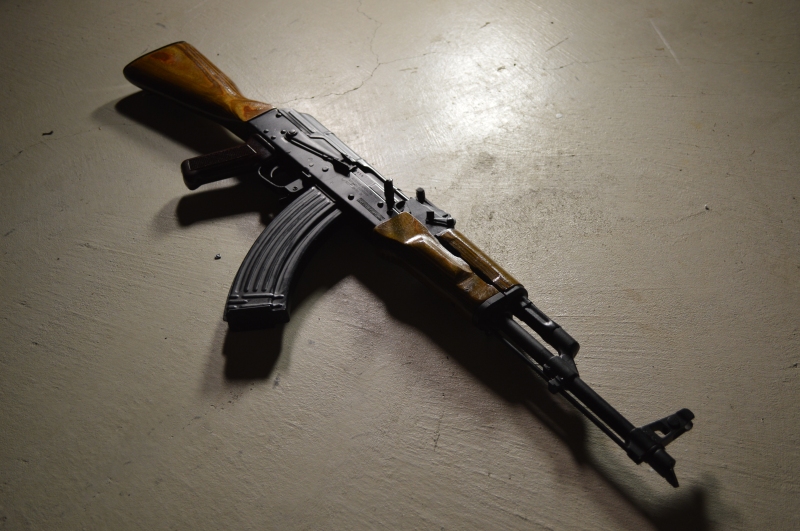
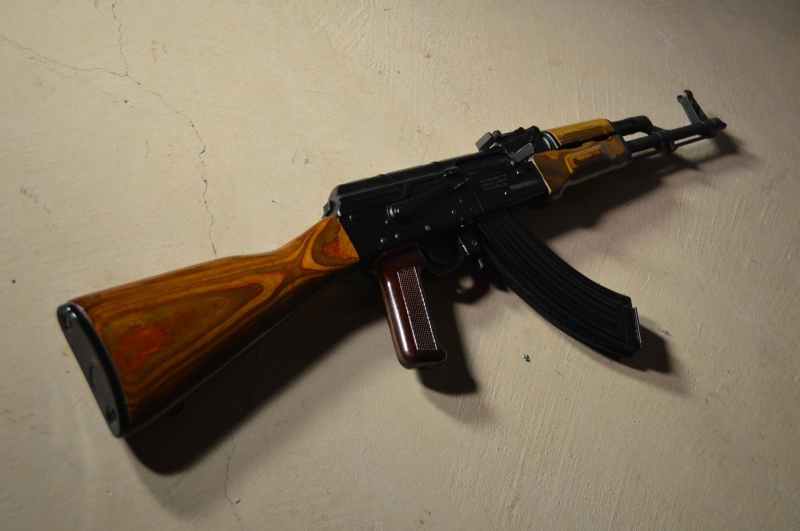
One of the most straightforward parts of the conversion is the back end modification. If you've done a Saiga conversion before, the process is no different for the AKM conversion. Simply drill out the old trigger pins, remove the riveted plate that covers the AK trigger hole, and remove the trigger guard. If you are lucky, the square hole for the pistol grip nut will already be cut out. If it is not make necessary measurements (approximately 2 millimeters forward of the old trigger hole) and trace a pistol grip nut as a guide. I also recommend removing the magazine release and obtaining a proper AKM unit, which can be riveted through the same holes as the original Saiga part. Once this back end conversion is complete, weld up the resulting holes for a cleaner look. I used a Tapco G2 AK trigger in my conversion and like it very much. If you are looking for a proper AKM clone, remove the optics rail. AKMNs weren't/aren't very common, so if you do not plan on using optics and want a true AKM replica, remove the rail. Furthermore, the Saiga optics rail is a much more modern version than what would be found on an AKMN. I have not had this done to my rifle yet, but plan to have the rail removed at the same time I have the conversion holes welded. Two of the simplest changes for this project are swapping the receiver dust cover and rear sight leaf. I purchased both of these parts from Oleg at Rusmilitary.com and both are original Soviet examples. Removing the rear leaf can be challenging, but I have had success using a screwdriver to push the front portion of the part down while pulling it out from the rear. Installing the new one can be done by firmly pushing it in from the rear through the channels cut into the sides of the rear sight block. This step may not be necessary if you plan to replace the whole rear sight block with a proper AKM one. The main difference between the Saiga rear sight block and an AKM one is the chamfer that surrounds the sight leaf. Most people will not notice this unless they are actively looking for differences. Like any Saiga conversion, a bullet ramp/guide must be added for the rifle to properly feed from a standard AK magazine. I used a guide from a Bulgarian AK-74 for mine, but the Dinzag version for Saigas is a better choice. Dinzag offers a kit with the proper drill bit and tap to install the ramp, I would go this route if I were doing the conversion today. Changing the barrel parts is the most difficult part of the project. You will need an AKM front sight block, a 45-degree AKM gas block, an AKM handguard retainer, and an AKM rear sight block (optional, for absolute accuracy) . The original barrel parts will need to be pressed off and the new ones pressed on. This is essentially impossible to accomplish without at least a 12-ton press. After all original parts have been pressed off the barrel, press the AKM rear sight block on first. You will probably be able to use the original pin hole to set this in place. Next, use an end mill or Dremel grinding wheel to cut alignment grooves into the barrel for the handguard retainer. These should be at the 3 and 9 o'clock positions on the barrel, just behind the step where the barrel thickens under the handguard. You should also make a channel for the retainer's lever at the 12 o'clock position, perpendicular to the barrel, and with a center 5 millimeters behind the step. After the above steps are complete, the original gas port should be welded closed on the barrel. Placement for the original hole will likely fall just above the rear pin hole in the block. AKMs have a 45-degree hole that is drilled just behind the bayonet lug. This means that the two holes are a little over half a centimeter apart. Measure approximately 6 millimeters forward of the original hole and drill a new one. I recommend countersinking this hole somewhat to allow for some flexibility in gas block placement. Press the new block on so that the front of it matches the position of the forward edge of the old block. Next, drill new holes for the pins and hammer/press them in. The last major piece to add is the front sight block. The only real consideration here is that you will need 6/10 or 3/5” of space for threading forward of the block. Once you have it pressed on to this depth, put the whole rifle in a vise and check alignment through the rear sight. You can make adjustments using a brass hammer on either side of the front sight block to eliminate cant. The front sight block does not need to be perfectly straight, eyeballing it will usually be sufficient, but it is a good idea to use a level to check your work. Once it is aligned to satisfaction, drill new pin holes and hammer or press the new pins in. Once all barrel components have been installed, clean up the work by welding the old, now exposed pin holes closed and grinding the welds flush. Threading the barrel is an easy home job using the 14x1 AK threading kit from CNC Warrior. This kit includes a die, thread alignment tool, die handle, and cutting oil. Beginning the threading process is as simple as partially screwing the alignment tool into the die and sticking the alignment post into the muzzle. As the die is rotated around the barrel, the alignment tool will eventually be backed off the rear of the die. Do not thread the barrel too quickly; after each 1/4-1/2 twist of progress, the die should be partially backed off and metal shavings should be cleared from the tool and the barrel. Make sure to use plenty of oil to prevent binding. The whole process can be summarized as twisting the die on a little, backing it off a little, and twisting it back on a little further repeatedly until the 6/10” of exposed barrel has been fully threaded. Once complete, add a slant brake and you are done. After the barrel is complete, obtain a correct AKM or AK-74 style gas tube with handguard. I like to add this part towards the end of the project because fitting will be required to get the spacing correct for the new gas block and rear sight block. There are flat surfaces on the rear of the gas tube that can be filed to fit the piece if it is too tight and cannot be pushed or hammered into the rear sight block. The gas tube should fit into the front of the rear sight block relatively easily, but should not rattle. After all the conversion work is complete, purchase a set of AKM furniture. I highly recommend real Soviet wood from somewhere like Rusmilitary.com, but availability can be spotty. Ironwood Designs does an adequate job of replicating Russian AKM wood with real arctic birch laminate if authentic parts are not available. Any AKM or AK-74 cleaning rod will work for this project. That is pretty much all there is to converting a Saiga to an AKM clone. I went to extra lengths to ensure that as many of the new parts were original Soviet examples. Outside of 922(r) compliance parts, the only non-Soviet part on my rifle is a Romanian handguard retainer. Since I wanted to replicate a late-1970s AKM, I sought a cast Izhmash gas block and cast front sight block with a squared lightening hole. Cope’s Distributing has recently had some complete rear sight assemblies and trigger guards that originally came from Soviet AKMs. My laminate furniture came from another collector and is unissued Soviet replacement wood. For those wondering, my compliance parts are my muzzle brake, gas piston, trigger parts, and magazine follower. While the Saiga to AKM conversion process is highly involved and perhaps more difficult than simply building an AKM from the ground up, I feel it was a worthwhile endeavor. The conversion allows me to retain the original Russian cold hammer forged barrel and Izhmash receiver, both of which are excellent quality parts and really are the heart and soul of the firearm. This project was time consuming and has taken extensive help from AK professionals, but the end result is something I am truly proud of and is a centerpiece of my collection. Photos: 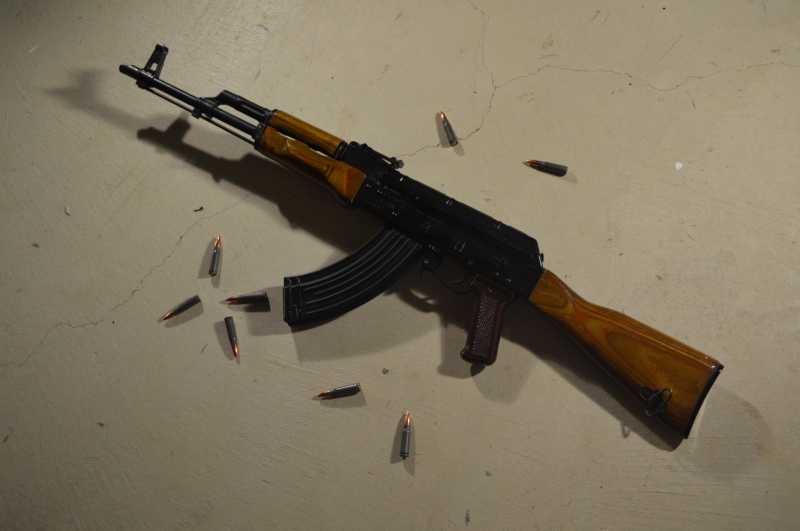

|
AK Sponsor