


AR Sponsor


Posted: 7/28/2016 12:07:37 PM EDT
[Last Edit: aguynamedbryan][Edited]
|
Hey guys - it looks like I'm subject to a character limit since I have a new account - I hope I'm not breaking any rules by doing this but I'm going to post my full topic over a couple thread responses...
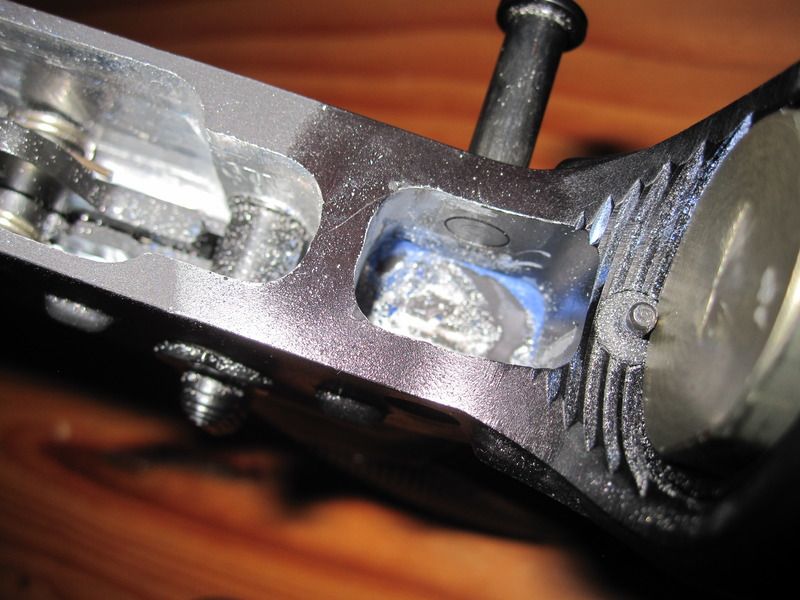
I’m having some very discouraging problems with my 80% builds… I bought a couple 80% lowers and jig from 80-lower.com and the blank lowers came with the rear shelf completed and the takedown pin-holes already drilled. The directions said if the lower came with the rear shelf already milled out there is no more work to be done there. With the completed lowers I took my newly delivered Aero Precision M4E1 upper and try to fit it up – no good. The front post is tight but fits in between the ears and the pivot pin functions fine. Then when I swing the rear of the upper into the lower it gets jammed. It appears to me that the pre-milled rear shelf isn’t wide enough to accommodate the rear post of the upper. I had the same problem when I previously tried to attach my 6920 upper to both completed lowers but figured I’d wait for my AP upper to get in before modifying anything. I tried test fitting my AP upper on the 6920 lower and it fit great. I tried test fitting my friends Delton (might have been a DPMS) upper on my lowers and that actually fit fine. So now I decide to shave away the inside of the rear shelf pocket, so I go at it with a dremel (I know I should have had more patience). Anyway, I throw some chalk in the rear shelf pocket and get a feel for where the post is getting hung up and manage to grind away enough material that the post goes in without any problems. 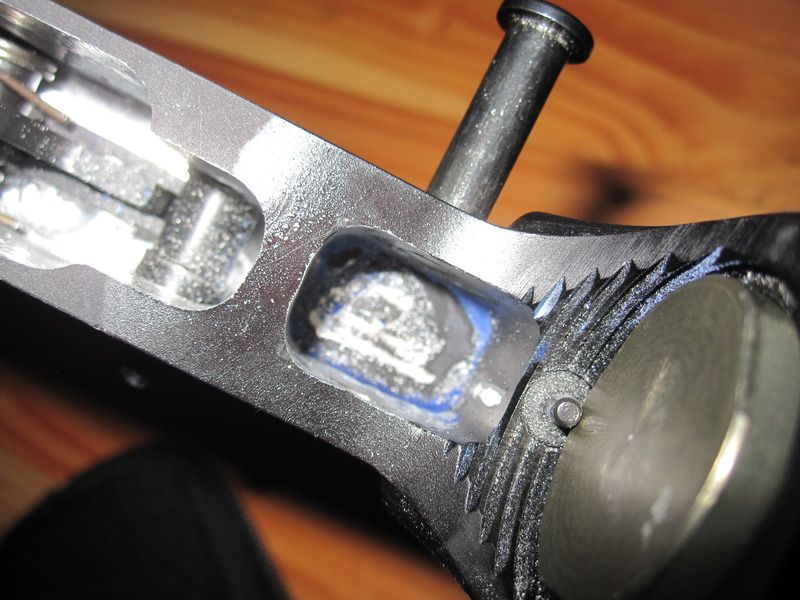
|
But now the problem I’m having is the rear pin won’t go through the hole of the upper post. In looking closer it appears that the hole in the upper rear post is just a hair too high but I can’t figure out where it’s getting hung up. When I push the upper down as far as it’ll go there isn’t any chalk on the bottom of the post – so it doesn’t appear to be bottoming out in the rear shelf pocket. I can also shine a flashlight from the opposite side along the seam between the upper and lower receiver and can see a small amount of light along the whole length.
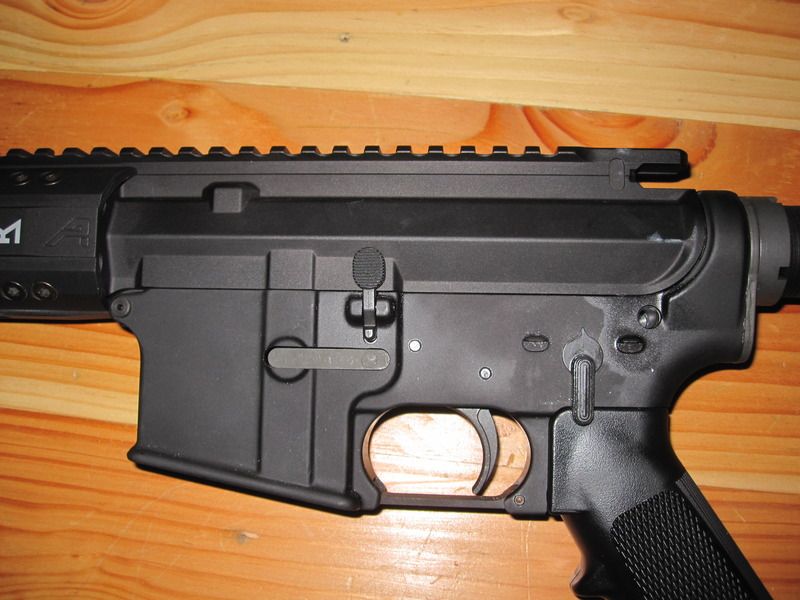
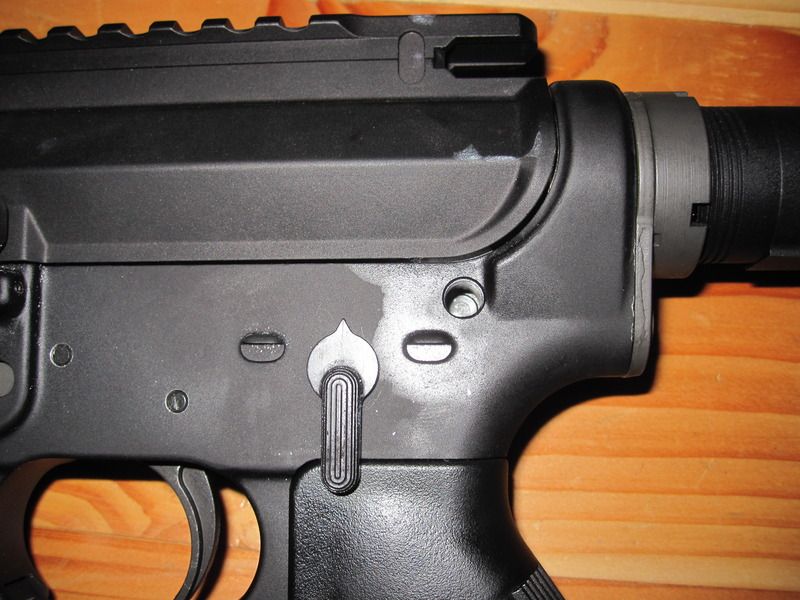
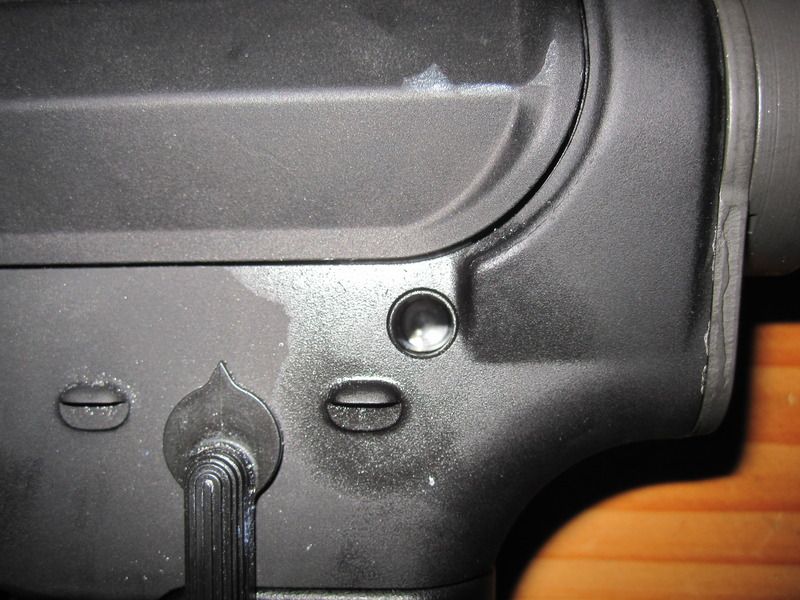
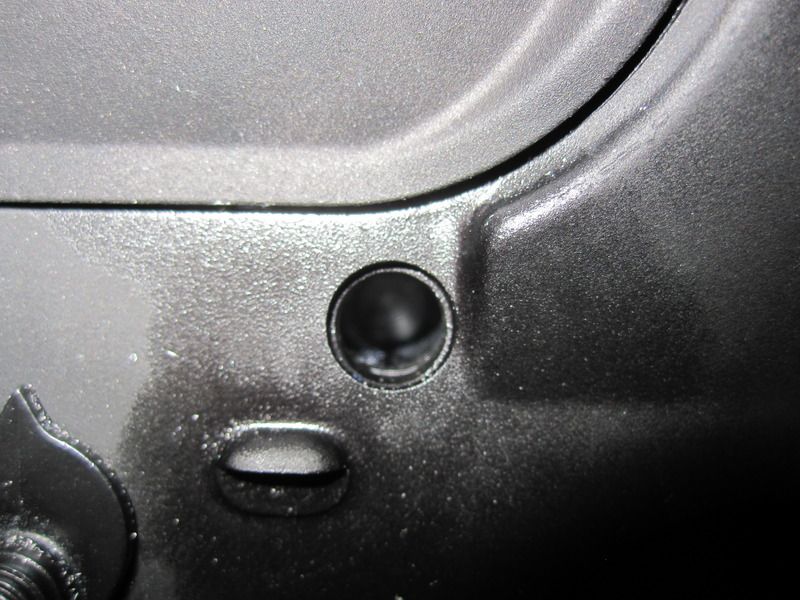
So I’m at a bit of a loss for what to do now. I really don’t want to modify my new upper to fit on crummy homemade lower, especially since it fit so great on my 6920 lower. Have you guys had any problems like this before or does anyone have any suggestions? Do you think I should go back to the 80% lower company and write a complaint? |

|
Looks like the rear take down pin hole is off a bit, pick up a round needed file and start lightly working on it until the pin will push through.
As far as seeing light between the lower and upper, that is not uncommon, I have seen it happen on brand new upper level guns in the past. What jig were you using when you drilled that rear take down pin hole? Why would you complain to the 80% lower company, you are the one that milled it and drilled the holes, Right? |
|
Originally Posted By DaveP1:
Looks like the rear take down pin hole is off a bit, pick up a round needed file and start lightly working on it until the pin will push through. As far as seeing light between the lower and upper, that is not uncommon, I have seen it happen on brand new upper level guns in the past. What jig were you using when you drilled that rear take down pin hole? Why would you complain to the 80% lower company, you are the one that milled it and drilled the holes, Right? The rear takedown pin hole functions fine on it's own - it's just when the upper is introduced it seems like one of the following is the problem: the rear takedown pin hole is too low, the upper lug hole is too high, or there is something hung up and stopping the upper from going all the way down. If you look at the close up picture of the takedown pin hole you can see at the bottom of the hole that there is a lip at the bottom which is the upper post sitting a little high. The rear takedown pin hole comes already drilled from the supplier and is used to secure the template/jig to the lower reciever. Noting that there was light between the two receivers was just meant to indicate it doesn't appear that the upper is "bottoming out" on the lower frame (not sure if that makes sense). Based on the above do you still think that modifying the pin hole is a possible fix? I hadn't thought of that yet and would be unsure of where to begin filing... Thanks |


| I don't think I've ever completed an 80% with the rear lug precut thst didn't need additional machining in the rear lug area. Most were undersized by about. 020-.030. Some needed milled farther to the rear, by the buffer retainer too. |
A firearm is like a parachute, if you need one but don't have one, you'll probably never need one again.

|
Originally Posted By j3_:
Two common problems that will keep the upper from closing are the rounded corners in the lower towards the front will catch the upper lug. The second is on the upper on the bottom just in front of the rear lug some manufacturers have a high spot the width of the lug raised above the height of the bottom of the rest of the upper. That high spot catches the curves in the lower cut out holding the upper up slightly. Squaring off the front two corners in the lower or flatting the high spot on the upper in front of the rear lug took care of the problem when I encountered it. There is one other thing. If you screw the stock tube in where the tube comes out past the front inside edge of the lower at the top it will keep it from closing also. Fixed it! It turned out being the upper on the bottom just in front of the rear lug as you said. Thanks for pointing this out - I hate to admit I would have probably never thought to look there. I don't have a small file to work on the upper so I just shaved a little off the lower with my dremel and it works great (in combination with widening/further milling the rear pocket as others pointed out). Thanks to everyone for their input. |
|
Originally Posted By BlackdogGS:
I got my lowers from 80% and the rear shelf was only partially complete. I still had to mill it. I'm using the Modulus HD jig. I just posted pictures under "My first mill job". Just out of curiousity did you get it from 80-lower or 80percentarms? I thought they were the same company but it turns out they aren't. On page 12 of the instruction manual (https://www.80-lower.com/content/80_Lower-80_Percent_Arms-Easy_Jig-Lower_Machining_Instructions.pdf) for mine it said I don't need to do anything with if the rear pocket was already milled out. I guess I learned the hard way that isn't the case. |
|
Originally Posted By aguynamedbryan:
Just out of curiousity did you get it from 80-lower or 80percentarms? I thought they were the same company but it turns out they aren't. On page 12 of the instruction manual (https://www.80-lower.com/content/80_Lower-80_Percent_Arms-Easy_Jig-Lower_Machining_Instructions.pdf) for mine it said I don't need to do anything with if the rear pocket was already milled out. I guess I learned the hard way that isn't the case. Originally Posted By aguynamedbryan:
Originally Posted By BlackdogGS:
I got my lowers from 80% and the rear shelf was only partially complete. I still had to mill it. I'm using the Modulus HD jig. I just posted pictures under "My first mill job". Just out of curiousity did you get it from 80-lower or 80percentarms? I thought they were the same company but it turns out they aren't. On page 12 of the instruction manual (https://www.80-lower.com/content/80_Lower-80_Percent_Arms-Easy_Jig-Lower_Machining_Instructions.pdf) for mine it said I don't need to do anything with if the rear pocket was already milled out. I guess I learned the hard way that isn't the case. 80% Lowers. My jig/instructions are differant than yours.  image hosting free no registration image hosting free no registration
|
| The last one I did, I didn't mill the wall between the FCG and the Rear lug pocket and the gun works fine, you can get away with it on some of the guns, Colt did the same in their factory guns for a while in an attempt keep them from being converted to full auto function. |

...believe in me, I'm with the High Command.
Joined:
May 2006
Posts:
9447
EE: 100% (35)
 MO, USA
|
Adding this thread to the Tacked "80%" Lower thread at the top of the Forum.
Some really good information. 
|
"When trading bullets it is better to give than to receive"
"People sleep peaceably in their beds at night only because rough men stand ready to do violence on their behalf." - George Orwell
"People sleep peaceably in their beds at night only because rough men stand ready to do violence on their behalf." - George Orwell
| The rear shelf of the 80% lowers is not cut to finished size. You do not need to remove the wall between the shelf and pocket if you do not want to, but there is still a few thousandths that need to be removed from the rear shelf area, primarily from the drivers side. |
| I always enlarge the rear pocket by a little bit and still work on the rear lug on the upper. I have done a couple that fit perfectly and I didn't have to do any work on the rear, but normally you will have to do something to get them to mate. |
I prefer them tight so they require fitting. Use high-spot dye, and take your time with hand fitting (I use wet-dry abrasive paper backed with a fiberglass tongue-depressor for final fitting). If we are going to take the time to custom build a weapon we should take the time to fit/marry the parts we machine. 
|
|
Originally Posted By aguynamedbryan:
Fixed it! It turned out being the upper on the bottom just in front of the rear lug as you said. Thanks for pointing this out - I hate to admit I would have probably never thought to look there. I don't have a small file to work on the upper so I just shaved a little off the lower with my dremel and it works great (in combination with widening/further milling the rear pocket as others pointed out). Thanks to everyone for their input. Originally Posted By aguynamedbryan:
Originally Posted By j3_:
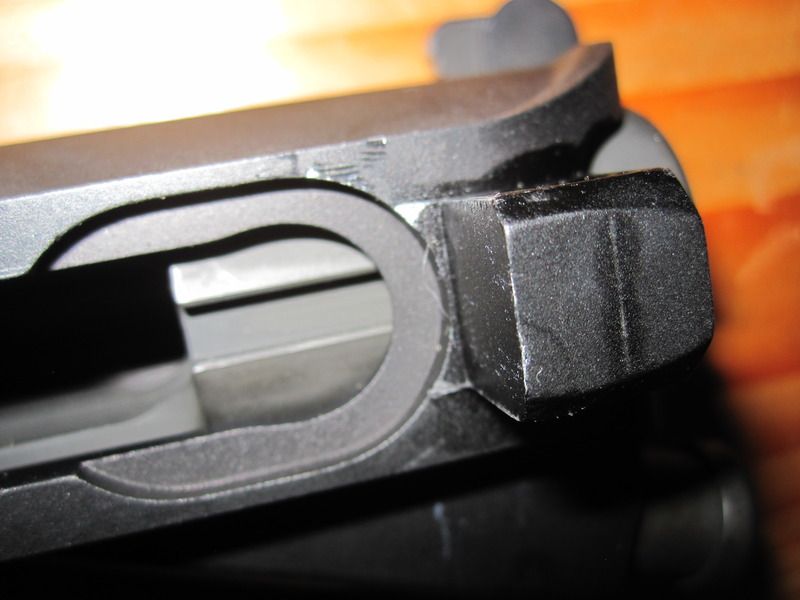
Two common problems that will keep the upper from closing are the rounded corners in the lower towards the front will catch the upper lug. The second is on the upper on the bottom just in front of the rear lug some manufacturers have a high spot the width of the lug raised above the height of the bottom of the rest of the upper. That high spot catches the curves in the lower cut out holding the upper up slightly. Squaring off the front two corners in the lower or flatting the high spot on the upper in front of the rear lug took care of the problem when I encountered it. There is one other thing. If you screw the stock tube in where the tube comes out past the front inside edge of the lower at the top it will keep it from closing also. Fixed it! It turned out being the upper on the bottom just in front of the rear lug as you said. Thanks for pointing this out - I hate to admit I would have probably never thought to look there. I don't have a small file to work on the upper so I just shaved a little off the lower with my dremel and it works great (in combination with widening/further milling the rear pocket as others pointed out). Thanks to everyone for their input. Just wanted to add a couple pictures of the high spots that were causing problems. It's those little corners where the anodizing is worn off. Instead of shaving that down I just shaved into the lower a little bit. I think if I milled the lower to connect the rear shelf and trigger pocket this probably wouldn't have been a problem. Thanks again for everyone's help. 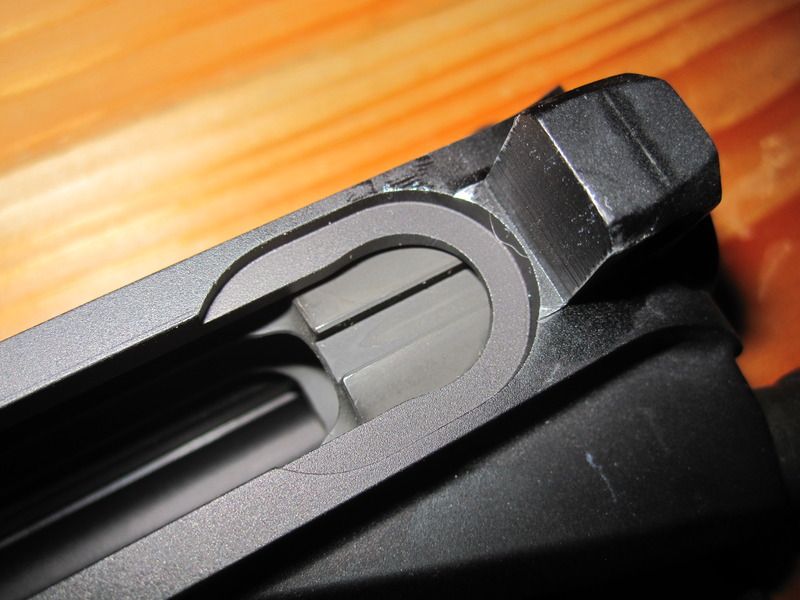
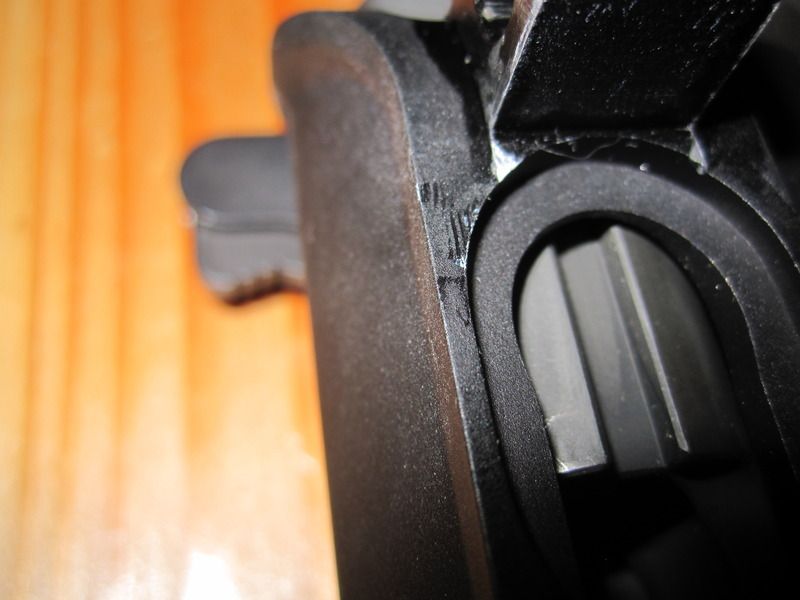
|
|
Originally Posted By Baldtrucker:
As for a dremal me personally would avoid that.. |
|
You should always double check your width (.500" Minimum) and your depth (.525" Minimum) for your rear takedown pocket on your AR-15 lower...
I have noticed that Aero Precision uppers are EXTRA TIGHT (fat dims) versus other brands and can give you some fitment Issues... Good luck. |

|
Originally Posted By j3_:
Two common problems that will keep the upper from closing.... There is one other thing. If you screw the stock tube in where the tube comes out past the front inside edge of the lower at the top it will keep it from closing also. what is your remedy for that? |
AR Sponsor