[ARCHIVED THREAD] - Home made holsters (Picture Thread) (Page 1 of 3)
Posted: 7/4/2012 5:40:04 PM EDT


|
http://img.tapatalk.com/63795c32-33ec-aec6.jpg
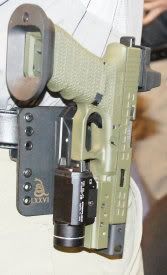
http://img.tapatalk.com/63795c32-3436-2383.jpg http://img.tapatalk.com/63795c32-3452-f282.jpg http://img.tapatalk.com/63795c32-3478-0b81.jpg http://img.tapatalk.com/63795c32-34c0-1178.jpg http://img.tapatalk.com/63795c32-3506-f66b.jpg http://img.tapatalk.com/63795c32-3534-3dfb.jpg http://img.tapatalk.com/63795c32-3595-b710.jpg http://img.tapatalk.com/63795c32-35dd-b8ff.jpg Sorry, had to stunt a little. I believe I've made all of this stuff personally though. Some of my favorite pieces. Cool thread idea. |


|
Quoted: Bravo, SGB. Great looking stuff. On the last pic, did you make the dual pull the dot keepers yourself? Thanks for the compliment Steve, yes I did the pull dot snaps myself. I got them a little to close together, the next one will have them set a little further apart. I like this one Steve, nice concept.  |


|
Quoted:
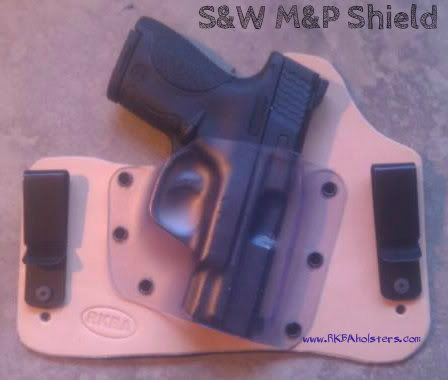
Anyone try their hand at making holsters modeled after the crossbread line ? I'm considering doing something like it in an OWB with a leather "vaneer" covering the kydex. Theory is that just about any leather could be used without having to mold the leather. |
|
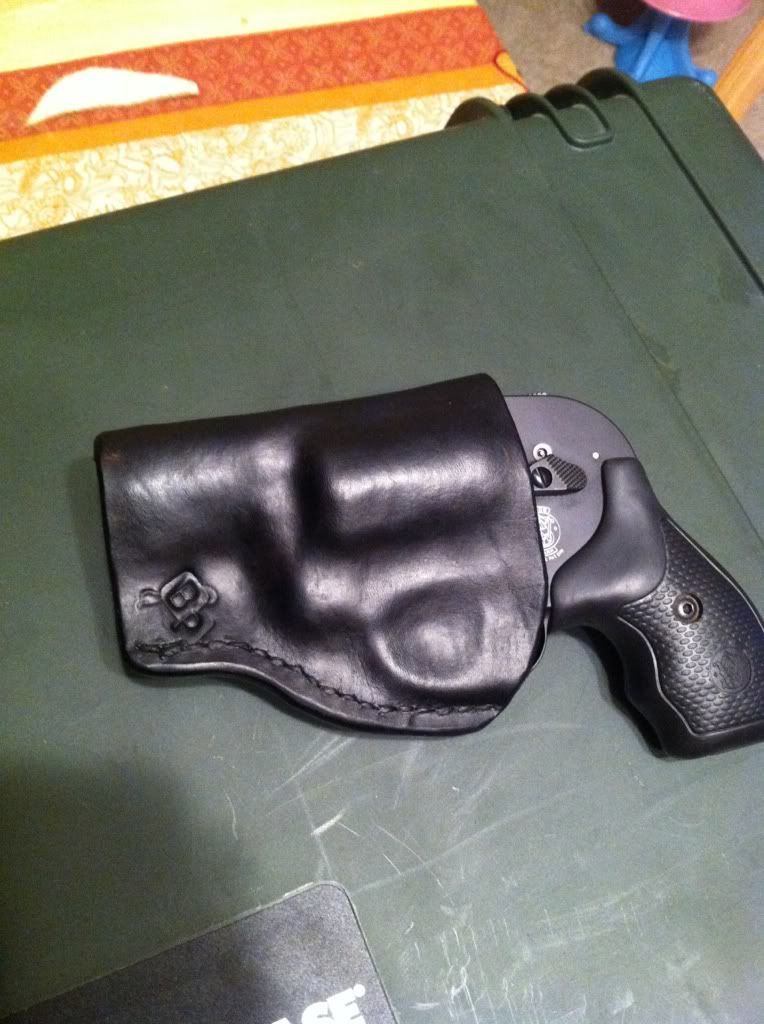
My first attempt at making a holster. A special thanks to ARFCOM member grabagear. Your email definitely helped.
I patterned it after the Galco Stow-n-go. I've been wearing it around the house and its very comfortable. Here's a couple things that I learned. 1. Its easy BUT attention to detail is paramount. 2. When using an awl, pay careful attention as to the angle you are inserting it. There was a few times that the point of the awl exited in different places. 3. Handstitching is easy but time consuming. 4. When using the awl, its best to only go 5-10 holes at a time then stitch. The leather begins to close up after a few minutes and its a nightmare trying to get the needle through closed up holes. 5. Make a pattern out of paper first. 6. PAY ATTENTION TO DETAIL!!! When I was cutting the leather, I overlapped a few of my cuts. It doesn't affect the holster but its ugly. Same holds true when stitching. There were a few times where the needle didn't exit exactly where I wanted it to. Again, doesn't affect anything but its not "perfect". My next attempt will be to wet shape the leather around a few tools. Once I get it down, a nice thumb break OWB is in order. 

|
|
Quoted:
Sorry dude but that's on the ruff side, both the design & execution. Gotta start somewhere. Howsabout offering some tips rather than criticism? Here's my very first concealment type holster which I felt was a POS: 
As for my fellow dispatcher... - Drop the back edge down to allow for a full firing grip. - Try wet molding - it won't hurt anything. - Be sure you're not using leather that's too thick. Too thick is overkill and more difficult to work with. Also makes a thicker... uh... package in the pants. 
- Stitching looks fine. You could clean up the edges, though. Round off corners. Get those edges closer to the stitching. You can cut 'em closer, use a coarse sanding drum, whatever. Finish the edges off with a fine sanding drum, sandpaper, sanding sponge. You can burnish the edges with something smooth like a sharpie marker or something. Don't have to get all fancy, but I typically use bee's wax or gum tragacanth when burnishing to help seal and really smooth out the edge. - Most importantly - don't get discouraged. If you want to keep on going, look at this one, figure out what you'd like to change, and implement those changes on the next one. And the next one. And the next one... Have a look at my DIY tutorial for more tips. |
|
Quoted: Gotta start somewhere. Howsabout offering some tips rather than criticism? You're right, instead of offering an honest opinion in the few minutes I had to spend online I should have taken the time to offer suggestions on how to hone his holster making skills. |
|
That's your piece of shit? What's a good one look like?
Quoted:
Quoted:
Sorry dude but that's on the ruff side, both the design & execution. Gotta start somewhere. Howsabout offering some tips rather than criticism? Here's my very first concealment type holster which I felt was a POS: http://www.jdlawhon.com/holstermaking/20.jpg As for my fellow dispatcher... - Drop the back edge down to allow for a full firing grip. - Try wet molding - it won't hurt anything. - Be sure you're not using leather that's too thick. Too thick is overkill and more difficult to work with. Also makes a thicker... uh... package in the pants.
- Stitching looks fine. You could clean up the edges, though. Round off corners. Get those edges closer to the stitching. You can cut 'em closer, use a coarse sanding drum, whatever. Finish the edges off with a fine sanding drum, sandpaper, sanding sponge. You can burnish the edges with something smooth like a sharpie marker or something. Don't have to get all fancy, but I typically use bee's wax or gum tragacanth when burnishing to help seal and really smooth out the edge. - Most importantly - don't get discouraged. If you want to keep on going, look at this one, figure out what you'd like to change, and implement those changes on the next one. And the next one. And the next one... Have a look at my DIY tutorial for more tips. |
|
Thanks for all of the advice. Truthfully, I was playing with the stitching, groover and making patterns more than anything else with my first holster. That said, its crude, ugly and still carries and draws nicely.
This is the second holster that I've been working on and its almost complete. This is for my Walther Modell 4 and my first time wet molding as well as burnishing the edges. The "stains" are water from smoothing out some rough spots. It still needs belt loops and a nice black stain but test fitting shows it has good retention and a nice draw. 

For my next one, I need to practice more with cutting smoother lines, belt loops and more complex patterns. You can see there is a wave running down the left side. A belt sander is on my "garage sale" list and I'll touch it up then. Right now, I'm using 6-7 Oz. shoulders from the Tandy's bargain bin. Once I've got everything down to where I'm confident, I plan on buying some nice 3 Oz. shoulders and wet molding/laminating so that I'll have smooth inside and outside. |


|
Apologies for the out of focus pics - cell phone was playing up !
Gun is an Uberti 1861 Navy - we aint allowed much else over here....handgun wise at least... Holster based on a Texas Slim Jim type - but not 100% happy with it - need to get the area near the trigger guard profiled better than it is. Sewn by hand, English saddle-stitched, with correct cotton thread at 9 to the inch 

|
|
Quoted:
My first attempt at making a holster. A special thanks to ARFCOM member grabagear. Your email definitely helped. I patterned it after the Galco Stow-n-go. I've been wearing it around the house and its very comfortable. Here's a couple things that I learned. 1. Its easy BUT attention to detail is paramount. 2. When using an awl, pay careful attention as to the angle you are inserting it. There was a few times that the point of the awl exited in different places. 3. Handstitching is easy but time consuming. 4. When using the awl, its best to only go 5-10 holes at a time then stitch. The leather begins to close up after a few minutes and its a nightmare trying to get the needle through closed up holes. 5. Make a pattern out of paper first. 6. PAY ATTENTION TO DETAIL!!! When I was cutting the leather, I overlapped a few of my cuts. It doesn't affect the holster but its ugly. Same holds true when stitching. There were a few times where the needle didn't exit exactly where I wanted it to. Again, doesn't affect anything but its not "perfect". Better to make 1 hole, sew, make the next hole, sew, etc. You can get a better rythm going that way |
|
Quoted:
Every one is different. I know a guy that uses 2 diff weight pieces for front n back. Some say lighter weight for iwb holsters. Personally I like thick heavy. So I use 8-9 or 9-10oz. On everything. Veg tanned. With that heavy of a weight, do you find that OWB with belt loops mold or soften over time with wear? The one I just made for my Modell 4 literally try to pull my belt straight instead of flexing. |
|
8/9 oz veg tanned drum dyed leather. With that heavy of a weight, do you find that OWB with belt loops mold or soften over time with wear? The one I just made for my Modell 4 literally try to pull my belt straight instead of flexing. All leather will soften over time with use. How your belt slots conform to the body is determined by your design and the way you mold & form the holster. |
|
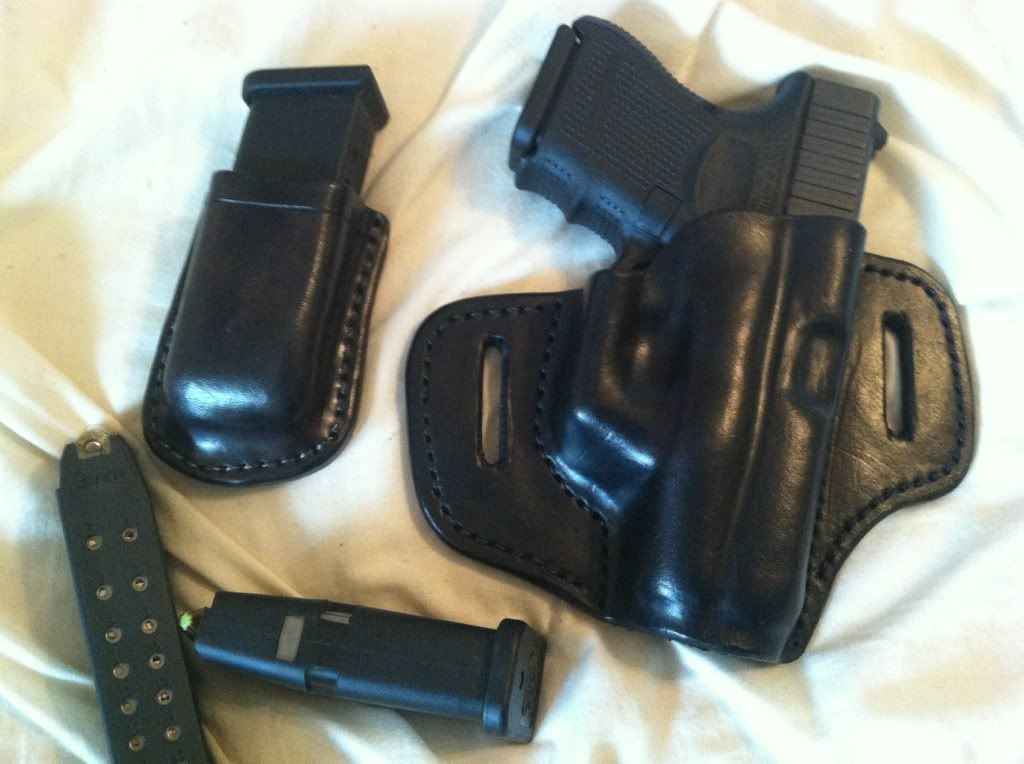
Most of my pancake two peice holsters use 5/6 oz for the front and 8/9 oz for the back sweat shield peice. This combo gives good stiffness and retention, without feeling like a brick is being strapped onto your belt. The thinner leather up front also gives me better wet molding detail.
-Tac P.S. thanks for the compliments on my work. I haven't tried kydex yet, as leather has kept me busy for the last 7 or 8 years... I might give it a try if I find the time. |