Warning


Close

Confirm Action

Are you sure you wish to do this?

Confirm Cancel
BCM
User Panel

Site Notices
Posted: 9/5/2012 6:19:59 PM EDT
My old man has been holding on to my old 20 ga. and it's gummy and not well cared for. Basically, the lock, breech face, and trigger assembly need cleaning. Anyone have any tips on getting this thing apart?
Link Posted: 9/5/2012 7:48:33 PM EDT
[#1]
What make/model? It could be almost as easy to clean as an AR15 or it could be one of those suck it up and pay a gunsmith $150 jobs.
ETA-as complex as O/Us can be, I'd recommend paying to have it done by someone who knows how.
Link Posted: 9/5/2012 7:53:19 PM EDT
[#2]
If it's a boxlock just remove the stock and spray it out.
Link Posted: 9/5/2012 8:09:12 PM EDT
[#3]
Antonio Zoli 20ga. Box lock? Wassat? I are dumb.
Link Posted: 9/5/2012 8:14:38 PM EDT
[#4]


Quoted:


Antonio Zoli 20ga. Box lock? Wassat? I are dumb.


Most Zolis i have seen are box lock
never tore into one though so not sure if anything is held into place by the stock
other concern is the stocks on O/U  are pretty thin at the "fingers" that go to either side of the tang and can be cracked easily when reassembling or removing as some can be fitted tightly and may need a good smack/wiggle to get on and off
 
Link Posted: 9/5/2012 8:14:54 PM EDT
[#5]


Quoted:


Antonio Zoli 20ga. Box lock? Wassat? I are dumb.


Remove the forend.  Remove the barrels.  


With a long shaft phillips bit for your cordless drill, dip it in vaseline.  Now using the greased phillips bit, remove the recoil pad with the drill set to low torque.  There will be a screw or bolt in the stock.  You may need another long shafted tool.  


Once you have the stock bolt removed, gently work the stock loose.  


Now take the action and blow it out with non-chlorinated brake parts cleaner.  Hit it with the compressor.  Oil *lightly* the bearing surfaces.  Too much oil in the action will seep into the wrist of the stock and soften it resulting in cracks.  


Put together in reverse order.  Store muzzle down in the safe.


The end.


Link Posted: 9/5/2012 8:15:44 PM EDT
[#6]
Step 1:  Remove the barrels.
Step 2:  Remove the stock.  This will let you see into the action.
Step 3:  Use Gunscrubber or something like it and clean out the action.  Do Not take anything apart.  You don't need to.
Step 4:   Allow to dry, wipe down the breechface, etc.
Step 5:   Lightly lube the moving parts and reassemble.


For my Beretta's it is that easy.
Link Posted: 9/5/2012 8:20:31 PM EDT
[#7]
Quoted:

Quoted:
Antonio Zoli 20ga. Box lock? Wassat? I are dumb.


Remove the forend.  Remove the barrels.  

With a long shaft phillips bit for your cordless drill, dip it in vaseline.  Now using the greased phillips bit, remove the recoil pad with the drill set to low torque.  There will be a screw or bolt in the stock.  You may need another long shafted tool.  

Once you have the stock bolt removed, gently work the stock loose.  

Now take the action and blow it out with non-chlorinated brake parts cleaner.  Hit it with the compressor.  Oil *lightly* the bearing surfaces.  Too much oil in the action will seep into the wrist of the stock and soften it resulting in cracks.  

Put together in reverse order.  Store muzzle down in the safe.

The end.


Everything he wrote is exactly correct, especially the part about storing it muzzle down. If it is older and been gummed up severely with old gun oil, soak the action in a bowl of solvent overnight. Then clean it with a strong, nylon brush, clean out the solvent, lightly oil, etc.
Link Posted: 9/5/2012 8:38:23 PM EDT
[#8]
Quoted:
Quoted:

Quoted:
Antonio Zoli 20ga. Box lock? Wassat? I are dumb.


Remove the forend.  Remove the barrels.  

With a long shaft phillips bit for your cordless drill, dip it in vaseline.  Now using the greased phillips bit, remove the recoil pad with the drill set to low torque.  There will be a screw or bolt in the stock.  You may need another long shafted tool.  

Once you have the stock bolt removed, gently work the stock loose.  

Now take the action and blow it out with non-chlorinated brake parts cleaner.  Hit it with the compressor.  Oil *lightly* the bearing surfaces.  Too much oil in the action will seep into the wrist of the stock and soften it resulting in cracks.  

Put together in reverse order.  Store muzzle down in the safe.

The end.


Everything he wrote is exactly correct, especially the part about storing it muzzle down. If it is older and been gummed up severely with old gun oil, soak the action in a bowl of solvent overnight. Then clean it with a strong, nylon brush, clean out the solvent, lightly oil, etc.


Bad idea, wrong solvent might lift the nickle.
Link Posted: 9/6/2012 6:31:42 AM EDT
[#9]
Thanks everyone. I'll get it cleaned out this weekend. I'm thinking the non-chlorinated brake cleaner is my best and safest bet.

The chambers are sludged up, even. A 2 3/4" shell won't slide in freely, and it's got a 3" chamber. However, the bore is bright, no signs of rust or ptting as far as I can see inside, through the chamber end and the barrel end.

I'll try to get some pics up, just for the fun of it.
Link Posted: 9/6/2012 6:48:13 AM EDT
[#10]


Quoted:


Thanks everyone. I'll get it cleaned out this weekend. I'm thinking the non-chlorinated brake cleaner is my best and safest bet.


The chambers are sludged up, even. A 2 3/4" shell won't slide in freely, and it's got a 3" chamber. However, the bore is bright, no signs of rust or ptting as far as I can see inside, through the chamber end and the barrel end.


I'll try to get some pics up, just for the fun of it.


When the chambers get that gooped up, it's usually from foreign debris or shooting really low pressure loads that do not allow the hull to obturate fully and get a good gas seal.


Do a google search for a video on how to remove the ejectors from that particular model...they are usually user serviceable and pretty easy to do, but I am unfamiliar with the process for that model.  They will be under spring tension, so use caution not to let springs run away on you.  Clean and lube the ejector channels and ejectors.    


Also, go buy a Tornado Brush.  I use a cleaning rod with the T handle removed.  Chuck the rod in your cordless drill and set it to "puree."  Some guys are afraid of the stainless Tornado brushes.  Don't be.  I've been using them for years on very expensive non-chrome plated bores with nary a scratch.


Get the bore (one at a time) really wet with Hoppes or other lead  / powder / plastic dissolving solvent.  Hold the barrels flat with your off hand on a non-marring surface (i.e. put a towel down.)  You'll also want to put a shop towel over the end of the barrels to catch the flying black nasty shit you are about to make.  


Then insert the chucked cleaning rod into the chambers (keep the removable chokes in place for this) and start drilling for gold....back and forth...keep the bores wet.  I use the brake cleaner and paper towels to intermittently clean the brush and rod.  Use wadded up paper towel (not store bought patches) for a tight fit and push them through to remove the sludge.  Lather, rinse, repeat until mirror shine.  


Then remove the chokes and clean the threads.  Use the big q-tips or something similar for the threads in the barrel.  It is important that these threads are clean.  I'll blast them with the brake cleaner too.  Just wear glasses and be mindful of the direction of spray so that the brake cleaner does not come shooting back at you.  


When the chokes are clean, apply an anti seize grease to the threads and external surface of the choke tubes and replace them.


Link Posted: 9/6/2012 7:01:46 AM EDT
[#11]
You shouldn't have to remove the iron from the forend, but do wipe the steel down with a lightly oiled cloth.  Make sure the cocking arms move freely.  Compressed air helps.  


As for the wood, I like Howard's restore-a-finish and their citrus wax for oil finished stocks.  For stocks with a clear hard finish, Cabinet Magic (home depot, cleaning aisle.)  You can use the Cabinet Magic on oiled stocks, though, too.  


An old soft toothbrush will help clean and get the finish restorer in the checkering without damaging the points.


Link Posted: 9/6/2012 7:06:53 AM EDT
[#12]
More than likely it is also metric. If the stock is held on by a nut make sure you use the metric size if it is indeed metric. Using a non metric socket may round off the corners if you try it.
Link Posted: 9/6/2012 7:15:08 AM EDT
[#13]
No chokes in this guy. Improved and modified built into the barrels.

16 days 'til dove season.
Link Posted: 9/6/2012 7:35:00 AM EDT
[#14]
Quoted:
My old man has been holding on to my old 20 ga. and it's gummy and not well cared for. Basically, the lock, breech face, and trigger assembly need cleaning. Anyone have any tips on getting this thing apart?


Google the make and model and you should find a bunch of information including some youtube vids some will be more helpful than others.

I picked up a Savage 550 for next to nothing because it "don't work right". A few hours on the WWW and a couple more at my work bench and I had it running perfect (and I am no gunsmith )
Link Posted: 9/9/2012 8:21:48 AM EDT
[#15]
Update,
Disassembled successfully!


I'm not taking it down any further, except for the fore-end latch. Will try to clean it out without hurting the wood if possible.


Another thing I'll have to clean the best way possible WITHOUT disassembling is the lock. I'll never be able to get it back together.


WARNING! Crappy photo below:


It's actually quite simple inside. There is no takeup in the trigger and a shallow sear. Now I know why the triggers always felt to good.


The spring design bothers me, though. Not much side to side support, but I guess when the action is in the stock, they aren't going anywhere.

I couldn't get a good picture of the bores, but I'll say the ejector was gummy but easily removed with one screw. I'll bathe, scrub, and lightly lube everything before reassembly.


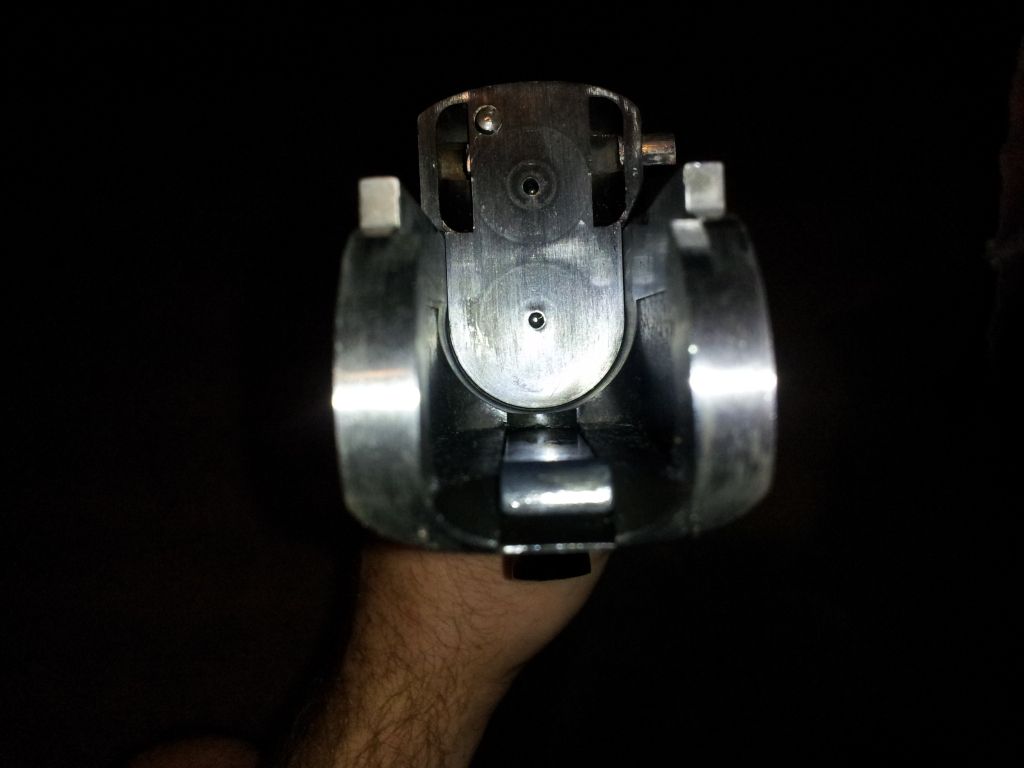
Breech face. I have learned that the firing pins are pretty much non-serviceable for anyone that isn't a gunsmith, but the design looks solid and since the pins are quite short, they will probably last a lifetime.


I'll get it cleaned up and post piktars.
Thanks again you all for the help.
Link Posted: 9/9/2012 8:23:39 AM EDT
[#16]
In for piktars. Whatever the f that is
Link Posted: 9/9/2012 8:27:17 AM EDT
[#17]
Gonna big a big pot to boil all of that
Link Posted: 9/9/2012 8:31:58 AM EDT
[#18]
Quoted:


With a long shaft phillips bit for your cordless drill, dip it in vaseline.  Now using the greased phillips bit, remove the recoil pad with the drill set to low torque.  There will be a screw or bolt in the stock.  You may need another long shafted tool.  


That is sooooooo hot.

And the reason we have an ultrasonic cleaner in the shop is.  The whole lock goes in.
Link Posted: 9/9/2012 8:34:42 AM EDT
[#19]
No further disassembly is required or suggested.  You did a great job.  Don't worry about those springs.  The stock will keep them in place when assembled.  


That looks like a modified Greener cross bolt lock.  A couple of drops of light oil on that flat cross bar, then chase with compressed air.  Remember, you don't want a whole lot of oil in that lock.  Just enough to cover the surfaces and then chase it with air.  


For the forend iron, I usually apply a light coat of oil with a q-tip and then chase it with air, taking care to wipe away any that gets on the wood.


Most of what that gunk is looks like dried up WD-40 or something similar.  The non-chlorinated brake parts cleaner should eat right though that.  Wear glasses.  


eta - nice gun.  I can see no boogered screws.  Keep it that way!  


Link Posted: 9/9/2012 8:42:28 AM EDT
[#20]
Quoted:
Gonna big a big pot to boil all of that


I know. But there's not much rust. If it were rustier, I'd just put it in a tub full of hot salty water to clean it up.
Link Posted: 9/9/2012 8:43:04 AM EDT
[#21]
Quoted:
No further disassembly is required or suggested.  You did a great job.  Don't worry about those springs.  The stock will keep them in place when assembled.  

That looks like a modified Greener cross bolt lock.  A couple of drops of light oil on that flat cross bar, then chase with compressed air.  Remember, you don't want a whole lot of oil in that lock.  Just enough to cover the surfaces and then chase it with air.  

For the forend iron, I usually apply a light coat of oil with a q-tip and then chase it with air, taking care to wipe away any that gets on the wood.

Most of what that gunk is looks like dried up WD-40 or something similar.  The non-chlorinated brake parts cleaner should eat right though that.  Wear glasses.  

eta - nice gun.  I can see no boogered screws.  Keep it that way!  


Heading to the auto parts store now. I'll try to find non-chlorinated.
Link Posted: 9/9/2012 10:19:11 AM EDT
[#22]
Well, the set screw for the extractor is good, but the threads in the extractor are gone I guess. They were gone from the beginning, only thing keeping the set screw in there was blind luck.

I used the gentlest bit of blue loc-tite to keep the set screw in place until I can get it under a magnifying glass and identify what the problem is exactly. If need be, I'll send the extractor and screw to Zoli USA and let them fix it. I've fixed hundred of threads in my work at various engine and cylinder head shops, but nothing this intricate.

I thought I could get away scot free, but I could not.

Clean Breech Face

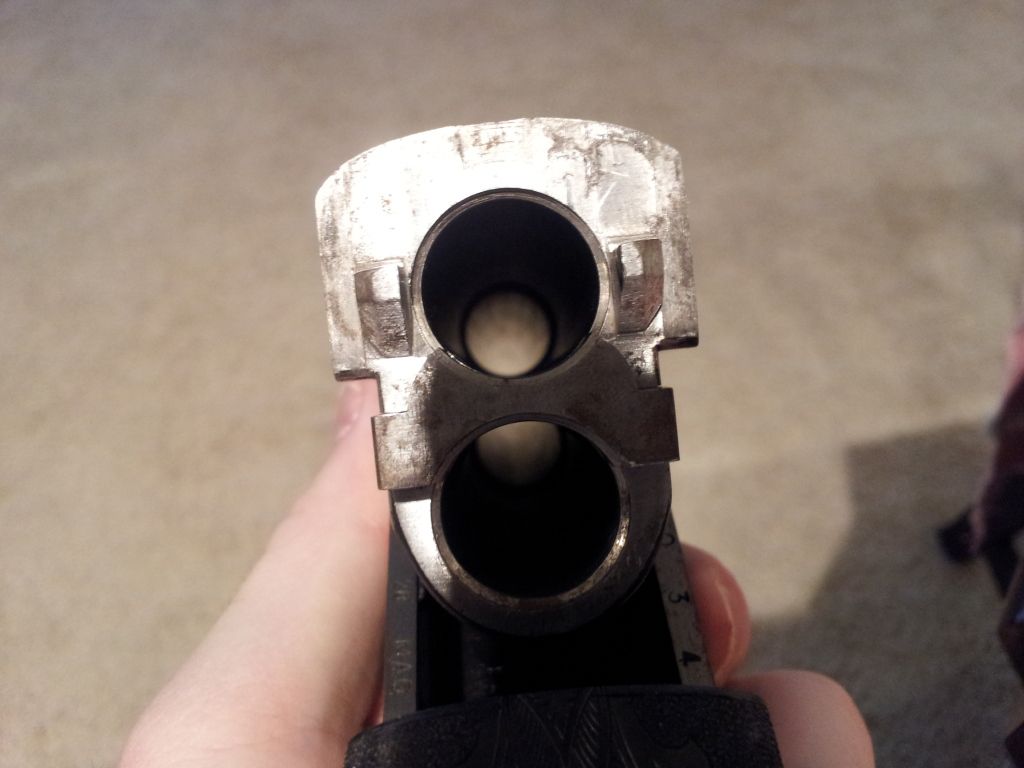
Clean chamber face, chamber and barrels

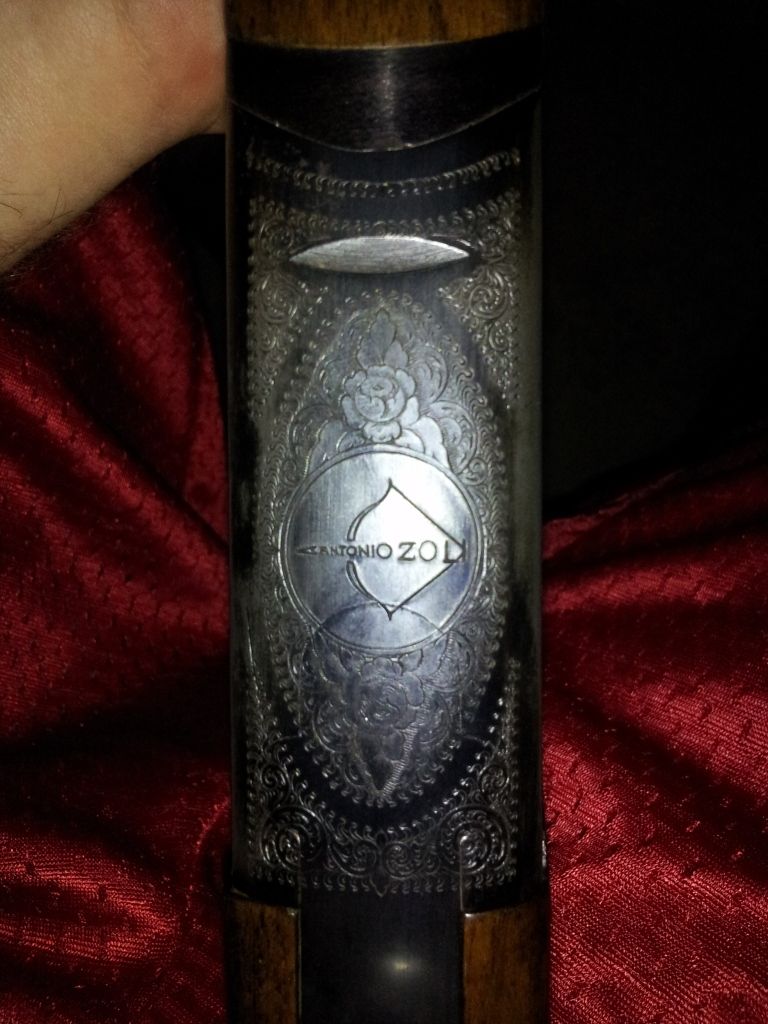
Zoli Logo. You can see the fairly nice machined fitment between parts. The bluing is coming off from time and use, but I'll be keeping a light coat of oil on it from now on.

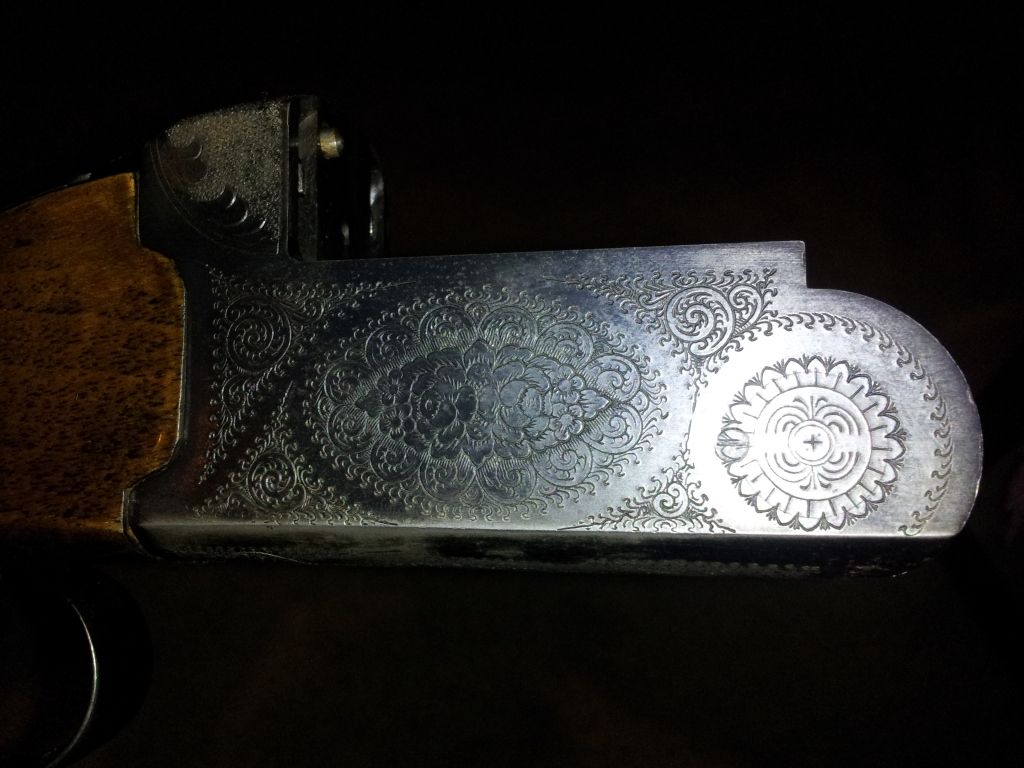
Scroll work. I do not know if it was cast, stamped, or done by hand.

A little history. Antonio Zoli USA has no idea what this shotgun is. Antonio Zoli Italy has been even less help, mostly due to the language barrier.

This particular shotgun is a Model 281.51266    20 ga. 3"Mag

My old man purchased it new from Sears and Roebuck in the early to mid 70's for $120, he doesn't remember. I'm in contact with Zoli to get a build date. This shotgun in current condition is worth around $400, and in my limited opinion would be a great buy at that price.

This is the last email I got from Zoli USA:
Sweptvolume,
It looks 60's. Has the desirable top lock- very strong. Engraving is probably hand finished. It was competing with b25 browning. Good gun with hand fitting. Many of these guns were made for abercrombie and fitch.
Srl
stephen r. lamboy
president
antonio zoli na
recreation dr.
canandaigua, ny 14424
585 590 1024


The story I get through the grapevine is that S&R imported these guns and Zoli sold them at a slight loss to enter the American market. The fit and finish on the metal parts is fine, the locking lug sits proud of the action body slightly, but the rest of the joints are flush. The wood had received less attention than the metal in manufacturing, and it shows. It's finished well, but doesn't lay flush on the sides.
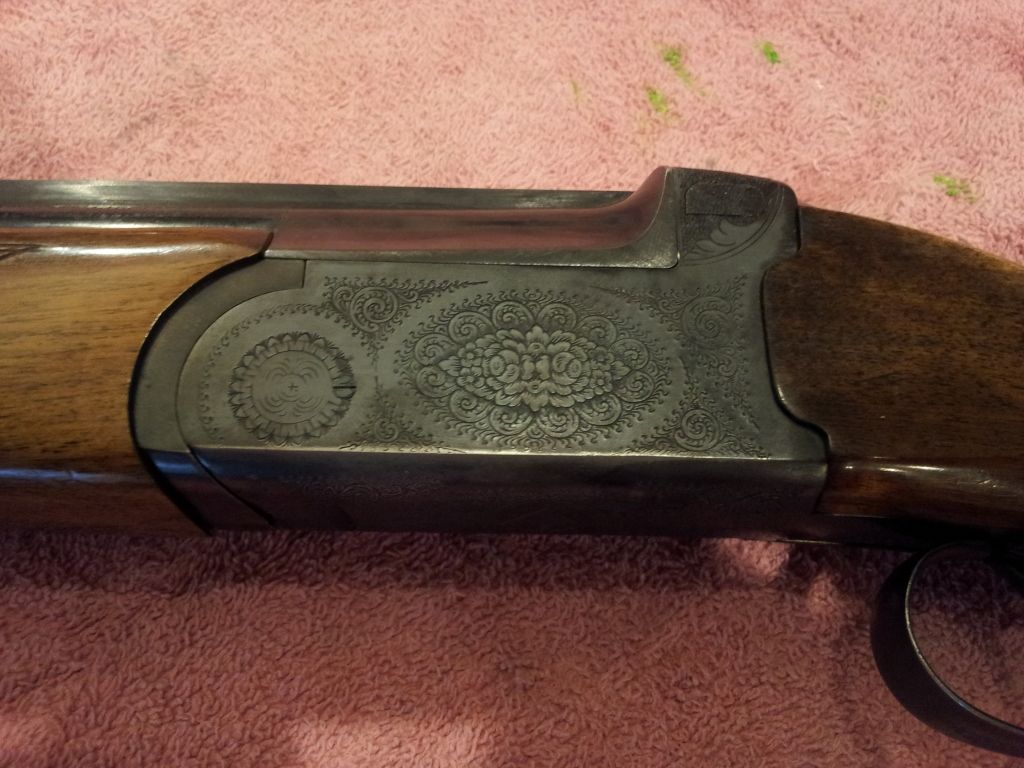

New Zolis are nicer. The entry levels are mid-line shotguns. Around $3,000 for a base model. I think my next Fudd shotgun will be a Beretta.

This shotgun has killed teal, quail, snakes, skunks, armadillos, and ducks. My Gen 1 Nova is my go-to gun for turkeys, ducks, geese, and home intruders, but I fell in love with this little shotgun years ago and my dad gave it to me. It points like a finger and is light enough to hold on to all day long.

Close Join Our Mail List to Stay Up To Date! Win a FREE Membership!

Sign up for the ARFCOM weekly newsletter and be entered to win a free ARFCOM membership. One new winner* is announced every week!

You will receive an email every Friday morning featuring the latest chatter from the hottest topics, breaking news surrounding legislation, as well as exclusive deals only available to ARFCOM email subscribers.


By signing up you agree to our User Agreement. *Must have a registered ARFCOM account to win.
Top Top