|
Posted: 4/13/2009 4:42:43 AM EDT
First the base coat of Krylon Khaki ...
And then comes the trial and error part of adding the pattern over the base coat ... 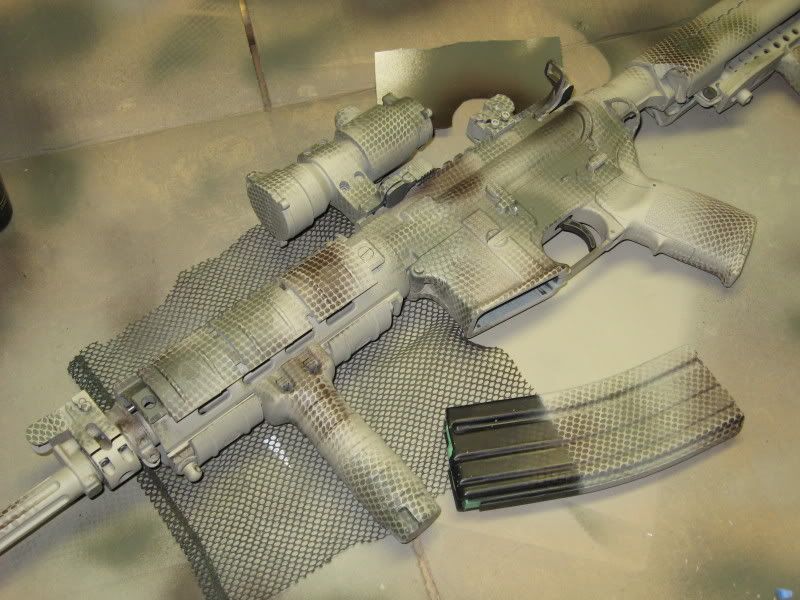
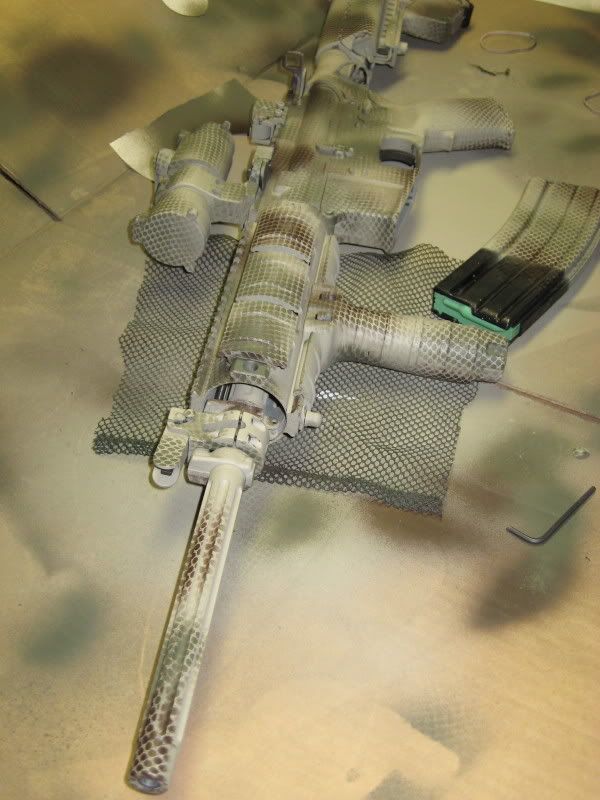
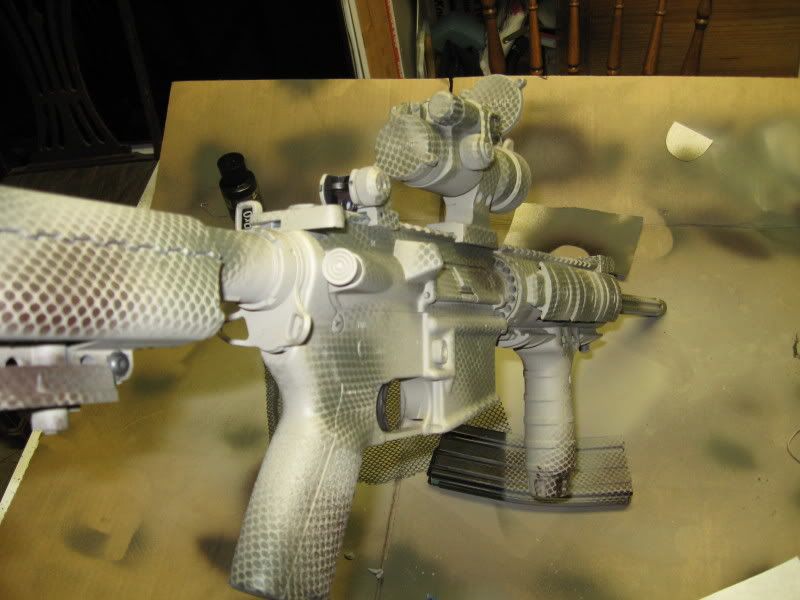
Also, be sure to do the inside of the scope covers ... 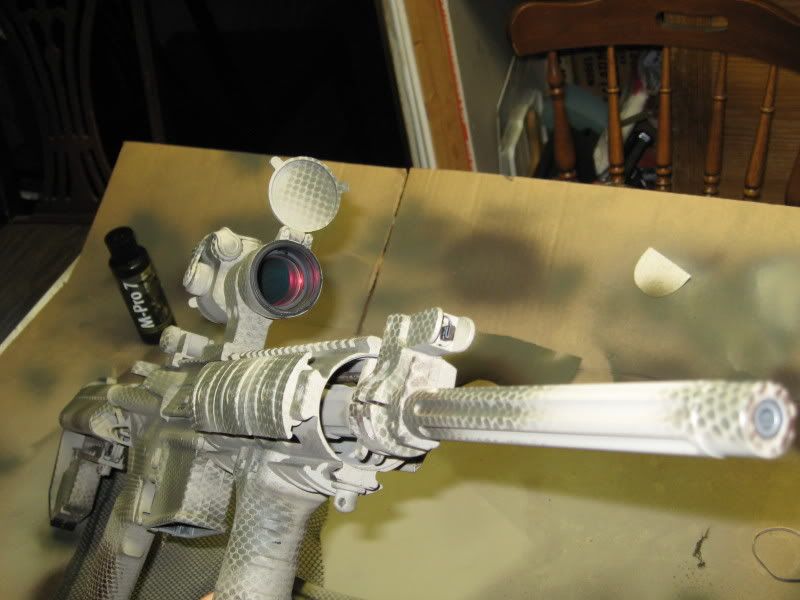
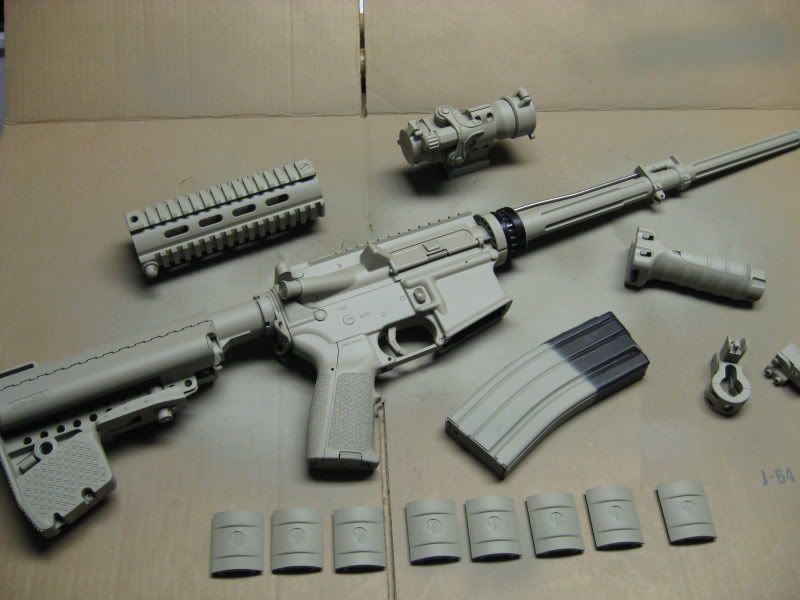
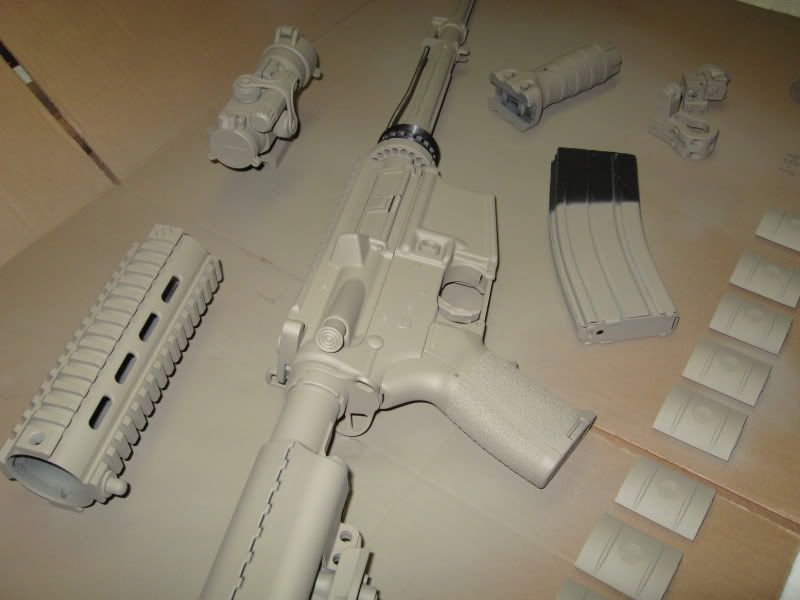
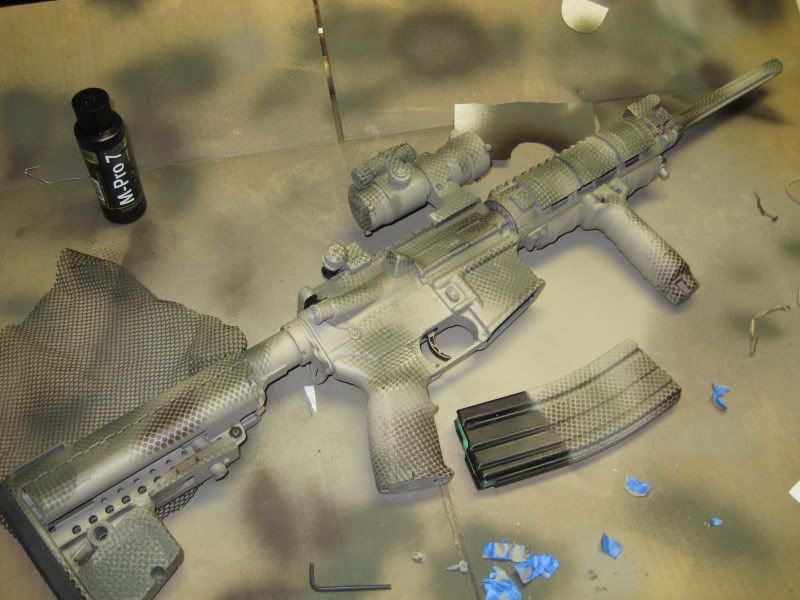
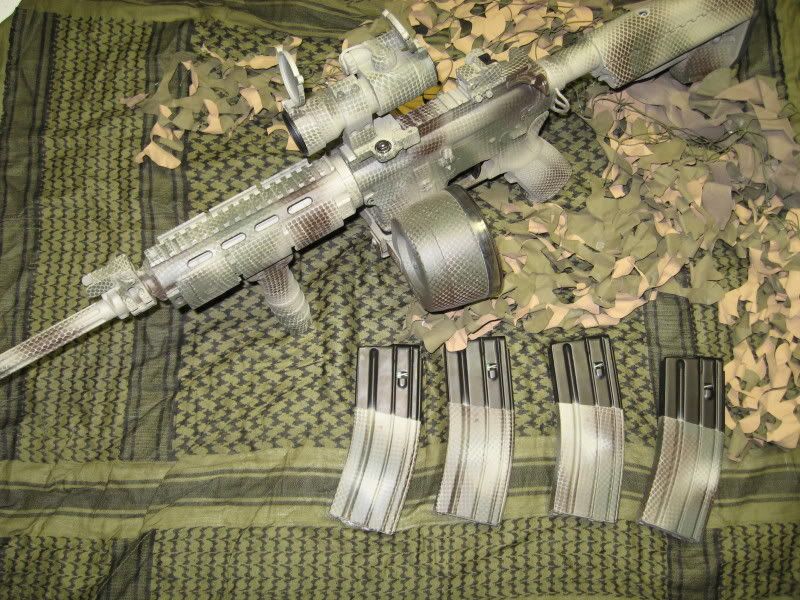
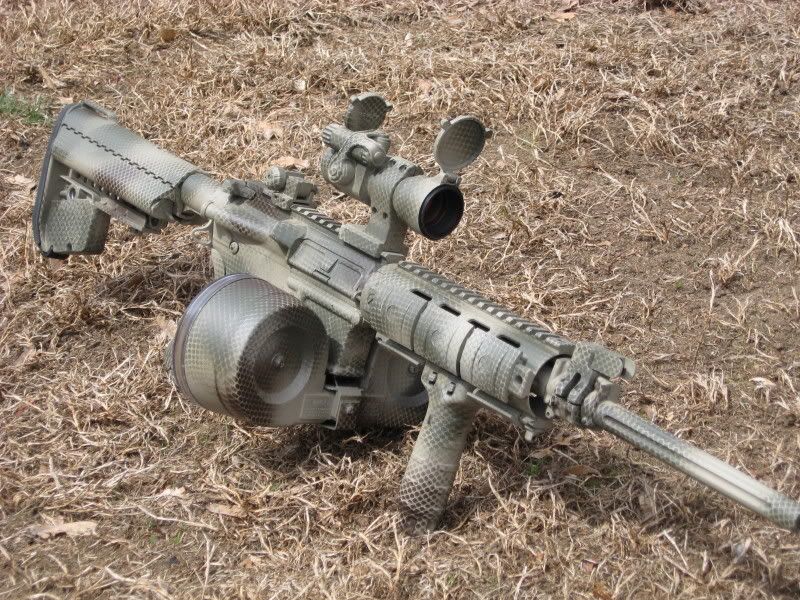
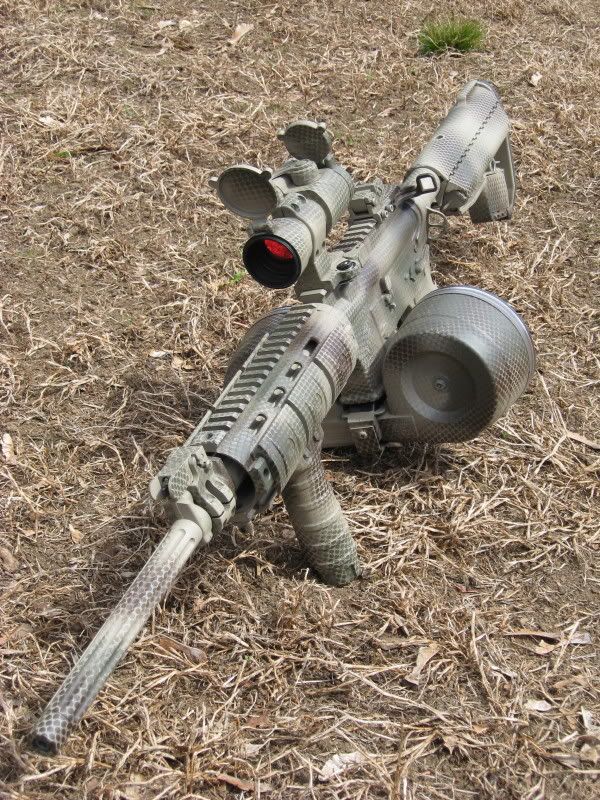
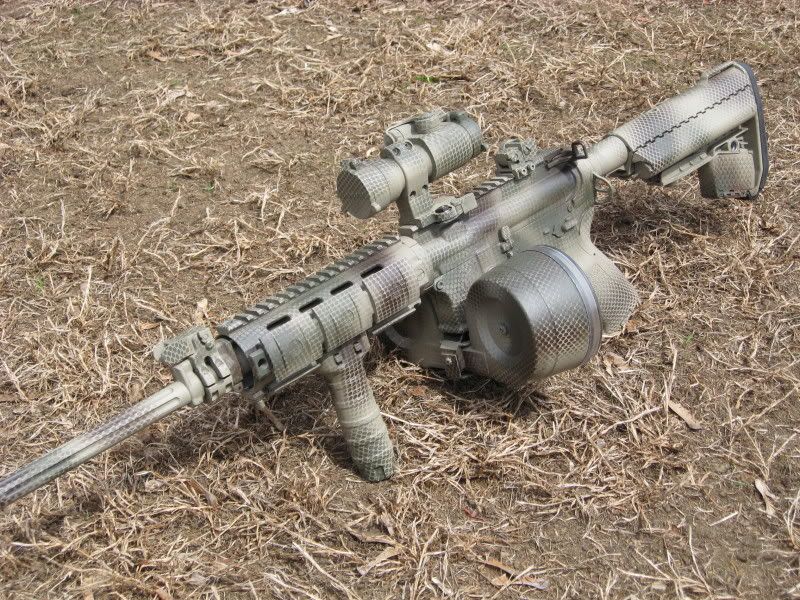
My take on the whole thing: Thinking back, the most challenging part of it was staring down at close to two-thousand dollars worth of carbine and sight and add-ons laid out there upon the table before me, and deciding to cover it all with multiple coats of spray paint, grimacing like some lunatic mulling over a terrible quandary. The actual painting, however, wasn't all that bad. After using brake cleaner to rid the surfaces of oil, I simply started applying the thin coats of Khaki, being sure to hit all the hidden areas. Allowing to dry overnight, I went back and put on a second coat. On the third day (you don't have to wait three days––I just got caught up in other things), I got to messing around with with a sniper veil (although some of you use a laundry bag or your wife's fishnet stockings). Laborious was the attempt to drape the gun and mounted scope with the veil and prep for the camo color application––To get the pattern distinct you must keep the veil or bag or stockings as close to the surface that is being painted as possible, otherwise as you sway the OD or Brown in the patter you want, the scales will blur or become none existent like you never had anything there at all. So be warned: keep the veil of bag or stockings close to the surface! Ultimately though, it was a losing battle. It wasn't looking right, and what I wound up doing was removing the Aimpoint and back-up irons, and cutting out a section of the veil to use it in those specific spots upon which I was applying the OD or Brown, tossing the rest of it aside. This technique seems to work best. As for what colors to apply first ... go for whatever you want, overlap as needed; I went back over spots already darkened with OD or Brown to apply Khaki scales. I also found that OD scales over the darker Brown already applied add a nice effect, and make that area a deeper dark from a distance. So, that's it. I opted for the "Snake-skin" pattern over the pine needle or straw pattern because it just seemed easier to control the coverage and pattern. Just be sure to prep the rifle first. You don't want paint in the barrel or the inside of the gun (which I found does have a tendency to creep in from the cracks). Plug or tape the muzzle, the magazine well, and even put some cotton or something in the chamber and the space where the bolt goes. Good luck! ETA: More Pics ... 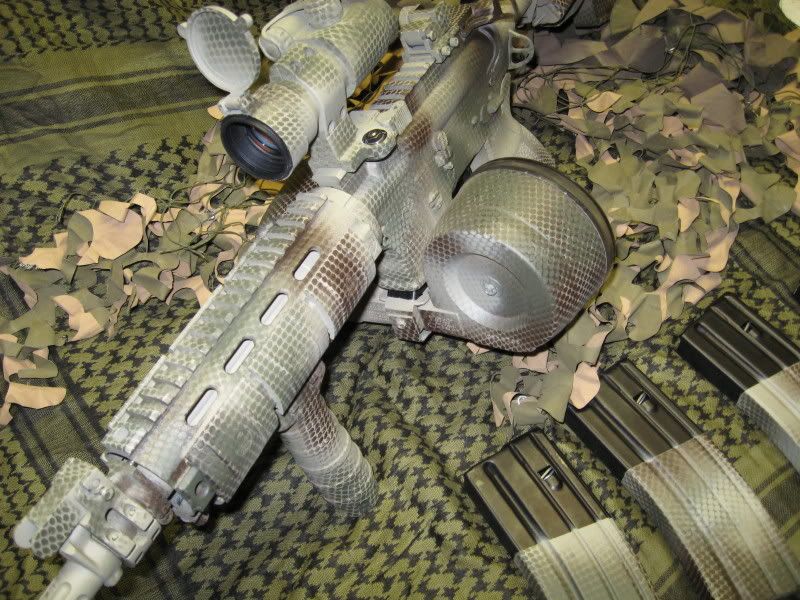
|
|
|
|
[#1]
Looks good, I like it.
|
|
|
|
[#2]
Quoted:
Looks good, I like it. The fluorescent lighting and camera flash make it look a bit lighter than it actually is. Overall, I don't think it came out half bad. A word of advice, though ... Were gloves. Holding the veil in place for spot application has left me having to brillo the paint of my mitts. |
|
|
|
[#3]
Did you remove the stock and paint the complete buffer tube tan?
|
|
|
|
[#4]
I have sprayed a couple of guns, and suppressors using a similar technique. I would also give the advice of having several different swatches of your 'pattern' material handy as you spray. You can rotate through the swatches and be less likely to smear paint from a wet swatch on to the gun.
I have also used a food grater as my pattern. It gave an interesting effect, but began to 'fill' with paint as I used it. Don't forget that it is easier to experiment on cardboard before you actually apply paint to the weapon. TRG |
|
|
|
[#5]
Quoted:
Did you remove the stock and paint the complete buffer tube tan? Yeah. I even cut out small circles to cover the numbers on the VLTOR. But sliding it back on caused a little scuffing of the paint.. |
|
|
|
[#6]
I think you did a hell of a job. patience is key and prepping is a must.
|
|
|
|
[#7]
Looks good. I found when I was painting mine that to do areas with a bunch of contours it helped a lot to use some thin fishing like like 2lb. test or so, and use it to wrap the net around and hold it tight against the surface. The fishing line is tiny so you won't see any lines from where it is wrapped. It was especially helpful when I was doing my scope where I wrapped around the big ends and the middle all at the same time.
|
|
|
|
[#8]
Looks good! I have been toying with the idea of painting mine. I painted some mags just for fun. But right now I kind of like my color scheme which is a black rifle and tan furniture. I named it after one of my fav drinks "Black and Tan"!
|
|
|
|
[#9]
Fire that beta mag then take a pic of what the gun looks like after...........................
|
|
|
|
[#10]
Holly mutha of pearl, that's F'n awesome! I'm always envious of talented folks like yourself, congrats!
|
|
|
|
[#11]
Looks very nice. I'm thinking about doing that but with multiple colors. To keep the net close you can try using some elmers spray glue which makes the net tacky enough to stick temporarily to the gun. However I also like the look of the net being off the gun as it blurs more. I do really like your idea of moving the net around as a stencil as when I did my rifle I covered the whole thing in netting temp glued and it was a royal pain.
|
|
|
|
[#12]
Nice, I didn't think I was going to like it but it came out very nice
|
|
|
|
[#13]
I am not a big fan of the snake pattern, but I must say "Bravo " to you....That looks great!
|
|
|
 Win a FREE Membership!
Sign up for the ARFCOM weekly newsletter and be entered to win a free ARFCOM membership. One new winner* is announced every week!
You will receive an email every Friday morning featuring the latest chatter from the hottest topics, breaking news surrounding legislation, as well as exclusive deals only available to ARFCOM email subscribers.

AR15.COM is the world's largest firearm community and is a gathering place for firearm enthusiasts of all types.
From hunters and military members, to competition shooters and general firearm enthusiasts, we welcome anyone who values and respects the way of the firearm.

Subscribe to our monthly Newsletter to receive firearm news, product discounts from your favorite Industry Partners, and more.
Copyright © 1996-2024 AR15.COM LLC. All Rights Reserved.
Any use of this content without express written consent is prohibited.
AR15.Com reserves the right to overwrite or replace any affiliate, commercial, or monetizable links, posted by users, with our own.


