|
Posted: 5/4/2013 6:47:17 AM EDT
I have seen a few copperhead patterns, but none really did a great job of replicating the snake skin and color.
I decided to give it a shot and duplicate using this image as a guide: Some of the pics are blurry, sorry about that. 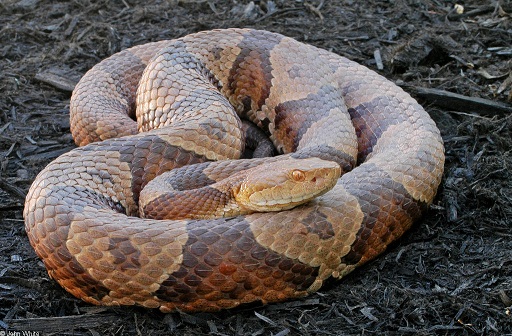
First step is a full coat of FDE/tan. This will be the light area between the copper. 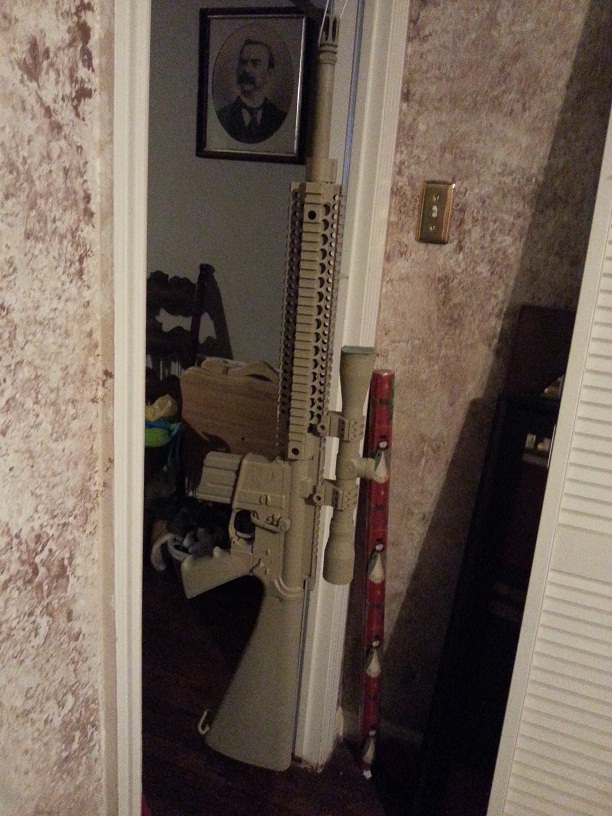
Next, tape off your diamonds/hourglasses. I just tore the tape to get a nice random edge shape. 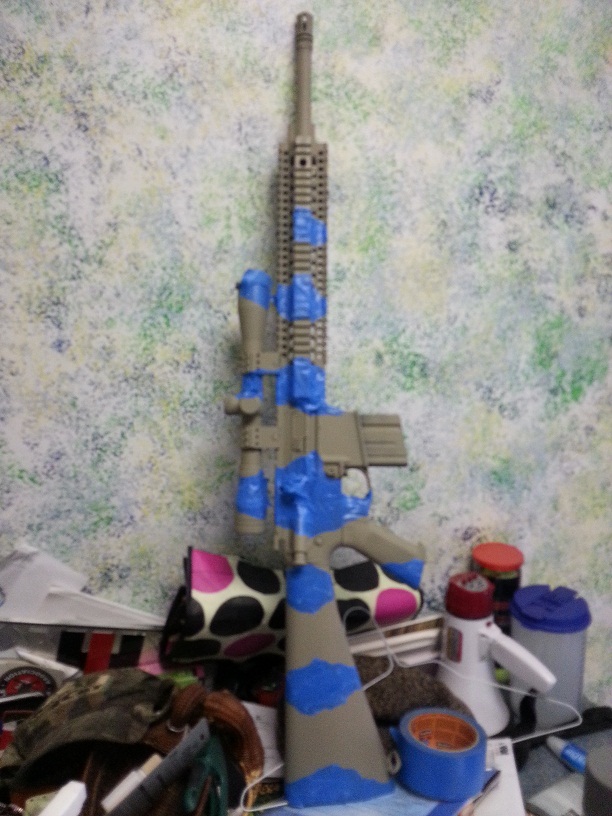
After you get the tape all down, Spray a full coat of brown. This will be the scale shadows in the copper areas. 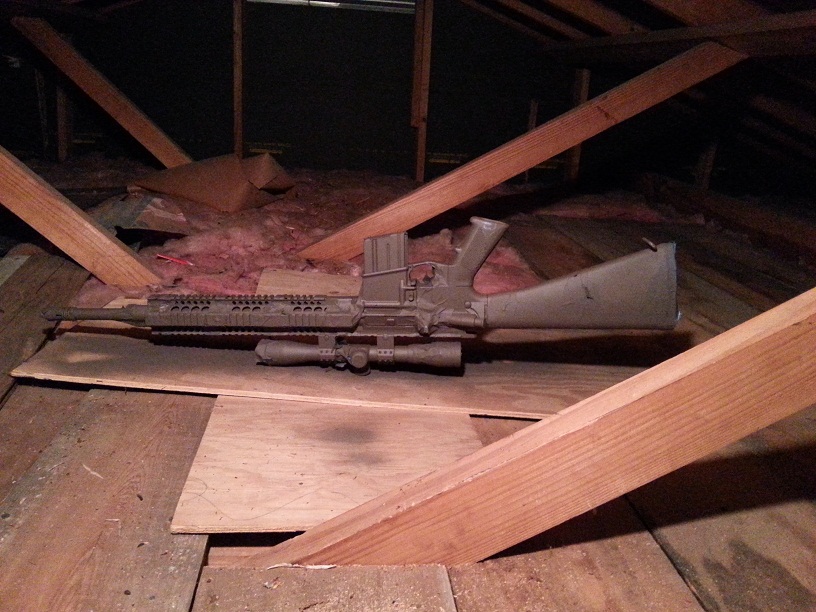
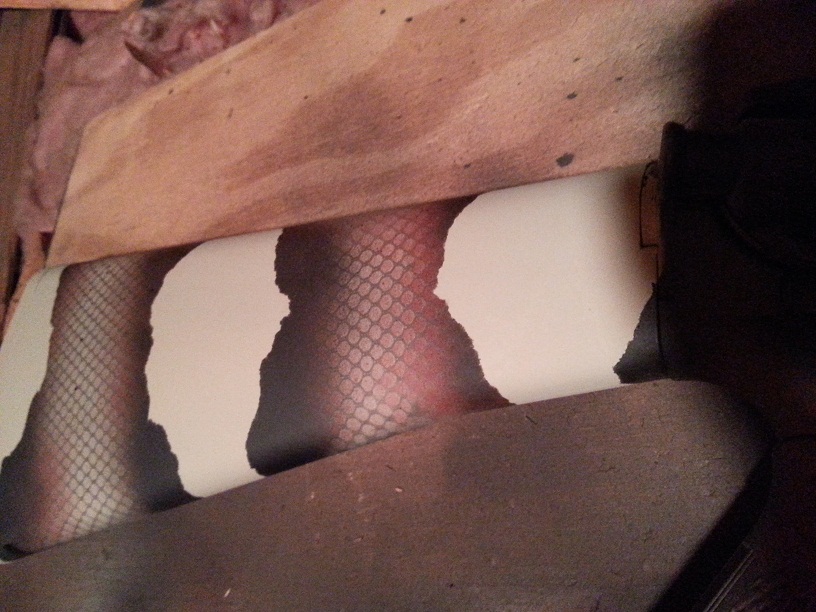
Now, the next part will vary on what you have available to use as a stencil for the scales. I found a bag of plastic balls in the toy section of K-Mart that was flexible enough to lay flat on most of the complex areas of the rifle. This is crucial for the detail in the scales. THE biggest tip I can give is lay your mesh out, cut reliefs in the fabric to allow it to sag in between areas like the stock and grip, scope rigs, etc. Then, once you know exactly where your mesh will lay, quickly spray a light coat of the brown again. While it's tacky, spread the mesh over and work from the center out, flattening it onto the rifle so it adheres to all the areas that need detail. This gives a really good scale look in some tight places(brass deflector). If you don't get the mesh right, take it off, spray more brown and try again. Now that the mesh is down, spray the un-taped areas with the FDE/tan. Then spray the copper on the edges, leaving just a touch of FDE/tan exposed in the center. This will give a nice faded, natural look to the copper pattern. 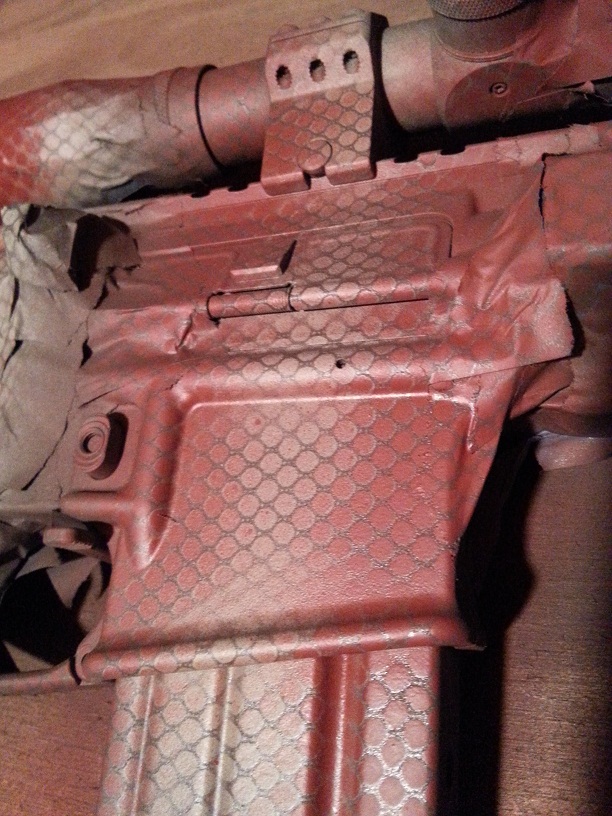
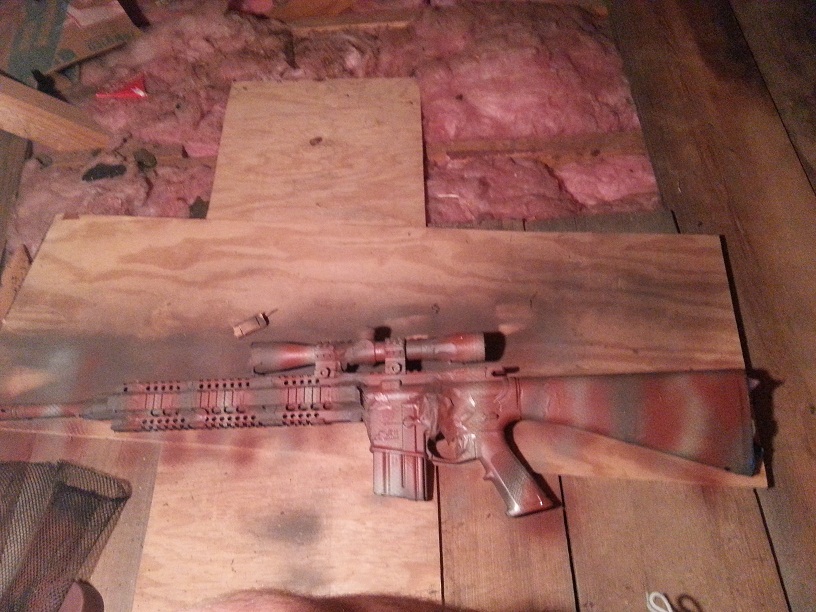
Take the mesh off, and spray a small amount of black/dark brown on the very edge of the tape. Move the can quickly and spray multiple times if necessary. If you prefer a darker pattern, cover more of the copper with black. 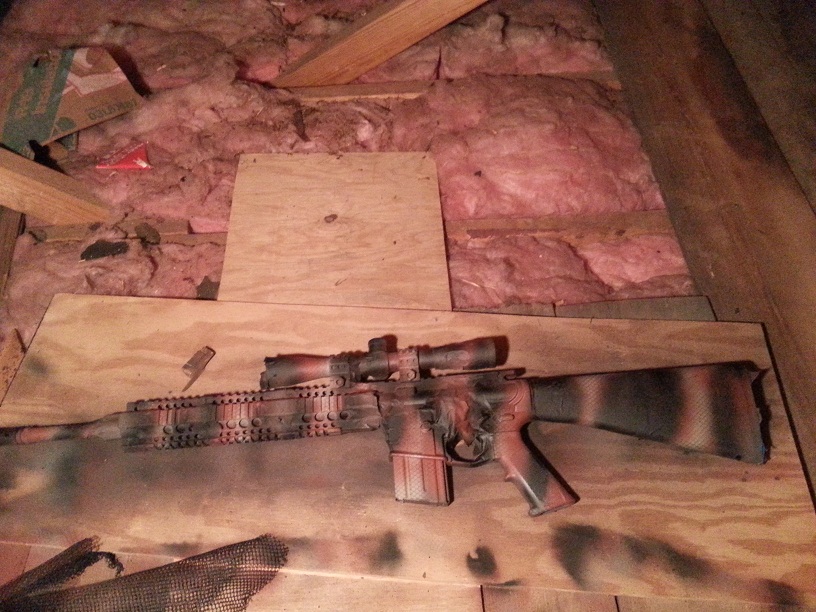
Once you are happy with the color and fades, take all the tape off. 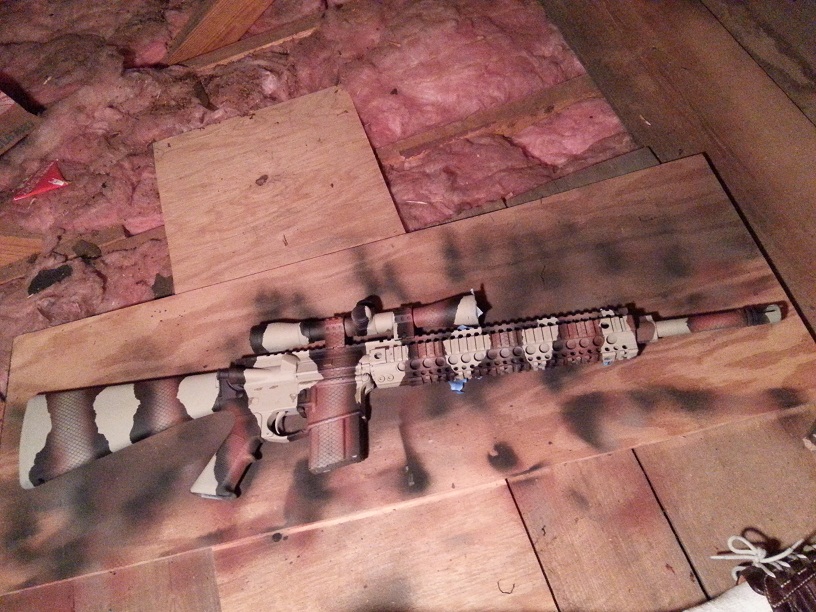
Now, this is where a lot of folks stop, because it looks good. The large, no scale sections didnt sit right with me, so I added a step to give those areas some reptilian flare. Take a bit of construction paper(any thick paper works, I used insulation backing) and tear a few pieces to mimic the curves of the hourglass/diamonds. The more pieces you tear, the more options you have to match the tape lines. Cover the FDE areas with the mesh, then use two of your contruction paper stensils to cover the copper/black areas. Use them to press the mesh to get a nice detail. Spray the center lightly with brown to get the scale detail. 
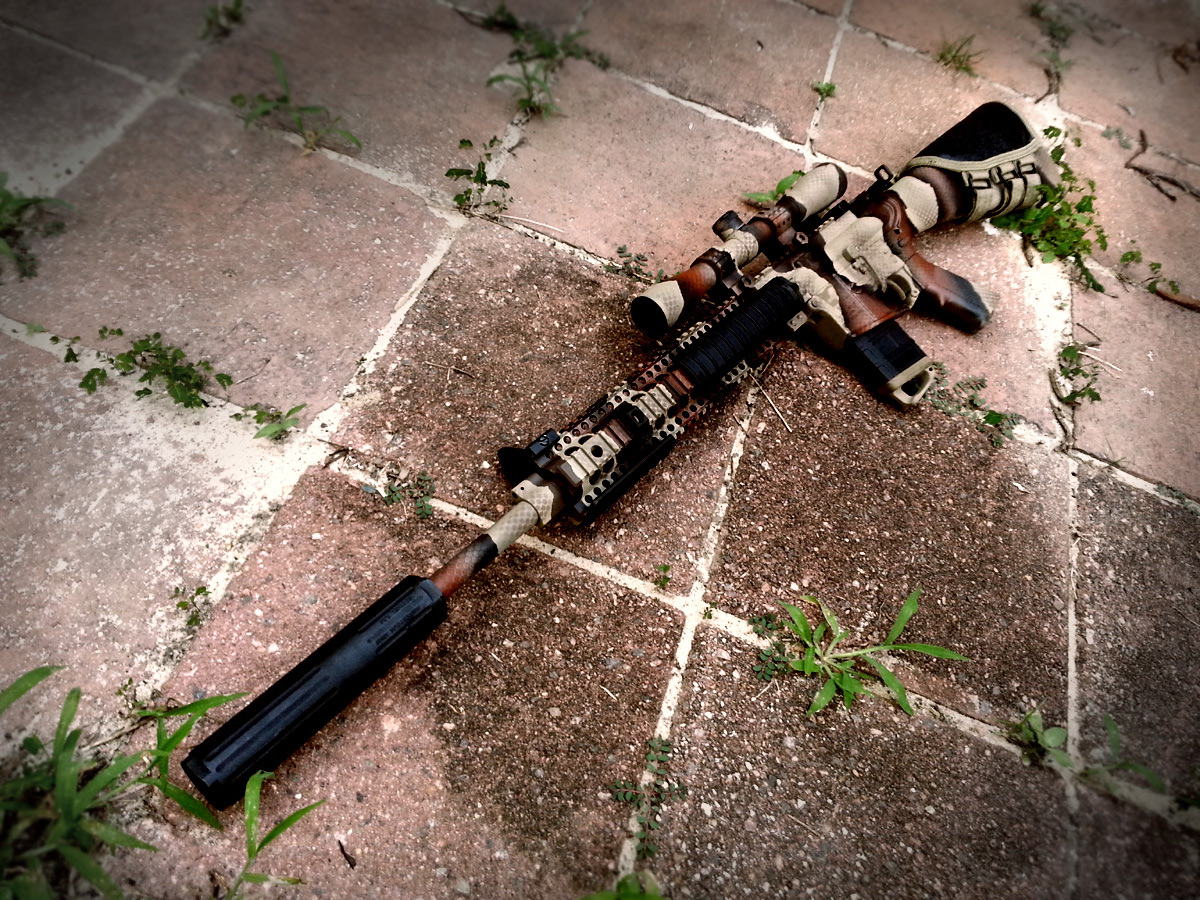
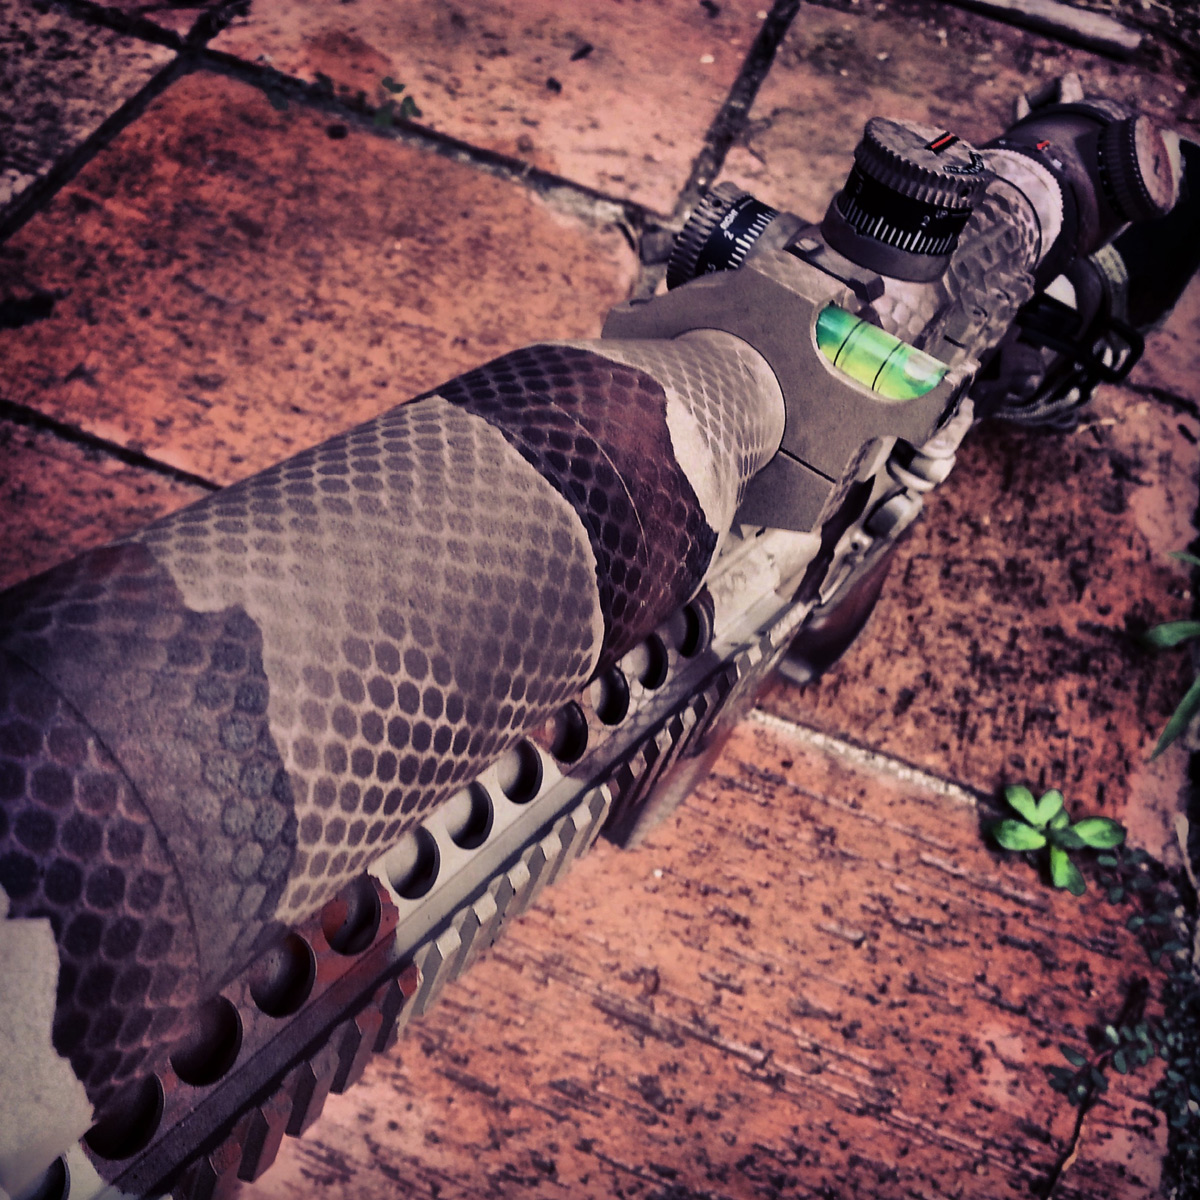
Step back and admire. 

|
|
|
|
[#1]
WOW... I think that is very, VERY cool looking...
You did a good job of maching the pattern.. brian |
|
|
|
[#2]
dude,
I normally think camo on rifles looks terrible. That is badass!!!!! |
|
|
|
[#3]
Excellent work and great write up
|
|
|
|
[#4]
Oh, I like it! Well done.
|
|
|
|
[#5]
Wow. That's awesome. I'm jealous.
|
|
|
|
[#6]
OUTSTANDING!
Very well done!! |
|
|
|
[#7]
looks great, and thanks for posting, but I'm not really sure I follow the instructions (especially the K-Mart balls part)
|
|
|
|
[#8]
.....Wow.
|
|
|
|
[#9]
Great job and thanks for the write up.
|
|
|
|
[#10]
Quoted:
looks great, and thanks for posting, but I'm not really sure I follow the instructions (especially the K-Mart balls part) Now, the next part will vary on what you have available to use as a stencil for the scales.
I found a bag of plastic balls in the toy section of K-Mart that was flexible enough to lay flat on most of the complex areas of the rifle. Most of us use a mesh material for the scale pattern. This mesh can easily be found in use for bags in major retail stores. Here is the item I bought. You can see the pattern if you zoom in. See the mesh in the bottom left of this pic:
Buy something in a mesh bag, cut up the bag, and lay it over the gun. |
|
|
|
[#11]
That looks SHARP!!!!
|
|
|
|
[#12]
did you do this in your attic?
|
|
|
|
[#13]
Looks great, I will be using this thread once my next build is done.
|
|
|
|
[#14]
Quoted:
did you do this in your attic? Shit, will he be willing to do it in mine? |
|
|
|
[#15]
thanks for the clarification offroader. I love what you've done and want to do it to my AR15. What kind of spray-paint did you use? and what were all the colors you used exactly?
Also, did the painting blend well when you flipped the rifle over to do the other side? |
|
|
|
[#16]
Dang, it looks great.
The only thing I would do differently, would be to darken the light areas just a bit more, and only leave the lightest of that right where they meet the next color. |
|
|
|
[#17]
Yep, It was raining, so I went to my indoor paint booth

The colors were Khaki, Brown, Copper and black. I painted the rifle from the top first, then did the sides so the pattern would wrap around. I wanted a little darker in the middle too, but I lost track of the tape lines after the second coat of brown. I would recommend marking the tape lines with sharpie after each coat to make it easier to see them. |
|
|
|
[#18]
Hey, I ain't complaining. Only a note of artistic difference. I would be proud to have that done to mine.
|
|
|
|
[#19]
Really, really, really, really, really, really, really, really, really, really, really, really, really...
AWESOME! I might try a snake scale pattern on this one. Maybe, Anaconda?   |
|
|
|
[#20]
Looks absolutely gorgeous.
Now what i want to know is you made it a point to tell us you bought a big bag of balls. What did you do with em? |
|
|
|
[#21]
Damn that is amazing, great work!
|
|
|
|
[#22]
Quoted:
Looks absolutely gorgeous. Now what i want to know is you made it a point to tell us you bought a big bag of balls. What did you do with em? I have a 1 year old. win, win. I think they'll make good reactive targets when he gets done with them.
|
|
|
|
[#23]
Very nice job.
|
|
|
|
[#24]
Looks great; well done.
|
|
|
|
[#25]
That came out really nice. Any problem with the barrel getting hot and slowly burning off the paint on the barrel?
|
|
|
|
[#26]
Holy crap, that's a work of art!
|
|
|
|
[#27]
Awesome work!
|
|
|
|
[#28]
wow usually i think the paint jobs on rifles suck
this is freaking awesome!!! |
|
|
|
[#29]
100% bad ass OP
|
|
|
|
[#30]
That is 100% fucking awesome. Great job OP.
|
|
|
|
[#31]
Thanks guys, I still want to try a diamondback version, but I'm running out of rifles.
Quoted:
That came out really nice. Any problem with the barrel getting hot and slowly burning off the paint on the barrel? I used Krylon Ultra Flat camo for the majority, same paint I used on my hunting rifle: 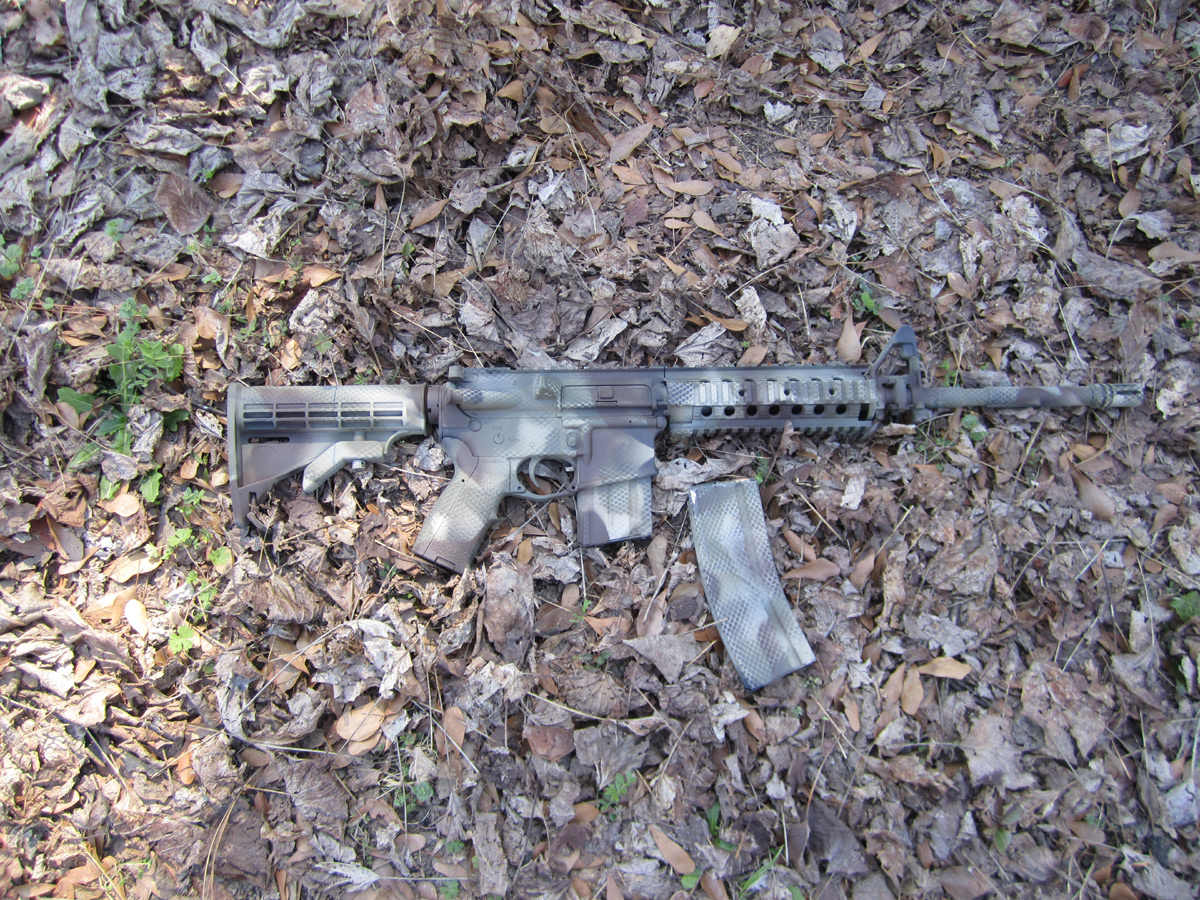
I have shot close to 500 rounds through that one(its a 6.8), and have not lost any paint or seen any discoloration. I expect some will occur with enough heat, but that won't bother me. |
|
|
|
[#32]
Nice work OP.
Saw a guy do that to a M-14 but his was not quite as nice as yours. Better not let my 95 year old grandmother see it though. She's a copperhead-killing machine. She would be choppin' at that flash suppressor with her little hoe!
|
|
|
|
[#33]
I have a gun and an attic and blue tape. I need some paint and moose balls.
This will require help. |
|
|
|
[#34]
Awesome. How do you fade colors?
|
|
|
|
[#35]
Quoted:
Awesome. How do you fade colors? practice |
|
|
|
[#36]
fresh pic. I need to paint my rail covers. |
|
|
|
[#37]
That looks fantastic. Nice job!
|
|
|
|
[#38]
I've gotta say, that looks awesome. I just showed it to my wife and told her that I've got to paint one of my AR's like that and she gave me the typical woman response: why? She thinks it looks like good work but doesn't understand the purpose. Women. Good job OP.
|
|
|
|
[#39]
That looks awesome!!!!

|
|
|
|
[#40]
Love it! Thanks for sharing.
I have a little Osage copperhead I've had for 8 years now (went to remove some from a farm and had to keep the best looking one). 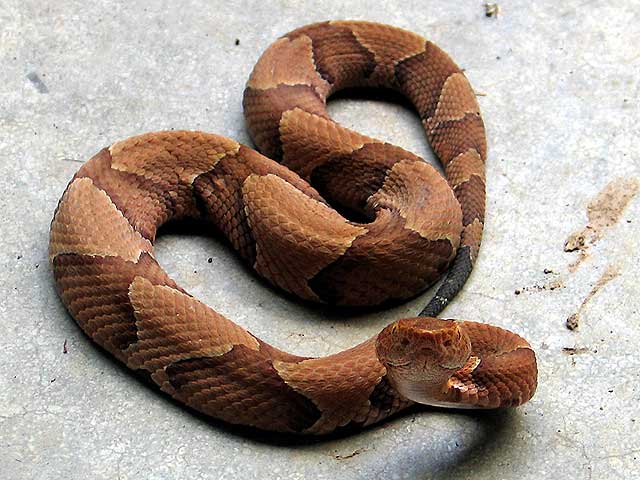
He's twice as big and a lot chunkier now. |
|
|
|
[#41]
Awesome work. You have a real talent for that.
|
|
|
|
[#42]
That is pretty sweet. Great work.
|
|
|
|
[#43]
This my favorite spray can job I have ever seen. I tried to recreate this pattern at least a half dozen times on a couple big ammo cans I have, and I have failed every time. I'm super jealous. You can see that in the beginning of the thread I asked the OP a bunch of questions to make sure that I was doing it right.
|
|
|
|
[#44]
Op, you're rifle looks awesome, well done
|
|
|
|
[#45]
if you lightly wet the mesh so that it is damp, it will "stick" and conform better to the countours. works good with paper as well, for one time use stencils.
|
|
|
|
[#46]
Quoted:
if you lightly wet the mesh so that it is damp, it will "stick" and conform better to the countours. works good with paper as well, for one time use stencils. This. I tried to emphasize this in the OP. The paint needs to be tacky for the mesh to stick right and get nice detail. Thanks for the kind words guys. If anyone wants something painted, you can arrange to ship it to me and I'll gladly do my best for a few bucks. |
|
|
|
[#47]
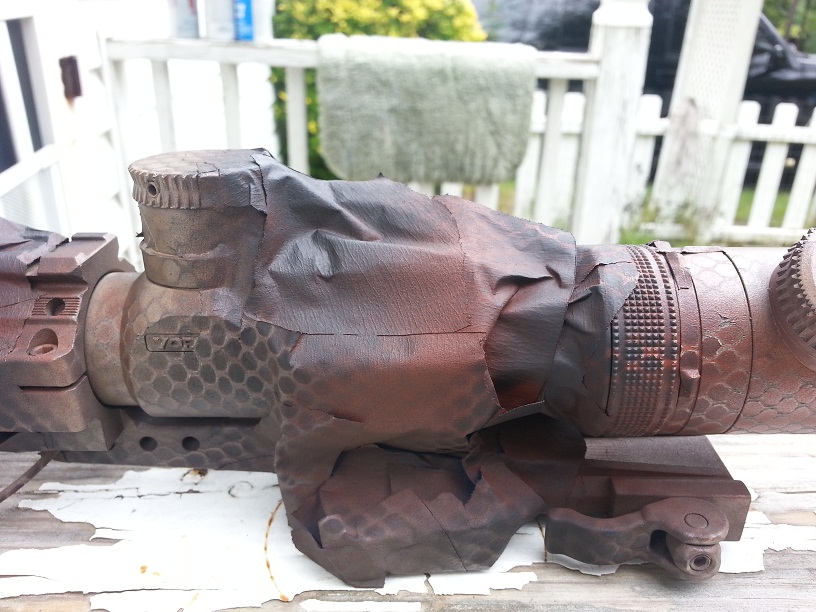
Started on the optic.
These give better detail of the pattern. The light tan or FDE is still under the tape, waiting to be sprayed brown with the mesh on it. 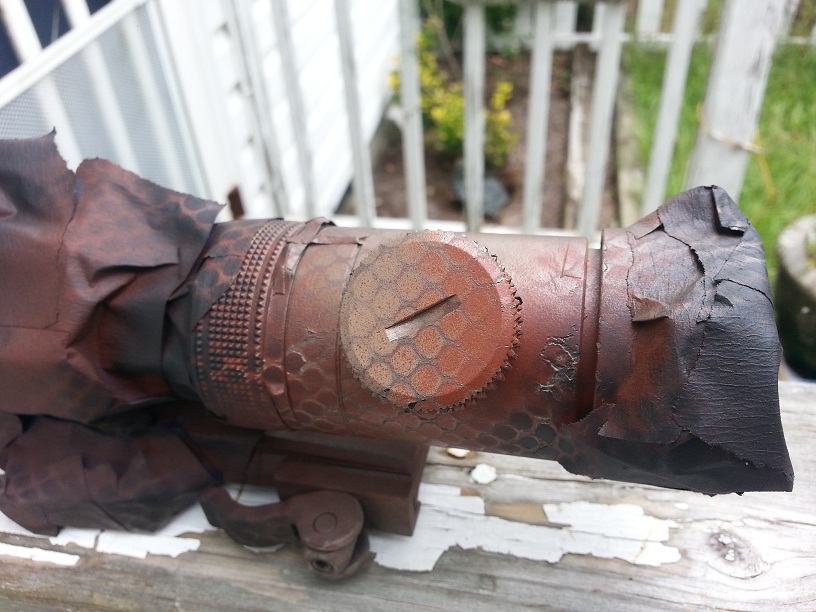
|
|
|
|
[#48]
Looks good. Now do the car in your avatar.
|
|
|
|
[#49]
Coincidentally, I have the colors to pretty much replicate this... Now, what to paint? Maybe my M&P 15-22?

|
|
|
|
[#50]
I think it looks great, but personally I would have gone with a little less red.
Great job, though! |
|
|
 Win a FREE Membership!
Sign up for the ARFCOM weekly newsletter and be entered to win a free ARFCOM membership. One new winner* is announced every week!
You will receive an email every Friday morning featuring the latest chatter from the hottest topics, breaking news surrounding legislation, as well as exclusive deals only available to ARFCOM email subscribers.

AR15.COM is the world's largest firearm community and is a gathering place for firearm enthusiasts of all types.
From hunters and military members, to competition shooters and general firearm enthusiasts, we welcome anyone who values and respects the way of the firearm.

Subscribe to our monthly Newsletter to receive firearm news, product discounts from your favorite Industry Partners, and more.
Copyright © 1996-2024 AR15.COM LLC. All Rights Reserved.
Any use of this content without express written consent is prohibited.
AR15.Com reserves the right to overwrite or replace any affiliate, commercial, or monetizable links, posted by users, with our own.


