|
Posted: 4/26/2012 5:47:31 AM EDT
I had a request to show how I make my steel.
Ok I will get started. These are file pictures I have done in the past and may not be the actual sequence taken to make these knives but will provide an idea of what is done. First select the steel. In this case 1095 simple carbon steel, the thicker bars and 15N20 a simple carbon steel with 3% nickel added. 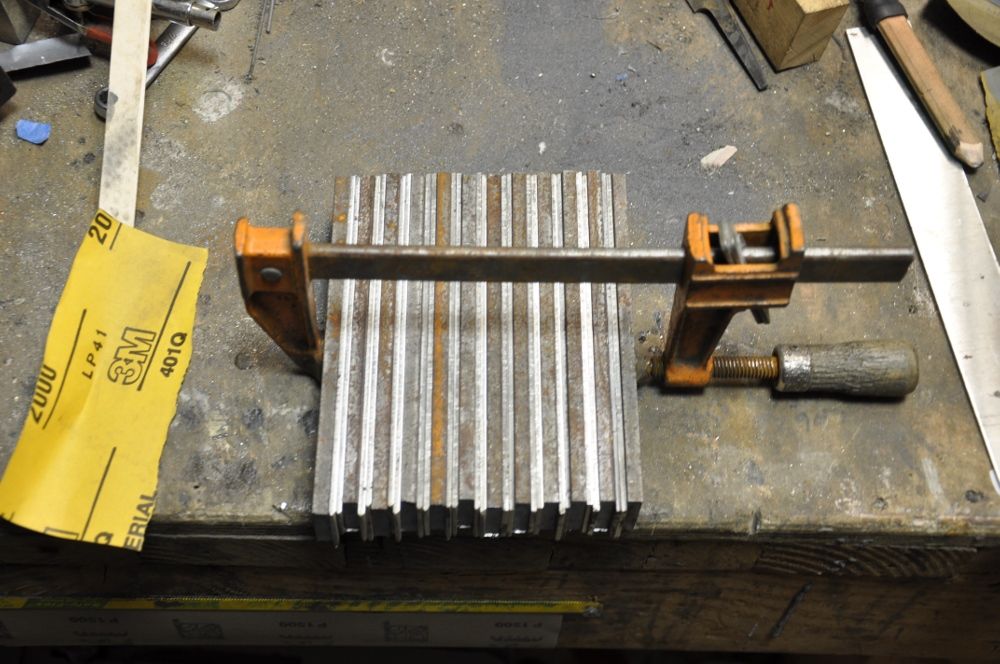
Weld the ends to prevent them coming apart and prep to weld on side plates. 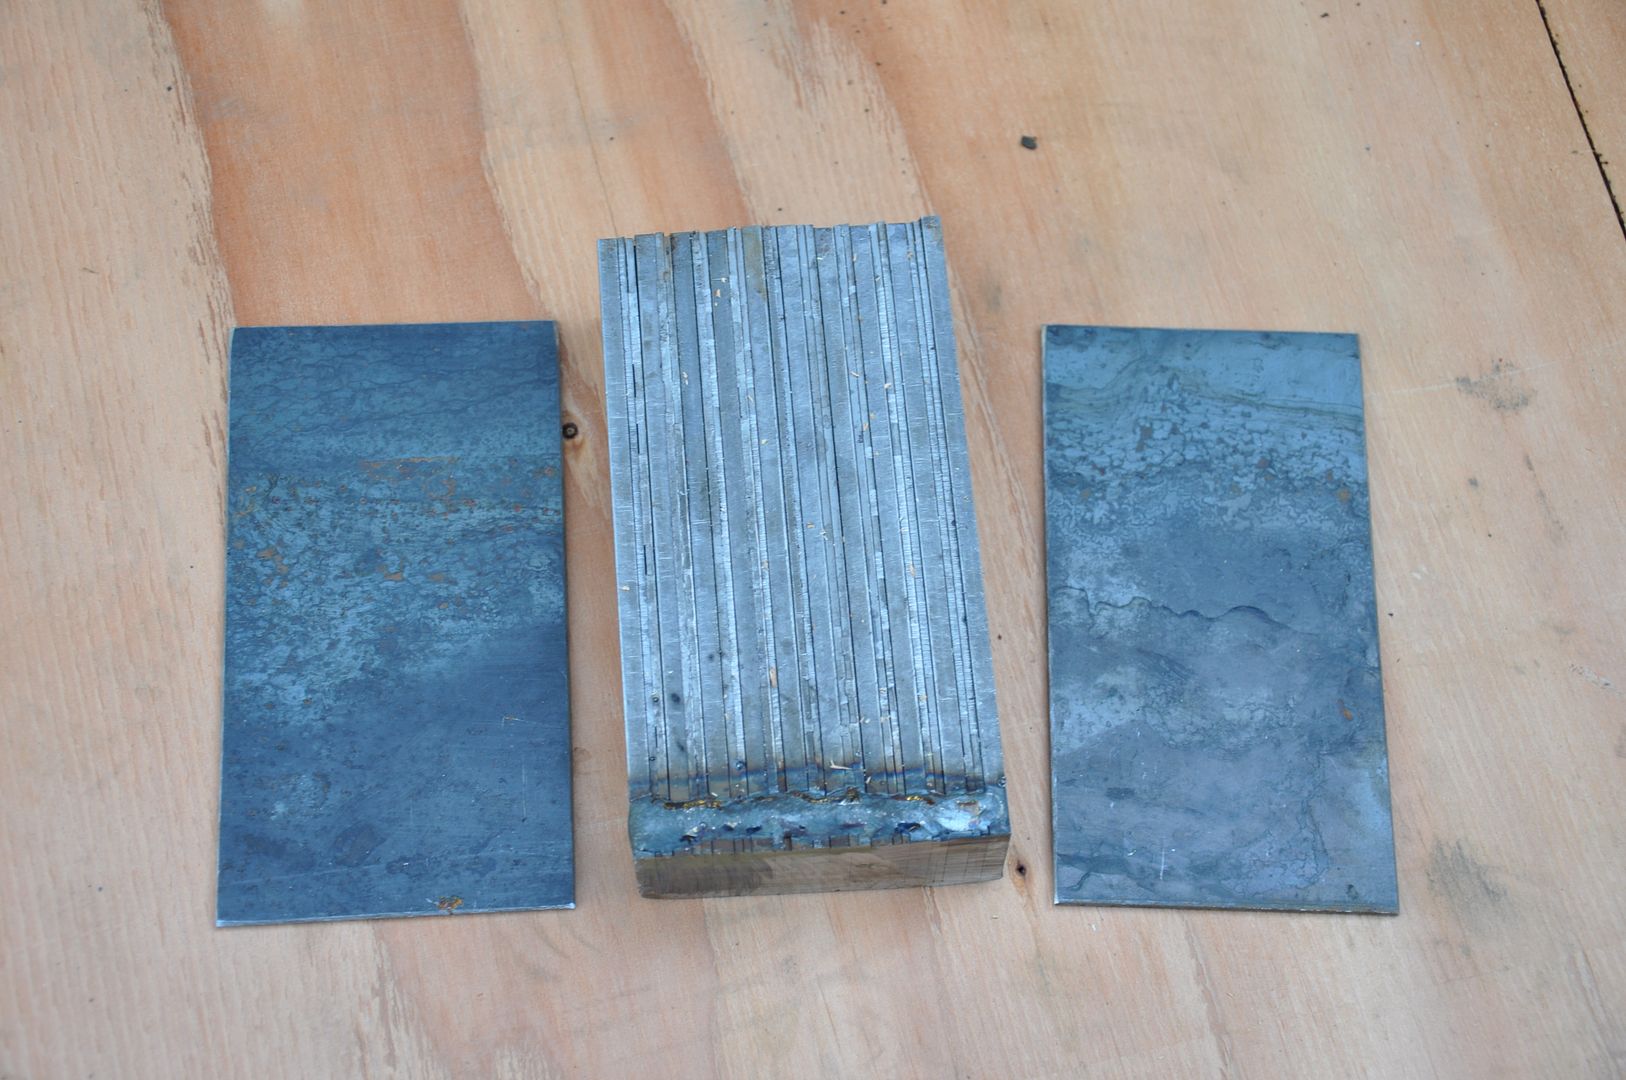
The billet welded up ready to get hot. 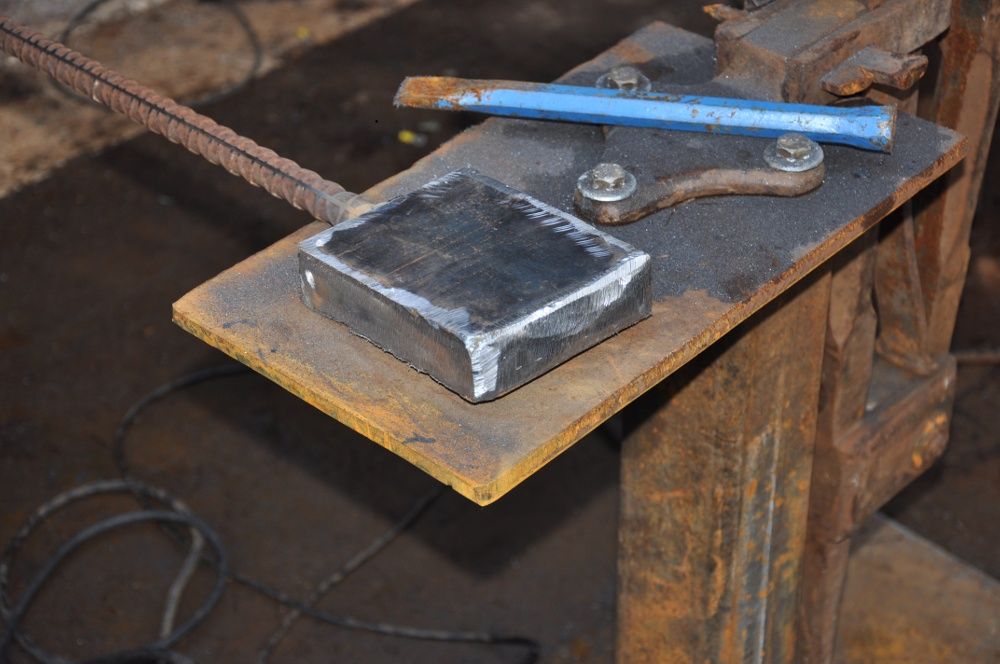
I do a process called "Dry Welding" in which I seal the billet inside a canister. This eliminated the problems with oxidation. I do not have to use flux to get the billet to weld. The internal parts are only tacked together and will be forged welded to create a solid block of steel. Now lets warm things up a bit. Inside the forge 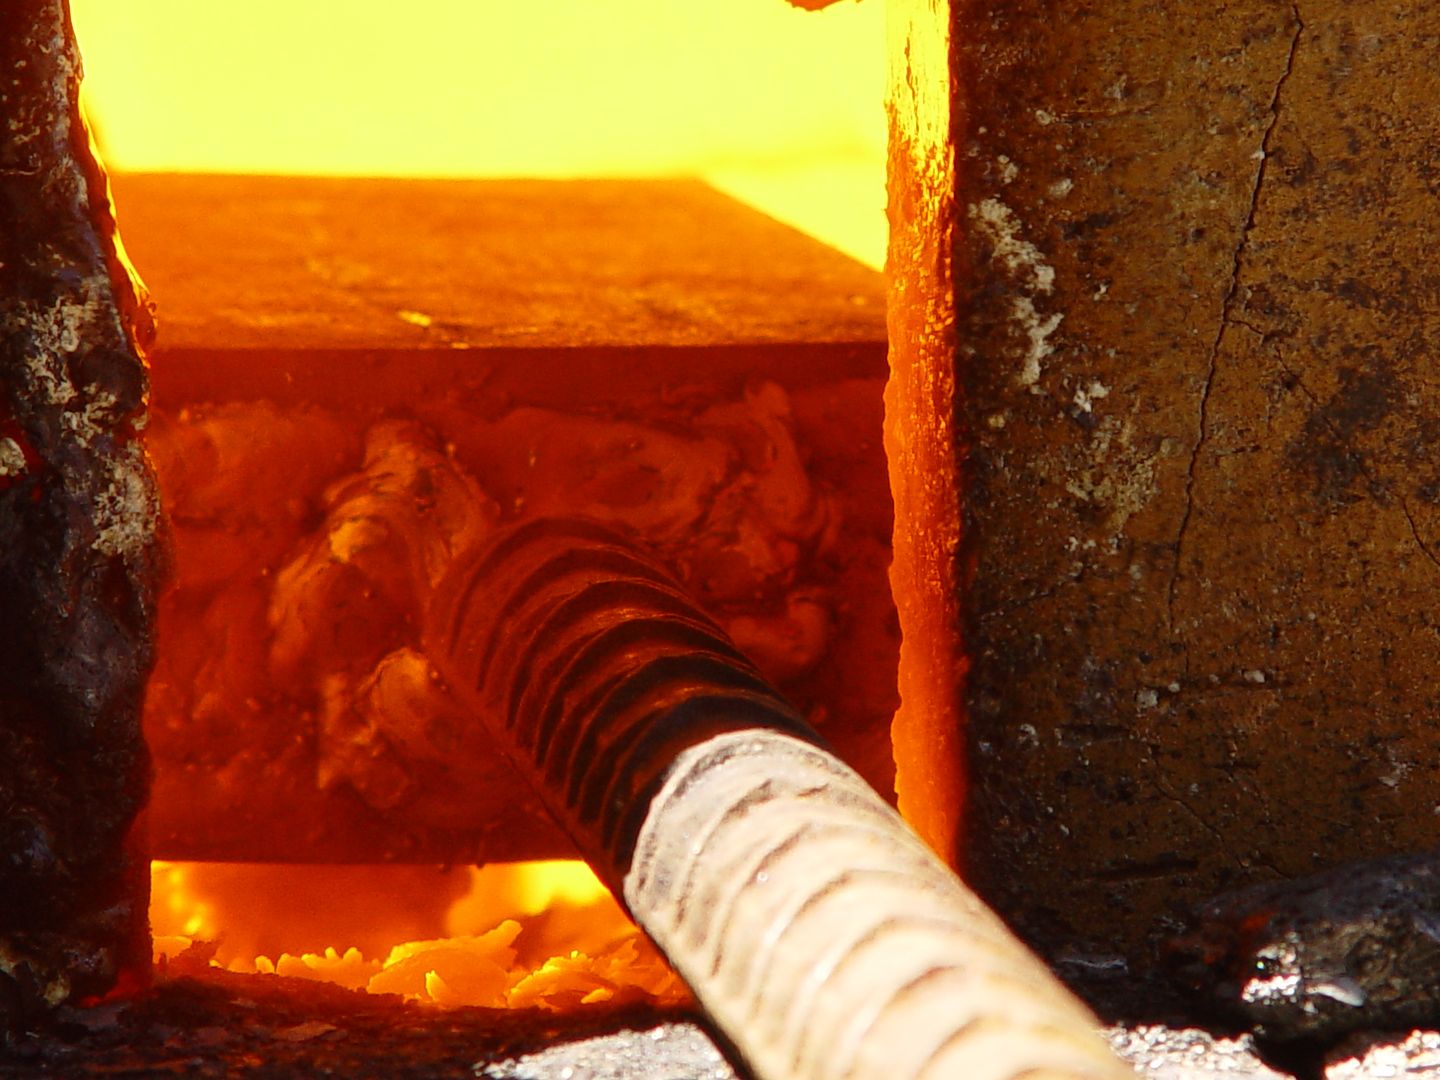
The forge from the outside 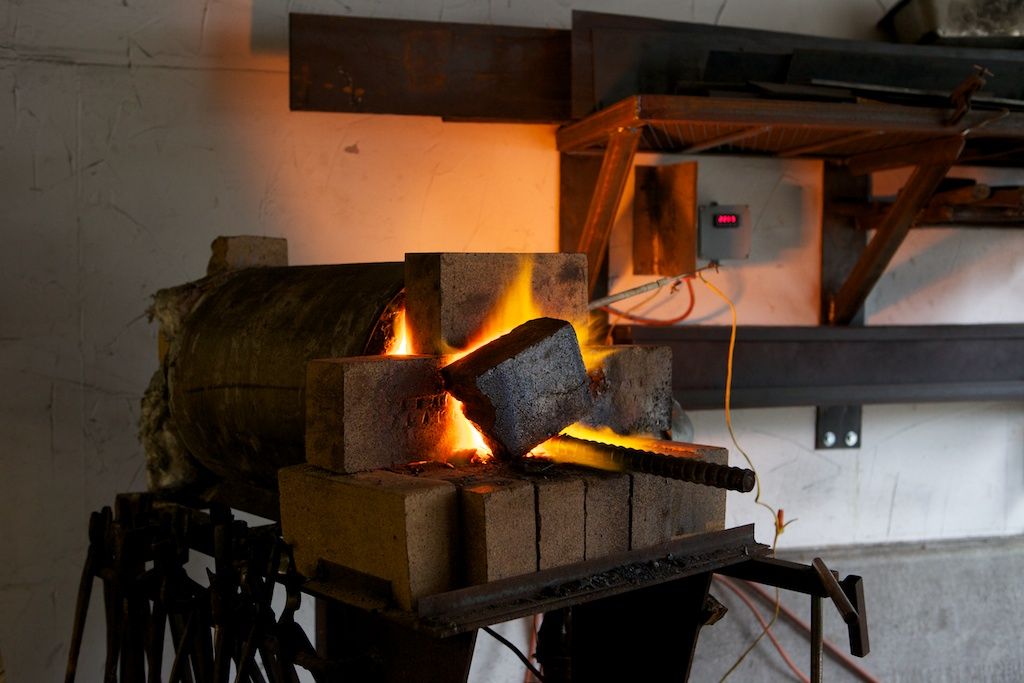
How hot is it? 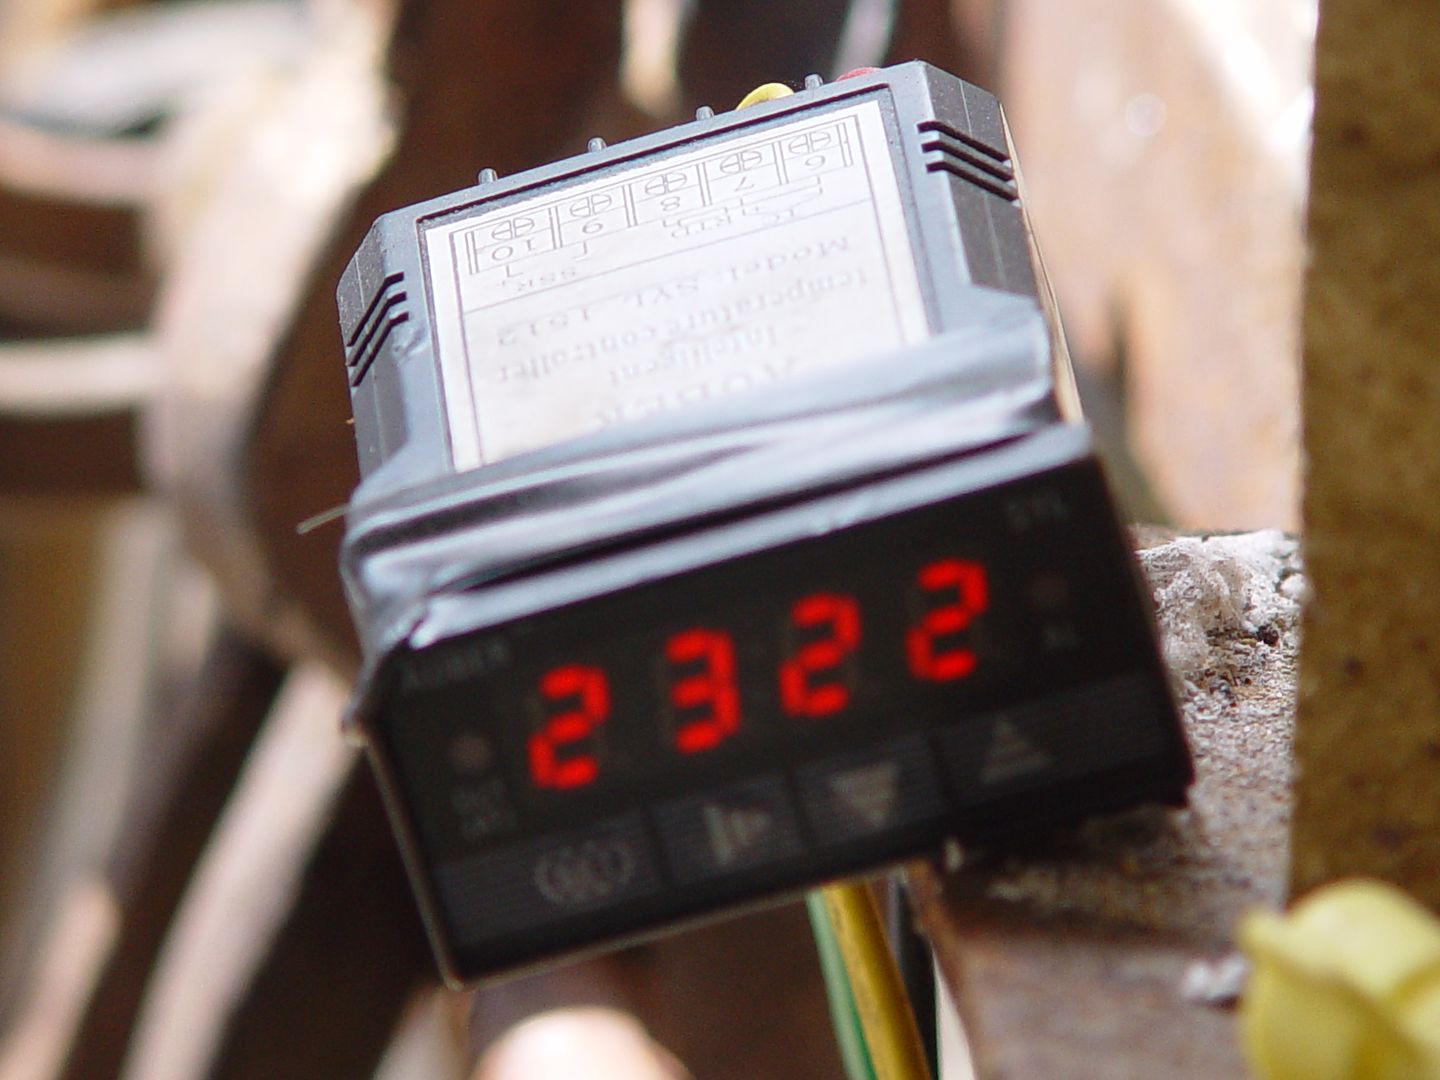
That is 2322F. I run between 2250f-2350f. Now it needs to soak for about 30-45minutes to ensure the inside of the billet is at temp. If it is too cold it will not weld. |
|
|
|
[#1]
OK continuing on.
Pull out the hot billet and it's time to meet my little friend. A 50 ton 4 poster press I modified for forging. 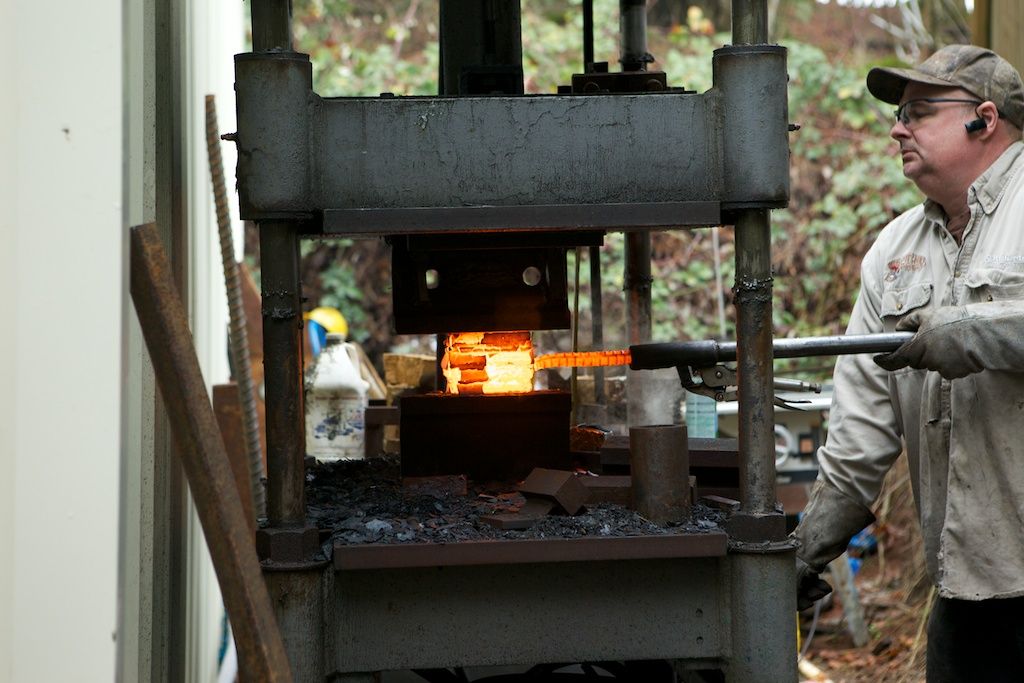
Here you can see the three phases leading up to this point. A HOT billet after the first press, one that has had the sides welded on and on waiting for the sides. 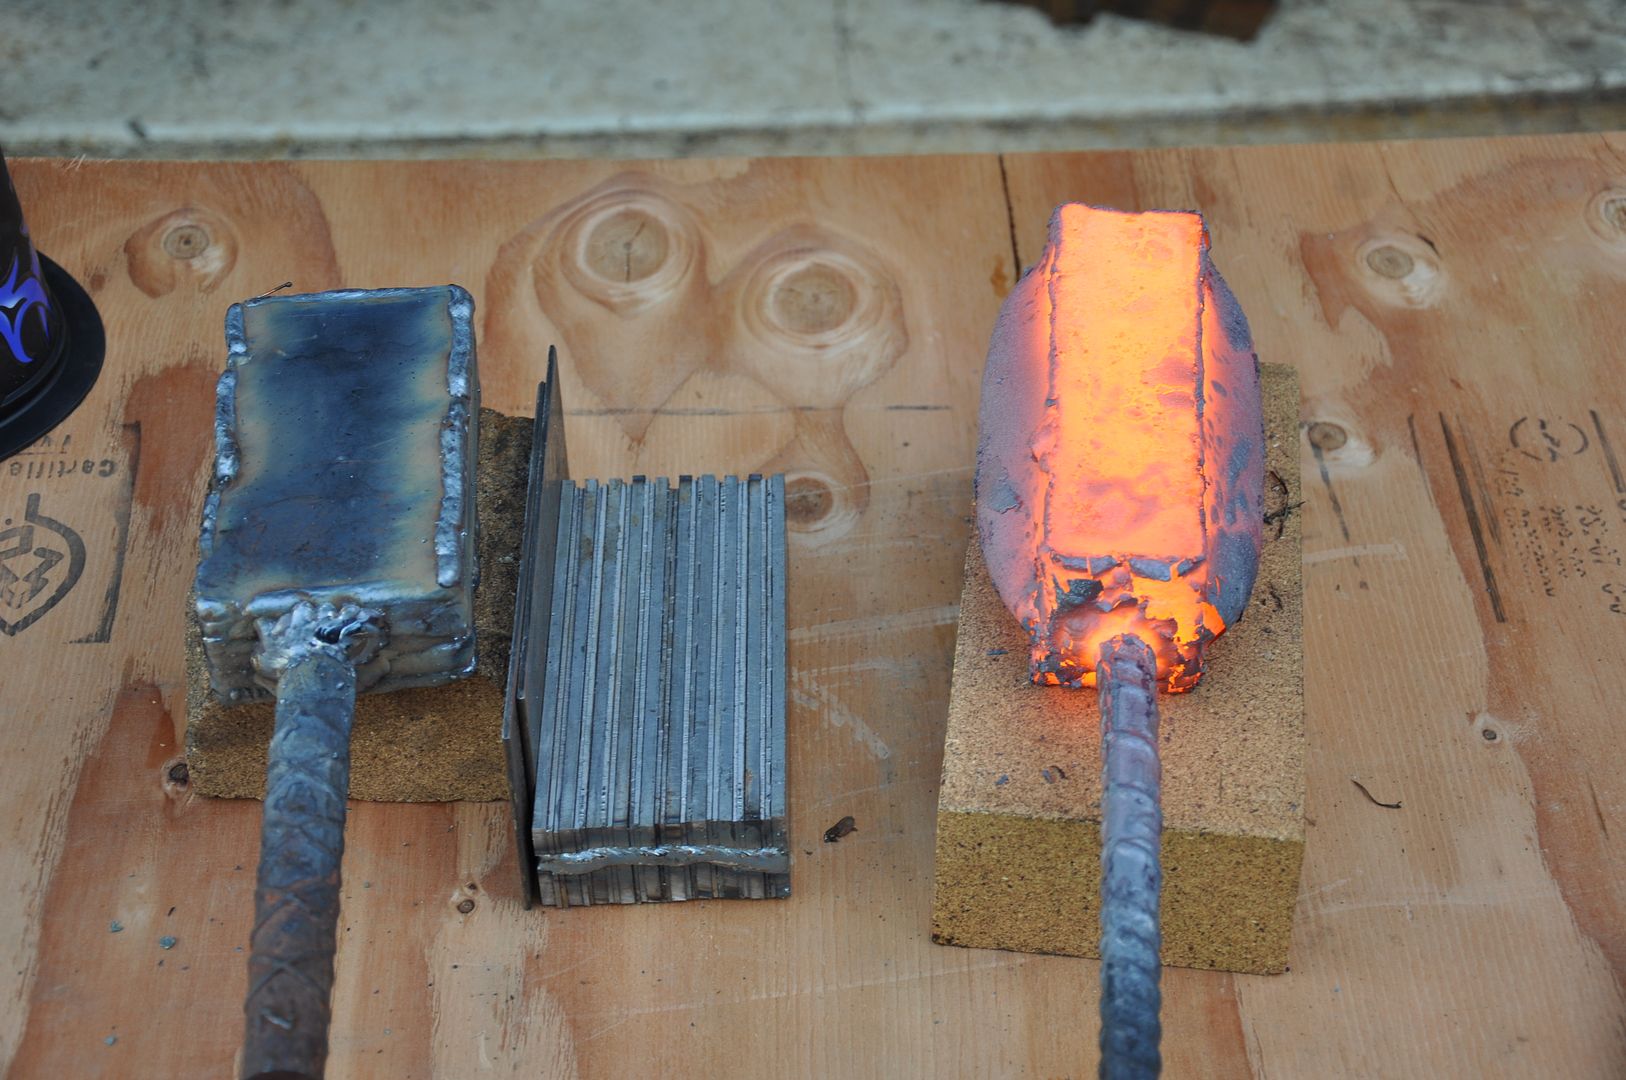
Removing the outer skin. It was used purely to prevent scale. It is disposed of. See the nice clean surfaces underneath. 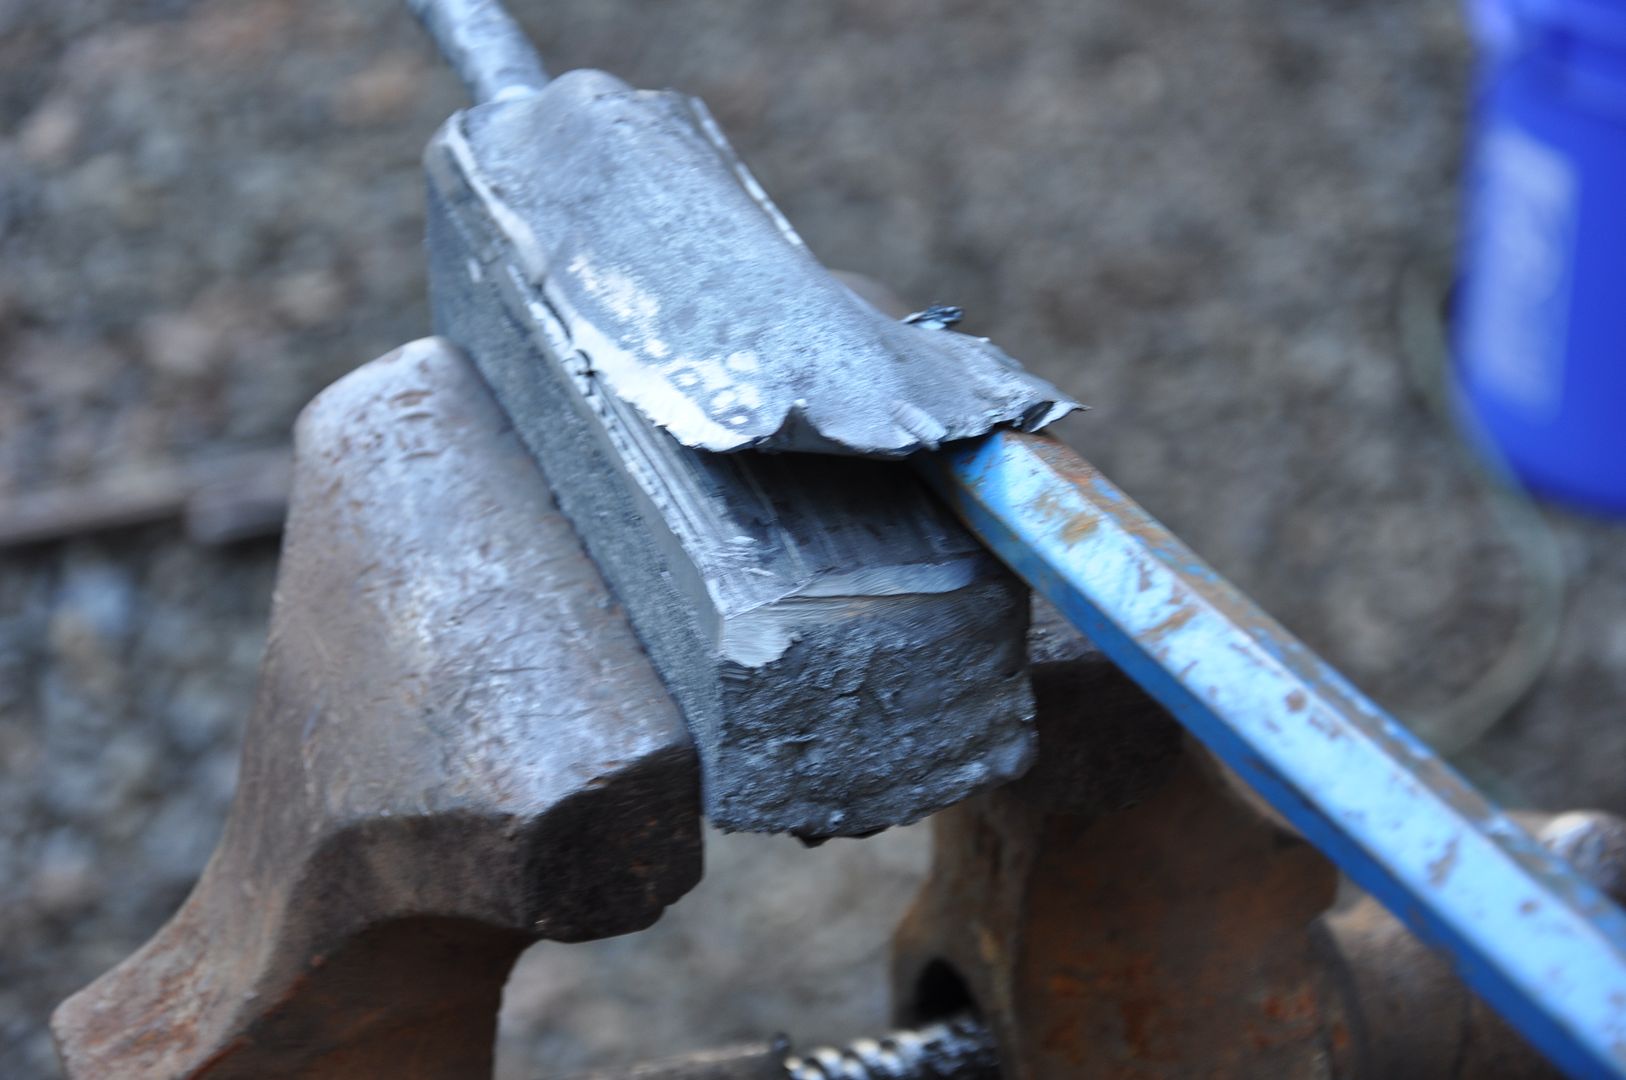
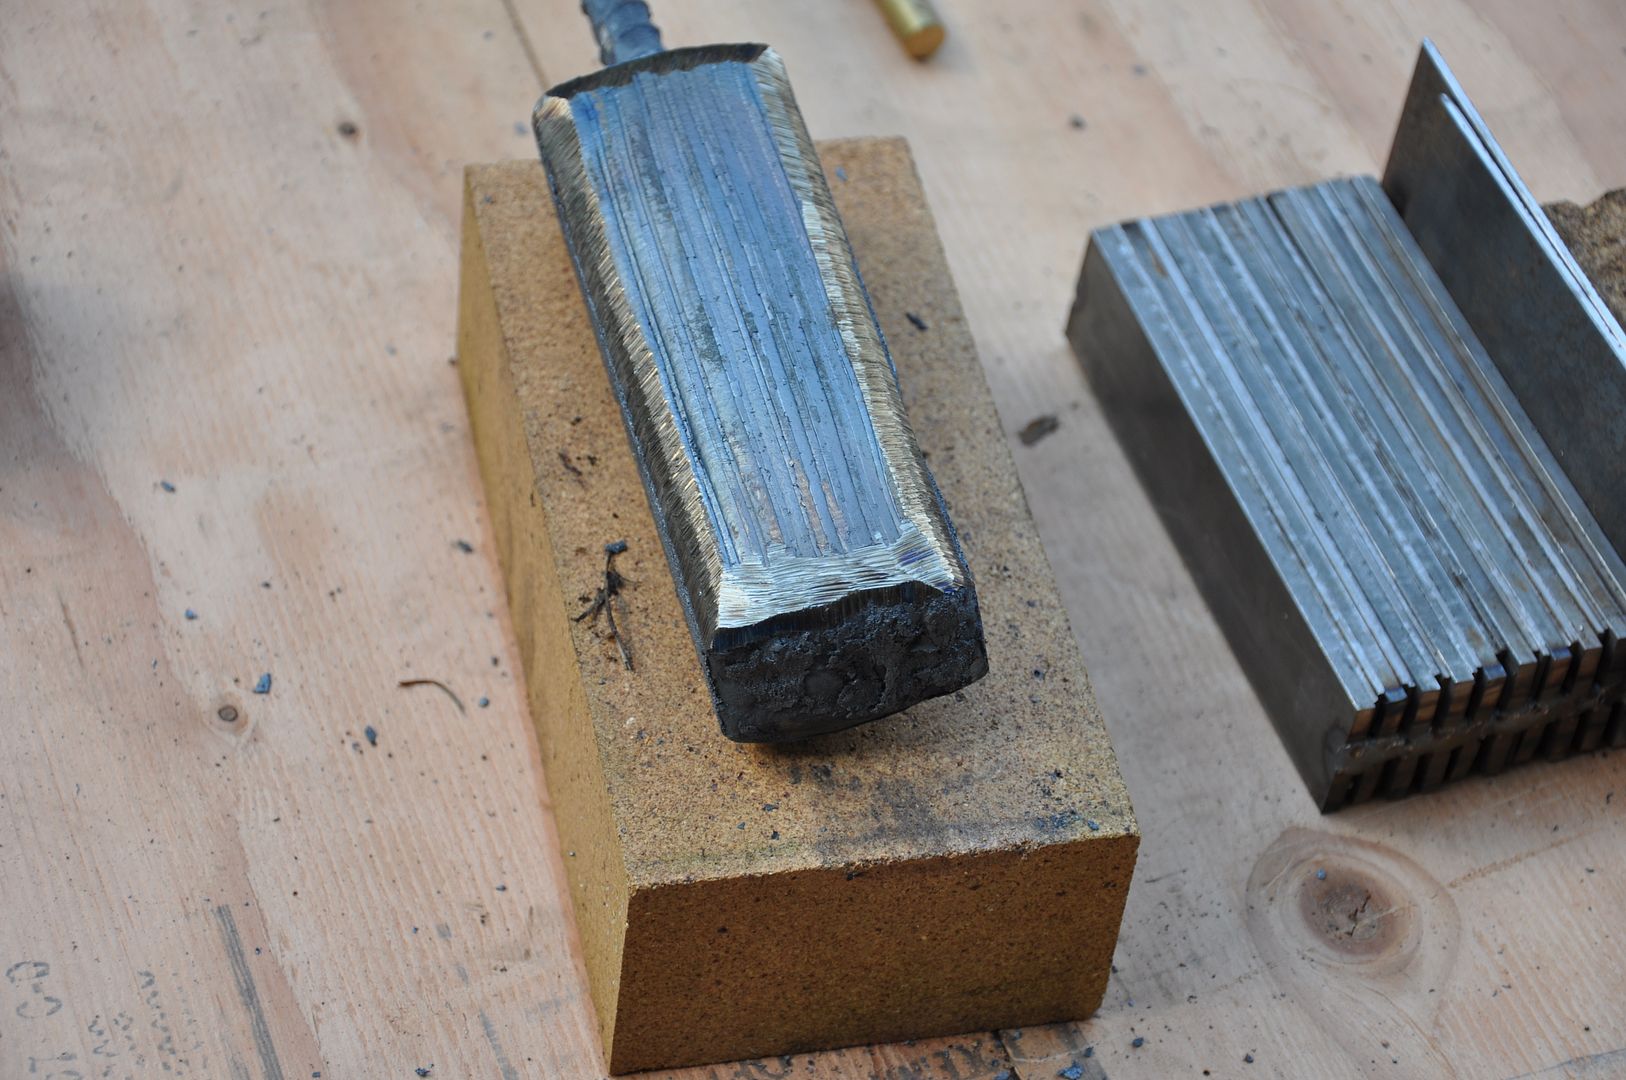
From this point the billet is manipulated in the press and power hammer to get the final pattern I desire. I will re-stack and weld the billet sealing the seams to prevent scale and thus obtaining a perfect weld. 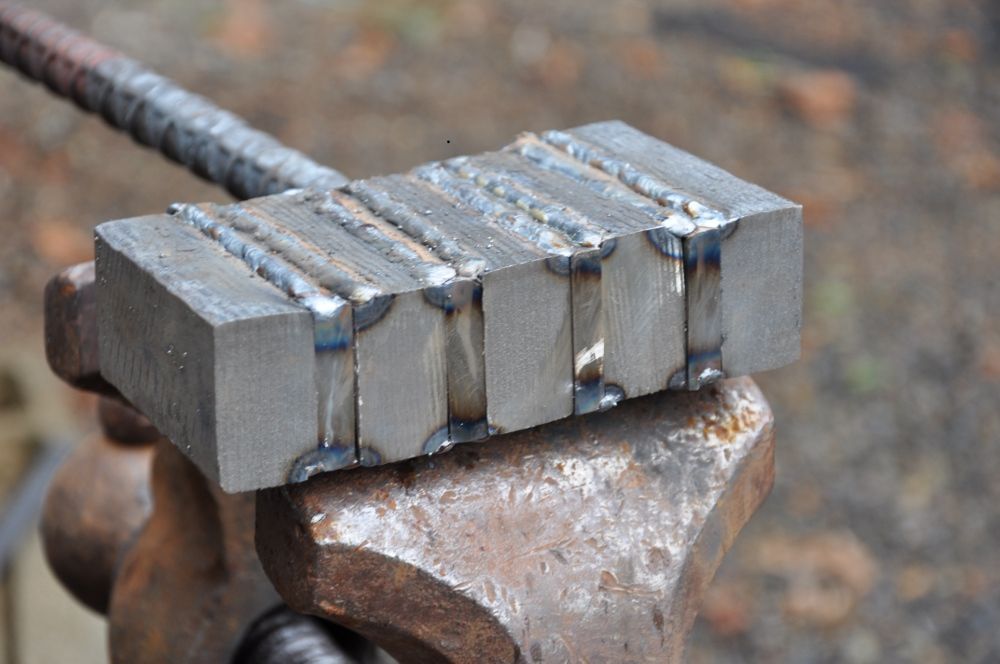
As you can see I added a bit of new material per the customers request on this billet. Here is a shot of me on the power hammer. 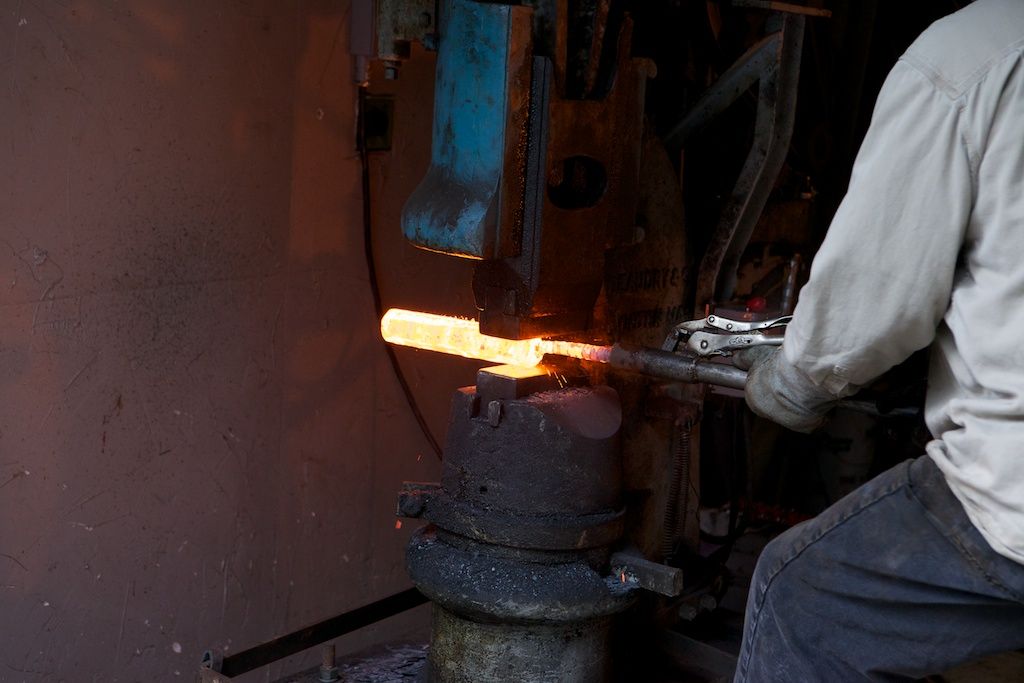
After I completed the stack to about 250 layers I needed to twist a large diameter billet. A friend volunteered to come on up and do some grunt work. Just starting the twist. 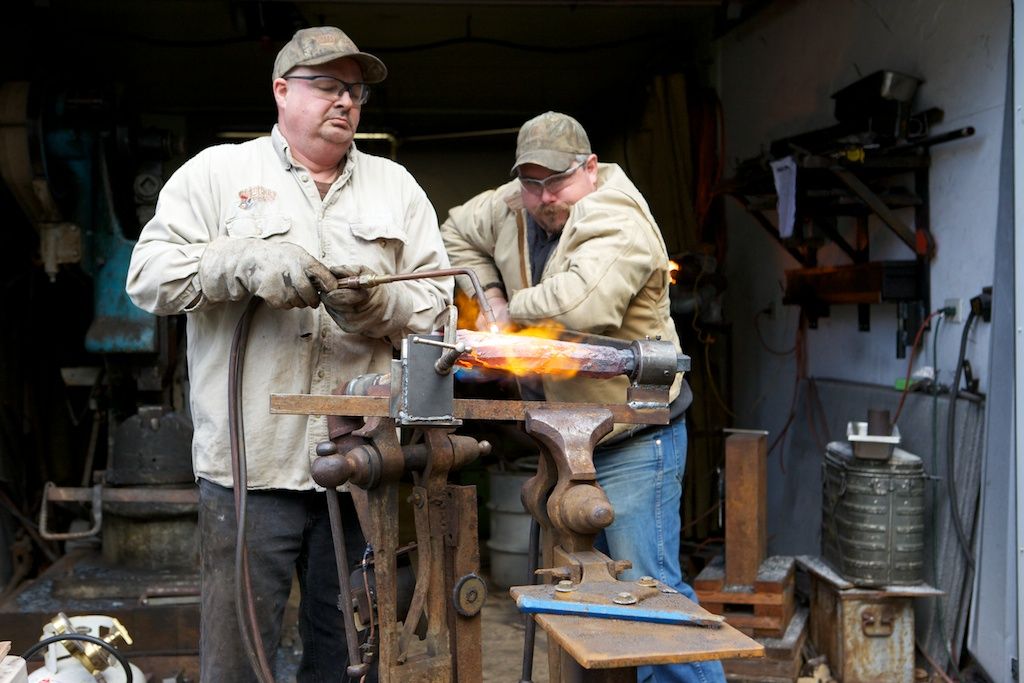
More to follow. |
|
|
|
[#2]
Here is the billet after the final twist. If you look really close you can see the layers.

I cut of about a 4lb section of the best twist and forged this bar. It was about 14" long x 2.25" wide. 
Forged to shape. To give a bit of prospective the anvil top is 18.5 inches across. 
Then she has to be ground. Top blade was the original I had done and turned out to be a bit undersized. The bottom blade was the one from the billet pictured. This was just prior to heat treating. 
Lets take a look at the pattern 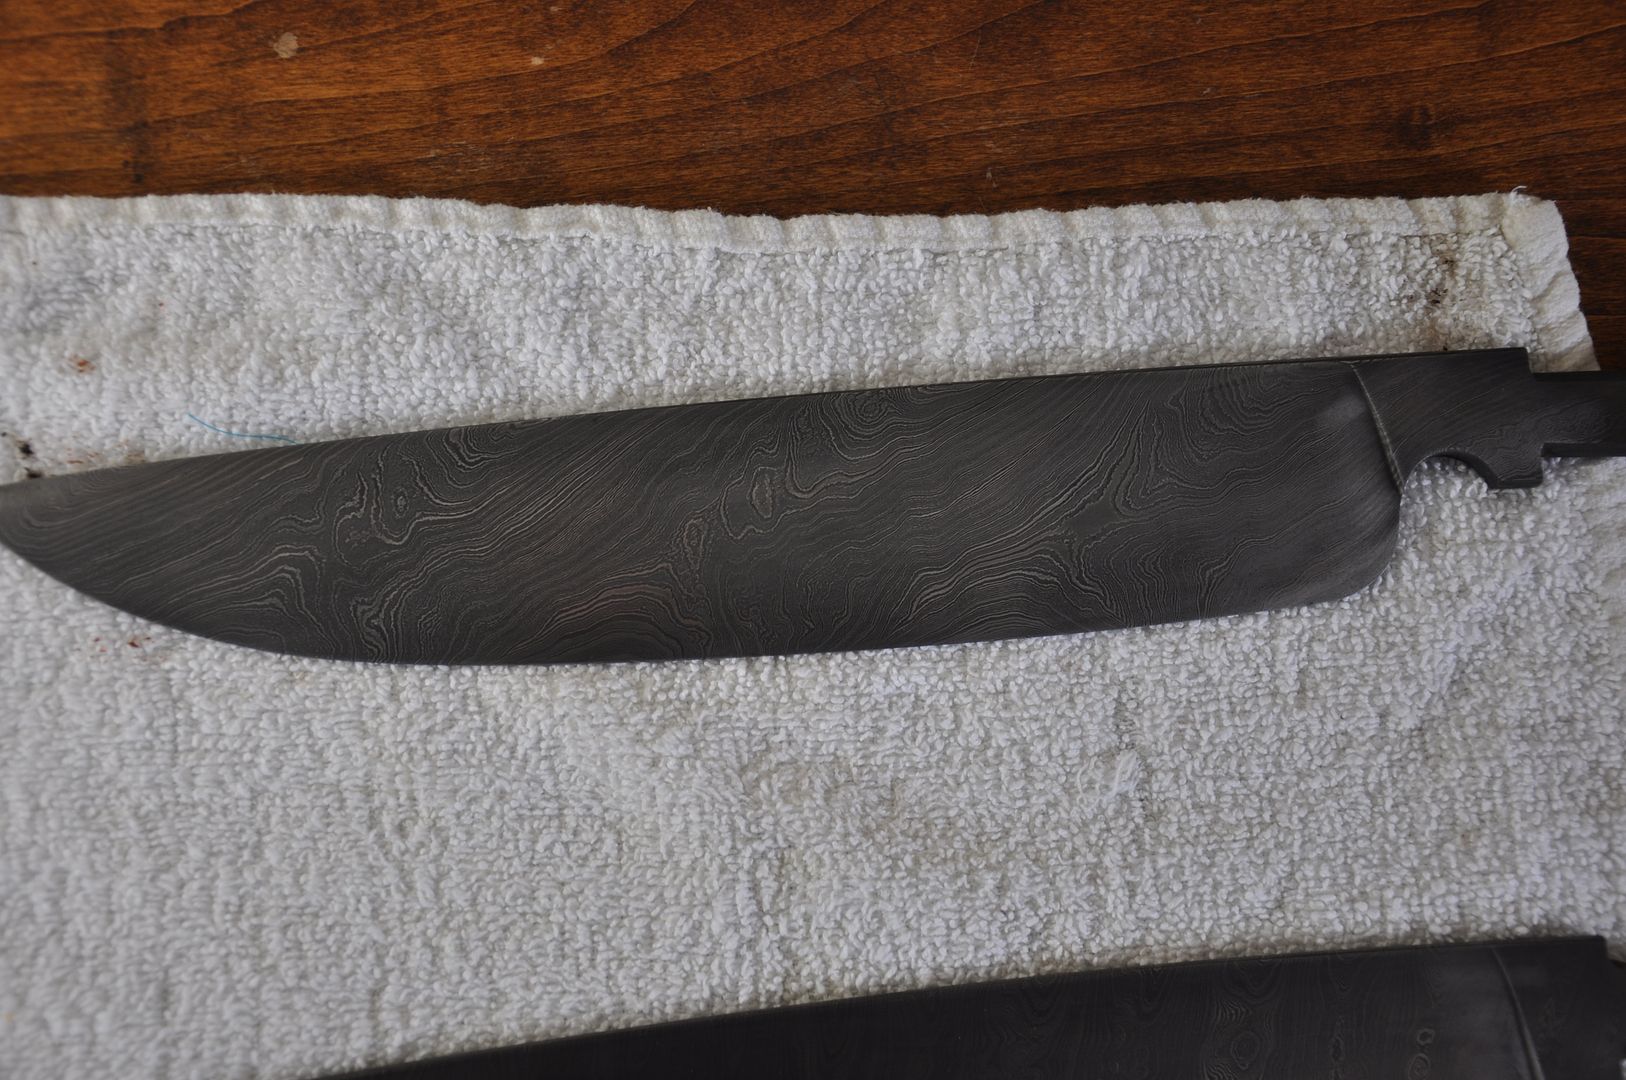
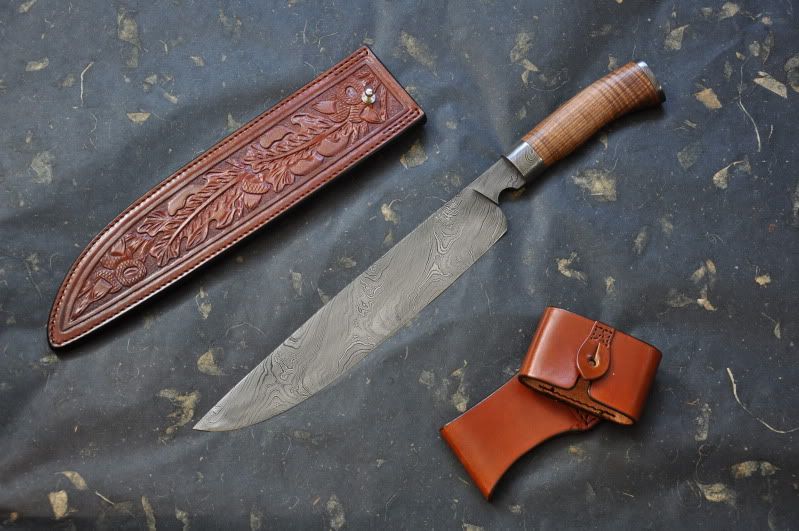
Sorry, can't find the finished shot of that knife but here is the big brother. Finished the same with a wood that is called Chalkte Viga. Very cool wood, if you have this in your hand the wood looks 3-d 
That is a very cursory how to an making a damascus knife. The blade is etched to bring out the pattern but only to reveal the layers. The pattern is in the steel not on the surface. Hope this helps you all understand the amount of work that goes into making one of these. It is done for the beauty more than anything else. And it also shows the skill of the smith. |
|
|
|
[#3]
Here she is. It is now at her new home in Malaysia.
She was dubbed Little sister by the owner since she was the second blade made but she was actually larger in just about every dimension. |
|
|
|
[#4]
Outstanding!
|
|
|
|
[#5]
Very impressive, very beautiful! Fine work, Sir!
|
|
|
|
[#6]
Beautiful work man!
Bravo Zulu to you! |
|
|
|
[#7]
WOW
That is the awesome-sauce |
|
|
|
[#8]
Outstanding work, thanks for posting this.
|
|
|
|
[#9]
Thanks all. As I mentioned this is a really quick overview. There are a lot of steps I left out just due to redundancy and space. It took me 16 hours to get to the twist. Then another 20 or so to finish out the knife. If I wanted a different pattern I would just re-stack the billet in a different manner. I will not make the claim that Damascus is superior to any other steel as many do. It is not better than the parent materials started with. That and there are far more possibilities the smith has induced problems than with a monosteel blade. I do stand behind my knives and they perform well. Dressing out a whole pig is a great test. I hope to find out how future steel works on them hogs.
|
|
|
|
[#10]
Beautiful work. I just saw a little video of Bob Kramer making his. I could watch and learn about this sort of thing all day.
|
|
|
|
[#11]
That is quite a feat!! Beautiful work!
|
|
|
|
[#12]
Cool process. Thanks for sharing.
|
|
|
|
[#13]
Thanks for the post, very interesting stuff!
Beautiful end result as well. |
|
|
|
[#14]
Thanks again all. I will show more on a different thread at a future date.
|
|
|
|
[#15]
OP, the bar holding the block of metal in the forge, what is it made of?
Also, if this is how all high quality knifes are made, I now understand why they are $400+ |
|
|
|
[#16]
The bar I welded on the billet to use as a handle is just a piece of 3/4" rebar. It is not integrated in any way into the billet. I either cut it of or forge from the far end and use it to make it easier to hold onto it.
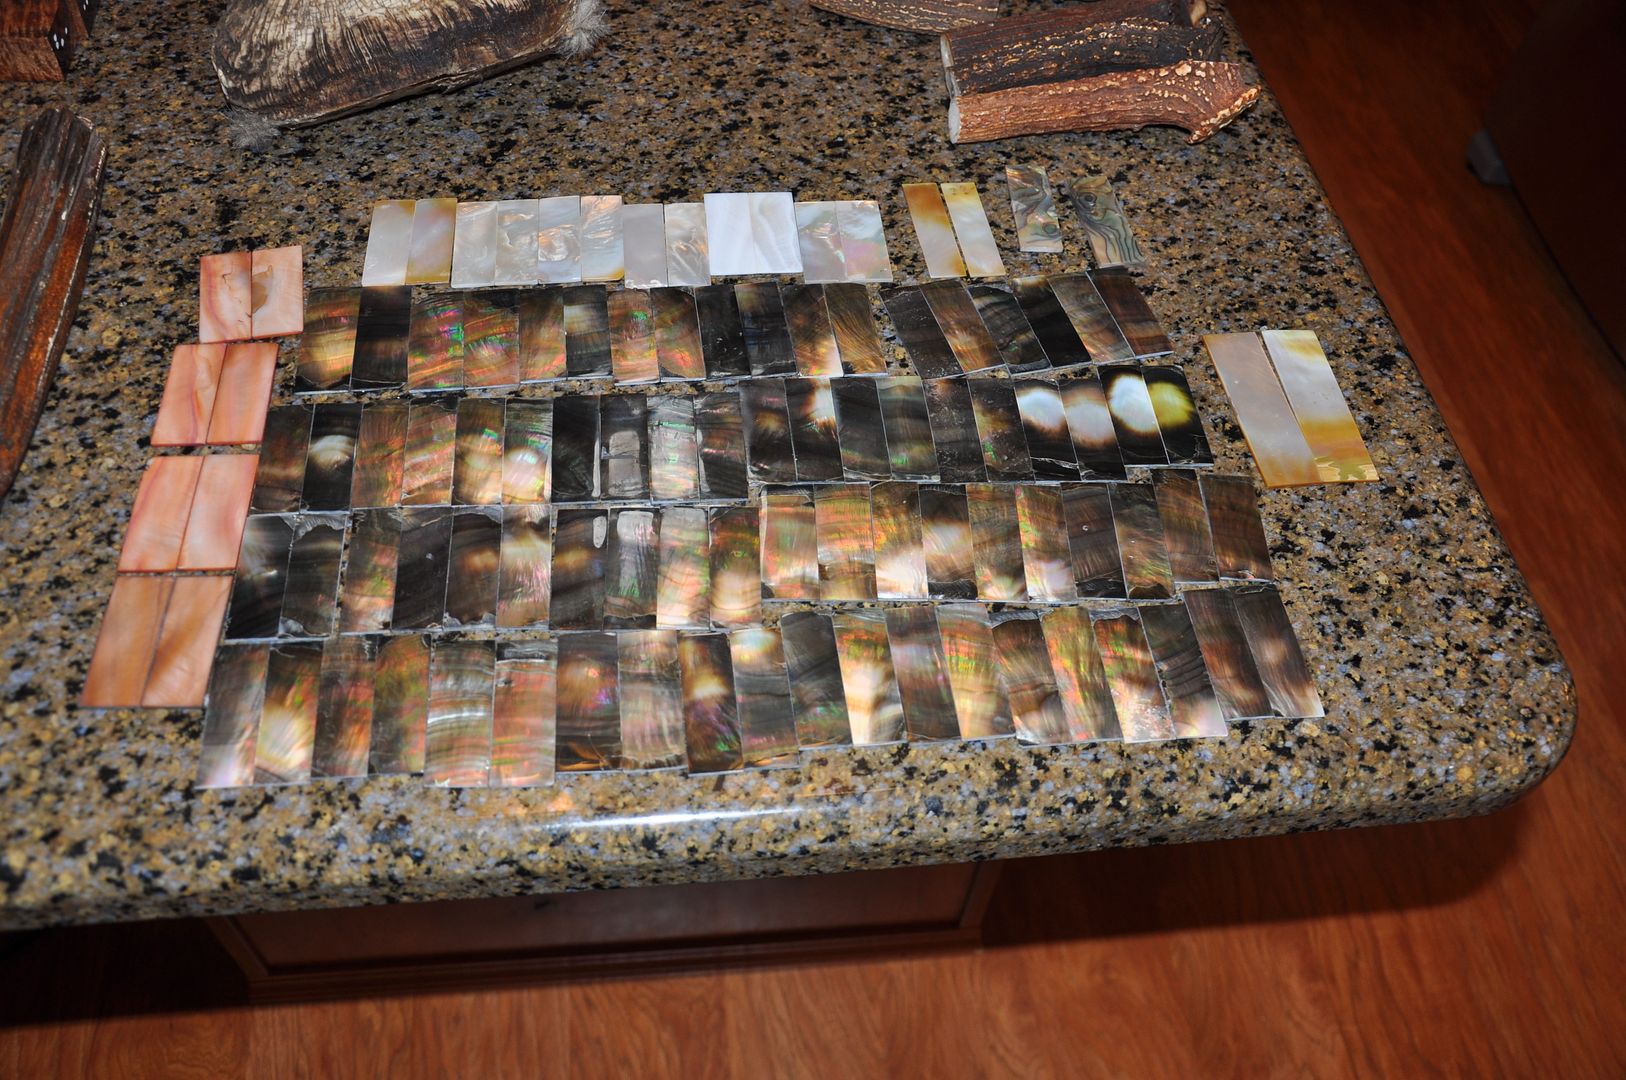
This is how I make my damascus knives. But I also forge my mono steel blades to shape. I do this for several reasons. First and foremost I like hitting hot steel. Second I can use material that is not in the shape of rectangular bars. The steel I use the most for mono steel is W2. I was only able to get it in large rounds and have to forge it flat to make a knife out of it. This is actually what I feel is the easiest part of the process. The fitting and shaping the fixtures takes even longer than making the Damascus. It is meticulous and tedious work. Like I mentioned in the post, it took 16 hours to get it to the twist, then another 20+ to finish the knife. I was able to make 6 knives out of that billet so it took 2.6 hours per blade to make the damascus another 10-20 to finish the knife. So I am glad it helped with understanding why these knives are so expensive. Not only that but materials have become so expensive many have had to give up making. A couple of popular woods have gone to $100 per handle for the premium grades. Also Sambar Stag used to be the cheap handle material and went for $2 in the 80's. Now it is close to $100 also. Then we don' even want to talk about Ancient Ivories that can go for more than $200/ handle. Here is a few shots of some handle I picked up. Well over 3k there my cost. 


|
|
|
|
[#17]
Very cool and thanks for posting this. Great information and pictures of a craftsman at work.
|
|
|
|
[#18]
Beautiful. Brings me back to crankin' the blower handle for my Dad. Does that sound wierd? Not if you know what I'm talkin' about. Great stuff Sir.
|
|
|
|
[#19]
I started cranking a blower. It taught me a great deal about fire control and patience. One heck of a workout for the left arm. The right arm got worked with the hammer. Older and wiser now, the power hammer and press get most of the heavy work. I just do the final shaping and clean things up. Still a workout though.
|
|
|
|
[#20]
That is absolutely gorgeous. True craftsmanship.
|
|
|
|
[#21]
Quoted:
I started cranking a blower. It taught me a great deal about fire control and patience. One heck of a workout for the left arm. The right arm got worked with the hammer. Older and wiser now, the power hammer and press get most of the heavy work. I just do the final shaping and clean things up. Still a workout though. Yes Sir! Never mess with a Smith. Unless you want your head pinched off. Not many Craftsmen left in the world like you Sir. |
|
|
|
[#22]
Yup the forearms get quite a workout. When I was swinging a 4 lb hammer my right arm was 3-4" bigger around than my left. Lots of fun.
|
|
|
|
[#23]
HaHa. I "disfigured" myself like that running shovels and asphalt rakes. Huge left trap and huge right lat. Very nice work Sir, you do the Profession proud.
|
|
|
|
[#24]
Thanks Crush and all. I really enjoy making knives. Even when they present a significant challenge. Screwed up 2 big choppers today. 20 hours of work down the drain. Oh well that's part of the process. Hopefully only a very small part.
|
|
|
|
[#25]
That's why I like forging. You can always take it back to its base. Time is of course never free. What happened? Temper? Grind? I bet they would be up to standards around here.
|
|
|
|
[#26]
Just found this thread.
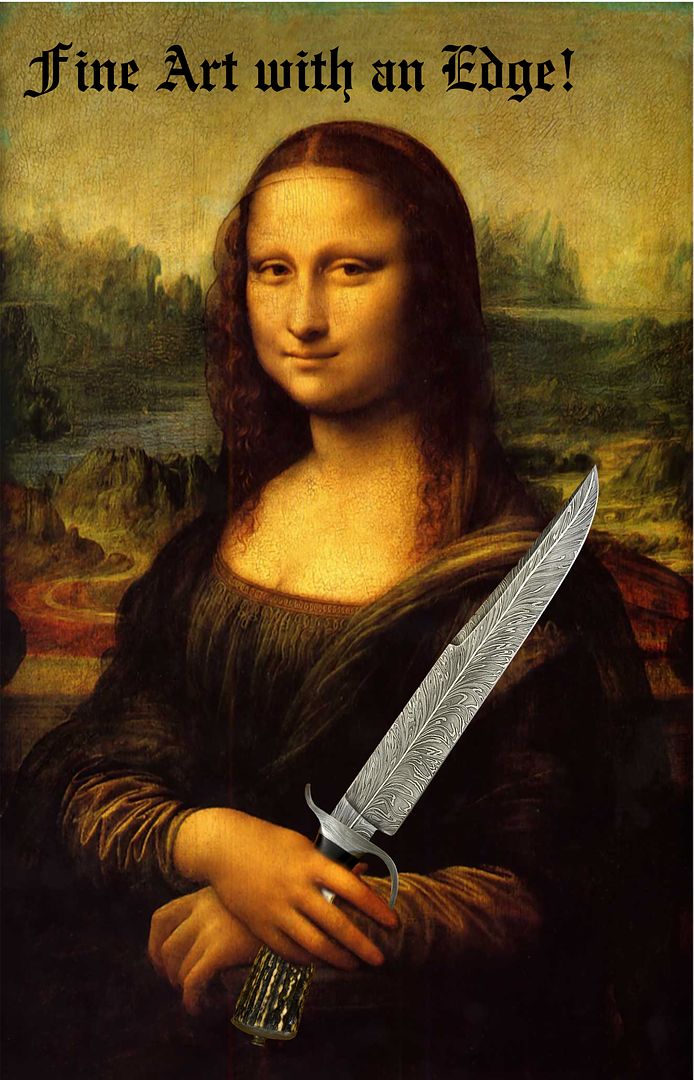
As the proud owner of two of your knives, it is very interesting to see the process. When you were here, you explained that you knew, in advance, how each pattern would look. You even gave me a knife with a pattern that was intended, before you even applied the heat, to look as if it was a feather. Everyone I have shown that knife too is left slack-jawed that you intentionally made a 'feather' out of steel and then in to a blade. Mind explaining how you did that? I have tried, and failed, to explain the processes that you used. I will show this thread to some of them soon. I can also locate the Mona Lisa blade and post pics if you want me to post it here. TRG |
|
|
|
[#27]
Here is the Mona Lisa blade. It is the poster for the Boise Knife show that will be in November this year. This is the Feather Pattern Brian was talking about.
I will try and put together a how to in the next few days. I will probably start a new post to keep things fresh. |
|
|
|
[#28]
A amazing work!
|
|
|
|
[#29]
Quoted:
A amazing work! Thanks |
|
|
|
[#30]
Wow, how did I miss this thread. Great looking knives, awesome mascus.
|
|
|
|
[#31]
No words. Amazing.
|
|
|
|
[#32]
Thanks all. Will be getting back into the shop next week. Will see if I can put a feather WIP together.
|
|
|
|
[#33]
Quoted:
Thanks all. Will be getting back into the shop next week. Will see if I can put a feather WIP together. Looking forward to it., Had your knives out again today to show them to my parents. Dad's a woodworker, very impressed. TRG |
|
|
|
[#34]
Cool. Nice to know they are appreciated.
|
|
|
|
[#35]
For those waiting for the how to on the feather, been real busy round the ranch. Will put something up as soon as I can...
|
|
|
|
[#36]
Quoted:
For those waiting for the how to on the feather, been real busy round the ranch. Will put something up as soon as I can... I have your hog skull ready to ship. It is not perfectly cleaned, but, the main stink is gone and with a little TLC (that .45 hurt it) you should be able to put it on your mantle. TRG |
|
|
|
[#37]
Im of your website??
Beautiful stuff! |
|
|
|
[#38]
My website is www.woodchuckforge.com
TRG. will contact you about the shipping. Thanks |
|
|
|
[#39]
Very interesting post. Thank you.
|
|
|
|
[#40]
I am a little late to this thread but really great stuff. It is impressive to see such rough materials be worked into such fine craftmanship.
|
|
|
|
[#41]
Thanks JIP
I will have to post a WIP on a blade I made from a shell from WW2. |
|
|
 Win a FREE Membership!
Sign up for the ARFCOM weekly newsletter and be entered to win a free ARFCOM membership. One new winner* is announced every week!
You will receive an email every Friday morning featuring the latest chatter from the hottest topics, breaking news surrounding legislation, as well as exclusive deals only available to ARFCOM email subscribers.

AR15.COM is the world's largest firearm community and is a gathering place for firearm enthusiasts of all types.
From hunters and military members, to competition shooters and general firearm enthusiasts, we welcome anyone who values and respects the way of the firearm.

Subscribe to our monthly Newsletter to receive firearm news, product discounts from your favorite Industry Partners, and more.
Copyright © 1996-2024 AR15.COM LLC. All Rights Reserved.
Any use of this content without express written consent is prohibited.
AR15.Com reserves the right to overwrite or replace any affiliate, commercial, or monetizable links, posted by users, with our own.


