|
[#1]
Originally Posted By jake-cutter:
After seeing some mrap seats i have been looking for a tan pair to go in the front. I have brand new tan high back hmmwv seats in the rear, but od in the front. Can't seem to find any tan seats. I guess i could try seat covers from Jatonkas. Interesting... The bottom ones look a little loose fitting though. Would be curious what the fabric texture looks like. Too bad they don't have some high res pics. Have you thought about using some fabric spray paint to recolor your seats? 
PowerNation's Detroit Muscle used fabric paint on a budget IROC interior refresh. Looked like they got good results but they used Duplicolor's product. |
|
|
|
|
[#2]
I was alos wondering the fit as the pics make them seem loose. I am going to ask on ss if anyone has bought them and see if I can get some feedback. The paint is an option but I had bad luck with the Dupli version on a Jeep top as it bleed out and made the top super stiff. |
|
|
|
|
[#3]
We changed a frame rail and I thought some of you would like to see what it looks like with the body off.


|
|
|
|
|
[#4]
Very cool! Wish I had a shop half as nice as that to work in.
What was the reason for the frame rail swap? Rusted out? Is removing the body a fairly straightforward process? I'm guessing that yellow strapping is a sling to lift it off with a gantry or lift? |
|
|
|
|
[Last Edit: fp1201]
[#5]
Originally Posted By Ryan_Ruck:
Very cool! Wish I had a shop half as nice as that to work in. I have worked in worse places....too old for that now. What was the reason for the frame rail swap? Rusted out? the frame was damaged and someone welded a patch over it, which of course corroded to hell and the frame failed. Is removing the body a fairly straightforward process? I'm guessing that yellow strapping is a sling to lift it off with a gantry or lift? The body is surprisingly easy to remove; only "difficult" thing is getting a second person to hold the wrench on the body mounting bolts so you can spin the bolts out with an impact. We have an over-head Crain that makes it very easy, and yes the Yellow straps are for lifting. 
|
|
|
|
|
[#6]
Impressive looking undertaking! Did you fabricate the replacement frame or just swap it with another? Rough idea of cost for this type of surgery? |
|
|
|
|
[#7]
Had a few spare hours this weekend between work, holidays and everything else to sandblast, prime, and paint the roll bar.
Using the RAPCO black phosphate primer and their 383 CARC replacement green in rattle cans. So far happy with everything; reasonably priced, shipped quickly, and great coverage as well as color match (though it will take some time to cure and lose some of it's gloss I'm told). Still has to catch up with the old CARC paint job that's been sitting outside for 5 years, so we'll see. Hopefully I can get this all mounted up later this week, and perhaps the new seats will be in as well. I replaced the rear seat belts already, and will need to fabricate mounts for all the seats when they come in. 

|
|
|
|
|
[Last Edit: Ryan_Ruck]
[#8]
See, here's exactly the thing I was talking about on SS that makes you
 . As though the poster should consider himself privileged he paid for a vehicle he should wear earpro in to drive around below normal highway speeds or else he should buy something else... . As though the poster should consider himself privileged he paid for a vehicle he should wear earpro in to drive around below normal highway speeds or else he should buy something else... 
Had to bite my tongue and just click away. Originally Posted By EdwardAvila:
Had a few spare hours this weekend between work, holidays and everything else to sandblast, prime, and paint the roll bar. Using the RAPCO black phosphate primer and their 383 CARC replacement green in rattle cans. So far happy with everything; reasonably priced, shipped quickly, and great coverage as well as color match (though it will take some time to cure and lose some of it's gloss I'm told). Still has to catch up with the old CARC paint job that's been sitting outside for 5 years, so we'll see. Hopefully I can get this all mounted up later this week, and perhaps the new seats will be in as well. I replaced the rear seat belts already, and will need to fabricate mounts for all the seats when they come in. http://www.ar15.com/media/mediaFiles/2/IMG-6444-118618.jpg http://www.ar15.com/media/mediaFiles/2/IMG-6450-118619.jpg Rollbar is looking good! If the paint on your truck is otherwise good and you're not looking to repaint it (which it doesn't sound like), and you want to restore the paint to what that new Rapco paint looks like you can wipe the body down with WD40. Haven't done it myself since I'm repainting in the Spring and don't want to worry about cleaning it all off but another member did earlier in the thread and his paint looked really good. |
|
|
|
|
[#9]
Originally Posted By Ryan_Ruck:
If the paint on your truck is otherwise good and you're not looking to repaint it (which it doesn't sound like), and you want to restore the paint to what that new Rapco paint looks like you can wipe the body down with WD40. Haven't done it myself since I'm repainting in the Spring and don't want to worry about cleaning it all off but another member did earlier in the thread and his paint looked really good. Yep- I had done a small section and it definitely rejuvenates it and brings it closer to new paint. Truck was painted in 2011, so paint is good throughout. Once I get the rollbar on there we'll see how it looks and what the next steps are. I'm not necessarily looking for the brand new paint look, so maybe I just need to get the new bar dusty which should be pretty easy around here. Truck hasn't even been washed since I got it. |
|
|
|
|
[Last Edit: EdwardAvila]
[#10]
Caught up on some more work...
Roll bar is mounted and looks good. Paint is not 100% match, so we'll see how everything settles in after a while. I've heard to let it cure as long as 90 days before it looses some of it's gloss and hardens... not sure if any of that is true, but we'll see what happens. Added the recently painted radio shelf with some new hardware. Not sure what I'm going to use it for yet. 
Rearranged the battery box with Optima Red Tops; I got the 6TL adapters and they fit in there nice, but the arrangement was a bit off, so I had to swap some wiring around to fit better with the new layout. Now everything is routed well, tightly held down, and I feel comfortable nothing is going to short. For ~$30 for a pair, I definitely recommend them. 
Got a pair of 4x6' horse stall mats (3/4" rubber) as a bed liner, and I replaced the old plywood pieces. Still working on cutting the front section (was waiting to see where the seats would end up), but it protects the bed, is comfortable to stand on, and I predict will do wonders for soundproofing and insulating the passengers. Two 4x6 mats cover the bed and center, with enough spare pieces to make floor liners for the rear passenger footwells. Also got the seats today... I know some of you have already gone through the installation of MRAP seats, but there's a lot I wish I had known before and so I'm working through it all. I was considering and willing to build all new bases for the seats, but after brainstorming for a while the ideas evolved into the simplest solution. First, everything has to be based on the passenger (commander) seat, as the battery box is a fixed item that I was not willing to move. As such, the height for everything else (assuming you want everything to match) is based on this seat. I determined that the existing MRAP seats with their bases were WAY too tall. Putting one on the battery box put my line of sight almost at the top of the windshield, and my head above the roll bar/windshield. That would not work, so I considered giving up the sliders? Making a shorter base? Bottom line was that ANYTHING more than the seat cushion on the battery lid was too tall. Time to take the seats apart and put the seat base directly on the battery box... (haven't figured out the backrest yet) I moved on to the rear seats, and similarly explored making new bases to equal the height of the commander seat. Then tried fitting just the seat base onto the existing lid, and that actually was a perfect height and allows access to the storage below without having to remove the whole seat. OK. Now how do we attach the back of the seat? Tried several options, including brackets, hangers, and other ideas, but in the end using the existing seat backs and bolting directly to the seat back frame worked best and maintained ability to remove those as well. So now the rear seats are done, and I basically threw away the entire seat structure. I lost the ability to recline the seats, and lost the sliders (but I wasn't going to be using those anyway), but I kept passenger's head inside the vehicle, and a lot more comfortably. I just put the new seat cushions on the original mounts. 
So now I have to figure out the back of the commander seat (probably some sort of bracket similar to how the original was mounted, only stronger), and the driver's seat. For the driver, I think I'm going to maintain the whole seat with the sliders, and either put a mount on top of the existing base, or I'm leaning towards removing the whole base and building a custom mount. If I do the latter, I think I can gain enough space between the seat and the door to put a rifle mount and a fire extinguisher next to the seat. Unfortunately not going to be able to work on the seats again until next week... Hopefully tomorrow I'll have some time to finish the bed liner. When I get front seats figured out, I'll post more pics. Also ordered last two gauges I needed to replace (new ones look too nice to keep originals) and working on an LED gauge cluster lighting solution (go the bulbs, but needed to order new bulb covers which are on the way). EDIT :: 1/5/2016 Laid out the mat, and did all the rough cuts to get it in place (just needs a little trimming here and there). Looks kinda blah from this angle, but it really fit nice and will serve to quiet some rattles (it fits tightly against the rear seats and prevents them from rattling). 
I have the option of screwing it in place (using existing holes and countersunk bolts so nothing sticks up) but I'll see if that's even needed. It's in there so tight that I don't think it can move. |
|
|
|
|
[#11]
Originally Posted By EdwardAvila:
Caught up on some more work... Wow, I'm surprised those MRAP seats sit tall enough you'd be eye level with the windshield. How tall are you? Maybe those specific seats are just a lot thicker in the seat area than the ones EagleArms and I used. I'm 6' tall and sitting back in my commander's seat the top of my head is just under the B-pillar with about 3" or so of headroom from the soft top. I did have a buddy that is 6'4" in the commander's seat but, we didn't take any measurements on clearances and we had the soft top off.  Seems you came up with a workable solution though! Seems you came up with a workable solution though! 
Mats look good! They really do a good job of helping quiet things down. |
|
|
|
|
[#12]
The mats look great. How did you cut them?
|
|
|
|
|
[Last Edit: EdwardAvila]
[#13]
Originally Posted By jake-cutter:
The mats look great. How did you cut them? Initially tried a circular saw like most people recommend, using a course blade to keep it from plugging up. That caused a bunch of smoke and the cut wasn't straight or smooth. Regular utility knife worked best with a straight edge to use as a guide. Took probably three passes to cut all the way though: first 1/3 carefully establishing the line, a second about 2/3 through the material, and for the final pass we put a 2x4 under the mat to open the cut and did the final 1/3 or less. This resulted in perfectly straight and clean cuts as long as you keep the blade upright. Another option would have been to use a hacksaw, but I think the utility knife leaves a much cleaner and straighter cut. In a couple of spots I removed some material from underneath the mat to fit over protrusions in the bed and let it lay perfectly flat. For the most part thought it's sitting pretty flat on top of all the d-ring tie downs and even the existing insulation. If I want to use the tie downs at some point, i could cut openings to expose them. As mentioned before I may use existing holes in the body, drill up from underneath, and bolt the mat down. I just have to figure out how to countersink the bolt/washer from above (cut a perfect 1" circle about 1/4" deep) so the heads do not protrude above the mat. I have a piece of mat left over that I can bolt to the inside of the tailgate when I bolt the gas can trays to the gate. As mentioned before I also made floor mats for the rear seats (fronts have original insulation). Ryan- I'll post pics of my seat bases tomorrow. Maybe what I got is totally different than what you have. I'm only 5'10". There was no way to make those seat bases any lower, and when I tried just the cushion, that was perfect height. Wouldn't have wanted to add another inch or more, let alone 5 or 6. Believe me I considered hacking them up and rewelding components, but there was no real winner. In the end simplicity won, and I didn't really need any adjustability in the commander or rear seats to justify keeping sliders and seat back tilt. Plus just using the cushions makes access to the battery box and rear storage as easy as possible so a whole seat doesn't have to be lifted. Also kept overall weight gain down. If there's any specific pics anyone wants to see with any of this, just let me know. |
|
|
|
|
[#14]
Originally Posted By EdwardAvila:
In a couple of spots I removed some material from underneath the mat to fit over protrusions in the bed and let it lay perfectly flat. For the most part thought it's sitting pretty flat on top of all the d-ring tie downs and even the existing insulation. If I want to use the tie downs at some point, i could cut openings to expose them. As mentioned before I may use existing holes in the body, drill up from underneath, and bolt the mat down. I just have to figure out how to countersink the bolt/washer from above (cut a perfect 1" circle about 1/4" deep) so the heads do not protrude above the mat. Maybe one of these? 
I may try one out on a piece of scrap I've got left over. Mine don't really move but I do like the idea of having them anchored in place with countersunk bolts. Maybe install some nutserts so removal for cleaning is very easy and doesn't require removal of nuts from under the truck... |
|
|
|
|
[Last Edit: EdwardAvila]
[#15]
Originally Posted By Ryan_Ruck:
Maybe one of these? I may try one out on a piece of scrap I've got left over. Mine don't really move but I do like the idea of having them anchored in place with countersunk bolts. Maybe install some nutserts so removal for cleaning is very easy and doesn't require removal of nuts from under the truck... Sounds like a perfect plan; let me know how you make out! Found this picture on eBay. Same seats and how high they sit on the battery box: 
|
|
|
|
|
[Last Edit: EdwardAvila]
[#16]
Here's some details on my seats and how they would have fit.
As we have discussed, because the battery box is the immovable object, everything I did was based on that. Here is the seat base. 
They have mounting studs on the bottom, so it's about 3/4" higher than it would end up. 
Here is the whole seat as it would sit (your butt would be 8-9" higher than stock?!?) 

So those where the problems I encountered with these seats. It seems like the ones Ryan and others got were lower profile? While I'm here, here's a pic of the mat facing rearward. You can see the scrap piece of mat I'm considering putting on the inside of the tailgate. 
|
|
|
|
|
[#17]
Originally Posted By EdwardAvila:
Here's some details on my seats and how they would have fit. As we have discussed, because the battery box is the immovable object, everything I did was based on that. Here is the seat base. http://www.ar15.com/media/mediaFiles/2/IMG-6461-120554.jpg They have mounting studs on the bottom, so it's about 3/4" higher than it would end up. http://www.ar15.com/media/mediaFiles/2/IMG-6462-120555.jpg Here is the whole seat as it would sit (your butt would be8-9" higher than stock?!?) http://www.ar15.com/media/mediaFiles/2/IMG-6465-120557.jpg http://www.ar15.com/media/mediaFiles/2/IMG-6463-120556.jpg So those where the problems I encountered with these seats. It seems like the ones Ryan and others got were lower profile? While I'm here, here's a pic of the mat facing rearward. You can see the scrap piece of mat I'm considering putting on the inside of the tailgate. http://www.ar15.com/media/mediaFiles/2/IMG-6460-120553.jpg Oh wow! Now I can see why it was a problem. That seat base is really tall! On the seats I've got the base/slider is very low profile. Doesn't stick out much further than the bottom of the seat. I'll snap a couple pics that show how low they are when I get home. |
|
|
|
|
[#18]
Originally Posted By Ryan_Ruck:
Oh wow! Now I can see why it was a problem. That seat base is really tall! On the seats I've got the base/slider is very low profile. Doesn't stick out much further than the bottom of the seat. I'll snap a couple pics that show how low they are when I get home. Yeah that's the whole problem. I looked back at your seats and they were much lower profile bases. I'm ok with this solution, as I can get access to the various boxes without having to remove whole seats, and I don't really see a need for adjustments on the 3 passenger seats anyway. Drivers seat will maintain full functionality as I will be fabricating a base anyway so I can adjust size and position. I "mocked up" the final look: 

I'd like to get/create a cargo net what will wrap around both sides of the rollbar down to the rear fenders. I also forgot I ordered one of those pulse tech battery maintainers which came in today so I need to figure out where to mount that. I'm more concerned with desulfation than maintaining charge, but it can't hurt... or can it? 
|
|
|
|
|
[#19]
Originally Posted By EdwardAvila:
Yeah that's the whole problem. I looked back at your seats and they were much lower profile bases. I'm ok with this solution, as I can get access to the various boxes without having to remove whole seats, and I don't really see a need for adjustments on the 3 passenger seats anyway. Drivers seat will maintain full functionality as I will be fabricating a base anyway so I can adjust size and position. I "mocked up" the final look: http://www.ar15.com/media/mediaFiles/2/IMG-6467-120764.jpg http://www.ar15.com/media/mediaFiles/2/IMG-6466-120765.jpg I'd like to get/create a cargo net what will wrap around both sides of the rollbar down to the rear fenders. I also forgot I ordered one of those pulse tech battery maintainers which came in today so I need to figure out where to mount that. I'm more concerned with desulfation than maintaining charge, but it can't hurt... or can it? Here's a couple shots of my seats' base up close. 

(I really need to paint my battery box cover... )
I like that cargo net look too! Will be very slick when you've got it done. Now you just need some half doors or custom tubular/safari style doors to go with it! |
|
|
|
|
[#20]
One thing us "taller" folks incounter and is seemingly missed is leg clearance between the door and steering wheel, not to mention smacking your knee on the headlight switch.
Hurts enough to make you pee yourself.... I'm 6'6" and believe me every inch of clearance change makes a difference! Soft top isn't anywhere as bad as solid doors/roof let alone those fucking armored coffins. |
|
|
|
|
[#21]
Originally Posted By fp1201:
One thing us "taller" folks incounter and is seemingly missed is leg clearance between the door and steering wheel, not to mention smacking your knee on the headlight switch. Hurts enough to make you pee yourself.... I'm 6'6" and believe me every inch of clearance change makes a difference! Soft top isn't anywhere as bad as solid doors/roof let alone those fucking armored coffins. Done that a couple times... That unlock lever does a great job jabbing your knee. For steering wheel clearance, I saw someone on SS mention that some trucks have a tilt adjustment under the dash that requires loosening a nut and bolt. Been meaning to check my truck. I wouldn't mind tilting the wheel up a little. Speaking of SS, saw a cool video just posted over there that shows how the Torsen diffs on our trucks work. Figured I'd repost it here for education. It's pretty cool! 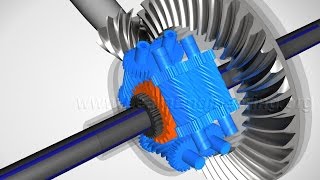 Torsen Differential, How it works ? |
|
|
|
|
[#22]
I keep looking at the triangle where the data plate and MWO tags are on my vehicle... this is the area where I tested the WD40 paint rejuvenation, and I'm contemplating doing it to the whole thing.
|
|
|
|
|
[Last Edit: EdwardAvila]
[#23]
Originally Posted By EdwardAvila:
I keep looking at the triangle where the data plate and MWO tags are on my vehicle... this is the area where I tested the WD40 paint rejuvenation, and I'm contemplating doing it to the whole thing. OK... there was no voice of reason to caution me against it so I went ahead and did it. Used about an 18oz Family Size bottle of WD40 ($6.97? at Walmart) to do the whole thing, and some areas I went back and hit a couple of times. I sprayed directly on the surface and used a hand towel to wipe down and leave a thin even film on everything and to prevent drips everywhere. The towel did leave lint everywhere because of the rough CARC surface, but that will blow away once everything is dry. At first, it will look wet and glossy and your wife may walk in and say "Oh no, what have you done?!?!? It looks so shiny!" 
But in a short time, all will go back to normal minus the oxidized look (this is maybe an hour after- I'll get another picture tomorrow morning of the whole thing). You can see it made a significant difference in the color. 
So while I have a while to wait to see what the overall look will end up being after it's had a chance to even out, I am confident it will be matte but "like new." I also did the engine while I was in there (I had the hood up to do it vertically, and I also did the underside). I like to hit all the areas that show any rust, but also any hoses and plastics; it cleans them right up and leaves everything looking like new. 
So that's it- under $10 and about an hour of time. |
|
|
|
|
[#24]
Originally Posted By EdwardAvila:
OK... there was no voice of reason so I went ahead and did it. Used about an 18oz Family Size bottle of WD40 ($6.97? at Walmart) to do the whole thing, and some areas I went back and hit a couple of times. I sprayed directly on the surface and used a hand towel to wipe down and leave a thin even film on everything and to prevent drips everywhere. The towel did leave lint everywhere because of the rough CARC surface, but that will blow away once everything is dry. At first, it will look wet and glossy and your wife may walk in and say "Oh no, what have you done?!?!? It looks so shiny!" http://www.ar15.com/media/mediaFiles/2/IMG-6477-122016.jpg But in a short time, all will go back to normal minus the oxidized look (this is maybe an hour after- I'll get another picture tomorrow morning of the whole thing). You can see it made a significant difference in the color. http://www.ar15.com/media/mediaFiles/2/IMG-6478-122017.jpg So while I have a while to wait to see what the overall look will end up being after it's had a chance to even out, I am confident it will be matte but "like new." I also did the engine while I was in there (I had the hood up to do it vertically, and I also did the underside). I like to hit all the areas that show any rust, but also any hoses and plastics; it cleans them right up and leaves everything looking like new. http://www.ar15.com/media/mediaFiles/2/mhosbsq1-122031.jpg So that's it- under $10 and about an hour of time.  Really gives it a fresh off the assembly line look! Really gives it a fresh off the assembly line look!
Good point about the CARC and lint. I definitely think when I repaint I'm going to do like Jake told him Sherwin Williams suggested and thin my CARC to get a nice, smooth finish. |
|
|
|
|
[#25]
I would suggest doing a 10% dilution to get a nice smooth finish if the temperature stays constant. 5% dilution gives a textured finish and 0 dilution is just hard to spray and takes a lot of time. I did have an issue last week where the temp was in the 70's when I sprayed and then quickly dropped to the 30's. The paint went on fine and there were no runs, but by morning there were runs on the vertical surfaces. So lesson learned is fast temp changes causes issues even in a garage.
|
|
|
|
|
[#26]
I'll have an update later today on my project, but in the meantime if anyone's looking for the hard to find SF c-pilars, there's a set on eBay. They came up last week and were sold, but looks like they're back. special forces c-pillars
|
|
|
|
|
[#27]
Originally Posted By EdwardAvila:
I'll have an update later today on my project, but in the meantime if anyone's looking for the hard to find SF c-pilars, there's a set on eBay. They came up last week and were sold, but looks like they're back. special forces c-pillars The guy selling these goes by libster29 on the G503 forum. If you email him directly you will get a better price. I have done business with him in the past and got a SF tool box that fits perfectly in the back and he made my front half doors. |
|
|
|
|
[Last Edit: EdwardAvila]
[#28]
Not a lot of time to work on the seats this evening, but the bracket for the commander's seat is done and primed (I didn't get a pic before painting, so I'll post one before installing). Because I decided to split the seat bottoms from the tops, the commander's seat requires its own bracket, bolted to the horizontal support beam right behind the battery box. Seat bottom is mounted to the battery box, making it easy to access the batteries without having to remove the whole seat.
As far as the driver's seat, I got the old base removed by drilling out the rivets. After looking at it for a while, decided not to remove the whole base, but instead to leave the front and rear angle brackets in place and use them as a base for the new mount. These two sections were well structured, and in addition to being riveted to the bottom they are riveted to the tunnel and the outside body on the ends. 
The plan here will be to put 4 vertical 1x2" rectangular tube legs bolted to these supports (2 bolts per), and then an angle iron frame welded on top of that to bolt the seat to. This will allow me to position the seat exactly where I want it, and still maintain maximum space underneath for storage. I'll have to find some sort of box or zippered case to keep under there. This will also free up a bunch of space between the seat and the door where I plan to put a fire extinguisher and perhaps a rifle mount along the B pillar. This seat will get installed complete to maintain back tilt and front to back sliders to adjust for different drivers. At the rear, I had two old jerry can mounts that came with the HMMWV and a couple of water containers laying around. I've been debating whether or not to install new mounts here for fuel cans, so this let me get an idea of what they would look like before I order them. The holes were already in the tailgate. Tradeoff is making it more difficult to use the gate, so I'm still debating it. What I eventually need is an airlift bumper and spare tire carrier back there, but probably not any time soon. 
Lastly, the paint looks good and like new, with a much richer deep matte OD green look. Hard to tell the difference in pics, but in person it is significant. In this photo I was playing with a rear cargo net over the sides of the roll bar, as this is what I think I'm going to try to achieve. 
At this point it looks like I'm going to have to have a custom net made, and then I can attach some of the footman loops back onto the new roll bar base to attach to. Anyone know a reasonable place to get some nets made? |
|
|
|
|
[#29]
Not much progress... got a little time to work on the seats.
On the commander's seat, this was the bracket made to hold the seat-back finally primed and painted. It bolted directly to the horizontal support, and then to the metal frame of the seatback itself. 

Moving to the driver's seat, we ended up using 1x1" tubing rather than the 1x2". Two pieces are laying on top of the existing angle that was riveted to the body, and span the full width from tunnel to body for maximum weight distribution. These will be bolted to the existing angle aluminum using four of the existing holes in front, and 4 in the rear. 
On top of that we're welding the 4 1" square tube risers with 1" drop from front to rear, and on top of that is welded the 2x2" angle iron base that the actual seat will bolt to. 

Hope to have time to finish this up tonight, paint tomorrow, and hopefully have the full set of new seats installed by the end of the week. What a pain in the ass. |
|
|
|
|
[#30]
It may be a pain in the ass but, that's exactly what you'll be preventing in the long run.
(Sorry, just couldn't help it! Seriously though, you are doing an absolutely awesome job with making those seats work! Great idea on mounting the seat back to the B-pillar support. In fact, I'm going forward that to the other new owner I know near me who bought those same seats. By the way, the paint looks great post-WD40. From the pic it does look really close to that new Rapco paint. |
|
|
|
|
[Last Edit: EdwardAvila]
[#31]
Originally Posted By Ryan_Ruck:
It may be a pain in the ass but, that's exactly what you'll be preventing in the long run. Originally Posted By Ryan_Ruck:
It may be a pain in the ass but, that's exactly what you'll be preventing in the long run. Definitely more comfortable. The biggest problem is more padding means you sit higher and further forward, so that's a tradeoff I've tried to minimize. Seriously though, you are doing an absolutely awesome job with making those seats work! Great idea on mounting the seat back to the B-pillar support. In fact, I'm going forward that to the other new owner I know near me who bought those same seats. Trying to do the best possible job! The bracket for the commander's seat back is just a re-implementation of the original mount that was there, so I can't take any credit for that. By the way, the paint looks great post-WD40. From the pic it does look really close to that new Rapco paint. the Rapco is a bit glossy still, and I think part of that is that the surfaces are smooth, and the paint goes on smooth, so it's smoother. Color-wise it's close, but not perfect. The Walmart camo green is a bit more gray, but seems to be flatter and less glossy. I'm hoping this will blend in more with time. Today I got the driver's seat base finished, painted, and installed. 

While the seat itself maintains adjustability, the seatbelt spool behind it limits leaning back unless you slide the seat forward, which you'd have to be very short to enjoy. I could have mounted the seat more towards the center, but then it would have been really off line from the rear seats, and would have had to go higher up to clear the center tunnel. Right now it's touching the tunnel in the front of the seat base. So for the most part, the seat is fixed even though the adjustability is "available". I took off the CDR (PCV equivalent) hose yesterday due to cracking and ordered from Kascar, so I won't get it until tomorrow otherwise I'd take it for a test drive. I did however get some battery terminal covers that fit the bigger terminals (had to send the previous ones back) and got them installed. Nice thick rubber, large enough to cover the terminals and get the thicker wires into. 
Makes me feel a little better about the battery box. Even though the batteries are better adjusted and positively held in place, the terminals are alway close to the hold down bracket and it makes me nervous that something would shift and short. Now I just need to find something to cover the positive terminal on the sidewall of the tunnel and I'll rest better. So that's the update. Going to be a busy end of the week and then we're off to SHOT for next week so probably not much going to happen for a while. A few small parts are due, so if I get those they'll go in, but nothing major. I have decided I need to learn to sew, as I think I'm going to have to make my own cargo net for the back of this thing. That should be a learning experience... I did watch these videos and got a little motivated. How hard can it be?
|
|
|
|
|
[Last Edit: Ryan_Ruck]
[#32]
Originally Posted By EdwardAvila:
Trying to do the best possible job! The bracket for the commander's seat back is just a re-implimentation of the original mount that was there, so I can't take any credit for that. Originally Posted By EdwardAvila:
Trying to do the best possible job! The bracket for the commander's seat back is just a re-implimentation of the original mount that was there, so I can't take any credit for that. I see... I'm not terribly familiar with the standard seat setup since my truck came with the high backs. Even though I checked the batteries in EagleArms's truck for him when checking mine at the storage yard, I couldn't remember how the commander's seat was setup on it. Originally Posted By EdwardAvila:
the Rapco is a bit glossy still, and I think part of that is that the surfaces are smooth, and the paint goes on smooth, so it's smoother. Color-wise it's close, but not perfect. The Walmart camo green is a bit more gray, but seems to be flatter and less glossy. I'm hoping this will blend in more with time. My experience with the Rapco matches yours. It has a much smoother texture than CARC. Even spraying it over CARC results in a fairly smooth surface. And you're right about the other camo paint. It is indeed more gray and darker overall. I tried it on my snorkel at first and wasn't too happy with the color match. Originally Posted By EdwardAvila:
Today I got the driver's seat base finished, painted, and installed. http://www.ar15.com/media/mediaFiles/2/IMG-6503-123907.jpg http://www.ar15.com/media/mediaFiles/2/IMG-6504-123908.jpg While the seat itself maintains adjustability, the seatbelt spool behind it limits leaning back unless you slide the seat forward, which you'd have to be very short to enjoy. I could have mounted the seat more towards the center, but then it would have been really off line from the rear seats, and would have had to go higher up to clear the center tunnel. Right now it's touching the tunnel in the front of the seat base. So for the most part, the seat is fixed even though the adjustability is "available". Those seats definitely look good in there! It's too bad they have such a tall base and couldn't be an easier install... Originally Posted By EdwardAvila:
I did however get some battery terminal covers that fit the bigger terminals (had to send the previous ones back) and got them installed. Nice thick rubber, large enough to cover the terminals and get the thicker wires into. http://www.ar15.com/media/mediaFiles/2/IMG-6502-123906.jpg Makes me feel a little better about the battery box. Even though the batteries are better adjusted and positively held in place, the terminals are alway close to the hold down bracket and it makes me nervous that something would shift and short. Now I just need to find something to cover the positive terminal on the sidewall of the tunnel and I'll rest better. I like those. I've always been a little concerned about the bolts on my commander's seat causing an issue with the battery terminals. I may have to order a set of those as some cheap insurance. Just an FYI, if you haven't been under that part of the truck, that positive terminal on the tunnel is actually a bulkhead pass through with an exposed stud on the underside too. Originally Posted By EdwardAvila:
I have decided I need to learn to sew, as I think I'm going to have to make my own cargo net for the back of this thing. That should be a learning experience... I did watch these videos and got a little motivated. How hard can it be? No idea how to sew except some simple hand stitching to mend stuff or using the speedy stitch on my truck's soft doors but, I have learned from the tactical gear section on here that if you intend to sew heavy nylon with a machine, an older one with metal internals is the way to go. Also, doing some small tactical gear projects, I've always gotten my webbing from StrapWorks (If you're not familiar with them. They were a vendor on here at one point, IIRC.). They should have the right webbing you need. They have a ton of color options. Enjoy SHOT Show! I really want to go to that one of these years. I've never been to Vegas and have thought it would be a great trip. |
|
|
|
|
[#33]
Originally Posted By Ryan_Ruck:
.Just an FYI, if you haven't been under that part of the truck, that positive terminal on the tunnel is actually a bulkhead pass through with an exposed stud on the underside too. Originally Posted By Ryan_Ruck:
.Just an FYI, if you haven't been under that part of the truck, that positive terminal on the tunnel is actually a bulkhead pass through with an exposed stud on the underside too. I forgot I'd seen that. At one point I was looking at putting a kill switch connected to that, and mounting it in the hole next to he commanders left knee (next to the radio tray). I assumed that hole was for another radio connector? No idea how to sew except some simple hand stitching to mend stuff or using the speedy stitch on my truck's soft doors but, I have learned from the tactical gear section on here that if you intend to sew heavy nylon with a machine, an older one with metal internals is the way to go. My experience is sewing on patches and buttons in basic training, 20 years ago. Off to find this tactical gear section which I guess I should know about... Also, doing some small tactical gear projects, I've always gotten my webbing from StrapWorks (If you're not familiar with them. They were a vendor on here at one point, IIRC.). They should have the right webbing you need. They have a ton of color options. Yep- been there and looked around. After SHOT I'll experiment with some ideas and figure out what I'm going to do. There are usually a few companies there that sell webbing and hardware. I've ordered some samples of various materials already as I have to determine color (ranger green, forest green, and olive drab are all options, so I want to compare) and material, order some webbing, and mock it up to determine opening size and layout as well as hardware and attachment points. Then I have to find a sewing machine and learn how to use it. Should have taken those sewing classes in grade school more seriously! |
|
|
|
|
[#34]
Originally Posted By EdwardAvila:
I forgot I'd seen that. At one point I was looking at putting a kill switch connected to that, and mounting it in the hole next to he commanders left knee (next to the radio tray). I assumed that hole was for another radio connector? Originally Posted By EdwardAvila:
I forgot I'd seen that. At one point I was looking at putting a kill switch connected to that, and mounting it in the hole next to he commanders left knee (next to the radio tray). I assumed that hole was for another radio connector? Yeah, that should be the hole for the power cord for a radio. Originally Posted By EdwardAvila:
Then I have to find a sewing machine and learn how to use it. Should have taken those sewing classes in grade school more seriously! You and me both! I've got a late '70s/early '80s vintage Singer among the things I inherited from my mom but I haven't the foggiest on how to use it. Maybe one of these days...
From my experience you shouldn't have any problem finding an older, more robust sewing machine at the local Goodwill or Salvation Army. They always seem to have 1 or 2 at the local ones I stop by occasionally. |
|
|
|
|
[#35]
Originally Posted By Ryan_Ruck:
From my experience you shouldn't have any problem finding an older, more robust sewing machine at the local Goodwill or Salvation Army. They always seem to have 1 or 2 at the local ones I stop by occasionally. I hit mine a few days ago and of course they didn't have anything, but I'm confident I'll find something I can use. Each night I sit up and make a list of things I'd like to get done the next day; otherwise I won't remember them in the morning. Last night's list included: Finish the floor mat with the leftover stall mat for the driver's side rear seat. While I was doing that I added one under the driver's seat, and went ahead and put some under the rear seats in the storage boxes. That should really dampen any noises coming from underneath. 
That exposed positive terminal in the battery box was bothering me, especially after putting in those nice terminal covers, so I took some self-fusing tape and covered it up. Kind of an ugly solution, but for now it will do. 
I did replace the factory rear seat "boards" that my seat-backs are bolted to with brand new ones just because the old ones had a few dents and the locking hardware was rusting. I saw them on eBay and ordered them without thinking. Really didn't need to do that, as it just increases my pile of take-offs that I now have to save and they were functionally fine. The new oil pressure and water temp gauges came in today too, so I went ahead and installed them, so now all the gauges are new and matching. 
One of the benefits of the new gauges is the transparent housings which allow more light in from the dash lighting. Combined with LED bulbs and the new clear bulb covers, I think everything will be usable at night. 
Final Pic: 
Next steps involve a bunch of sewing after designing the cargo net so someone else has to start posting in here. Oh, and I need to design some sort of a front brush guard. Not happy with anything I've seen anywhere, and I don't want to seriously affect my approach angle, so that's another project to think about. Plus some weapon mounts, both for shooting and carrying rifles. Perhaps something at SHOT Show will provide some inspiration... |
|
|
|
|
[#36]
Don't have a HMMWV, don't plan on getting one either...
But, I saw that some of you guys did the Lizard skin + monstaliner. How did that turn out? Any tips? |
|
|
|
|
[#37]
Originally Posted By SmartDrug:
Impressive looking undertaking! Did you fabricate the replacement frame or just swap it with another? Rough idea of cost for this type of surgery? We order replacement frame rails through the Federal Stock system. While I don't remember the cost (~$1K IIRC) it takes about 40 hours to do the job. |
|
|
|
|
[Last Edit: Ryan_Ruck]
[#38]
Originally Posted By Mr_Smiley:
Don't have a HMMWV, don't plan on getting one either...
But, I saw that some of you guys did the Lizard skin + monstaliner. How did that turn out? Any tips? Lizard Skin Tips: - Get the Lizard Skin application kit with gun. Better control than a plain Schutz gun. - Don't cut corners on prep since it's going to be the first coating against your original surface. - The Sound Control is thicker than the Ceramic Insulation. The Ceramic Insulation doesn't seem to "go as far" as the identical amount of Sound Control. Monstaliner Tips: - Don't get it on your skin, takes forever to get off. - Make sure you get enough for your entire job in one application session or you'll be doing double surface prep duty. Anywhere you miss on the second surface prep will allow the second coat of Monstaliner to peel off fairly easily. - Get lots and lots of disposable foam brushes of different sizes to get all your corners, seams, and other places you can't get a roller into. - Get plenty of extra rollers (I used 4). You can find texturizing ones similar to the Monstaliner foam ones at O'Reilly Auto Parts. Just ask them for the bed liner rollers. Application Tips For Both: - Have a big enough air compressor. - Have a good line dryer and regulator. - Closely follow directions from both manufacturers. As for how it turned out, couldn't be happier! With the Sound Control, the only sound I get from my truck now is engine and tire noise. No squeaks from panel joints or rattles. No resonation so it doesn't sound like your riding in a metal garbage can. The Ceramic Insulation isn't a thermal cure all but it does a good job cutting temps and since it works both ways, helps keep heat inside in the winter. The Monstaliner is a pretty tough top coat. It can resist a lot but dragging anything too sharp across the top can gouge it. It seems like it is more prone to this with it on top of the Lizard Skin. If this is something you might be doing frequently, maybe consider doing more than 2 coats and getting it on there extra thick. The only thing I could consider a "con" is that the Monstaliner can be slick when it's cured, especially when wet. More plastic-like than rubbery texture. |
|
|
|
|
[#39]
Originally Posted By Ryan_Ruck:
Lizard Skin Tips: - Get the Lizard Skin application kit with gun. Better control than a plain Schutz gun. - Don't cut corners on prep since it's going to be the first coating against your original surface. - The Sound Control is thicker than the Ceramic Insulation. The Ceramic Insulation doesn't seem to "go as far" as the identical amount of Sound Control. Monstaliner Tips: - Don't get it on your skin, takes forever to get off. - Make sure you get enough for your entire job in one application session or you'll be doing double surface prep duty. Anywhere you miss on the second surface prep will allow the second coat of Monstaliner to peel off fairly easily. - Get lots and lots of disposable foam brushes of different sizes to get all your corners, seams, and other places you can't get a roller into. - Get plenty of extra rollers (I used 4). You can find texturizing ones similar to the Monstaliner foam ones at O'Reilly Auto Parts. Just ask them for the bed liner rollers. Application Tips For Both: - Have a big enough air compressor. - Have a good line dryer and regulator. - Closely follow directions from both manufacturers. As for how it turned out, couldn't be happier! With the Sound Control, the only sound I get from my truck now is engine and tire noise. No squeaks from panel joints or rattles. No resonation so it doesn't sound like your riding in a metal garbage can. The Ceramic Insulation isn't a thermal cure all but it does a good job cutting temps and since it works both ways, helps keep heat inside in the winter. The Monstaliner is a pretty tough top coat. It can resist a lot but dragging anything too sharp across the top can gouge it. It seems like it is more prone to this with it on top of the Lizard Skin. If this is something you might be doing frequently, maybe consider doing more than 2 coats and getting it on there extra thick. The only thing I could consider a "con" is that the Monstaliner can be slick when it's cured, especially when wet. More plastic-like than rubbery texture. Originally Posted By Ryan_Ruck:
Originally Posted By Mr_Smiley:
Don't have a HMMWV, don't plan on getting one either...
But, I saw that some of you guys did the Lizard skin + monstaliner. How did that turn out? Any tips? Lizard Skin Tips: - Get the Lizard Skin application kit with gun. Better control than a plain Schutz gun. - Don't cut corners on prep since it's going to be the first coating against your original surface. - The Sound Control is thicker than the Ceramic Insulation. The Ceramic Insulation doesn't seem to "go as far" as the identical amount of Sound Control. Monstaliner Tips: - Don't get it on your skin, takes forever to get off. - Make sure you get enough for your entire job in one application session or you'll be doing double surface prep duty. Anywhere you miss on the second surface prep will allow the second coat of Monstaliner to peel off fairly easily. - Get lots and lots of disposable foam brushes of different sizes to get all your corners, seams, and other places you can't get a roller into. - Get plenty of extra rollers (I used 4). You can find texturizing ones similar to the Monstaliner foam ones at O'Reilly Auto Parts. Just ask them for the bed liner rollers. Application Tips For Both: - Have a big enough air compressor. - Have a good line dryer and regulator. - Closely follow directions from both manufacturers. As for how it turned out, couldn't be happier! With the Sound Control, the only sound I get from my truck now is engine and tire noise. No squeaks from panel joints or rattles. No resonation so it doesn't sound like your riding in a metal garbage can. The Ceramic Insulation isn't a thermal cure all but it does a good job cutting temps and since it works both ways, helps keep heat inside in the winter. The Monstaliner is a pretty tough top coat. It can resist a lot but dragging anything too sharp across the top can gouge it. It seems like it is more prone to this with it on top of the Lizard Skin. If this is something you might be doing frequently, maybe consider doing more than 2 coats and getting it on there extra thick. The only thing I could consider a "con" is that the Monstaliner can be slick when it's cured, especially when wet. More plastic-like than rubbery texture. Do you think lizard skin is tough enough to be applied standalone inside the engine compartment? Thinking about applying it under the hood(or bonnet ) and on the other side of the fire wall too.
Was there any special prep to doing the monstaliner on top of the lizard skin? Thanks for the help 
|
|
|
|
|
[#40]
Originally Posted By Mr_Smiley:
Do you think lizard skin is tough enough to be applied standalone inside the engine compartment? Thinking about applying it under the hood(or bonnet ) and on the other side of the fire wall too.
Was there any special prep to doing the monstaliner on top of the lizard skin? Thanks for the help It's definitely tough enough. That and underbody application are some of their recommended application types. It will just discolor from abrasion from a darker gray to a lighter gray. It's really only an issue if it is a wear surface like where passengers or cargo might be. For applying Monstaliner on top of Lizard Skin, it needs to be lightly scuffed up with a regular Scotchbrite pad, Monstaliner brown pad, or 120 grit sandpaper and then very thoroughly vacuumed of any remaining dust. Do not solvent clean. This was all per Monstaliner's rep direct to me. |
|
|
|
|
[#41]
Originally Posted By Ryan_Ruck:
It's definitely tough enough. That and underbody application are some of their recommended application types. It will just discolor from abrasion from a darker gray to a lighter gray. It's really only an issue if it is a wear surface like where passengers or cargo might be. For applying Monstaliner on top of Lizard Skin, it needs to be lightly scuffed up with a regular Scotchbrite pad, Monstaliner brown pad, or 120 grit sandpaper and then very thoroughly vacuumed of any remaining dust. Do not solvent clean. This was all per Monstaliner's rep direct to me. Originally Posted By Ryan_Ruck:
Originally Posted By Mr_Smiley:
Do you think lizard skin is tough enough to be applied standalone inside the engine compartment? Thinking about applying it under the hood(or bonnet ) and on the other side of the fire wall too.
Was there any special prep to doing the monstaliner on top of the lizard skin? Thanks for the help It's definitely tough enough. That and underbody application are some of their recommended application types. It will just discolor from abrasion from a darker gray to a lighter gray. It's really only an issue if it is a wear surface like where passengers or cargo might be. For applying Monstaliner on top of Lizard Skin, it needs to be lightly scuffed up with a regular Scotchbrite pad, Monstaliner brown pad, or 120 grit sandpaper and then very thoroughly vacuumed of any remaining dust. Do not solvent clean. This was all per Monstaliner's rep direct to me. Bad ass. Would love to have the 4bd1 not be silly loud. Been there done that with the CUCV, and I'm over it.
Seems like it's pretty easy to lift the body from the frame on a rover. May end up just lizard skinning all the things. |
|
|
|
|
[#42]
Originally Posted By Mr_Smiley:
Bad ass. Would love to have the 4bd1 not be silly loud. Been there done that with the CUCV, and I'm over it.
Seems like it's pretty easy to lift the body from the frame on a rover. May end up just lizard skinning all the things. Oh yeah... You're the dude I saw posting about the Australian military Land Rover you bought in GD (for anyone else that didn't see it)! Bad ass truck! |
|
|
|
|
[#43]
Ryan nailed it on the Lizard Skin and Monstaliner. The Lizard Sink with their gun went in super easy and even filled in some minor paint imperfections. I sprayed the Monstaliner vs rolling it in and it came out great. I recommend getting more than you think you will need. They sale 1 qt kits individually but I would of liked to of got 4 individual qts vs the 1 gallon so I could tough up or do small areas later on. You will spend more time on prep than spraying either product. There are probably better bedliners out their, but Monstaliner was able to mix up the colors we needed and can do custom colors to match if you have the paint codes.
|
|
|
|
|
[Last Edit: EagleArmsHBAR]
[#44]
Aaaaaaaaaaaaaaaaaaaaaaaaaaaaaaand its gone. That was a wild ride! Hey, I should buy a HMMWV off that government auction website!
If I were to do it again (and I might), I would buy a two man truck style HMMWV and not do anything to it other than buying one that was in "running" condition and ensuring it had a roof and a rear curtain. I do another spray paint job with the Rapco paint (desert tan this time) and call it a day. I wouldn't waste time trying to make it a perfect convertible HMMWV in all configurations. I never took more than one other person with me, except for the test drive when I sold it. For that reason, I'd go for a cheaper two man unit from the beginning ... besides, I like the two door configuration a lot anyways. I'd also buy one that isn't too far away so that I could get it myself and I'd also make sure it seems to pass Texas inspection before I bought it. I feel so empty now, but I keep telling myself cash in the bank and knowledge to do this again is a good thing. Thank you, Ryan, for your encouragement and assistance along the way! All in all, I didnt profit from the sale. I made enough to cover cost, but not much more (less than $1,000, but I don't have final figures yet). Trying to make this the perfect HMMWV got expensive and I went over budget. I had a great truck though and I am happy for the experience. Only arfcom could make a guy like me spend tens of thousands of dollars on stuff and not get mad about it. |
|
|
|
|
[#45]
Originally Posted By EagleArmsHBAR:
Aaaaaaaaaaaaaaaaaaaaaaaaaaaaaaand its gone. That was a wild ride! Hey, I should buy a HMMWV off that government auction website!
If I were to do it again (and I might), I would buy a two man truck style HMMWV and not do anything to it other than buying one that was in "running" condition and ensuring it had a roof and a rear curtain. I do another spray paint job with the Rapco paint (desert tan this time) and call it a day. I wouldn't waste time trying to make it a perfect convertible HMMWV in all configurations. I never took more than one other person with me, except for the test drive when I sold it. For that reason, I'd go for a cheaper two man unit from the beginning ... besides, I like the two door configuration a lot anyways. I'd also buy one that isn't too far away so that I could get it myself and I'd also make sure it seems to pass Texas inspection before I bought it. I feel so empty now, but I keep telling myself cash in the bank and knowledge to do this again is a good thing. Thank you, Ryan, for your encouragement and assistance along the way! All in all, I didnt profit from the sale. I made enough to cover cost, but not much more (less than $1,000, but I don't have final figures yet). Trying to make this the perfect HMMWV got expensive and I went over budget. I had a great truck though an i am happy for the experience. Only arfcom could make a guy like me spend tens of thousands of dollars on stuff and not get mad about it. A bittersweet moment it seems. Hopefully she went to a good home? It was a pleasure to help out! Hope you do pick up another one in the future. We need as many of these owned, titled, and on the road as possible so it makes it that much harder for folks to claim they aren't fit to be on the road. |
|
|
|
|
[#46]
for weapon mounts.
http://www.essentialhardware.com/crawford-sg2-spring-grip-broom-holder-78-zinc-237164.html?utm_campaign=google&utm_source=google&utm_medium=cpc&gclid=CMKi9qba0NECFYhqfgod5ogIog tool dip the ends after rough sanding them and spacing them apart with a bock of wood. fab a cradle for the stock attach both to an upright. youll have almost exactly what the Military use in vehicles for storing weapons. |
|
|
|
IA, USA
|
[#47]
Those look like the weapons mounts mine came with. I still havent tried them, there isn't much leg room as is.
|
|
|
|
[#48]
Originally Posted By sawdustnsteel:
for weapon mounts. http://www.essentialhardware.com/crawford-sg2-spring-grip-broom-holder-78-zinc-237164.html?utm_campaign=google&utm_source=google&utm_medium=cpc&gclid=CMKi9qba0NECFYhqfgod5ogIog tool dip the ends after rough sanding them and spacing them apart with a bock of wood. fab a cradle for the stock attach both to an upright. youll have almost exactly what the Military use in vehicles for storing weapons. Ha! I thought the M16 mounts I had seen in these trucks looked familiar.
|
|
|
|
|
[#49]
Originally Posted By EagleArmsHBAR:
I'd also buy one that isn't too far away so that I could get it myself and I'd also make sure it seems to pass Texas inspection before I bought it. I feel so empty now, but I keep telling myself cash in the bank and knowledge to do this again is a good thing. Thank you, Ryan, for your encouragement and assistance along the way! EagleArms, you will want another one in the future. But I understand what you are saying. If I were to do it all over again, I would keep it simple and go with a 4 man soft top. Might pick up another one to go with the slantback I am building, but it will be kept simple. I think lawman has two, a soft top and slantback and now a GMV unless he used his soft top to make the GMV. Progress for me has been slow since I had to get a ton of bolts to put the turret on. Put most of it together and then took it back apart to seal everything up with seam sealer as there are a lot of places for water to get in. I have also been looking for seat covers since I put in the seats in the back, they stick out. I have the old OD high back in the front and new tan high back in the rear. I emailed the only company I could find that made seat covers and they only over them in OD. I would like tan or grey or even black. |
|
|
|
TX, USA
|
[Last Edit: TexJeepTJ]
[#50]
Another HMMWV acquisition success
First of, thanks to all of you who have been posting your info regarding acquisiton, modifications, paint, registration, etc. This thread has been a great resource in getting mine up and running (and road legal). And to provide some current timeline information to those running through the process (or considering it), here's my experience so far: - Won 2 M998's off of the GovPlanet auction in September 2016 (was really only looking for one, but overachieved). Paid and submitted the EUC application the same day. Both were in running condition, first sold for just over $12K and the other just over $11K. Both have the 6.5 engines and are "complete" with all the standard parts (and a few cool upgrades). - EUC's approved Nov 30th (approx 60 days, first time applicant), picked up from Ft Riley, KS and shipped via third party transport company to the shop that's going through them here in CO on Dec 2nd. - Got insurance through GEICO, full coverage, both trucks, for about $360/6 months. The agent didn't have a M998 in the pre-selection menu, so she basically just "built" the entry as a 1990 AMG HMMWV with a few of the specs. - SF97's finally arrived via FedEx Jan 13th (approx. 6 weeks after EUC approval, delay may have been due to the holidays and gov't slowdown of such periods) - Registered through the Texas FMV (former military vehicle) process, zero problems in Bexar county (just had to help the lady behind the desk find the tab for FMV with plates, under the "antiques" tab on her computer, and brought a copy of the TX vehicle code section that states FMV's are exempt from the inspection requirement). Brought in theVTR-135 (Application for Former Military Vehicle License Plate), Form 130-U (Application for Texas Title), the proof of insurance from GEICO, the SF-97 and transfer letter from IronPlanet, Bill of sale showing the price and taxes, and two printed photos of the trucks, front and back. Thanks for the rec's on all of this from prior threads! Cost was $79.25 for each registration through the next cycle ending next year (Texas does a 5-year plate cycle on these just like antiques), and walked out with registration and license plates within about an hour. TX credited the sales tax paid through IronPlanet to Kansas, and didn't charge me any additional taxes (unlike what happened to another guy I read about). Current status: Both trucks are running, but as can be imagined probably got a little "neglected" towards the end of their service with the Kansas NG. One needed 3 out of the 4 half-shafts replaced, so using the opportunity to upgrade it to the 12K's, a leaking fuel tank, some seals, new shocks, etc. Also swapping out the alternator/generator to the 200amp 12/24v Neihoff. The other had a bad differential, leaking transfer case intercooler, and some other leaking seal, so getting that done at the shop along with new front springs and a host of other minor issues. Once the half-shafts arrive next week, should have it on the road and up to the house, where the real fun begins of bringing it back up to "spec". Will post more photos when it gets to that point! |
|
|
 Win a FREE Membership!
Sign up for the ARFCOM weekly newsletter and be entered to win a free ARFCOM membership. One new winner* is announced every week!
You will receive an email every Friday morning featuring the latest chatter from the hottest topics, breaking news surrounding legislation, as well as exclusive deals only available to ARFCOM email subscribers.

AR15.COM is the world's largest firearm community and is a gathering place for firearm enthusiasts of all types.
From hunters and military members, to competition shooters and general firearm enthusiasts, we welcome anyone who values and respects the way of the firearm.

Subscribe to our monthly Newsletter to receive firearm news, product discounts from your favorite Industry Partners, and more.
Copyright © 1996-2024 AR15.COM LLC. All Rights Reserved.
Any use of this content without express written consent is prohibited.
AR15.Com reserves the right to overwrite or replace any affiliate, commercial, or monetizable links, posted by users, with our own.


