|
[#1]
Quoted:
Trying out a new filament (for me) today. Silk Copper Filament PLA 1.75 mm by CC3D that I picked up on Amazon. When the first lines were going down, the wife said "it looks like you're printing copper wire!". It laid down really nicely just using the same PLA settings I had been using for a previous print (210° C, 0.2mm layer, 60° C bed for first layer). The sheen is really there, it really does look like new penny copper. These pics don't really convey that as well as seeing it directly. https://www.skhowell.com/images/copper-filament-1.jpg https://www.skhowell.com/images/copper-filament-2.jpg I'm about 10 hours in on that first print & no problems. Extrusion looks good, no glitches and layers look to be tight w/good bond. I didn't pick it for this particular print, it was just a good opportunity for a test (I'm printing a 45 cell sharpie box for our daughter's desk). https://www.skhowell.com/images/copper-filament-3.jpg |
|
|
|
[#2]
I'm officially over the Ender 3. I can't get a consistent result no matter what I try. some prints are amazing, others are shit. often the same print in succession. I'm sick of dicking with it. I need to find something either easier, or more consistent that this damn thing.
Unfortunately I've poured a bunch of money into trying to get it printing well, and I absolutely hate that thing 
|
|
|
|
[#3]
Quoted:
I'm officially over the Ender 3. I can't get a consistent result no matter what I try. some prints are amazing, others are shit. often the same print in succession. I'm sick of dicking with it. I need to find something either easier, or more consistent that this damn thing. Unfortunately I've poured a bunch of money into trying to get it printing well, and I absolutely hate that thing
|
|
|
|
[#4]
Quoted:
Very cool, just bought a spool. Quoted:
Quoted:
Trying out a new filament (for me) today. Silk Copper Filament PLA 1.75 mm by CC3D that I picked up on Amazon. When the first lines were going down, the wife said "it looks like you're printing copper wire!". It laid down really nicely just using the same PLA settings I had been using for a previous print (210 C, 0.2mm layer, 60 C bed for first layer). The sheen is really there, it really does look like new penny copper. These pics don't really convey that as well as seeing it directly. https://www.skhowell.com/images/copper-filament-1.jpg https://www.skhowell.com/images/copper-filament-2.jpg I'm about 10 hours in on that first print & no problems. Extrusion looks good, no glitches and layers look to be tight w/good bond. I didn't pick it for this particular print, it was just a good opportunity for a test (I'm printing a 45 cell sharpie box for our daughter's desk). https://www.skhowell.com/images/copper-filament-3.jpg |
|
|
|
[#5]
Quoted:
I'm officially over the Ender 3. I can't get a consistent result no matter what I try. some prints are amazing, others are shit. often the same print in succession. I'm sick of dicking with it. I need to find something either easier, or more consistent that this damn thing. Unfortunately I've poured a bunch of money into trying to get it printing well, and I absolutely hate that thing |
|
|
|
[#6]
Quoted:
I'm officially over the Ender 3. I can't get a consistent result no matter what I try. some prints are amazing, others are shit. often the same print in succession. I'm sick of dicking with it. I need to find something either easier, or more consistent that this damn thing. Unfortunately I've poured a bunch of money into trying to get it printing well, and I absolutely hate that thing I suspect that Creality has issues with their quality control and sometimes a lemon slips through. I took the money from my Ender 3 and saved 2 more months for an Original Prusa. The prints are consistent, I'm still working on fine tuning it. |
|
|
|
[#7]
Quoted: Don't worry I will give a full review when I get in around 3 weeks. |
|
|
|
[#8]
I started printing parts on Monday for a CNC router project that my dad and I are working on. The stuff you can make with a 3D printer is pretty cool.

|
|
|
|
[#9]
Yes it is.
There will quickly come a day where there is a 3D printer in every home, and some kind of system where you can pay to print parts you need (you "rent" the file or something) directly from the manufacturer. If the OEM engineers put out the files, they certainly should work as good as OEM. The tech just needs to get a little more set-and-forget ready. |
|
|
|
[#10]
Quoted:
my prusa came with one. not sure i can go back to a non-removable surface. my tornado has been powered off since i got the prusa. Quoted:
Quoted:
Don't worry I will give a full review when I get in around 3 weeks. |
|
|
|
[#11]
Quoted:
Very cool, just bought a spool. Quoted:
Quoted:
Trying out a new filament (for me) today. Silk Copper Filament PLA 1.75 mm by CC3D that I picked up on Amazon. When the first lines were going down, the wife said "it looks like you're printing copper wire!". It laid down really nicely just using the same PLA settings I had been using for a previous print (210 C, 0.2mm layer, 60 C bed for first layer). The sheen is really there, it really does look like new penny copper. These pics don't really convey that as well as seeing it directly. https://www.skhowell.com/images/copper-filament-1.jpg https://www.skhowell.com/images/copper-filament-2.jpg I'm about 10 hours in on that first print & no problems. Extrusion looks good, no glitches and layers look to be tight w/good bond. I didn't pick it for this particular print, it was just a good opportunity for a test (I'm printing a 45 cell sharpie box for our daughter's desk). https://www.skhowell.com/images/copper-filament-3.jpg 
|
|
|
|
[#12]
Quoted: Don't worry I will give a full review when I get in around 3 weeks. |
|
|
|
[#13]
Trying to print a part with a 3" bridge and getting a lot of stringing underneath the bridge, even with full supports.
Hatchbox PLA, 195 deg nozzle, 60 deg bed. At 0.2mm layer height and I think 60mm/s print speed. Rest of the print is great. Any ideas? |
|
|
|
[#14]
Quoted:
Trying to print a part with a 3" bridge and getting a lot of stringing underneath the bridge, even with full supports. Hatchbox PLA, 195 deg nozzle, 60 deg bed. At 0.2mm layer height and I think 60mm/s print speed. Rest of the print is great. Any ideas? But a 3" bridge is quite a ways. ETA: Could always just put on supports as well, or re-design the part to reduce/eliminate the bridge (if you have the CAD file). Hard to say w/o seeing the part though. |
|
|
|
[#15]
Quoted:
In your slicer bridge settings: reduce extrusion by, oh say 10% (to start out with, it should already be reduced from normal print extrusion), and speed it up. You want to "pull" quickly on the filament's last attachment point until it re-connects on the other side, not "lay" filament like normal printing. But a 3" bridge is quite a ways. ETA: Could always just put on supports as well, or re-design the part to reduce/eliminate the bridge (if you have the CAD file). Hard to say w/o seeing the part though. 

|
|
|
|
[#16]
Use a chamfer, not fillet. Fillet on the Z axis doesn't work well.
Otherwise, remember that you always (with default settings) have a 1 layer gap between the top of your supports and the bridging extrusion. That means it will always droop a bit. Also, PLA sticks well to PLA, and you will rip off some of the bridging extrusion when you remove supports. And make sure your supports are plenty dense. If your slicer supports it, run about 6 layers of dense support on top of a minimal support column. Minimized plastic/print times but still gives lots of support for your bridge. Edit to clarify: Under a bridge with or w/o support material will NEVER look as good as the rest of the part made with "normal" solid printing. ETA: Unless that bridge is in view, structurally it would be OK and personally I would leave it alone. Maybe add a couple extra solid layers, but otherwise I'd call it good if its a hidden face. |
|
|
|
[#17]
Quoted:
You will love printing on PEI. Quoted:
Quoted: Don't worry I will give a full review when I get in around 3 weeks. |
|
|
|
[#18]
Late to the party, but I just got an Anycubic Mega S. Tests are done. Pretty easy once I got the mesh leveling firmware loaded.
I now have it working on parts for a MPCNC. :) |
|
|
|
[#19]
Just finished up the first part of my enclosure. 3 Lack tables from Ikea. All parts printed in CC3D Silk Copper. Filament feeds from the top trough a PTFE lined pass through. PSU was relocated to the bottom of the base table. 2 6Qt Sterlite containers also mounted on base table that slide out for tools and such. Side and rear panels are ABS and the front is cast acrylic.
Octopi is next but need to figure out how to connect the lights, PSU and a 120mm exhaust fan to the Octopi first. Relays and such confuse the hell out of me.


|
|
|
|
[#20]
Quoted:
Use a chamfer, not fillet. Fillet on the Z axis doesn't work well. Otherwise, remember that you always (with default settings) have a 1 layer gap between the top of your supports and the bridging extrusion. That means it will always droop a bit. Also, PLA sticks well to PLA, and you will rip off some of the bridging extrusion when you remove supports. And make sure your supports are plenty dense. If your slicer supports it, run about 6 layers of dense support on top of a minimal support column. Minimized plastic/print times but still gives lots of support for your bridge. Edit to clarify: Under a bridge with or w/o support material will NEVER look as good as the rest of the part made with "normal" solid printing. ETA: Unless that bridge is in view, structurally it would be OK and personally I would leave it alone. Maybe add a couple extra solid layers, but otherwise I'd call it good if its a hidden face. |
|
|
|
[#21]
Quoted:
... Octopi is next but need to figure out how to connect the lights, PSU and a 120mm exhaust fan to the Octopi first. Relays and such confuse the hell out of me. https://www.adafruit.com/product/2935?gclid=EAIaIQobChMI0KL9vY654QIVxoKzCh1BKg6sEAQYASABEgJaZ_D_BwE 
Nick |
|
|
|
[#22]
Quoted: This is a $25 power strip you can control with a PI or Arduino I/O line: https://www.adafruit.com/product/2935?gclid=EAIaIQobChMI0KL9vY654QIVxoKzCh1BKg6sEAQYASABEgJaZ_D_BwE https://cdn-shop.adafruit.com/970x728/2935-13.jpg Nick |
|
|
|
[#23]
Ok, I've been reading this for a while- all of it is totally new to me.
If y'all are going to make me spend my money, please recommend to me a quality machine with as little tinkering with it to get it to run correctly. I plan on using it for small quadcopter parts, and other things like that. I'm not even sure what material those things are printed with. Also, what's a good youtube channel for novices. Thank you for spending my money.
|
|
|
|
[#24]
Quoted:
Ok, I've been reading this for a while- all of it is totally new to me. If y'all are going to make me spend my money, please recommend to me a quality machine with as little tinkering with it to get it to run correctly. I plan on using it for small quadcopter parts, and other things like that. I'm not even sure what material those things are printed with. Also, what's a good youtube channel for novices. Thank you for spending my money.  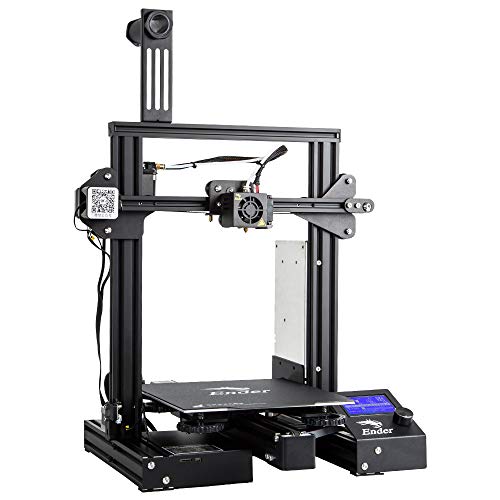
|
|
|
|
[#25]
Thanks for the link, but I've read a lot of posts here about tinkering with this thing to get it to run right.
My days of tinkering with stuff are just about over, I'd rather pay $500 to get something to run correctly out of the box. I do appreciate the input. If that ender 3 turns out ok for you, I may do the same. 
|
|
|
|
[#26]
Quoted: Thanks for the link, but I've read a lot of posts here about tinkering with this thing to get it to run right. My days of tinkering with stuff are just about over, I'd rather pay $500 to get something to run correctly out of the box. I do appreciate the input. If that ender 3 turns out ok for you, I may do the same. https://www.prusa3d.com/original-prusa-i3-mk3/  Original Prusa i3 MK3 Release! |
|
|
|
[#27]
To go all out: get the kit. The saving will pretty much pay for the multi-material upgrade.
https://shop.prusa3d.com/en/printer-upgrades/183-original-prusa-i3-mk25smk3s-multi-material-2s-upgrade-kit-mmu2s.html# This will be my next printer setup.  Printing soluble interface supports with Original Prusa i3 MK2 Multi Material |
|
|
|
[#28]
Quoted: Thanks for the link, but I've read a lot of posts here about tinkering with this thing to get it to run right. My days of tinkering with stuff are just about over, I'd rather pay $500 to get something to run correctly out of the box. I do appreciate the input. If that ender 3 turns out ok for you, I may do the same. But, if you are ok with the 750 dollar price tag of the Prusa, it is a great printer. I don't think its 500 dollars better, though. If you want it pre-built then its 1k dollars and in that price range there are far better printers with much larger build volumes out there. If you're bored enough here is a link to a live feed of mine now. It's about 2 hours into a print. First piece of the hull from Peter Sripol's R/C Utility Ship. Don't wait for it to finish though, it still has about 20 hours to go. Live Feed |
|
|
|
[#29]
Quoted:
I started printing parts on Monday for a CNC router project that my dad and I are working on. The stuff you can make with a 3D printer is pretty cool. https://www.AR15.Com/media/mediaFiles/22875/20190401_201254-899650.jpg |
|
|
|
[#30]
Quoted:
Awesome.. I just saw it @ the 3D print fest in Indiana this past weekend.... My roll is out for delivery today!... I also picked up Silky Red from Atomic among others while I was there... https://i.imgur.com/BAB6zoO.jpg |
|
|
|
[#31]
Quoted:
is that a monoprice maker select? either way you can actualy get stuff to stick to the buildtak? i havent ever been able to get it to work Quoted:
Quoted:
I started printing parts on Monday for a CNC router project that my dad and I are working on. The stuff you can make with a 3D printer is pretty cool. https://www.AR15.Com/media/mediaFiles/22875/20190401_201254-899650.jpg I have had some issues with adhesion on one side of the plate, but I found out tonight that the build plate was way off level. The front right corner looked like it had almost a millimeter gap. I reset all four corners and I've got something printing right now. It looks like it's working better, but I'll see once it's done. |
|
|
|
[#32]
Quoted:
mrrf was pretty good this year, was there saterday. grabbed two spools from atomic but im only 20 mins from them in ligonier so i may run out to get more. next year is already booked to near 4 times the space Quoted:
Quoted:
Awesome.. I just saw it @ the 3D print fest in Indiana this past weekend.... My roll is out for delivery today!... I also picked up Silky Red from Atomic among others while I was there... https://i.imgur.com/BAB6zoO.jpg 
|
|
|
|
[#33]
Quoted: You might want to keep an eye on whatever you're printing with the Atomic filament. One of my coworkers bought some from them at MRRF last weekend and had this happen: https://www.AR15.Com/media/mediaFiles/22875/55882185_10210878240032519_8487478434916728832_n-902082.jpg |
|
|
|
[#34]
Quoted: Maker select plus, yeah. Funny thing...I've had it for about a year. When I first got it I couldn't get anything to stick. I finally got disgusted with it and just set it off to the side. A couple of weeks ago I decided it was time for it to work or find a new home, so I pulled it out, cleaned the dust off of it, loaded the filament and it's been working. I don't know if cleaning it off with Windex helped, but it is working now. I have had some issues with adhesion on one side of the plate, but I found out tonight that the build plate was way off level. The front right corner looked like it had almost a millimeter gap. I reset all four corners and I've got something printing right now. It looks like it's working better, but I'll see once it's done. |
|
|
|
[#35]
Quoted:
Be aware that can happen with any filament. The filament wants to be straight, not curved on the spool. This is actually a PRIME reason why I made a filament box with teflon tube guides. |
|
|
|
[#36]
Quoted:
Prusa is what you seek. Little more than $500 though, unless you get a kit to assemble yourself, then you are close. https://www.prusa3d.com/original-prusa-i3-mk3/ |
|
|
|
[#37]
Quoted: Got any pics of what that looks like? |
|
|
|
[#38]
Trying out a new filament (for me), Tronxy Flexible Blue TPU 1.75mm. The mod to the extruder has it feeding the TPU without a problem (essentially, there is PTFE tubing on both sides of the extruder gear, with pretty much just enough separation for the gear & pressure wheel to touch filament. As long as there isn't a blockage, the filament feeds fine (with a blockage, it finds a way to escape!)
This stuff is not as floppy as what I've read about NinjaFlex, but is still pretty soft (easy to tie in a tight knot). First layer is going down OK & I discovered the need to slow down enough that the extruder doesn't try to over-run what the nozzle is laying down (found out the hard way). I haven't yet found the sweet spot for good layer adhesion without excessive stringing. Printed a geco that was pretty hairy . Re-enabled retraction (a small amount) & wiping to see if that helps. Giving the geco a try without brim & supports and at slightly lower temp (215° C). Time will tell.

|
|
|
|
[#39]
Quoted:
intresting, i may try cleaning it and giving it a shot again. ive been useing tape and had mostly luck but i also had to replace the y carrige...bent the crap out of it somehow. also the atomic spools are kinda odd on thye inside they dont fit the holder all that well |
|
|
|
[#40]
Went through a few iterations but I think I'm getting close to a decent profile for this brand TPU in Cura for my printer.
This is the last print of the series as it was on the build plate at finish: 
It was done with supports, but no brim. Side by side with the first completed print: 

The first print is seen here after a -lot- of trimming. There were strings everywhere. It looked like a hairy lizard. It's printing also generated a lot of "buggers" - wads of over-heated TPU that would collect on the nozzel & drop off. The last print was done at 75% scale to save some time. It was printed with 0.15 mm layers rather than the 0.20 mm layers of the first one. No buggers generated during the print. The only trimming of the last print was removal of supports. 
The major changes were to lower the temp by 10-15 °C (initial layer @ 215° then 207° for the rest) & to slow down by about 50% from the speed of the first completed print (15 mm/s initial layer 20 mm/s for the rest). I'll give it another shot tomorrow & see if I can tweak the profile a bit to get the supports to come off more cleanly. |
|
|
|
[#41]
Anybody have suggestions for useful gun stuff to print?
|
|
|
|
[#42]
Quoted:
Anybody have suggestions for useful gun stuff to print? Glock Sight Pusher Here is a link to a metric shit ton of gun files, from AR lowers, to complete guns to suppressors. Under Misc in this link there are a bunch of 3d printable accessories. |
|
|
|
[#43]
Quoted:
Anybody have suggestions for useful gun stuff to print? |
|
|
|
[#44]
|
|
|
|
[#45]
Quoted:
Sorry it took so long. Life and all. https://www.AR15.Com/media/mediaFiles/165887/KIMG0555_JPG-905716.JPG I found out this morning as a thunderstorm rolled through at 2:30 that the stepper motors on my printer sound remarkably like the emergency alert system tone.
|
|
|
|
[#46]
Quoted: No problem, I figured something came up. Are there dividers between the spools in the box? I found out this morning as a thunderstorm rolled through at 2:30 that the stepper motors on my printer sound remarkably like the emergency alert system tone. I've found that giving the spool too much freedom of rotation is a bad thing, and a little drag helps keep the spool under control. The spool on PVC seems to do just fine. That container is a "dry" storage tote, and its loaded with moisture absorber packs. Each spool has its own teflon tube which meets up to the teflon tube coming out of the extruder. The little yellow thing on the inside of the filament itself is a simple cotton ball style clamshell cleaner just for added cleanliness, and oiling if needed. |
|
|
|
[#47]
I ran across some titanium (TC4) all-metal heatbreaks for the Ender's MK8 hot end at the TH3D site that are now back in stock.
https://www.th3dstudio.com/product/tough-titanium-heatbreak-for-creality-machines-tough-dual-hotend/ They sell for $9.99 & are advertised as having a polished bore. I have one coming & will be putting in a spare MK8 assembly. Not sure if I will install it right away. It would reduce the likelihood of issues due to melted material in a gap between bowden tube & nozzle end. While on their site I notice there was an update to their unified firmware package (now at U1.R2.10a). The full package with configured Arduino IDE is at: https://www.th3dstudio.com/knowledgebase/th3d-unified-firmware-package/ The source files by themselves can be downloaded from GitHub: https://github.com/houseofbugs/TH3D-Unified-U1.R2/releases |
|
|
|
[#48]
Finished stringing an articulated dragon I printed for our grandson's upcoming birthday. It was done in the copper silk PLA & was probably 70+ hours (including some reprints) print time. Not completely happy with how I managed stringing the elastic, but not bugged enough to cut it loose & redo (stretching & tying elastic is a treat when the hand cramps up
).  
It was hard to photograph with a flash with all the reflection off the material ... The model was on Thingiverse: "Braq" jointed dragon by bq3D https://www.thingiverse.com/thing:854575 and was submitted by a Spanish artist. There are 42 pieces. |
|
|
|
[#49]
Quoted:
Finished stringing an articulated dragon I printed for our grandson's upcoming birthday. It was done in the copper silk PLA & was probably 70+ hours (including some reprints) print time. Not completely happy with how I managed stringing the elastic, but not bugged enough to cut it loose & redo (stretching & tying elastic is a treat when the hand cramps up ).https://www.skhowell.com/images/DSCN5728.jpg https://www.skhowell.com/images/DSCN5730.jpg https://www.skhowell.com/images/DSCN5734.jpg It was hard to photograph with a flash with all the reflection off the material ... The model was on Thingiverse: "Braq" jointed dragon by bq3D https://www.thingiverse.com/thing:854575 and was submitted by a Spanish artist. There are 42 pieces. 
|
|
|
|
[#50]
Thanks!
The whole elastic cord strung, ball joint thing kinda caught my interest. At some point I'll probably do another jointed dragon print, maybe in silk gold. Currently printing a somewhat smaller ball joint robot by the same designer. It has 15 pieces & I'm doing it in the same silk copper as the dragon. This is a much shorter print, probably < 20 hours total (if everything prints OK). It should finish up the spool (& maybe take a little more). I put a "filament out" alarm in line so I'll know in time to initiate a filament change & put the replacement spool on. The alarm is just a DIY made from a roller arm micro switch in a small printed housing plus a buzzer & 9 volt battery. I have it sitting on top of the enclosure at the filament entry point. An automated version would be nice to add, but will probably have to wait until I feel like upgrading the printer's control board to something with a bit more real estate. |
|
|

AR15.COM is the world's largest firearm community and is a gathering place for firearm enthusiasts of all types.
From hunters and military members, to competition shooters and general firearm enthusiasts, we welcome anyone who values and respects the way of the firearm.

Subscribe to our monthly Newsletter to receive firearm news, product discounts from your favorite Industry Partners, and more.
Copyright © 1996-2024 AR15.COM LLC. All Rights Reserved.
Any use of this content without express written consent is prohibited.
AR15.Com reserves the right to overwrite or replace any affiliate, commercial, or monetizable links, posted by users, with our own.


